PlanetJune Craft Blog

Latest news and updates from June

Archive for Reviews

review: Facebook Advertising

For those of us with small businesses (crafty or not), advertising and marketing is always a difficult area. Very few of us can afford an advertising budget, so we have to try to make wise decisions that lead to maximum promotion with minimum expenditure.

Having said that, it could be that we’re missing out on effective advertising methods, so I thought I’d try an experiment with Facebook advertising on behalf of the entire crafting community, to see if it might be something we should be doing.

advertisement on Facebook
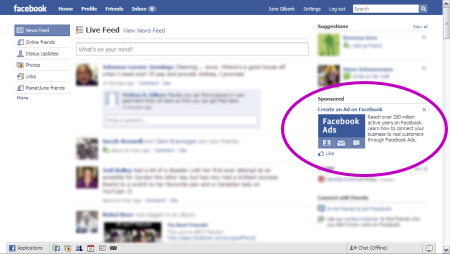
This is what an advertisement on Facebook looks like – I’ve circled the ad in purple

For this experiment, I spent $150 on Facebook advertising. Before you think I’m wealthy or foolish enough to waste $150 (that’s the revenue from close to 40 pattern sales!), I should mention that I received all the credit I used as promotional vouchers by signing up for Canada Post’s Venture One small business scheme and the VISA Business Network, so I haven’t actually lost anything as a result of this test.

Setting up the Ad

Facebook know their users, so you can tailor your ad to be shown to only a specific demographic. If you want to, you can specify your target age, gender, location, language, interests, etc, and only the FB users who match your profile will see your ad. In my case, I limited to residents of US, Canada, UK, Australia and New Zealand who listed Crochet, Crocheting, or Amigurumi in their interests. This is a very powerful screening tool!

You can also choose to pay by CPC (you pay each time your ad is clicked on) or CPM (you pay per 1000 views of your ad), your maximum CPC or CPM bid, and the daily maximum you’d like to spend.

Your ad consists of a title (up to 25 characters), an image (110 x 80 pixels), and body text (up to 135 characters). Facebook have some very specific rules about the content of their ads: no abbreviations allowed (e.g. ‘&’ instead of ‘and’ is not permitted!); full sentences and punctuation are required; no excessive capitalization – it’s worth checking to make sure you follow all their rules, because…

What Comes Next

Once you’ve set up the ad, you have to wait for it to be manually approved. This takes a minimum of several hours (in my experience), and if you change anything in the ad later, you have to wait for it to be approved again before it will run. So make sure you get it right first time!

Once the ad has been approved, you can monitor stats from your Ads page, and see how many times it’s been viewed, clicked on, and the average cost you’ve paid (Facebook, like other ad systems, only make you pay the minimum you need to ‘outbid’ other advertisers, so you don’t always pay your maximum bid price). You can also pause or delete your ad if you need to.

My Experience

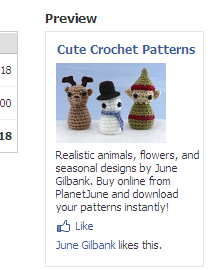
Facebook certainly has plenty of users. I was expecting to spend a few dollars a day, but I blew right through my initial $50 within 1 day! This is the ad I used:

PlanetJune Ad 1 on Facebook

I used the CPC model and my $50 bought me 67,252 impressions (times that the ad was shown on anybody’s screen) and 241 clicks through to my site. Not one of these clicks generated a direct sale 🙁

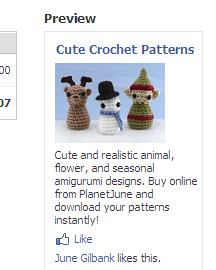
So, with my remaining $100, I switched a few things up. Carina pointed out that my ad did not contain the word amigurumi (well, duh, how did that happen?!), so here’s my revised ad text:
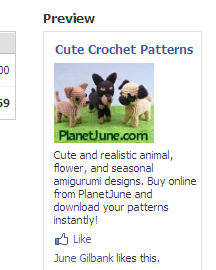
PlanetJune Ad 2 on Facebook PlanetJune Ad 3 on Facebook

I tried running the ad with the two different pictures shown above, but after a couple of thousand views I could see that the PocketAmi Christmas image was getting better results, so I pulled the AmiDogs ad and kept running the Christmas ad.

I also switched to the CPM bid model, so instead of paying per click, I was paying per view of the advert. This didn’t seem like a good plan – after all, I wanted people to click through, so that was more valuable to me than the number of views – but it turned out that my views cost me a lot less with this model, and I also got more clickthroughs! Why? Here are my theories:

  • The text was more appealing in the revised ad
  • People had seen the ad more often by now and were more tempted to click it
  • By chance: the people who happened to see the ad on Day 2 were more receptive to it

My $100 lasted for 2 days, although the morning of the first day the ad was ‘pending’ waiting for approval of my changes. The results were 290,241 impressions and 1206 clickthroughs – that’s twice as many views and 2.5x more clicks per dollar than with my first attempt!

I’m going to give you full disclosure of my revenue, in the interests of helping you make an informed decision: my Google Analytics report shows sales of only $70 resulting from these clicks, although it’s not 100% accurate (I’ve noticed it doesn’t pick up all my sales), so that could be a low estimate. So, on the surface, I didn’t even break even with my advertising budget, but this doesn’t account for the intangibles:

  • People who signed up for an account or my mailing list and may become customers at a future date
  • People who bookmarked or saved my site for later
  • People who didn’t complete checkout at the time, and returned to my site later to complete the purchase (so the sale wouldn’t show up as coming from Facebook)

Conclusions

Facebook ads are definitely interesting. I love that you can specifically target the people who are your potential customers. But the advertising costs are just too expensive for smaller businesses to justify, unless they can somehow convert almost all their clicks into sales, or sell a very expensive product where one sale would cover the advertising budget for the day/week.

Obviously, this is just going from my personal experiences, and you may have different results if you try using Facebook ads. Personally, I won’t be advertising with FB again unless I can find another promotional voucher for free credit – it’s just too expensive for my budget. Having said that, I’m still hopeful that the almost 1500 clicks I received during the course of this experiment will lead to some more new customers at a later date, as well as the few direct sales I received on the day.

I hope you’ve found this report helpful in deciding where to spend your precious funds to try to grow your business! Have you tried FB ads too? I’d love to hear about it – please leave a comment and share your experience.

Comments (20)

review: Soak Wash

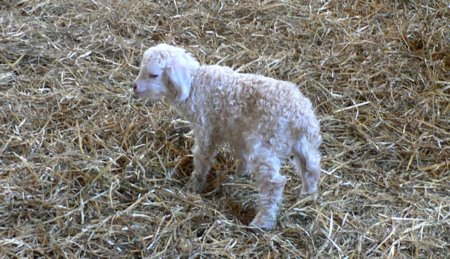
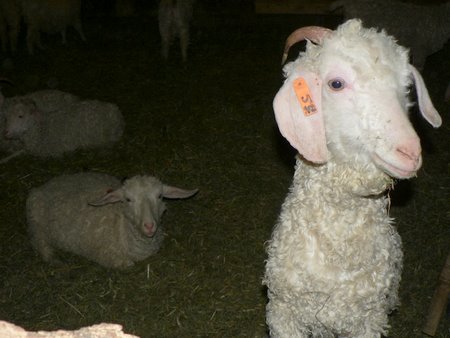
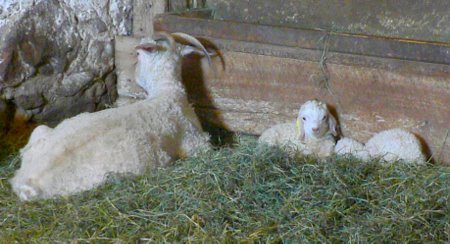
Last April, we visited the Wellington Fibres Open House, to see the baby Angora goats and maybe pick up some mohair yarn for a future project. There were about 30 tiny little newborn kids who were absolutely adorable, especially when they started leaping about! We also saw the mill where the mohair fibre is processed and spun into yarn, which was very interesting, but I forgot to take any photos – the sweet little kids were just too distracting! It was still winter in Ontario, so the goats were being kept inside, hence my poor quality low-light photos, but you should get the idea:

angora goat at wellington fibres

angora goat at wellington fibres

angora goat at wellington fibres
Awww, look at the little babies!

After seeing the goats in person, I really wanted some mohair yarn to play with. (In case you didn’t know, Angora goats produce mohair; angora yarn actually comes from Angora rabbits!) Unfortunately for me, all the yarn on display in the shop was dyed in pretty jewel tones – not what I was looking for – and I couldn’t see any natural undyed yarn. As it turned out, they did have some, but it wasn’t ready to sell as it hadn’t been washed yet. They let me buy it unwashed, and I’ve been waiting to find the time to wash it ever since…

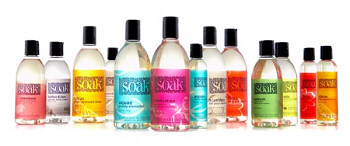
Washing natural yarns scared me – I wouldn’t want to accidentally felt the yarn together before I even had a chance to crochet with it! Enter Jacqueline from Soak, who saw on Twitter that I had yarn in need of washing, and kindly sent me some samples of Soak to try. What is Soak? From their website:

soak wash
Keep the fibers you love looking great with Soak. This rinse-free formulation is perfect for washing your laciest lingerie, your softest sweaters, hand-made quilts and even baby clothes. Soak is gentle and deliciously scented with fabric-friendly ingredients that revitalize fibers so they look great and last longer.

Now that sounds good!

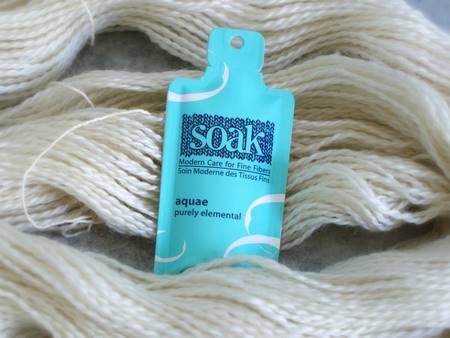
unwashed mohair yarn and SOAK
My unwashed yarn with a Soak sample

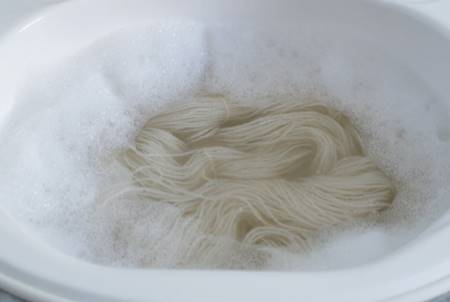
I ran some cool water in the sink, and added the Soak (I tried the Aquae fragrance, which was subtle and fresh-scented). I made sure my hank of yarn was tied together at several points so it wouldn’t get tangled while wet, and then pushed it into the water so it got thoroughly wet.

SOAKing my yarn
SOAKing my yarn

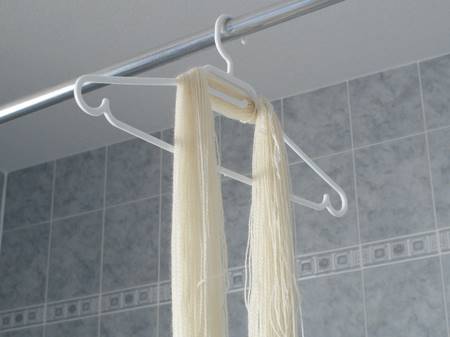
I left it for about 20 mins, then carefully removed the yarn, squeezed it out gently and then rolled it in a towel to try to get some of the excess water out. Then I hung it on a plastic clothes hanger over the bath to dry fully.

clean yarn drying over the bath
Clean yarn drying

Um, yeah. This stuff works – this is the dirty residual water after I removed my precious yarn:

dirty water after washing yarn
Yuck!

Convinced, I then used Soak in the Floral fragrance to wash my PlanetJune t-shirt (which I made with an iron-on transfer and I’m always scared to wash in case the transfer flakes or cracks) and the socks I crocheted last winter, with equally good results (although they weren’t quite as dirty to begin with!).

I’m very impressed with Soak. It would be great for cleaning amigurumi – not needing to rinse it out means washing is a much gentler process for delicates. And I think I’ll be using it to wash any of my punchneedle pieces that get dirty, too! All I have to do is decide which is my favourite fragrance (I like Aquae best so far, but I still have the Citrus, Celebration and Unscented varieties to try) and then buy myself a full size bottle.

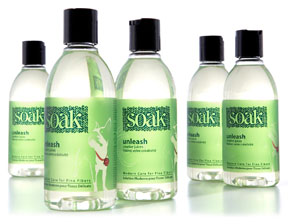
unleash soak

And now Soak have partnered with the wonderful Ravelry to release a new Ravelry-exclusive scent: Unleash, with a light, fruity, fresh, and crisp fragrance – sounds yummy. (It’s currently sold out at Ravelry, but they’ll have more in stock soon.) UPDATED: It’s back in stock! I think I might be tempted to try this one!

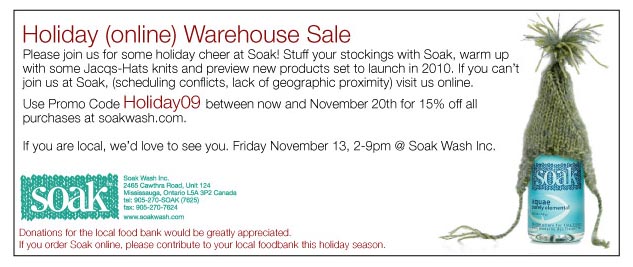
Soak promo
If you’d like to try Soak for yourself, I have a deal for you! Order online from soakwash.com by November 20th and use promo code ‘Holiday09’ to receive 15% off your order!

Comments (5)

Paper Chains & Garlands is here!

Okay, you know you’re too busy when you forget that your first book was released 2 days ago and miss doing a post on the release date…

My papercraft book and kit, Paper Chains & Garlands, is now here! It’s available to purchase exclusively through Barnes and Noble.

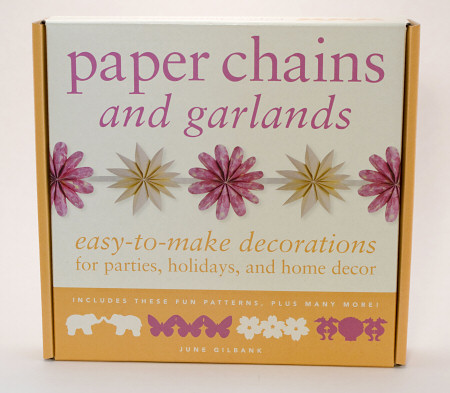
Paper Chains & Garlands by June Gilbank (planetjune)
Front of box

I was hoping that I’d be able to sell signed copies through my site, but it turns out that the shipping costs for me to receive author copies from the US make that an impossible dream. So, instead, if you’d like to buy my book, I’d be very grateful if you’d click through from the links on my site, so I can make a tiny commission from your purchase!

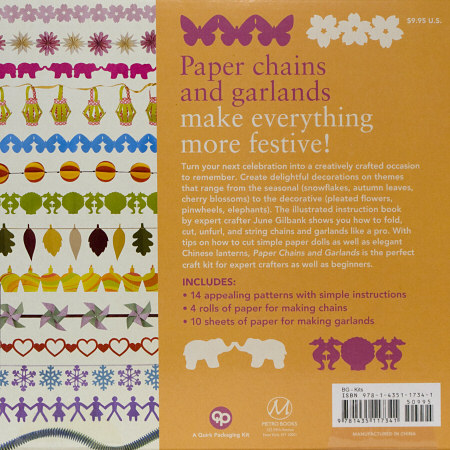
Paper Chains & Garlands by June Gilbank (planetjune)
Back of box with pictures of all the projects down the left hand side

For those of you without a magnifying glass, the back of the box reads:

Paper chains and garlands make everything more festive! Turn your next celebration into a creatively crafted occation to remember. Create delightful decorations on themes that range from the seasonal (snowflakes, autumn leaves, cherry blossoms) to the decorative (pleated flowers, pinwheels, elephants). The illustrated instruction book by expert crafter June Gilbank shows you how to fold, cut, unfurl, and string chains and garlands like a pro. With tips on how to cut simple paper dolls as well as elegant Chinese lanterns, Paper Chains and Garlands is the perfect craft kit for expert crafters as well as beginners.

Paper Chains & Garlands by June Gilbank (planetjune)
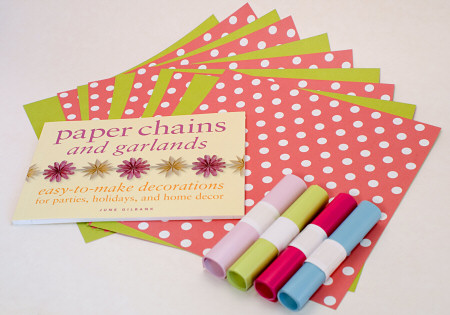
Inside the box: the book, 4 rolls of paper chain paper and 10 sheets of double-sided garland paper

The book has full illustrated instructions for all 14 projects and includes full-size templates.

Paper Chains & Garlands by June Gilbank (planetjune)
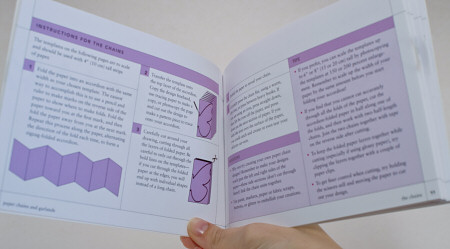
Inside the book: pretty colours, and full instructions & illustrations by me!

I hope you’ll enjoy Paper Chains & Garlands. It’s a sweet little book and kit, and would make a perfect Christmas gift, if you’re thinking that far ahead!

If you’d like to buy it, please click through to Barnes & Noble now. It’s a total bargain at only $9.95, so don’t miss out! Thank you for your support 🙂

Comments (10)

my book: Paper Chains & Garlands

FINALLY! I can give you a sneak preview of my papercraft book, Paper Chains and Garlands. After months of waiting, it’s wonderful to see how my projects, text and illustrations have been transformed into a thing of beauty… And it’s not only a book, it’s a kit!

Paper Chains & Garlands by June Gilbank (planetjune)
Front of box

Paper Chains & Garlands by June Gilbank (planetjune)
Back of box with pictures of all the projects down the left hand side

For those of you without a magnifying glass, the back of the box reads:

Paper chains and garlands make everything more festive! Turn your next celebration into a creatively crafted occation to remember. Create delightful decorations on themes that range from the seasonal (snowflakes, autumn leaves, cherry blossoms) to the decorative (pleated flowers, pinwheels, elephants). The illustrated instruction book by expert crafter June Gilbank shows you how to fold, cut, unfurl, and string chains and garlands like a pro. With tips on how to cut simple paper dolls as well as elegant Chinese lanterns, Paper Chains and Garlands is the perfect craft kit for expert crafters as well as beginners.

Paper Chains & Garlands by June Gilbank (planetjune)
Inside the box: the book, 4 rolls of paper chain paper and 10 sheets of double-sided garland paper

The book has full illustrated instructions for all 14 projects and includes full-size templates.

Paper Chains & Garlands by June Gilbank (planetjune)
Inside the box: the book, 4 rolls of paper chain paper and 10 sheets of double-sided garland paper

Drawing all the step-by-step illustrations took me sooo long, but I’m really happy with how clear and colourful it all looks. The inside of the book isn’t all purple, by the way – the instructions and illustrations for each project match the colours in the actual project – it’s so pretty!

Paper Chains & Garlands will be available in Barnes and Noble stores and from www.bn.com from September 30th 2009 – that’s just over a week from now!

I was hoping to be able to sell signed copies from my shop, but sadly due to the box being over 2cm thick, Canada Post would charge me $8 (Canada), $9 (US) and $16 (International) just to ship the book, which I doubt any of you guys would be willing to pay for a $10 book, right?! 🙁

I think it’s a really cute kit and I hope it’ll do well. Now I just have to wait until the 30th and see what people think of it!

Comments (16)

eBook review: Creating a Blog Audience

I’m sure you’ve heard of ‘Sister’ Diane Gilleland, the creator of the popular Craftypod podcast and blog. A few months ago, Diane entered the world of self-publishing via eBooks with her first offering for craft bloggers: Making a Great Blog: A Guide for Creative People. Diane’s latest eBook, Creating a Blog Audience: An Unconventional Marketing Guide is the next in her craft blogger series, and something I thought might be useful for me as I try to reach new customers for PlanetJune…

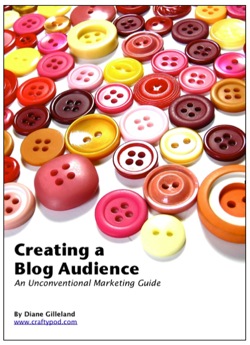
Creating a Blog Audience, by Diane Gilleland

The first thing I noticed when reading this book is that Diane’s voice really shines through. If you’ve ever listened to Craftypod, you’ll know exactly what to expect – every word is written in Diane’s warm, clear, conversational tone and it’s hard not to imagine her speaking the words on the page directly to you.

As the subtitle of the book suggests, this is indeed “an unconventional marketing guide”. Far from the traditional marketing concept of sending out your message to everyone possible and hoping some of them will listen, Diane focuses on ‘Engagement Marketing’ techniques: engaging with people and, by doing this, starting to build a community of people who are actually interested in what you have to say.

As an established blogger (I’m now into my fourth year of blogging!) I’m fortunate to already have an audience of wonderful readers, and a lot of the material in this book covers things I already do. Having said that, this book provided a new way of thinking about these things, and I’ve been able to identify several areas that I’d like to invest more time in – even things as simple as commenting on others’ blogs (which I’m guilty of not doing often enough, as I usually read posts through Google Reader and don’t take the time to click through to tell people I enjoyed their post or to leave my opinion). And some of Diane’s suggestions were completely new to me – her Gathering Place #5 was something I’d never even considered as a place to meet like-minded people, although it makes total sense. (You’ll have to buy the book to find out which website I’m talking about!)

Diane’s advice is tailored to craft bloggers, so it’s very easy to understand and apply. Diane includes a set of worksheets to help you identify and plan for what will work best for you and your blog, and related links and resources on her website.

If you’re a new or relatively unknown blogger and are trying to build an audience for your blog, you’ll find this book will be absolutely invaluable. If, like me, you already have an audience but are looking for ways to grow and to market your business, you’ll find some tips in here that will help you to increase your audience and build your community. Now I just have to put what I’ve learnt into action!

Creating a Blog Audience by Diane Gilleland is 62 pages long and is available to purchase for $13.50 from Craftypod.

Comments (2)

Artfire: an alternative to Etsy?

ArtFire - Buy Handmade - Sell HandmadeIf you buy or sell handmade goods, you may have already heard of Artfire.com, a new online marketplace. Artfire is similar to Etsy in many ways, but also has some interesting differences, especially in their fee structure. I’ve been investigating for a while, so I thought it might be useful if I summarised some of the things I’ve discovered, in case you’re also wondering if you should try selling your wares on Artfire…
This post is a review based on my own opinions – I’m not affiliated with Artfire in any way other than as a user!

Google Running a few test searches on Google to try to find some of my crochet patterns, I found that my Artfire page comes up much higher in the rankings than my Etsy page. This gives you an immediate advantage over your Etsy-selling competition if buyers are googling for a certain type of item.

No Account Checkout Unlike Etsy, your customers don’t have to have an Artfire account in order to buy, so if you link from your blog to your Artfire, that’s a good way to get sales from non-Etsians who may be unwilling to create an Etsy account.

No Fees! You can sign up for free and list up to 10 items at any one time with absolutely no strings, no listing fees, and no commission fee when you sell an item (vs 20c listing fee and 3.5% commission on Etsy). This would be a great way to get your feet wet with Artfire – you have nothing to lose.

Did I mention it’s free to sell?! So important I think it deserves a second mention: NO listing fees! NO selling fees! That’s an amazing deal.

Monthly Fee Upgrade The free account limits you to selling 10 items at any one time. To sell as many items as you want, there is a flat fee of $20 per month. But for the first 5000 sellers the fee is only $7 per month – and that’s guaranteed never to increase.

Those 5000 places are going pretty fast – I’ve been thinking about it for the past few weeks, and in that time the number of $7 memberships left has gone down from 2600 to 1400… I decided I wanted to get in at the $7 level while I still have the chance. If I don’t like it, I can go back to the free 10-item membership, and I haven’t lost anything. But I’m prepared to pay for a few months at least and give it a chance to succeed.

As I’m currently paying over $30 in Etsy fees each month, knowing that I could sell a thousand patterns and would still only be paying $7/month in Artfire fees makes this deal very tempting! Just listing my 44 items would cost me $8.80 at Etsy, so I’ll already be saving money by the time I’ve finished setting up all my listings.

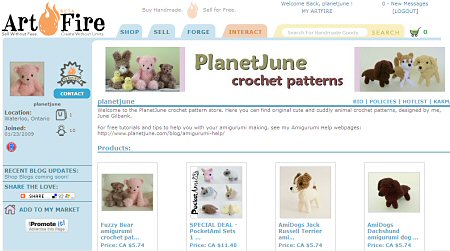
PlanetJune store on Artfire.com
My Artfire storefront

Artfire is still small and new, but it’s growing fast, and I really think it has the potential to be big. I’ve only had 1 sale so far, but it all went very smoothly. If you are thinking of expanding your sales venues, I suggest you consider Artfire among your options. At least sign up for a free account – you can upgrade to the $7 monthly account later if you don’t feel like committing today (but remember that those memberships are going fast, so don’t leave it too long!)

Please list me (planetjune) as the referrer if you do decide to sign up. Here’s my direct link: Register on ArtFire.com.

I’ll report back in the coming months with how sales in my Artfire shop compare with sales in my Etsy shop and, of course, my main PlanetJune shop. I’m thinking of writing some more posts about things I’ve found out about while running my business, so please let me know if you’d like to hear more on my perspective of running a craft business…

Comments (15)

review: ergonomic crochet hook

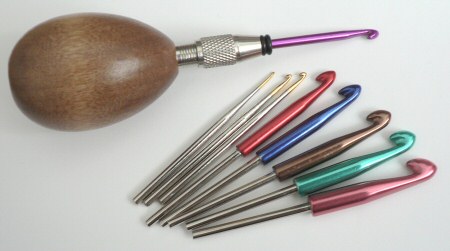
It sounds like many of you are wondering about the ergonomic crochet hooks I bought a few weeks ago, so I’ll give you my opinions so far. Please bear in mind that this is only based on my personal experience with it (the Eleggant Hooks ergonomic crochet hook set).

ergonomic crochet hook review

First impressions

The wooden egg feels good in my hand. It picks up some heat and is warm and comfortable to hold. I’m not entirely sure where my forefinger and thumb are supposed to rest on the hook – is there a preferred way to hold it? My fingers would naturally rest on the textured area used to open and close the mechanism, but that is heavily textured and not comfortable. I shifted my grip to hold further along the shaft, and that was more comfortable.

The initial problem I see is that this hook design is very dependent on your hand size. My hands are small, and, with the egg in the palm of my hand, I wanted to hold the hook too low down (a crocheter with very large hands may find the opposite). The amount of hook shaft that extends from the mechanism is quite short too, which, once I have my fingertip resting on the shaft, makes it really short. That’s not a problem – it’s just something different to get used to.

When I first received the hooks, some of them had quite a sharp ridge over the head, which was catching and snagging on the yarn. I filed the ridge down to smooth it and it was much improved, although it still seems more pointy than what I am used to, and so more prone to split the yarn.

Hook shape

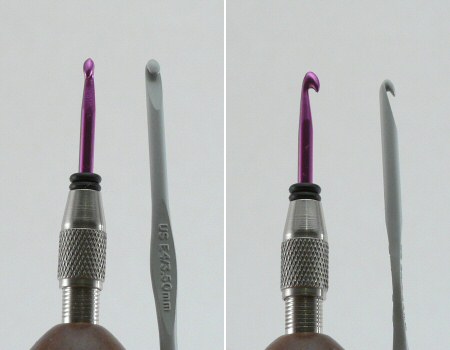
My main difficulty is with the ‘hook’ part. I am very loyal to the Susan Bates hook shape, but this shape is completely different. It’s thin, pointy, and the shaft is narrower than the size of the hook, which makes it more difficult for me to maintain my usual tension.

hook comparison
For each picture above, L: 3.5mm ergonomic hook, R: 3.5mm Susan Bates hook

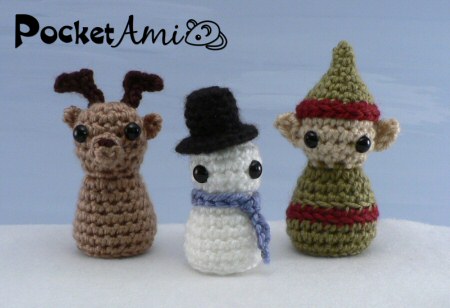
If you like this style of hook (closer to a Boye hook) you shouldn’t have a problem with that though. However, the combination of narrow shaft and very pointy tip of the hook meant that the tip would split my yarn every time I tried to draw back up through a loop. In consequence it took at least twice as long as usual to complete a stitch, trying not to snag the yarn as I drew the hook up through each loop, and my tension was much tighter than normal. You can see the result of this clearly with my Christmas PocketAmi: I made the entire snowman with the new hook, and then gave up and used a regular Susan Bates hook for the other two. See how small the snowman’s body is in comparison (even though they all have the same number of rounds)?

christmas pocketami by planetjune

I just want to reiterate at this point that this is not a design flaw with the hook – it’s just the style of hook that I am used to. If you like the Boye hook style, you may love this hook shape….

Ergonomics

My main hand problem when I crochet is actually with my non-crocheting hand; the hand that holds the work in place rigidly grips the work without moving for long periods of time, and that is the main cause of my (crochet-related) pain. So, unfortunately, no hook would address my main concern. If you experience pain in your hooking hand or problems gripping a regular hook, I definitely think the egg shape would help you – it is comfortable to hold and lets you control more of the positioning with the palm of your hand, so there is less pressure on your forefinger and thumb.

One point I should note: either because of the hook shape or the egg, I found myself making more exaggerated twisting motions with my wrist than I normally do when I crochet. I wonder if this could lead to a wrist problem in the long term? I really don’t know.

Overall

The kit itself is small and convenient, and I do like the support of the wooden egg. I’m considering buying a new Susan Bates E hook and trying to hack it into the mechanism (the shaft is slightly too wide to fit without modifications) – if that works I would have a fair test to see if my difficulties were caused by the shape and style of the hook attachments, or the design of the system itself. I have a feeling I would really like it with my favourite hook attached, and it may also solve the extra twisting motions I experienced.

If I can get my preferred hook to work with the egg, I will definitely report back – I don’t want to put people off buying one just because I don’t get along with the narrow Boye-style hooks!

I can’t recommend you buy or avoid this hook set – I really think so much depends on the user. If you like the hook style it’s supplied with, you may love it. If your hand is not abnormally large or small, you may love it. If you are lucky enough to have a chance to do so, I’d suggest you try crocheting with one before you buy. I had held mine in my hand, but I didn’t try actually crocheting with it.

Crocheting is a repetitive activity, and as such can lead to repetitive strain injuries. The most important thing to remember – whatever hook you use – is to take regular breaks, and stretch your hands (and probably your arms and back too, if you are like me and end up hunched up over your work). Your body will thank you for it!

Over to you…

Do you have any experience with ergonomic crochet hooks, or solutions for crochet-related hand/wrist pain? Please share in the comments!

Comments (33)

amigurumi animals

* If you can see this post, you’re viewing the new improved PlanetJune server! *

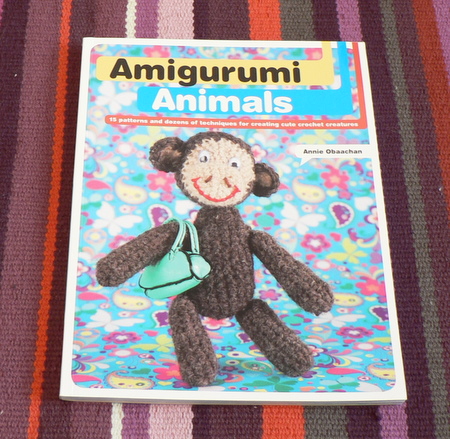
I just went to my mailbox, and look what I found inside (sorry about the photo quality; the sun is not cooperating today):

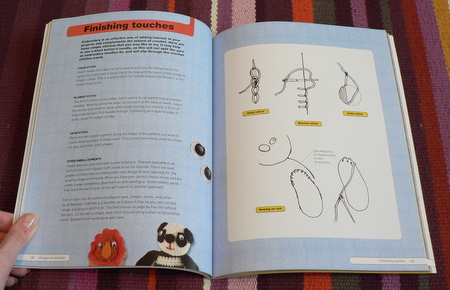
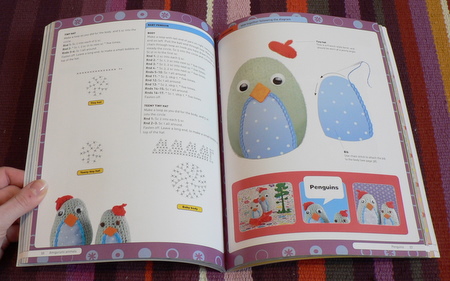
It’s a new book, Amigurumi Animals by Annie Obaachan! The book is very cute, and has lots of tips for how to design and make amigurumi:

It includes a menagerie of patterns you can make (with both written and charted instructions):

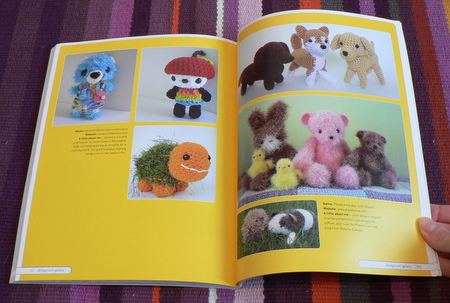
In the back is a gallery of amigurumi artists, and guess who has a full-page spread? 😉

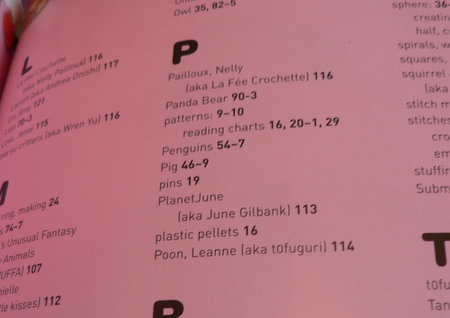
Three large pictures, and a little blurb about me and PlanetJune.com. What really cracked me up, though, is I even made it into the index 😀

If you’re an amigurumi beginner, you could do a lot worse than picking up Amigurumi Animals (and not just to look at my photos!)

Comments (9)

Next entries »
  • Quick Links: Crochet

    navigation: arrow

    buy crochet patterns and accessories from my online store

    'Everyday Crochet' and 'The Essential Guide to Amigurumi' crochet books by June Gilbank

    Crochet video tutorials and step-by-step photo tutorials

    Free PlanetJune crochet patterns

    Frequently Asked Questions

    Quick Links: Crafts

    navigation: arrow

    Punchneedle Embroidery information, ebook & patterns

    Papercraft ebook & tutorials

    Free PlanetJune craft projects & tutorials

  • Blog Post Categories

  • Blog Archives

  • Welcome to PlanetJune!

    June Gilbank

    Hi, I'm June. Welcome to my world of nature-inspired crochet and crafting. I hope you enjoy your visit!

    If you'd like to get in touch, you can contact me here.
    crocheted Canadian flag by PlanetJune
  • A fanned-out pile of the books Everyday Crochet and The Essential Guide to Amigurumi, with text 'The answers to all your crochet questions at your fingertips - find out more'
  • Support PlanetJune!

    Want to say thanks? You can send me money in seconds at paypal.me/planetjune (over $20) or paypal.me/planetjune2 (under $20) or send me a donation through my shop.

    Or simply click through from my links before you shop at Amazon, Etsy, KnitPicks, LoveCrafts or Crochet.com, and I'll make a small commission on your purchase, at no cost to you! Start here:

    ♥ Support PlanetJune ♥

    Tip: This link is also in the footer of every page!

    Thank you so much for your support!