PlanetJune Craft Blog

Latest news and updates from June

Archive for November, 2011

Accessories CAL roundup 1

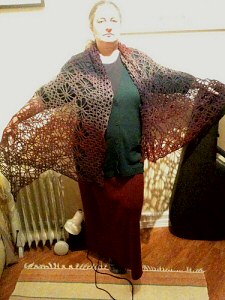
It’s time for another crochet-along roundup from the PlanetJune ravelry group members. The Accessory-Along raised some interesting discussions this month (some of which I’ll blog about in future): the difference it makes when you ‘yarn under’ instead of ‘yarn over’ when you crochet, how to do the Tunisian knit stitch, and the difference between working into a ch and a ch-sp. See, Crochet-Alongs are fun and educational!

As many of the PlanetJune Accessories patterns take far longer to complete than an amigurumi, the group members have voted to extend the Accessories CAL for another month, to give people more time to complete their projects, or even start new projects to give as Christmas presents. You can join in too, if you’d like – we’d love to have you join us!

In addition, I’ll be launching the 2011 Christmas CAL tomorrow (with prizes!) so check back here or on Ravelry for details πŸ™‚

And now let’s see the November results of the Accessories CAL! (As usual, I’m crediting the participants by their Ravelry usernames, so you can look them up on Ravelry if you want more details.)

Let’s start this roundup with the show-stopping larger projects:

PlanetJune Accessories CAL PlanetJune Accessories CAL
Shunra’s stunning Diamond Flowers Scarf Wrap (using the increased size modifications) & Pysselkiisen’s Scarf Sweater (modelled by her sister)

PlanetJune Accessories CAL PlanetJune Accessories CAL
jukatca’s Lacy Bobbles Cowl, worn two ways

PlanetJune Accessories CAL PlanetJune Accessories CAL
PixyKayte’s Chunky Elegance Rug (small size) & my Aunt’s miniature Lacy Bobbles Cowl for my cousin’s new baby

And here’s a selection of some larger project WIPs that we can look forward to seeing again, hopefully completed, in the second roundup at the end of next month:

PlanetJune Accessories CAL PlanetJune Accessories CAL
Shunra’s Diamond Flowers Scarf & klopferli’s Lacy Bobbles Cowl

PlanetJune Accessories CAL PlanetJune Accessories CAL
Enphra’s Climbing Eyelets Triangular Shawl & CrochetColorJunkie’s Gossamer Lace Wrap

And now to the ‘quick and easy’ projects!

PlanetJune Accessories CAL PlanetJune Accessories CAL
A selection of my other patterns cleverly turned into accessories by Fatals-attraction, most of which use crochet thread and tiny 1-2mm hooks to make tiny versions! (Gecko pin, Basic Rose ring and necklace, Tiny Whale necklace, Toadstool [from my book] necklace, Love Hearts photo frame, Amigurumi Balloons pin)

PlanetJune Accessories CAL
theMarkofSMB used my Plumeria pattern to make a lovely crocheted headband

PlanetJune Accessories CAL
theMarkofSMB also crocheted 2 Scalloped Scarves and an amazing 10 Lip Balm Holders! (I think I know what some people are getting for Christmas this year!)

PlanetJune Accessories CAL PlanetJune Accessories CAL
Fatals-attraction’s Scalloped Scarves and klopferli’s Lip Balm Holders

PlanetJune Accessories CAL PlanetJune Accessories CAL
Lip Balm Holders by klopferli and Lightblue

PlanetJune Accessories CAL PlanetJune Accessories CAL
Lip Balm Holders by PixyKayte and Fatals-attraction

PlanetJune Accessories CAL
4 Lip Balm Holders by jukatca

Another great roundup! Well done to all the CAL participants; your projects all look wonderful πŸ™‚

From large to small, there is, I hope, something for everyone to be found in my Accessories range. If you’d like to make any of the projects featured in this roundup, you’ll find all the patterns in the PlanetJune Accessories section of my shop. And, if you have time this coming month, please join the Accessories CAL and share your projects with us before the end of the year!

Comments (2)

Gift Boxes crochet pattern

A couple of months ago, I put out a call in my Ravelry group for Christmas or Holiday design requests, and the most popular idea was for a square gift box, worked in the round. It’s easy enough to crochet a square base, but working the sides in one piece in the round means that the resulting box won’t look square – there are no corners, and, with every round, the square becomes more and more circular…

I decided to rise to the challenge and develop a circular box, worked in one piece in the round, that still looks square. I actually thought I’d already come up with the perfect technique, but, after testing it, I wasn’t happy with the result, so I went back to the drawing board. I created at least 10 cornering techniques and compared samples of each to find the ultimate corner, but I think it was worth the effort, because these boxes undeniably have real square corners:

crocheted square gift boxes by planetjune
I chose rich peacock hues for my boxes, with a lighter shade of each colour for the trim, but of course you can change the look by using traditional Christmas colours, or any other colours you like.

Each box has a removable lid, and they are sized so that, with the lids on, the three can nest neatly inside each other. The smallest is 2.5″ (6cm) wide and the largest is 4.5″ (11cm) wide.

crocheted square gift boxes by planetjune

You can also use them, with or without lids, as pretty little desk or bathroom organisers, or to display trinkets…

crocheted square gift boxes by planetjune
3 of the small boxes without lids

If you’d like to try out my special no-sew, worked-in-a-spiral, square corner technique, the Gift Boxes pattern includes full written instructions, and a bonus 3 page step-by-step photo tutorial at the end of the pattern. I laid it out like this so you’ll have plenty of photos to make sure you’ll definitely be able to understand how to make the corners, but you can save on ink by not printing the last 3 pages!

The Gift Boxes crochet pattern is now available in my shop, or you can bundle it with any other 2 PlanetJune Accessories patterns by picking up a custom set of any 3 Accessories patterns.

Note ready to make it yet? Add it to your Ravelry queue!

I hope you like them!

Comments (7)

holiday patterns and tutorials

I’ve created so many Christmas-related patterns and tutorials over the past 5 years, I thought it might be helpful to see them all together in one place.

Before I get into the roundup though, I’d like to ask a quick favour: I’ve been shortlisted for Inside Crochet magazine’s 2011 Blog awards and, if you enjoy my blog, I’d really appreciate your vote. It just takes a click to vote; no signup necessary. Vote here – thank you!

PlanetJune Christmas Crochet Patterns

My 2011 holiday pattern isn’t quite finished yet (thanks to a gardening accident to my finger which forced me to reschedule my tutorial photography session for the pattern), but I hope to publish it before the end of November, so you’ll still have plenty of time to make it before Christmas!

In the meantime, here are my other Christmas patterns from my regular ranges:


Top row: Christmas Trees, Christmas Baubles
Middle row: Poinsettia (donationware), PocketAmi Christmas
Bottom row: Christmas Pudding (donationware), Candy Cane (donationware)

And from PlanetJune Accessories:

PlanetJune Accessories Reindeer Antlers crochet pattern lip balm holder crochet pattern by planetjune
Reindeer Antlers, Lip Balm Holder (donationware – and a perfect stocking stuffer!)

By the way, there’ll be another Christmas CAL for all my holiday patterns in the PlanetJune Ravelry group from December 1st, and I think I’ll throw in some prizes like last year. You’ll find crochet-along details on Ravelry from Dec 1st, and I’ll post with a link here too once it’s all set up πŸ™‚

PlanetJune Christmas Craft Tutorials

punchneedle poinsettia by planetjunepolymer clay poinsettia by planetjune
felt poinsettia by planetjunepom-pom christmas tree tutorial

Top: Punchneedle Embroidered Poinsettia, Polymer Clay Poinsettia
Bottom: Felt Poinsettia, Pom-Pom Christmas Tree

I think that’s it! I hope you’ll find a project (or a few) that you’d like to try for your Christmas crafting this year. And please, don’t forget to vote for me πŸ™‚

Comments

free pattern: Lip Balm Holder

Never lose your lip balm again (or have it melt in your pocket) with this stylish holder! Clip it to your keyring, to your bag, or even to your belt loop and you’ll always have lip balm at hand when you need it. Quick and easy to crochet, just pop a lip balm inside and you have a perfect little gift!

lip balm holder crochet pattern by planetjune

You’ve probably seen simple lip balm holder patterns before, but not like this one! Why?

  • It’s worked in a fine yarn/thread with a small hook, so it looks subtle and elegant, not bulky and only appropriate for kids (although it’s great for kids too!)
  • Don’t be put off by the tiny size: this pattern is designed to be easy on the hands! Only the base is worked in single crochet; the sides are worked into chain-spaces, so it’s much easier to insert your hook to begin each stitch.
  • The sturdy hanging loop will keep your holder safe*.

*In case you’re wondering about that ‘sturdy hanging loop’ part, I know what I’m talking about! I first made myself lip balm holders from crochet thread in 2006. They lasted well, but I’d attached each to a metal ring by crocheting the ring to the top of the holder:
broken lip balm holder
After prolonged use, the strands of thread attached to the ring frayed through, as you can see, so I determined to give my new design a sturdy loop so the thread isn’t stressed at any one point.

lip balm holder crochet pattern by planetjune

I tested this pattern using 4 different thicknesses of thread and yarn, so you can see how versatile it is. L-R: size 5 crochet thread, size 8 pearl cotton, size 10 crochet thread, fingering weight yarn (Bernat Baby).

It works up very quickly, and if you add a yummy flavoured lip balm inside, it’ll make a perfect stocking stuffer gift!

This is a donationware pattern, and I’ve changed things slightly this time by adding some additional info that you’ll only find in the PDF version (which you’ll receive as a thank you for your donation):

  • A modification to make the holder slightly wider (in case you crochet tightly or have a non-standard-width lip balm tube)
  • A simpler edging (in case you don’t get along with reverse single crochet)
  • Tips for attaching the various types of hardware that you see in my photos

But, as always, the pattern is free for your use and donations are entirely optional πŸ™‚

Enjoy!

Go to Lip Balm Holder pattern >>

Comments (7)

how to reverse single crochet

Link easily to this tutorial in your patterns: www.planetjune.com/rsc

Today I’d like to show you my favourite technique for making a decorative crocheted edging. Reverse single crochet (also known as crab stitch) makes a twisted cord edging, and it’s very easy to achieve – it’s no more than a single crochet stitch, but you work in the opposite direction to usual (left to right for right-handers; right to left for left-handers). Provided you don’t work too fast and tangle up your stitches (which is easy to do when you’re working backwards) it’s an easy technique to master.

reverse single crochet (crab stitch) video tutorial

As it’s easier to show than to tell, I’ve put together a new video to demonstrate. I hope you’ll find it useful, if you haven’t already mastered this stitch.

(If you want to practice the technique, it’ll be featured in both of my next two patterns, and you’ll get a peek at one of them in the video – another new donationware pattern to be released later this week!)

Reverse Single Crochet (right-handed)

Click to watch this video on YouTube.

Reverse Single Crochet (left-handed)

Click to watch this video on YouTube.

Note: The videos may look a little small embedded in the blog: if so, you can fullscreen them or click through to YouTube to watch them in full HD resolution πŸ™‚

I’ve been compiling a list of crochet technique videos that I plan to create over the coming months. If you have any suggestions you’d like me to add to my list, please let me know.

If you enjoy my crochet tutorial videos, please help to spread the word about them, and/or subscribe to the PlanetJune YouTube channel.


Do you find my tutorials helpful? If so, please consider making a contribution towards my time so I can continue to create clear and concise tutorials for you:

Thank you so much for your support! Now click below for loads more crochet video and photo tutorials (and do let me know what else you’d like me to cover in future tutorials…)

See more helpful PlanetJune crochet tips and technique tutorials

Comments (29)

Cape Town wildlife VI

This is the sixth post in my monthly series on the fascinating nature I encounter here in South Africa. I’ll be back with another crochet post tomorrow!

How could I possibly top last month’s wildlife post? Short of going on a safari, I don’t think it’s going to get much more impressive than penguins and whales and lizards and dassies, all in one day! So I’m narrowing my focus a bit and I’m going to show you something much closer to home (my own back garden, in fact) that’s an absolute miracle of nature.

As you may remember, a few months back, we noticed some weird blobs on the wall of our house, that turned out to be Garden Acraea butterfly cocoons. It turns out that we have a perfect butterfly ecosystem in our garden: we have a Wild Peach (kiggelaria africana) tree (unfortunately no relation to an edible peach) where the butterflies lay their eggs.

garden
The wild peach is the larger, darker tree at the back. The butterfly wall (left of photo) faces the tree.

As winter ended and spring began (I’m in the southern hemisphere, remember), the cycle started up, and I’ve been able to observe the whole fascinating process just by stepping out into my garden!

butterfly eggs
Butterfly eggs

After hatching, the little caterpillars feast on the wild peach leaves (which grow back quickly – don’t worry about the tree). Apparently cuckoos eat the caterpillars, although I’ve yet to spot one on our tree. And when the wild peach fruits ripen (from February) they apparently attract a whole host of different birds, so I’ll report back if we see anything interesting πŸ™‚

caterpillars
Baby caterpillars and munched leaf

When the caterpillars are fully grown, they find a convenient sunny wall to attach themselves to before pupating. They spin a silk mat and grip onto it with proleg hooks called crochets (of course, crochet means hook in French, so that’s not really a huge coincidence, but it still made me smile!)

caterpillar silk mat
You can see the silk mat clearly when the caterpillars form their chrysalises on a window instead of the wall. (This butterfly had just emerged from his chrysalis.)

So here’s the puzzle: how does that butterfly, with those big wings, come from that skinny little chrysalis?

Like this! As the butterflies emerge, the wings are curled and crumpled. They straighten and unfurl, in the slowest of slow motion. Here’s a sequence of photos to demonstrate:

butterfly emerging from cocoon

butterfly emerging from cocoon

butterfly emerging from cocoon

butterfly emerging from cocoon

butterfly emerging from cocoon

butterfly emerging from cocoon

This takes about an hour. At the end of this the wings are really frail and floppy – the slightest breeze makes them flap all over the place and almost pulls the butterfly from the wall! The butterfly rests with all her wings held together so the wind doesn’t catch them and waits for another hour or so while her wings strengthen. Then she abandons the cocoon and climbs slowly up the wall, flapping her wings to test them:

butterfly emerging from cocoon

And then she’s off!

butterfly
Flying back to the wild peach tree

Nature is pretty amazing, don’t you think?

Whatever else is going on, there’s magic everywhere in the world if you just slow down and look for it. Today I’m sharing mine with you – I hope you enjoyed it!

Comments (12)

eyelet ripple crochet pattern

Update: The Scarf Sweater instructions, together with my Eyelet Ripple stitch pattern, are now available as a printable Donationware pattern. They are still available for free, but if you like them please consider sending me a donation to show your appreciation:

eyelet ripple scarf sweater crochet pattern

Send me a donation and receive the easy-to-print PDF version of the instructions and stitch pattern (with bonus assembly photos and instructions on how to wear it) as a thank you!

click here to make a donation

Donations of any size are much appreciated. Just add the amount you wish to donate, and, once you have checked out and paid, your pattern will instantly be available to download from your PlanetJune account.

The complete pattern and instructions are available below, regardless of whether or not you choose to pay for them πŸ™‚

This is a PlanetJune original crochet pattern. Feel free to use items made from this pattern however you wish, but I’d appreciate credit as the pattern designer. Please do not reproduce the pattern anywhere else; instead post a link to www.planetjune.com/scarfsweater

Not ready to make it yet? Add it to your Ravelry queue:

***

Wow, I really didn’t expect such a great response to my Scarf Sweater – I linked it up on Ravelry and over 60 people have queued it already! Of course, you can use any stitch pattern to make a scarf sweater, but I’ve been getting questions about the eyelet ripple stitch pattern I used, so I thought I’d share some info about ripples and the pattern for my eyelet ripple.

crocheted hug scarf sweater by planetjune crocheted hug scarf sweater by planetjune

Ripple Basics

Ripple (aka chevron) patterns in crochet take 2 basic forms:

  • Solid Ripple: the peaks and valleys are formed by increases and decreases, giving a solid fabric with no holes
  • Eyelet Ripple: the peaks and valleys are formed by chains and skipped stitches, leaving a hole (an eyelet) at the point of each direction change

Note: these are my names for them; other people may call them by other names or not distinguish between the two types at all!

All ripples are formed by a section of straight stitches, a peak to change direction, another section of straight stitches, and then a valley to change direction again. This forms a zig-zag pattern. The number of stitches in the straight sections determines the width of the ripple, and the number of increases/decreases or chains/skipped stitches determines the angle of the ripple.

June’s Eyelet Ripple Pattern

eyelet ripple crochet pattern by planetjune

You can use this pattern to make a scarf, a blanket, or a scarf sweater like mine! This is a generic pattern, so you can make it any width you like. N is the number of repeats, not including the half repeat at each edge. So in the stitch diagram below, N=1 and the ripple has 2 complete zig-zags. (For my Scarf Sweater, I used N=3, so I had 4 zig-zags.)

Terminology

ch chain
ch-sp chain space
dc double crochet (treble crochet for UK/Aus)
st stitch

Pattern

Ch 12xN + 15.

Row 1: dc in 4th ch from hook (unworked chains count as dc), dc in next 4 ch, skip next 2 ch, (dc in next 5 ch, ch 2, dc in next 5 ch, skip next 2 ch) N times, dc in next 4 ch, 2 dc in last ch.

Row 2: ch 3 (counts as dc), dc in same st, dc in next 4 st, skip next 2 st, (dc in next 4 st, [dc, ch 2, dc] in next ch2-sp, dc in next 4 st, skip next 2 st) N times, dc in next 4 st, 2 dc in last st.

Repeat Row 2 until your piece is as long as you want.

Stitch Diagram

eyelet ripple crochet stitch diagram by planetjune

Scarf Sweater Joining

If you’re making this into a scarf sweater, when you come to seam the two short ends together, you won’t be stitching two straight lines; you’ll be matching up the zig-zag shapes at the ends of the scarf, as shown below. If you stitch neatly, the zig-zag disguises the seam very nicely – I tried to find my seam so I could take a photo of it for you, and I can’t actually find it!

eyelet ripple crochet stitch diagram by planetjune

When you join the two layers across the back, do take a moment to make sure you continue the zig-zag pattern across both layers, to make the seam less visible. You won’t get the eyelets along the seam, but at least the zig-zags can flow down across both layers.

crocheted hug scarf sweater by planetjune

I hope you enjoy this pattern. Please leave me a comment below if you do, and consider leaving me a donation. Thanks!

click here to make a donation

More PlanetJune Accessories patterns

If you’ve enjoyed this post, you might also like my PlanetJune Accessories crochet patterns: they all include stitch diagrams and clear written explanations so you can easily crochet elegant wearable accessories for yourself and to give as beautiful gifts. Here’s a taster of the range:

PlanetJune Accessories crochet patterns

We’re also having a PlanetJune Accessory CAL on Ravelry throughout November, and you’re very welcome to join in!

Comments (12)

a crocheted hug: scarf sweater

Update: The Scarf Sweater instructions, together with my Eyelet Ripple stitch pattern, are now available as a printable Donationware pattern. They are still available for free, but if you like them please consider sending me a donation to show your appreciation:

eyelet ripple scarf sweater crochet pattern

Send me a donation and receive the easy-to-print PDF version of the instructions and stitch pattern (with bonus assembly photos and instructions on how to wear it) as a thank you!

Donations of any size are much appreciated. Just add the amount you wish to donate, and, once you have checked out and paid, your pattern will instantly be available to download from your PlanetJune account.

The complete pattern and instructions are available below, regardless of whether or not you choose to pay for them πŸ™‚

This is a PlanetJune original crochet pattern. Feel free to use items made from this pattern however you wish, but I’d appreciate credit as the pattern designer. Please do not reproduce the pattern anywhere else; instead post a link to www.planetjune.com/scarfsweater

Not ready to make it yet? Add it to your Ravelry queue:

***

I saw an intriguing knitwear idea on Pinterest a few weeks ago, and had one of those ‘I could make that’ moments. Here are some examples I found on Etsy (the first picture is the one I first found – uncredited – on Pinterest, and used my Google Search by Image trick to track down):

inspiration for cross wrap sweater (see text below for credits)
Photo (and inspiration) credit L-R: Max & Melody, Pilland, Rumina

I just wanted to test the basic concept to see how it worked – it’s essentially just a scarf turned into a sweater by wrapping and stitching it together. It’s very simple, so while I won’t be creating a full pattern, I’ll share the basic method (below), in case you’d like to make one too! I crocheted mine, but you could easily knit one if you prefer.

crocheted hug scarf sweater by planetjune

My version is very simple – I just crocheted a long rectangle like a scarf, wrapped it around myself, seamed the two short edges, and seamed across the back. I used worsted weight yarn for speed and crocheted a basic eyelet ripple to add a subtle chevron pattern. I also made it a bit wider than knitted ones, as an experiment to see if that would make it more snuggly.

Update: I’ve published free instructions for my eyelet ripple stitch pattern, in case you’d like to use it to make your own Scarf Sweater, or to make a scarf or ripple blanket πŸ™‚

crocheted hug scarf sweater by planetjune

I think it’s pretty cute, although a little chunky on my short figure. The nature of the design makes it a bit of a challenge to get into, and the shoulders are a bit constrictive – I won’t be raising my arms above my head while wearing this! But the best thing about it is that wearing it feels like a warm, soft hug; despite having no sleeves, it’s really warm and cosy.

If I planned to take this further, I’d refine the concept to make a more elegant, less bulky version. But I think this is the end of the line for my experiment – it was fun, it worked, my curiosity is satisfied, and I have a new handmade garment to keep me warm.

If you want to try making one of your own, here’s a mini tutorial to get you started. You can knit or crochet this, in any stitch pattern you like – all you’re doing is making a long narrow rectangle, just like a scarf:

Basic Scarf Sweater Instructions

  1. Measure your back from where you want the bottom of the sweater to sit, up to your neckline (add an inch or two if you want to make a little fold-over collar like mine has or keep it shorter to be more fitted). Divide by two to get your width measurement.
  2. Pick a stitch pattern and start crocheting (or knitting) a rectangle with the width you determined in Step 1.
  3. You’ll be making a very long rectangular scarf, but the length depends very much on your figure! The easiest way to figure out how long you need it is to wrap it around yourself: it should go across the back of your shoulders, cross over down your front, around your back above the waist, and cross over again up your front to meet the starting edge. It’d be easiest to get someone else to arrange it on you and make sure the two wraps meet across the middle of your back, or you can do it yourself in front of a mirror and expect to wriggle a lot to get it into position (guess which I did!)
  4. When it’s long enough, pin the two short ends together while it’s on your body, then seam together (or make a double twist and then seam the two short ends together).
  5. Arrange it nicely with the seam in an inconspicuous place – mine lies on the lower wrap so it’s hidden. Ask your helper to pin the top and bottom wraps together across your back (or figure out where to stitch by yourself – it’s possible; I managed!), then seam them across the back, stopping just before each underarm.

Update: It just occurred to me that although you can use any yarn (and a suitably sized hook), it may be helpful for you to know the details of what I used for mine, as a starting point for yours: I used an H (5mm) hook and worsted weight yarn (Bernat Satin, in Denim Mist Heather). I used 2.7 skeins and I wear a size XS-S top.

This is probably the simplest ‘pattern’ there could be for making a sort of sweater, don’t you think?

I hope you enjoy this pattern. Please leave me a comment below if you do, and consider leaving me a donation. Thanks!

Comments (51)

« Previous entries
  • Quick Links: Crochet

    navigation: arrow

    buy crochet patterns and accessories from my online store

    'Everyday Crochet' and 'The Essential Guide to Amigurumi' crochet books by June Gilbank

    Crochet video tutorials and step-by-step photo tutorials

    Free PlanetJune crochet patterns

    Frequently Asked Questions

    Quick Links: Crafts

    navigation: arrow

    Punchneedle Embroidery information, ebook & patterns

    Papercraft ebook & tutorials

    Free PlanetJune craft projects & tutorials

  • Blog Post Categories

  • Blog Archives

  • Welcome to PlanetJune!

    June Gilbank

    Hi, I'm June. Welcome to my world of nature-inspired crochet and crafting. I hope you enjoy your visit!

    If you'd like to get in touch, you can contact me here.
    crocheted Canadian flag by PlanetJune
  • A fanned-out pile of the books Everyday Crochet and The Essential Guide to Amigurumi, with text 'The answers to all your crochet questions at your fingertips - find out more'
  • Support PlanetJune!

    Want to say thanks? You can send me money in seconds at paypal.me/planetjune (over $20) or paypal.me/planetjune2 (under $20) or send me a donation through my shop.

    Or simply click through from my links before you shop at Amazon, Etsy, KnitPicks, LoveCrafts or Crochet.com, and I'll make a small commission on your purchase, at no cost to you! Start here:

    ♥ Support PlanetJune ♥

    Tip: This link is also in the footer of every page!

    Thank you so much for your support!