PlanetJune Craft Blog

Latest news and updates from June

Archive for July, 2010

packaging: reduce, reuse, recycle

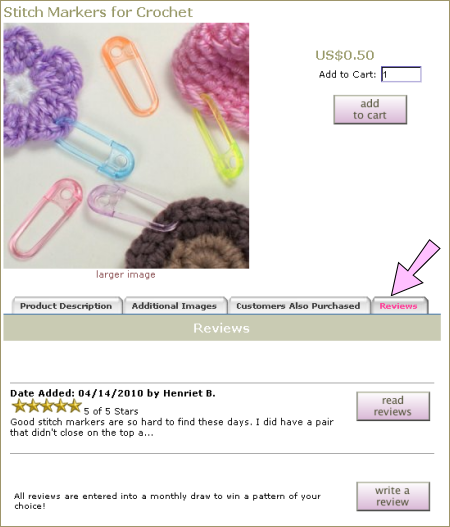
Since I began selling physical products (safety eyes and noses for amigurumi, stitch markers for crocheters, and Detail Stuffing Tools) in addition to virtual products (PDF patterns and ebooks) I’ve had a new challenge to contend with: packaging. Canada Post has the delightful rule that any packages over 2cm thick cost around 4x as much to ship, so I have to pack carefully to ensure that all my packages are within the 2cm height limit – which can be quite tricky!

I also want to do my part to protect the environment (you’ve probably already guessed this from the subject of most of my designs, but animals and the natural world are really important to me), so I try to follow the ‘environmental 3 Rs’ principle: Reduce, Reuse, Recycle.

Reduce: I’m continually refining my packaging process to use the least material while still being secure and protecting the contents. I’ve gone from using one sheet of bubble wrap to pack 4 orders, to cutting it in such a way that I can safely package an average of 7 orders using a single sheet of bubble wrap – that’s a big reduction! This little stack will package 12 orders:

bubble wrap

Reuse: I do use plastic bubble wrap for packaging because there’s nothing like it for protecting my little goodies as they travel across the world to their destinations, but I don’t feel too bad about that because I advertise locally and collect clean, tape-free bubble wrap from people who’ve just moved house and have bags of it sitting around after unpacking all their ornaments and tableware. (Speaking of which, I’m running low – if anyone around the K-W area has a bunch of bubble wrap going spare, please contact me.) Clever, huh?

Recycle: I use recycled Post-It notes to make the thank you notes I send out with each order.

planetjune thank you notes

And this isn’t quite recycling, but it’s a step in the right direction. I went out to replenish my stock of envelopes today, and I made the decision to switch from smart-looking white envelopes to blah-looking kraft coloured envelopes.

envelopes

I’m hoping that nobody will mind the colour change – it’s just an envelope, after all; you only glance at it for a second before ripping it open and discarding it (into your recycling bin, right??), so how could anyone object?

FSC certified envelopes

But the added bonus here is that my new envelopes are FSC certified. Forestry Stewardship Council (FSC) certification guarantees that the wood used to produce paper products is taken from responsibly managed forests.

orangutan says: please use sustainable paper sources

Many species of animals and plants (including my favourite, the orangutan) are at great risk from deforestation, so using FSC certified paper products is an easy way to do your part to help protect the environment – just look out for the FSC logo when you’re shopping.

My envelopes are FSC certified as “Mixed Sources”. The wood used to produce FSC certified products with a “Mixed Sources” label comes from FSC certified well-managed forests, controlled sources and/or recycled material.

This means that, while my envelopes may not be fully recycled, at least their production hasn’t deprived any endangered species of their natural habitat, so you can feel good about ordering your crochet supplies from me! 🙂

Comments (7)

dino cards

I’m just back from my sister’s wedding (which was spectacular); my refashioned shoes held up well and I managed not to trip on my way up the aisle, so we’ll call that a success! It was lovely to see my family, but I really missed being online (other than daily email checks for anything urgent) – how sad is that?! Now I’m trying to pick up the reins of my life and business again, which is surprisingly difficult after a week away from it all…

But look what was waiting for me on my return: new Dinosaur business cards!

dinosaur business cards by planetjune

What do you think? I’m really pleased with them – they work much better than any of the previous options I was considering. If you order anything that needs shipping (i.e. eyes, noses, stitch markers, and/or Detail Stuffing Tools) from my shop in the near future, you’ll be getting one of these in your package! (And, of course, if you’d like to buy any or all of the Dinosaur crochet patterns, you’ll find them all in the Prehistorical Animals category in my shop.)

And in other news, we’re almost up to the halfway point of the Summer Crochet-along (CAL) on Ravelry.

PlanetJune Summer Crochetalong: Alpacas and African Violets

We already have some excellent completed projects (see below), and many more in progress.

Summer Crochetalong: first completed projects
Photo credits: African Violet by bsktkls; Alpacas by rainydaybaby

If you’d like to join in and make an Alpaca or African Violet, there’s still over a month to go, and don’t forget you can get 20% off the cost of the pattern(s) (either or both) if you’re crocheting along – check the CAL instructions to find out how 🙂

Ahh, it’s good to be back!

Comments (5)

reviews and vacations

Reviews

Just realised I forgot the ‘Review and Win’ draw at the end of June – oops! The June winner is Vicki S – congratulations, Vicki! I’ll email you to find out which pattern you’d like as your prize 🙂

I’m really happy to have almost 100 reviews in my shop now – thank you so much to everyone who’s taken the time to review one of my patterns or products over the past 3 months. But there are still lots of patterns that have yet to receive a single review, so please keep reviewing! (It’s an easy way for you to help my business even if you don’t have any spare cash to buy more patterns right now, and you might win the next monthly draw!)

planetjune reviews

To write a review:

  1. Go to www.planetjune.com/shop
  2. Browse to the item you want to review
  3. Click the Reviews tab
  4. Click the write a review button

…You may be July’s free pattern winner!

Vacation

And now a little shop admin: as you may have gathered from my previous post, my fancy-schmancy shoes and I are heading to the UK for my sister’s wedding next weekend. This means that any orders for eyes, noses, stitch markers and stuffing tools received after today (July 11th) will be shipped when I return on July 21st. (That’s the downside of having a one-person business! Sorry for any inconvenience.)

Pattern orders are unaffected: all patterns will still be available for immediate download, as always. I’ll also be checking email while I’m away, so feel free to contact me with any questions.

Comments (2)

shoe refashion with beads

I’m filing this as a tutorial because you could use the same methods to add pretty bead embellishments to any pair of shoes!

My sister’s getting married next week and I, being the maid of honour, need to have pretty shoes for the occasion. This is a huge problem for me; I’m not a girly shoe kind of girl, and I’ll go for comfort over style any day: heels hurt my feet, pointed toes hurt my feet, unpadded footbeds hurt my feet… However, I’m not stupid, and I don’t think running shoes would be the right look for this occasion! I thought silver would be best with my purple maid of honour dress, but all the silver shoes I saw looked totally tacky or ridiculously expensive. After a marathon 2.5 hour shopping trip covering 7 shoe shops, there was only one pair that looked nice (i.e. not flip flops), were fairly comfortable (i.e. standing in them for 2 seconds didn’t make me say “ouch!”), and reasonably priced. So we went back to the first store (of course that’s where they were!) to buy them.

shoe refashion

But. Slight problem: on closer inspection, the beading on the shoes was quite nice, apart from a hideous misshapen lump in the middle of each band, surrounded by a border of tacky-as-anything gold seed beads. Why would they do this?! I despaired for a moment and then remembered that I’m crafty and can totally fix stuff like this. I bought the shoes.

shoe refashion
Before. Hideosity.

The beads were stitched on with invisible nylon thread, and the fabric (and hence the threads) were all glued down to the layer below, so I could snip the threads on the offending beads without all the other beads falling off.

shoe refashion
Offending beads removed.

I wanted to replace the focal bead with something that would tie it more closely to my purple dress. I found some flat oval cats eye beads that are subtly purple, without looking out of place on the shoe (some of the existing beads are pinkish so the tones match). I couldn’t glue the focal beads to the shoe because the surface was too uneven and the beads were too slippery, so I used some invisible nylon beading thread to go through the focal bead and through an existing bead on each side to lock it in place. A little superglue on the knot to stop it from coming undone when I snipped off the ends of the thread, and the focal beads were secured.

shoe refashion
Focal beads attached.

Now I just needed to fill the empty space around the new focal beads. I bought some glass seed beads in similar shades to the seed beads already on the shoe, and used some Aleene’s Jewel-It glue (specifically designed for permanently sticking gems onto clothing – I happened to have bought an Aleene’s trial size multipack a couple of years ago, and never had a use for this type of glue until now!) to attach them. I put a bead on the tip of a needle, dipped one side into the glue, and used the needle to position the bead. Then I used a pin to keep the bead in place while I removed the needle, and waited for the glue to dry. Easy, if a little fiddly.

shoe refashion
Seed beads fill the gaps

I love the finished shoes – well, as much as I could love impractical women’s shoes. No idea how I’ll cope with those little heels; I’ll probably trip up the aisle! Wish me luck!

Shoes: $35. Beads: $7.50. Wearing a pair of shoes I actually like to my sister’s wedding: priceless.

shoe refashion

Comments (7)

more Dinosaur patterns (finally!)

I have a confession to make: when I launched my Dinosaurs Set 1, I promised I’d design another set if/when I sold 100 copies of the first set. And, ahem, well let’s just say that happened quite some time ago… I did start working on Set 2 in rare quiet periods while I was working on my new book, but there’s a lot involved in designing a three pattern set, so I put them to one side and concentrated on individual patterns until I had more time on my hands.

crocheted dinosaurs by planetjune
Dinosaurs Set 1, L-R: Brachiosaurus, Stegosaurus, Triceratops

And that time is now!

As you probably know from my first set, my dinosaur designs are deceptively simple: crocheted all in one colour, so they are really easy for you to crochet, and all the magic is in the shaping I built into them. It was really important to me that the new dinos have the same aesthetic as the original designs, and I hope I’ve succeeded in that:

crocheted dinosaurs by planetjune
Dinosaurs Set 2, L-R: Pteranodon, Plesiosaurus, Tyrannosaurus Rex

The first set (Brachiosaurus, Stegosaurus, Triceratops) were all herbivores, but I didn’t really want to make an all-carnivore set (some of the dino shapes are too similar to give an interesting mix of designs), so the theme of Set 2 is land, sea and sky. Coincidentally, once I started my research, I discovered that all the dinos I chose for Set 2 are actually carnivores anyway – ha!

Meet The Dinosaurs

amigurumi tyrannosaurus rex by planetjune

Tyrannosaurus Rex was an obvious choice for my land dinosaur. He was the ‘king’ of the dinosaurs – need I say more?! T. rex was one of the largest carnivores, at about 40 ft long. He used his long tail to counterbalance the weight of his big head, he walked on his back legs, and had almost comically tiny arms.

amigurumi plesiosaurus by planetjune

Plesiosaurus is my sea dinosaur. I’ve always loved the elegant shape of Plesiosaurs. Plesiosaurus was about 8 ft long, and had an extremely long neck, a small head, wide body, and four long, paddle-like flippers. He lived in the sea and fed on fish and cephalopods.
Fun fact: some people believe that Nessie, the mythical Loch Ness monster, could be a surviving plesiosaur!

amigurumi pteranodon by planetjune

Pteranodon is my sky dinosaur; a type of Pterosaur. I was going to call him Pterodactyl, but then I discovered that the word Pterodactyl actually covers several different species (some of which don’t have that distinctive head crest!), and that the correct name for this specific dino is Pteranodon. He had a 20-30 ft wingspan, a long toothless beak, and a characteristic cranial crest at the back of his head.

I should probably mention, that, during my research for these species, I discovered that, technically, neither Plesiosaurs nor Pterosaurs are actually dinosaurs! The term ‘dinosaur’ correctly covers only a certain type of terrestrial reptile with an upright stance, so Plesiosaurs and Pterosaurs are simply related reptiles that lived in the same time periods as the true dinosaurs. I think that, for the purpose of this collection, and what people understand when they hear the word ‘dinosaur’, it’s okay for me to include them in my dinosaur set – I don’t expect anyone to use my patterns as research tools!

I hope you like my new dinosaur set! You can buy the patterns individually in the shop, or save a bundle when you buy the complete Set 2.

And here’s a bonus pic of my Dinosaurs Sets 1 and 2 – is it just me, or do they look really cute together?! (And I love those Vanna’s Choice yarn colours!)

crocheted dinosaurs by planetjune
Click to see them larger!

PS – I mentioned the new dinos on my Facebook page yesterday, and people there are already asking about Dinosaurs Set 3! Well, the same thing applies as last time: I’ll make a third set if I sell 100 copies of this one. So, if you want even more dinos, please spread the word about my new dino patterns!

Comments (23)

Facebook Advertising redux

You may recall that I wrote a review of my experience advertising on Facebook last November. My advertising budget was $150 and I only made around $70 in direct sales – ouch. I concluded:

I love that you can specifically target the people who are your potential customers. But the advertising costs are just too expensive for smaller businesses to justify… Personally, I won’t be advertising with FB again unless I can find another promotional voucher for free credit – it’s just too expensive for my budget.

Well, now I have just that opportunity – a promotional voucher for $25 of Facebook ad credit, so I thought I’d try another FB advertising test, using what I learnt from last time, and trying to tweak things to give me better results. And once again, I’ll share my results with you, so you don’t have to waste money to discover what I’ve already found out!

The Ad Setup

(If you’re interested in advertising on Facebook, I recommend you read my previous report first, and then come back here – it gives a good overview of the FB advertising experience which I’m not going to cover again today.)

advertisement on Facebook
This is what an advertisement on Facebook looks like – I’ve circled the ad in purple

With only $25 (which I know from prior experience is very easy to blow through in a single day!) I set my daily budget at $12.50, so I could try different things on 2 days and compare the results.

I chose a CPM (pay per thousand views) bid, not CPC (pay per click), as I found that much more successful last time round.

Last year’s ad was a Christmas ad, so I had to change the image this time. That means I can’t directly compare the results to the previous experiment, as I’m sure the choice of photo plays a part in my success (or lack thereof).

PlanetJune Ad 2 on Facebook PlanetJune Ad 4 on Facebook

L-R: the old ad and the new one

I also excluded people who are already a fan of PlanetJune on Facebook, as the goal of this test is to see if I can attract new customers with this advertising.

Phase 1
I targeted all crocheters (around 150,000 people). I checked realtime stats in my shop throughout the day, and I could clearly see that customers who actually completed a purchase clicked all over my site and typically viewed 20-80 pages before completing a purchase. The Facebook clickers, however, typically looked at only 1 or 2 pages before leaving.

Phase 1 verdict: $12.13 spent, 99,000 views, 51 clicks, 0 sales.

Phase 2
I targeted only people who had listed amigurumi as an interest. This gave me a far more focused target, but only 2000 people have amigurumi listed as an interest. Could I get them ALL to click through? Or would anyone who lists amigurumi as an interest already know me, and not bother clicking?

My money went a lot further in phase 2, because I was targeting so few people. I actually managed to advertise for 5 full days using my remaining budget! A higher percentage of people clicked through (again not surprising, as many people who list crochet as an interest aren’t interested in amigurumi/toys) and people looked at an average of 5 pages before leaving.

Phase 2 verdict: $12.89 spent, 120,000 views, 207 clicks, 1 sale.

Conclusions

Targeted marketing
By focussing on only people who like amigurumi instead of crochet in general, I saw a 20x improvement in the number of people who clicked my ad. Assuming each person only clicked the ad once, over 10% of my potential audience clicked through! Targeted marking is a powerful tool. But it still didn’t lead to sales.

Saturation
In Phase 1, 150,000 people could have seen my ad – it could have potentially been seen by a different person each time it was displayed. In Phase 2, however, only 2000 people (at most) could see my ad, so that means that each person, on average, saw my ad 60 times! By day 5, the clickthroughs had dropped from about 50 to only 19, and that doesn’t surprise me: if you’ve seen an advertisement 59 times and chosen not to click each of those times, why would you click after seeing it for the 60th time?!

Return on investment
As before, I made less money in direct sales than I ‘invested’ into the advertising – here, a $10 return on $25. (Although, also as before, this doesn’t account for new people who may have found me through the ad and may become customers at a future date.)

Casual clickers vs shoppers
The one big thing I’m taking away from this experience is that Facebook users appear to be casual clickers; that is, they may click on an ad out of a vague curiosity, but not be interested enough to really explore my shop or make a purchase. This is a very different behaviour from people who find me through a google search and are actively looking for crochet patterns: these shoppers are in a ‘buying’ frame of mind and while they may come to my shop looking for, let’s say, a “sea turtle crochet pattern”, they tend to look through my entire shop before buying, and often end up buying far more goodies than they were originally searching for.

Of course, I could have seen more success if I’d managed to create a more appealing ad, but who knows?! Maybe I’d have seen more clicks, but the fact is that the people who did click didn’t follow through and make a purchase, so I could have multiplied the number of clicks with a better ad and still seen the same result.

Based on this, I’m really not sure there’s any value in my paying for advertising. People who are prepared to buy something can easily find me through Google, and that costs me nothing. I’ll stand by my conclusion from last time: it’s just not worth the money.

Over to you…

What’s your experience? Have you tried advertising, on Facebook or elsewhere? (I also tried a $100 Google AdWords advertising experiment – would you like me to report on that experience too?) Have you found something that actually works for you? I’d love it if you’d share in the comments!

Comments (36)

  • Quick Links: Crochet

    navigation: arrow

    buy crochet patterns and accessories from my online store

    'Everyday Crochet' and 'The Essential Guide to Amigurumi' crochet books by June Gilbank

    Crochet video tutorials and step-by-step photo tutorials

    Free PlanetJune crochet patterns

    Frequently Asked Questions

    Quick Links: Crafts

    navigation: arrow

    Punchneedle Embroidery information, ebook & patterns

    Papercraft ebook & tutorials

    Free PlanetJune craft projects & tutorials

  • Blog Post Categories

  • Blog Archives

  • Welcome to PlanetJune!

    June Gilbank

    Hi, I'm June. Welcome to my world of nature-inspired crochet and crafting. I hope you enjoy your visit!

    If you'd like to get in touch, you can contact me here.
    crocheted Canadian flag by PlanetJune
  • A fanned-out pile of the books Everyday Crochet and The Essential Guide to Amigurumi, with text 'The answers to all your crochet questions at your fingertips - find out more'
  • Support PlanetJune!

    Want to say thanks? You can send me money in seconds at paypal.me/planetjune (over $20) or paypal.me/planetjune2 (under $20) or send me a donation through my shop.

    Or simply click through from my links before you shop at Amazon, Etsy, KnitPicks, LoveCrafts or Crochet.com, and I'll make a small commission on your purchase, at no cost to you! Start here:

    ♥ Support PlanetJune ♥

    Tip: This link is also in the footer of every page!

    Thank you so much for your support!