PlanetJune Craft Blog

Latest news and updates from June

Archive for April, 2013

Forgotten Gems CAL roundup

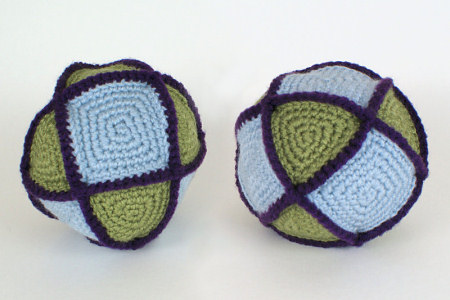
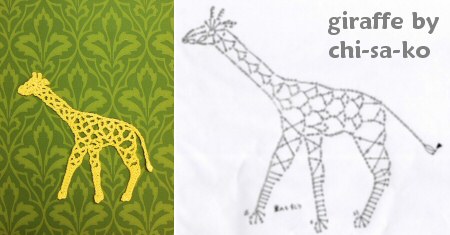
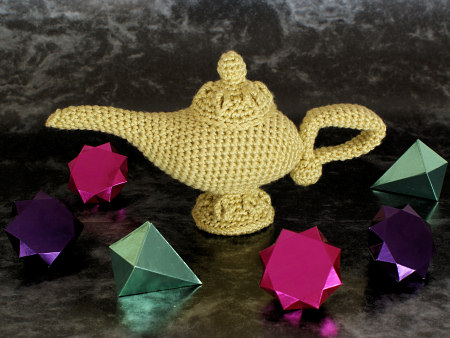
The Forgotten Gems CAL featured an eclectic mix of some of my more neglected designs:

Forgotten Gems CAL at PlanetJune

With no fast (or free) patterns on offer, I knew there’d be fewer entries than usual, but we’re definitely looking at quality, not quantity this month – looking at the photos below makes me a very proud designer!

And it’s interesting to see that, with all that choice, there were some definite themes running through the CAL – surprise favourites have been Aardvarks and Yetis & Bigfoots, as well as lots of Chunky Elegance Rugs made into surprisingly beautiful doilies (just use crochet thread and a steel hook if you’d like to try making one too).

Now, roundup time! (And don’t forget to keep reading to the end for the May CAL details…)

__(‘Read the rest of this entry »’)

Comments (5)

Cuboctahedron crochet pattern

Time for another geeky-fun geometry-inspired pattern! The Cuboctahedron is one of the Archimedean solids – a group of polyhedra made from two or more types of regular polygons, where every vertex (corner) is identical. The 13 Archimedean solids have up to 92 faces each, but the Cuboctahedron is perfect to crochet because it has only 14 faces and the resulting shape is a nicely balanced, satisfyingly large ball.

cuboctahedron geometric ball crochet pattern by planetjune
Cuboctahedron is a faceted geometric ball – how fun is that?!

I’m releasing the Cuboctahedron as an expansion pack for my Polyhedral Balls pattern, so you can extend the value of of that pattern if you’ve already bought it, without having to pay the full price again for something similar.

What is an Expansion Pack?

Expansion Packs by PlanetJune

  • An Expansion Pack is an add-on to an existing PlanetJune pattern.
  • The Expansion Pack lets you modify or add to the original pattern to create something else.
  • You cannot use the Expansion Pack alone – you must also purchase the original pattern in order to be able to complete the pictured items in the Expansion Pack pattern.

Cuboctahedron, in particular, includes:

  • All the modifications required to crochet and assemble a cuboctahedron.
  • Tips for colour selection to give your ball the most impact.
  • Full right- and left-handed step-by-step assembly diagrams as separate appendices, so you need only print the pages you need.

Cuboctahedron dwarfs my other Polyhedral Balls! It makes a lovely toy as it’s 6″ (15cm) in diameter:

cuboctahedron geometric ball crochet pattern by planetjune
Cuboctahedron with its smaller Polyhedral Ball cousins

You can buy the Cuboctahedron Expansion Pack for only $2.50 individually from the shop, or, if you haven’t yet bought the Polyhedral Balls pattern, you can select it as an add-on to that pattern before you add it to your shopping cart, and save 50c on the pair.

Launch Discount

I know you’ve probably already bought Polyhedral Balls, so you won’t be able to save that 50c. But, for this week only, if you add the Cuboctahedron Expansion Pack pattern to your shopping cart, together with anything else (totalling $5 or more), then use the code GEEKYFUN at checkout and you’ll still get your discount! (Valid until next Monday: 6th May 2013.)

Note: If you don’t need anything else right now, this also applies to Gift Certificate purchases, so you can pick up a $5 gift certificate now, get your discount, and have $5 in your PlanetJune account ready for your next purchase, or to send to a crocheting friend!

cuboctahedron geometric ball crochet pattern by planetjune

I really like this cuboctahedron – it’s interesting and unusual, and it doesn’t take too long to crochet and assemble. I’m not sure if I’ll make any of the other Archimedean solids though: the other small (few-sided) ones are too unbalanced to make good balls, and, discounting the 64- and 92-sided ones, the remaining interesting ones still have at least 26 faces!

(I assume a pattern for a polyhedral ball with 26, 32, or 38 faces would be off-putting, but do let me know in the comments if I’m wrong about that – I’d be happy to make more of these geometric designs if there’s demand for them…)

Happy geometric crocheting!

Comments (5)

crocheted giraffe motif

I first saw this amazing realistic giraffe pattern on Pinterest last year, but the pin was linked to an illegal pattern-sharing site, with no credit to the original designer (a pet peeve of mine). After searching through several pages of results on Google’s Search by Imagesee my tutorial post for instructions! – I eventually managed to find the original Japanese page, hidden among many Russian and Italian pattern-sharing sites.

But – good news – since then, a ravelry page has popped up for the designer, Chinami Horiba, so you can see all her pretty patterns without having to navigate her Japanese site. (She has lots more of these shaped motifs as well as more traditionally-shaped doily designs.)

giraffe by chi-sa-ko
Chinami Horiba (aka chi-sa-ko)’s giraffe and chart – I’ve blurred the chart intentionally! – please visit her site for the pattern if you’d like to crochet this giraffe.

I’d never seen anything like this before! I’m not even sure what this would be called – it’s not a doily; it’s too lacy for a typical applique; it’s not a toy… (Does this technique for making lacy 2D motifs have a name? Let me know in the comments if it does, and I’ll update this post – it’d be nice to know in case anyone wants to search for more of this type of pattern.)

Even when you know hundreds of techniques, there’s always something new to learn, so I couldn’t resist grabbing some yellow yarn immediately and having a go to see how it works. Crochet charts are just magic; I followed the chart and made a perfect giraffe without needing to know a word of Japanese.

mystery stitch 1

I did get a bit stuck when there was a stitch I didn’t understand: it looks like a Y-shaped treble crochet, with two tops and only one bottom. A V-shape would have been obvious, but a Y? I decided it must mean a tr with a dc worked into the side to form the second top line of the Y. It looks right, so I think that must be what was intended.

mystery stitch 2And there was one other stitch I couldn’t understand from the diagram: the bobble at the end of the tail. I decided to go with a 3 hdc bobble, but now I look again it looks more like an hdc on the right (or an arrow? maybe it’s a long pulled-up loop?), and then a 2hdc bobble. No idea what the black triangle means. (ETA: arrowheads in a chart mean ‘start’ or ‘end’.) Still, my bobble is close enough.

I crocheted my giraffe with worsted weight acrylic and an E hook (I didn’t have a more appropriate yarn to hand), so it was fairly stiff and sturdy to begin with. The bottoms of the legs wanted to curl up though, so I stiffened the finished piece with a mixture of white glue and water, pinned it to shape and let it dry.

crocheted giraffe
Better too many pins than too few!

And here’s the result:

crocheted giraffe
Now isn’t that clever? (btw I’m left-handed, so my giraffe faces the opposite way – the crossed tr and dtr stitches didn’t lie nicely if my giraffe faced left.)

Crochet is so versatile because there’s only ever one live stitch, so you can turn or rotate the work to any angle and insert your hook anywhere to begin the next stitch. That versatility is what allows us to easily create amazing shapes like this giraffe. Well, I say ‘easily’, but that’s when you have a charted pattern to follow – I’m sure it’s a challenge to develop patterns like this, and almost impossible to write a written pattern that clearly describes where to go next after you complete each stitch.

I’m going to try to resist that design challenge, but, who knows, I may be able to take elements of this technique to incorporate into future designs; it’s already given me some technique ideas. That’s why I always like to keep learning – you never know when something will spark new inspiration!

Comments (22)

Magic Lamp crochet pattern

After I completed my Orca pattern, my designing brain felt a bit tired – all those colour changes make for a fabulous-looking whale, but if you think it’s a bit fiddly crocheting the colour changes, try designing them at the same time – it’s 10 times more difficult, and quite a brain-bender to get size, shape and colour all working together at once! So, before I jumped into the next commission (Red Panda – awww!) I needed a little palate cleanser: a design with no colour changes, so I could concentrate on my favourite part: the shaping.

I wanted to make something truly original, and I’ve been watching Once Upon a Time so I had fairy tales on the brain. I thought a magic lamp would make a fun toy for kids wanting to play Aladdin and the Genie, and an elegant decorative piece for anyone else! So I set out to create a beautifully-shaped life-sized magic lamp, and here’s the result:

magic lamp amigurumi crochet pattern by planetjune

Fun Fact time: I’d always wondered why Aladdin’s magic lamp is called a ‘lamp’ when it really looks more like a metal teapot. In case you’re wondering too, this is an ancient type of oil lamp. The oil was poured in through the lid at the top, and a wick inserted through the nozzle (that’s the bit that’d be the spout if it were a teapot). The oil is drawn up through the wick and the flame burns at the tip of the nozzle when you light it. So there you go!

I’ve designed a decorative raised diamond pattern for the lid and base of the lamp (and I’ve developed a new technique for creating these details without leaving big spaces around the taller stitches that will gape when the pieces are stuffed). I think they add something special to the design; I hope you agree!

magic lamp amigurumi crochet pattern by planetjune
I spent a happy evening making the paper gemstones for these photos 🙂

These details are slightly trickier than your standard “all single crochet, all the time” amigurumi, but the additional crochet stitches are fully explained, and I’ve documented the entire process of creating the diamonds with step by step photos, for both right- and left-handers (in separate appendices, so you can save ink by printing only the page you need, or neither!)

But if you’re still daunted by the diamonds, I’ve also given an option in the pattern for a simplified lid and base. The undecorated pieces omit the diamonds, but still have exactly the same shaping as the standard lid and base, so your lamp will still look elegant and shapely.

magic lamp amigurumi crochet pattern by planetjune

I designed this lamp while I was stuck with no internet for 2 weeks last month. As I crocheted it, I wished that my internet connection would be restored, and lo! it was! Maybe your Magic Lamp will grant your wishes too… While I can’t promise that, it will, at the very least, be something interesting and different to crochet 😀

If you’d like to make a lamp of your own, you can find the Magic Lamp crochet pattern in my shop right now! If you’re not ready to get started, how about a little ravelry love? Click to favourite or queue my Magic Lamp design:

So tell me: do you like my magic lamp design? I really hope you do! It’s always nerve-wracking to come up with something so unusual – I really can’t predict ahead of time if it’ll be wildly successful or a massive flop…

Comments (12)

crocheted icord scarf

You may remember this finger-crocheted infinity scarf I made as part of my ruffle yarn review:

ruffle yarn scarf: finger crocheted
Finger crocheted cowl (12 wraps of giant chain stitches)

Although I made it just for fun, I quite liked the result, and almost wanted to wear it. Wrapping an ultra-skinny scarf 12 times around my neck felt a bit stupid though, so I unravelled it and came up with another fun use for the yarn: I used my own crocheted i-cord tutorial (which, incidentally, was my first ever video tutorial!) to make a finger-crocheted i-cord scarf:

ruffle yarn scarf: finger crocheted i-cord
I-cord infinity scarf (4 chunky wraps of i-cord)

The great thing about i-cord is it makes a round braid instead of a flat chain – it’s thicker and stronger than a chain. For knitters, you can just knit i-cord on dpns, but, if you don’t knit, you might like to try crocheting an i-cord too. There are lots of things you can use i-cord for: in amigurumi-making, as a trim, to make drawstrings or tiebacks, as bag handles, to coil into a mat, etc, etc…

crocheted i-cord

It was easy to make my i-cord scarf – I used my index finger as a giant crochet hook and otherwise followed my tutorial exactly. And the colour changes of the yarn worked out well: by coincidence, they matched up almost perfectly with the length of one row, so each row is a different colour:

ruffle yarn scarf: finger crocheted i-cord
My finger is the ‘hook’ – I’m left-handed, remember!

My finger was a bit tired after finger-crocheting the entire skein of yarn into i-cord, but I’m happy with the resulting scarf. As each row of i-cord is essentially 3 chains arranged together into a circle, it reduced the length of my scarf from 12 skinny wraps around my neck to 4 chunky ones. It was fun to make, and who knows, I may even wear this version out of the house…

Comments (5)

April update

It’s all go for me at the moment: we have to renew our visas so we can stay in South Africa, and we’re applying for permanent residency too. As much as I’d like PlanetJune to be my top priority at all times, I have to renew my passport from abroad, get police clearances from various countries, get X-rays and medical reports, liaise with a lawyer, and all the rest of the rigamarole that goes along with immigration stuff. That’s all quite stressful and time-consuming – bureaucracy here is never fast, cheap or easy – but I have to believe it will, eventually, all get sorted out.

As a result, you may notice I’m also a little quieter on social media at the moment – I don’t want to be that person who tweets about every trial and tribulation, so that means there may be days/weeks where I have nothing to say. If I’m quiet, just assume I’m still working hard, dividing my time between my business and all this other stuff, and inching closer to the point where this new stress is nothing more than a memory and I’m free to devote 100% of my attention to PlanetJune again!

Review and Win contest

March’s ‘Review and Win’ winner is Susan S, with her review of my Sea Otter:

Sea Otter amigurumi crochet pattern by PlanetJune

Made the sea otter and his clam shells recently, and everyone who sees him is amazed. Has far more personality and is more “realistic” than other sea otter patterns I considered. The pattern is clear and easy to follow, and contains excellent tips.

Congrats Susan – I’ll email you to find out which pattern you’d like as your prize 🙂

Forgotten Gems CAL

Every month, in my monthly newsletter, I give a discount code for a ‘Forgotten Gem’ of a pattern – one that, for some reason, hasn’t enjoyed as much popularity as it deserves. All 17 of the previously featured Forgotten Gems patterns are included in the April crochet-along, so there’s a lot of variety including both amigurumi and accessories:

Forgotten Gems CAL at PlanetJune

From the chatter in the CAL thread, it seems like the Chunky Elegance Rug Trio and Aardvark patterns are going to be popular CAL choices this month! If you’d like to join in too, we’d love to welcome you in the PlanetJune group on Ravelry.

Comments (5)

steam-relaxing yarn

When you unravel something you’ve crocheted, the yarn looks kinked up and squashed. Re-using this yarn can leave your crocheting looking noticeably different from starting over with fresh yarn. Wouldn’t it be nice if there was a way to refresh the yarn and return it to its unused state so you don’t have to waste it or put up with the re-used appearance? Guess what: there is!

steam-relaxing yarn
Can you turn ‘stressed’ yarn back into ‘relaxed’ yarn? Yes!

I first read about this technique at TECHknitting but I wasn’t really convinced it’d work on acrylic (although I really hoped it would), so I decided to put it to the test with the yarn recovered from one of my prototype pandas.

(You may be wondering ‘why bother?’ The nicer acrylic yarns are actually quite expensive, and, if you’re a crochet addict, the cost of yarn soon mounts up; if there’s an easy way to save money, why not take it? But, for me, the real reason is availability – now I have to import all my amigurumi acrylics from the US, they’re like gold dust to me, and I hoard every metre! Making 3 prototype pandas took a whole skein of white Red Heart Soft, and that’s not something I can easily replace. Reclaiming the yarn so I can use it to design another amigurumi would be ideal, but not if it’s going to look messy and obviously re-used.)

steam-relaxing yarn
A 65m length of kinked up acrylic yarn reclaimed from a prototype panda.

Steam-relaxing

You can steam yarn with a clothes steamer or ordinary steam iron, and it will magically relax, de-kinking and fluffing itself back up! And yes, as I discovered, you can even do this with acrylic yarn – you can see my results in the photos below.

Note: to reclaim an entire skein of yarn, it’s probably easier if you wind it into a hank (a large loop), soak it, and let it dry (for more details on this method, see Webs’ article: How to Recycle Yarn). But for the yarn length recovered from frogging amigurumi or other small projects, steaming is simpler and faster.

Steam-relaxing yarn really is like magic: the yarn wriggles about as it relaxes and it looks quite eerie, like a pile of snakes – watch TECHknitter’s video to see exactly what I mean – but soon the yarn will turn from a kinked tangle into strands of fluffy yarn spaghetti.

My iron doesn’t have a ‘shot of steam’ feature, so it took a fair while to steam the entire 65m pile you see above, but the method really does work. I didn’t touch the yarn at all between these two photos – this is how it moved, by itself, in reaction to the steam:
steam-relaxing yarn
Before (left) and after (right) comparison of a small section – you can see that the yarn has de-kinked and untwisted itself.

steam-relaxing yarn
Pre-steamed (left) and post-steamed sections of my big pile of yarn.

Top Tips

Learn from my experience!

  • It’s much more effective if you spread the yarn out so you’re only steaming one layer at once, and work over a small area.
  • Watch to see when the yarn stops wriggling about when the steam touches it – that’s when it’s fully relaxed and time to move on.
  • For acrylics in particular, it’s critical that you don’t ever let the iron touch the yarn. Sit so you’re at eye level with your ironing board, then you won’t have to bend to see what’s going on, and you’ll be able to keep an inch between your yarn and the iron (you do need to keep it close though, so the steam is most effective).
  • If you have the option to avoid it, don’t start with a big tangle of yarn (as shown in my photos) – once it’s de-kinked, you’ll still have to untangle it and wind it. I’d recommend you wind the yarn into a ball as you unravel your work, then unwind a couple of metres at a time and lay it in rows along the ironing board. Steam-relax that length of yarn, then wind it immediately into a new ball before pulling out the next kinked length. (Once it’s all relaxed, you can re-wind the yarn into a neater ball if you like.)

steam-relaxing yarn
The 65m pile of yarn, post-relaxation. (Don’t leave it in a pile like I did here!)

I’m almost tempted to buy a handheld clothes steamer now, after seeing how effective this method is. And, as an added bonus, the yarn goes from feeling quite hard when it’s kinked up and squashed, to lovely and soft and bouncy again – it really does seem as good as new!

steam-relaxing yarn
After winding it into a centre-pull ball it’s practically indistinguishable from new yarn and ready to use for another amigurumi design!

Steam-relaxing is a bit of a niche technique, but if you frog a project and want to reclaim the yarn, I highly recommend it. You’ll save money, you can re-use the yarn so it’s not wasted, and I promise you’ll have fun watching the yarn wriggle about – what’s not to like?

Comments (11)

  • Quick Links: Crochet

    navigation: arrow

    buy crochet patterns and accessories from my online store

    'Everyday Crochet' and 'The Essential Guide to Amigurumi' crochet books by June Gilbank

    Crochet video tutorials and step-by-step photo tutorials

    Free PlanetJune crochet patterns

    Frequently Asked Questions

    Quick Links: Crafts

    navigation: arrow

    Punchneedle Embroidery information, ebook & patterns

    Papercraft ebook & tutorials

    Free PlanetJune craft projects & tutorials

  • Blog Post Categories

  • Blog Archives

  • Welcome to PlanetJune!

    June Gilbank

    Hi, I'm June. Welcome to my world of nature-inspired crochet and crafting. I hope you enjoy your visit!

    If you'd like to get in touch, you can contact me here.
    crocheted Canadian flag by PlanetJune
  • A fanned-out pile of the books Everyday Crochet and The Essential Guide to Amigurumi, with text 'The answers to all your crochet questions at your fingertips - find out more'
  • Support PlanetJune!

    Want to say thanks? You can send me money in seconds at paypal.me/planetjune (over $20) or paypal.me/planetjune2 (under $20) or send me a donation through my shop.

    Or simply click through from my links before you shop at Amazon, Etsy, KnitPicks, LoveCrafts or Crochet.com, and I'll make a small commission on your purchase, at no cost to you! Start here:

    ♥ Support PlanetJune ♥

    Tip: This link is also in the footer of every page!

    Thank you so much for your support!