PlanetJune Craft Blog

Latest news and updates from June

Archive for Other Crafts

adventures in knooking

I bet many of you (unless you saw my tweets last weekend) are thinking ‘huh?’ right about now… But if you’re like me (a crocheter who doesn’t knit) you’re going to love this craft: knooking is knitting with a crochet hook. No, it’s not tunisian crochet, or any other type of crochet; when you knook you form genuine knitted stitches. The finished product is indistinguishable from a knit piece. Isn’t that cool?

I just don’t get along with the pointy sticks and I’ve often wished I could just put a hook on the end of a knitting needle so I could snag those stitches more easily, so the idea of knooking was very appealing. You do need to use a special hook to knook with – it has to be straight all the way down the length (i.e. no wider thumb grip) and have some way to attach a cord to the non-hooked end. You can modify a regular crochet hook, or a locker hook makes the perfect starter tool – you can find it in most craft stores, and it’s approximately equivalent in size to a G hook.

This weekend I had some time on my hands and thought I’d finally give knooking a try. I must be a bit of a masochist – I didn’t want to start with a boring swatch or dishcloth pattern; I wanted something that I could actually use once I’d finished it. I’d seen a free knitting pattern a few weeks ago for a Shaun the Sheep DS case and it seemed like it may be a feasible (and cute!) first project. Luckily it starts with the back, which is plain, before moving to the colourwork on the front, so I figured I’d have time to get used to the knit and purl stitches before introducing another element of difficulty.

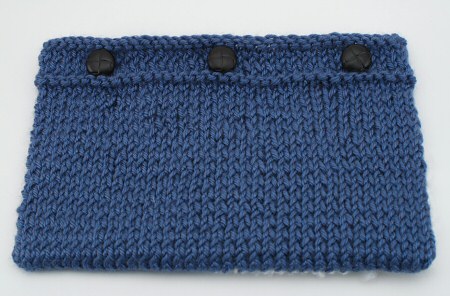
knooked shaun the sheep bag, pre-blocking
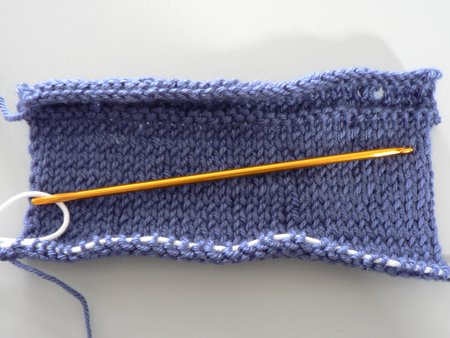
First knooking attempt in progress

Here it is after getting 2/3 through the back. (The hole at the top right is a buttonhole, not a mistake.) You can see my white cord running through the active stitches at the bottom of the picture. Each time you complete a row, you slide the stitches down off the bottom of the hook onto the cord, and then work into them again for the next row.

I think I may have wrapped the yarn wrongly a couple of times, because there are a couple of flubs in my beautiful knitted fabric. Also, my yarn was a bit splitty, which didn’t help when trying to form those awkward purl stitches. I was surprised that my stitches looked so even, considering this was my first ever attempt at knooking.

The colourwork was easier than I’d anticipated. I worked the design backwards (mirror image) because I’m left-handed and wasn’t 100% sure if knit stitches are symmetrical (although I think they are) so I thought I’d play it safe. I left yarn ends dangling on the inside while I knooked, and wove them all in later. My only difficulty was my choice of a bouclé yarn for the ‘wool’: it turns out that bouclé is just as challenging to knook with as it is to crochet with!

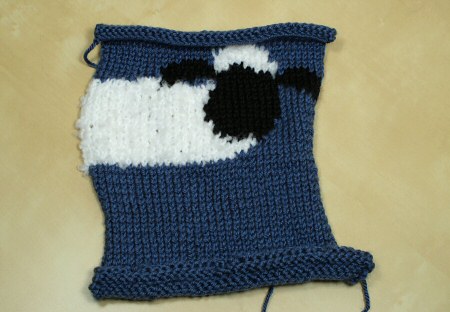
knooked shaun the sheep bag, pre-blocking
Before blocking

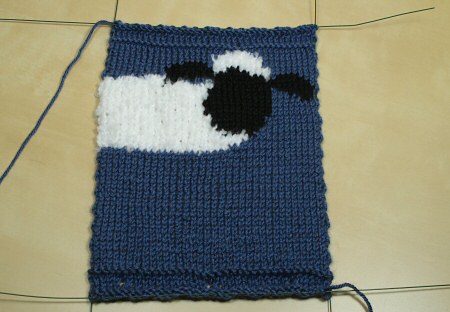
My finished piece was curling up a lot at the edges, so I used makeshift blocking wires (actually floral wire – I don’t have much need for real blocking wires in my daily life) and some steam blocking to straighten it out (yes, you can steam block acrylic!).

knooked shaun the sheep bag, wires attached for blocking
Blocking wires in place

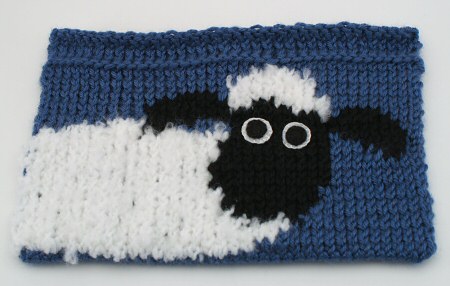
When it was dry, I seamed the sides and attached some buttons to the top. I wasn’t sure how to make the eyes, but in the end I made some from black and white felt strengthened with embroidered buttonhole stitches around the edges. The whole project cost me nothing: all the materials came from my stash (yay!) – even the buttons!

knooked shaun the sheep bag, front
Front

I could see by the end (the top border) that I’d really got the hang of it: my stitches were much more consistent than they had been on the back of the piece, although they really hadn’t been bad to start with. I think I can say that I’ve conquered the basics of knooking, and I’m looking forward to trying out another knitting pattern with my hook!

knooked shaun the sheep bag, back
Back

Have I captured your interest? If you’d like to try knooking, I recommend you check out the Knooking blog (I learnt how to knook from Jen’s excellent how-to videos) and Knooking Ravelry group 🙂

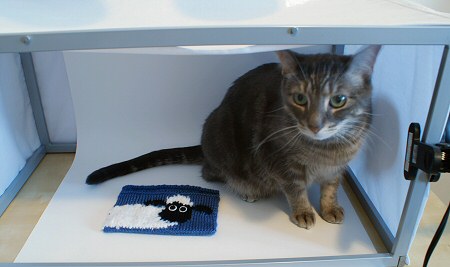
cat in light box
Maui insisted on ‘helping’ with the photoshoot!

Comments (42)

adventures in needlefelting

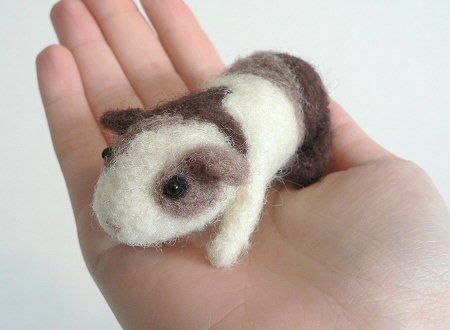
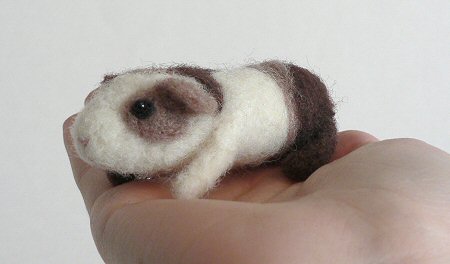
needlefelted guinea pig
Click for larger picture

In case you’ve never heard of needlefelting before, here’s the basic premise (ignore the rest of this paragraph if you already know all about it). By stabbing unspun wool repeatedly with a barbed needle, the wool fibres get tangled together and the wool begins to form a denser, more coherent piece. The more you stab, the firmer the piece becomes. By building up layers of wool in different colours and in different areas, it is possible to form complex sculptures with fine detail. That’s the theory, anyway!

There are some amazing examples of finished work in the Needle Felting Flickr group pool. I think I first heard of needlefelting over a year ago through articles in CRAFT magazine, but I’ve never tried it until now. I had my first attempt this weekend, using the supplies I got from the show last weekend. I couldn’t decide whether to start with something simple to learn the techniques, or to jump straight in and try to make something I actually wanted to make. In the end, I decided I didn’t want to ‘waste’ my wool on a test piece, so I dug out my photographs of Cinnamon (the best guinea pig ever) and started work.

I really liked needlefelting – I found it to be like a combination of my crocheted animals (texturally) and polymer clay sculpting (you can build up areas by adding more wool, in the same way as you can with a clay sculpture). It takes a lot of stabbing to get the wool to felt together firmly , but I discovered that, by compressing the wool first as much as possible, the wool begins to hold together after only a few stabs. I also discovered (after a few hours of make-it-up-as-I-go-along experimentation) that there are some very helpful videos on YouTube that show the process – I recommend watching a few if you plan to start needlefelting for the first time!

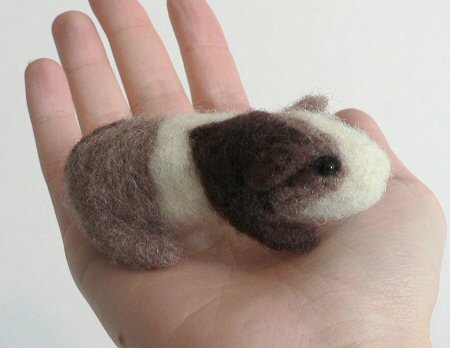
Now back to my guinea pig sculpture. It took a long time and a lot more wool than I expected. I tried to make the markings as accurate as possible, so I started with the white wool at the head and worked my way back, adding darker sections where they were needed. With hindsight, I think it would have been a lot easier to make and shape an all-white guinea pig body and then add thin patches of darker wool over the top to create the markings – I’ll know for next time!

I needlefelted in tiny black wool patches for the eyes, and then sewed round black onyx beads over the top to give them that realistic glint. I also used two strands of embroidery floss to stitch on a tiny nose and mouth. Apart from that, the whole mini-pig is solid wool.

needlefelted guinea pig

needlefelted guinea pig

I’m very pleased with this as my first piece, and I have enough wool left to make a few more little sculptures. It’s very satisfying when the piece comes together, and if the shape isn’t quite right, you can just add a litle more wool over the top to reshape it.

Another craft conquered! Well, the basics of it, at least. What shall I try next…? Any recommendations? Please leave them in the comments!

Comments (23)

custom t-shirt & creativ festival

To any of my readers in or around Ontario, Canada, I’ll be at the Creativ Festival near Toronto (Mississauga to be precise) this Saturday (April 26th). I’ll be hanging out for the day at the booth for A Needle Pulling Thread magazine. I’ll have some of my creations on display, and I’ll bring my latest WIP to work on in any quiet moments!

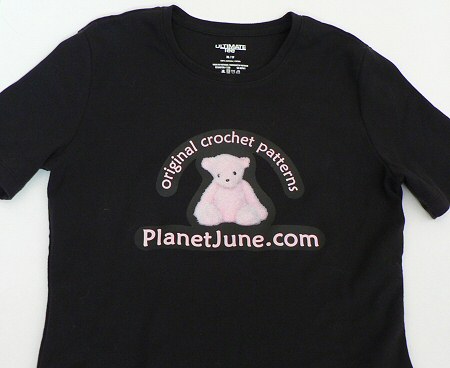
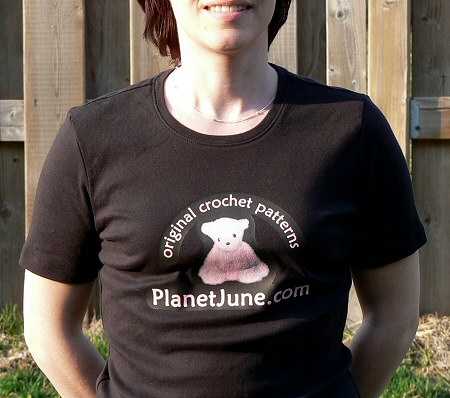
So people will be able to recognise me there, I’ve made a custom PlanetJune t-shirt using iron-on printable transfer paper:

planetjune t-shirt!

I bought the transfer paper for dark t-shirts and printed my design onto the paper. I had to cut it out very carefully so I didn’t leave any white borders to spoil the design, then ironed it on to my prewashed T-shirt.

planetjune t-shirt

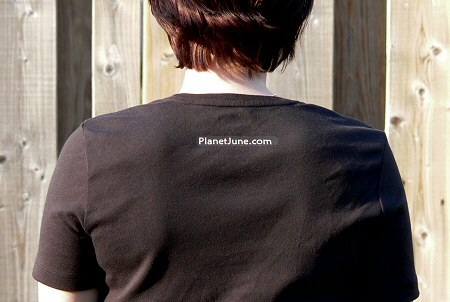
I even added a second mini design on the back of the shirt:

planetjune t-shirt

If you’re going to the Creativ Festival, please make sure you stop by the booth and say hello to me! And I have AquaAmi cards to give away if you mention you read my blog 🙂 Hope to see you there!

Comments (7)

wip: freezer paper stencil

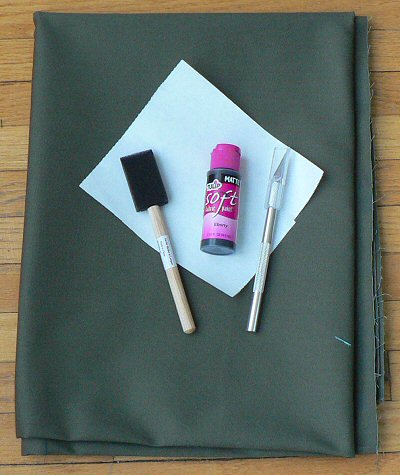
Q: What do you get when you add:

  • Fabric
  • Freezer paper
  • Scalpel
  • Fabric paint
  • Foam brush? 

supplies for freezer paper stencilling

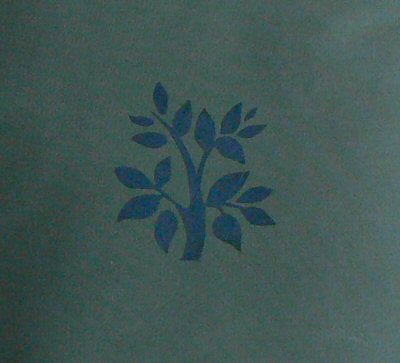
A: My first freezer paper stencil!

freezer paper stencil

(Don’t know what a freezer paper stencil is? Angry Chicken explains it best.)

I love it – the edges came out really crisply, and I dried the paint with my hairdryer between coats so it only took about 10 mins from ironing on the stencil to peeling it off again. This is (hopefully) going to be a handbag, although I haven’t even designed the bag yet, so it could be a little while before it’s finished.

I predict more stencilling in my future…

Comments (3)

japanese craft book

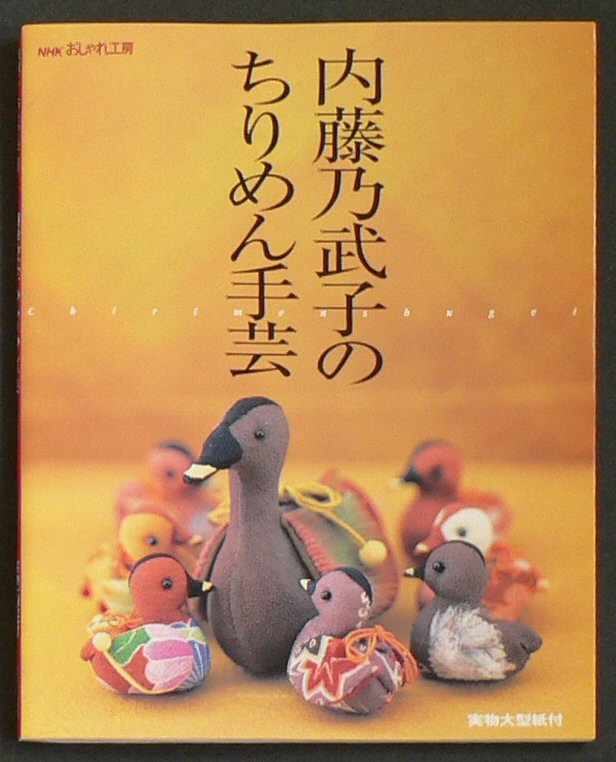
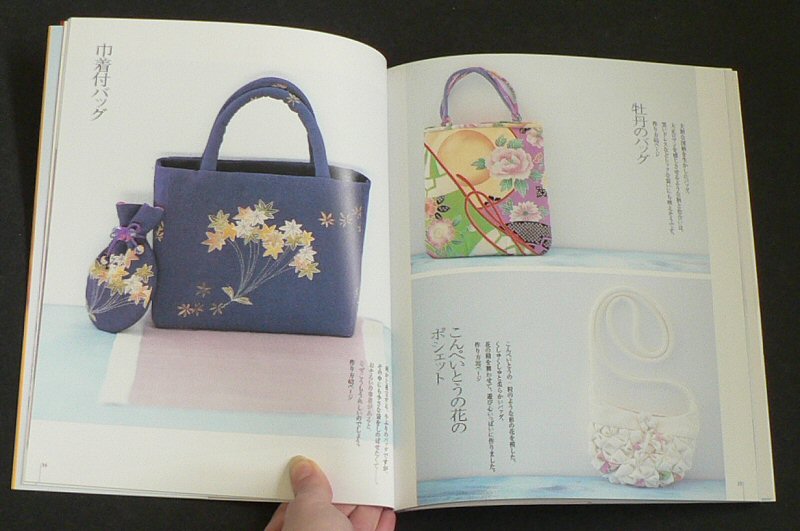
I have been coveting Japanese craft books for months, and trying to decide which of the books at Crafting Japanese. I like best. There’s something about the Japanese designs that really appeals to me. I finally saw the one craft book that I couldn’t resist – those ducks on the front cover are so cute! I bought it from a Japanese seller on eBay but found out later when I had the book and the ISBN that it’s also available (more cheaply) from amazon.co.jp.

The book seems to be called “chirimen shugei” which I believe means “chirimen handicrafts”. Chirimen is the type of textured fabric that the patterns use – anyone know where I can find some? In Canada especially?

The patterns are a mix of lovely bags, Japanese dolls, and cute animals and fruit with little pouches inside. The book comes with a pullout of full-size paper patterns.

ISBN 4140311002


Front cover


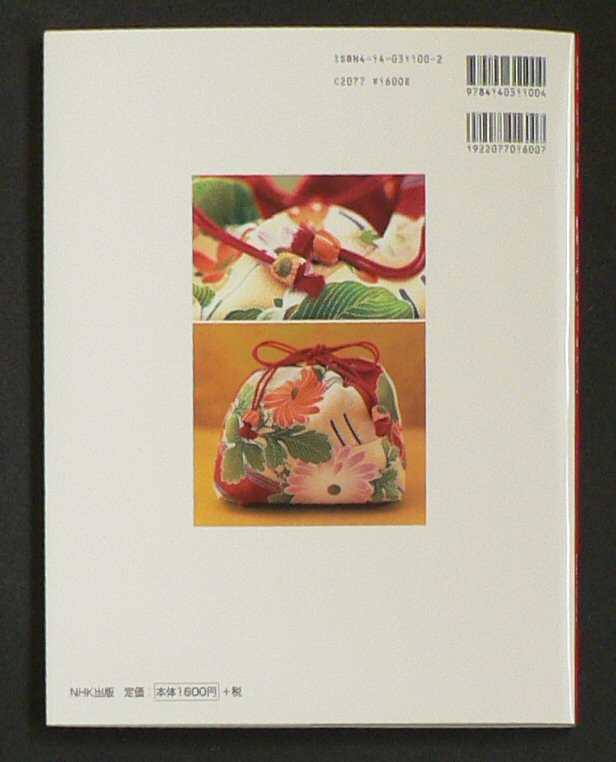
Back cover


Sample page

It all looks so lovely! I can’t wait to get started making something from the book. I just need to find some suitable fabric.

Comments (1)

no more jingling keys

I wasn’t sure if I should post this or not – it’s so simple, and not exactly stylish… But it’s so useful and it really works – you could make a much prettier version (and I probably will, but I’m testing this one for longevity first).

By the way, I have been making other things lately… but they are Christmas presents, so they will have to wait to be posted!


At work, I carry around my ID and keys on a lanyard. They jingle and clank together every time I take a step. I work in a library so I get a lot of looks as I walk by, jingling as I go… 

All that is no more! I can move silently again thanks to my quick fix: craft foam.

stop keys from jingling with craft foam

I used scissors to roughly cut pieces of craft foam to shape, cut a hole in the top of each piece, and added one piece of foam onto my keyring between each key. I also made an ID-card shaped piece to stop the keys from clunking against my ID.

Easy and 100% effective against key-jingling embarrassment.

Comments (3)

the incredible shrinking plastic

I remember Shrinkydinks from when I was a kid, but only had a chance to try it once, at my cousins’ house. In case you haven’t heard of it, it’s a sheet of clear plastic that you draw on, cut into a shape and then put in the oven, where it rapidly shrinks to 1/3 the size. The picture you drew on it also shrinks down, giving you a detailed miniature image. I bought myself a pack from Michaels a few months ago, and finally had a chance to try it out this weekend. I have to say that Shrinkydinks are MAGICAL…

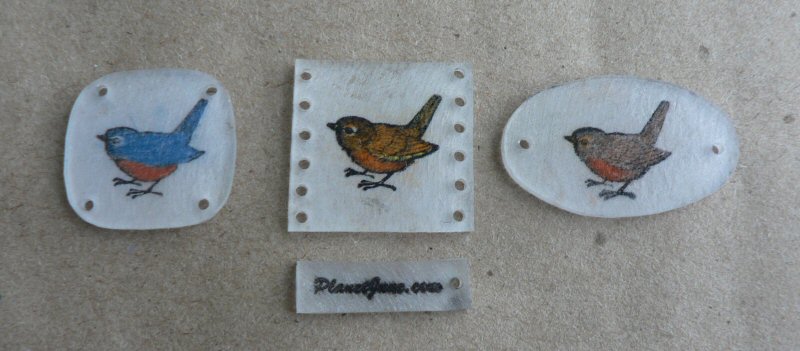
I rubber-stamped a bird image a few times, and coloured the images with regular coloured pencils. I also tried stamping my website logo. I bought a 1/8″ hole punch to make holes around the edges. Here’s the result (click for larger version):

bird shrinkydinks, rubber stamped, coloured and punched

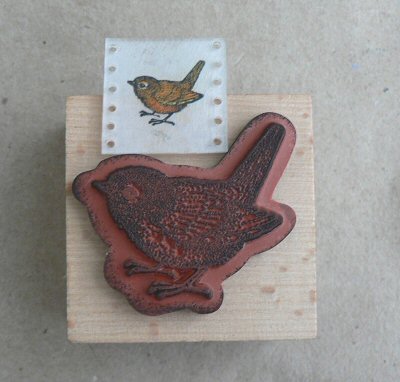
The stamped image on the left came out too faintly. I’m happiest with the middle image because the coloured highlights I added really stand out. It looks like bright colours have the best effect. By the way, for scale, here’s the size of the original rubber stamp:

rubber stamp and shrinkydink plastic 

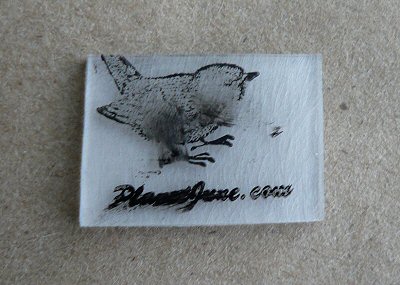
My website logo isn’t as pretty as the birds. You’re supposed to stamp/draw onto the rough side (the underside) of the plastic, but that means the image gets reversed when you turn it over to the smooth side, so anything with text has to use the rough side of the plastic as the finished side. So, out of interest, I tried stamping onto the smooth side of the plastic:

smudged stamp images on shrinkydinks

Yeah, not so good. 1) the ink doesn’t dry, and 2) even putting it in the oven doesn’t set it. I suppose the only way would be to stamp it, bake it carefully without smudging the ink, and then use a spray fixative.

Now I’ve finished the experiments, I’m looking forward to actually making something with Shrinkydinks! It’s so much fun watching the pieces of plastic curl up and shrink in the oven, and then flatten back down as much thicker, but much smaller pieces.

Comments (2)

Next entries »
  • Quick Links: Crochet

    navigation: arrow

    buy crochet patterns and accessories from my online store

    'Everyday Crochet' and 'The Essential Guide to Amigurumi' crochet books by June Gilbank

    Crochet video tutorials and step-by-step photo tutorials

    Free PlanetJune crochet patterns

    Frequently Asked Questions

    Quick Links: Crafts

    navigation: arrow

    Punchneedle Embroidery information, ebook & patterns

    Papercraft ebook & tutorials

    Free PlanetJune craft projects & tutorials

  • Blog Post Categories

  • Blog Archives

  • Welcome to PlanetJune!

    June Gilbank

    Hi, I'm June. Welcome to my world of nature-inspired crochet and crafting. I hope you enjoy your visit!

    If you'd like to get in touch, you can contact me here.
    crocheted Canadian flag by PlanetJune
  • A fanned-out pile of the books Everyday Crochet and The Essential Guide to Amigurumi, with text 'The answers to all your crochet questions at your fingertips - find out more'
  • Support PlanetJune!

    Want to say thanks? You can send me money in seconds at paypal.me/planetjune (over $20) or paypal.me/planetjune2 (under $20) or send me a donation through my shop.

    Or simply click through from my links before you shop at Amazon, Etsy, KnitPicks, LoveCrafts or Crochet.com, and I'll make a small commission on your purchase, at no cost to you! Start here:

    ♥ Support PlanetJune ♥

    Tip: This link is also in the footer of every page!

    Thank you so much for your support!