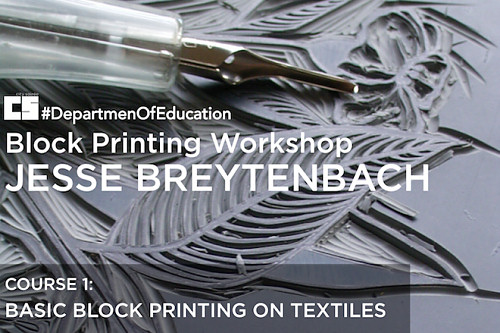
PlanetJune Craft Blog

Latest news and updates from June

Archive for Other Crafts

thread crochet poinsettia

If you’ve been following my blog for a while, you may remember that I have a tradition of crafting a new poinsettia every year, to mark the holidays. Here’s the collection to date:

tsumami kanzashi poinsettia by planetjunecrocheted poinsettia by planetjune
polymer clay poinsettia by planetjunepunchneedle poinsettia by planetjune
polymer clay poinsettia by planetjunebeaded poinsettia by planetjune

Top (L-R): 2006 kanzashi poinsettia; 2007 crocheted poinsettiaĀ 
Middle (L-R) 2008 polymer clay poinsettia; 2009 punchneedle poinsettia
Bottom (L-R) 2010 felt poinsettia; 2011 beaded poinsettia

Although you can’t tell from these individual photos (and I don’t have them all to hand to take a group shot), there’s one sore thumb in my poinsettia group: the crocheted poinsettia. It wasn’t until after I’d made it that I decided to start this collection, so it doesn’t match in colour or size. All the others are 2-3″ diameter; the crocheted version much larger, at about 6″ across!

I decided to rectify that this year, and scale down my crocheted Poinsettia pattern by using thread and a small hook instead of the worsted weight yarn specified in the original pattern. I like #8 perle cotton because it’s available in many colours, so easy to find appropriate shades, but it’s too fine for me to crochet with – I get hand pain when I try to crochet with very fine yarns and tiny hooks. This time I determined to be sensible – it’s so important to listen to your body and stop when it hurts, before you reach the point of doing real damage…

And here’s the result: the 2012 PlanetJune Poinsettia is a thread crochet poinsettia. If you’d like to make one too, just follow the Small Poinsettia instructions in my pattern and use crochet thread and a small hook.

thread crochet poinsettia by planetjune

For this poinsettia, I used 2 strands of #8 perle cotton held together, and a B (2.25mm) hook, which gave me the perfect sized poinsettia (2.75″) to fit in with the rest of my collection. I limited myself to a maximum of 2 leaves per day, with only minimal discomfort as a result. And now I’ve proved I can do thread crochet again, provided I keep it to just a few minutes at a time šŸ™‚

There’s still time to make your own small poinsettia before Christmas: with only 12 leaves instead of 18, it’s much faster than the standard large version, and it still looks good. You can find all my Poinsettia designs as PDFs in my shop, or use the links above for the free online versions.

And that makes 7 poinsettias! I wonder which craft I’ll try for next year’s design…

Comments (4)

wip project organiser

Sometimes an idea is so simple you can’t believe it never occurred to you before – and this is one of them.

I have a system for organising my crochet WIPs (works in progress): each project gets its own zip-lock bag or plastic tub, and the yarn, hook, swatches or prototypes, completed pieces, and any other project bits all stay together until the project is finished. But I have a lot of designs on the go these days, and the WIP bags and boxes were piling up all over my office. Furniture here is expensive, so I couldn’t just run out to buy an inexpensive storage solution as I would have in Canada. Then, inspiration struck!

wip project organiser

I bought this canvas hanging closet organiser when we first moved to South Africa and our temporary apartment had no storage areas except for the built-in closets. Once we moved into our house and all our clothes arrived, we needed all our hanging space for clothes, so the organiser was forgotten, until today.

A minute with the Dremel and a tiny drill bit, a couple of white screw-in cup hooks and an offcut of rope, and voilà: an instant WIP organiser. I’ve hung it in the wasted space just beyond the door in my office – and there’s actually room to add a 2nd one next to it, if my number of projects expands further…

Each project is still contained in its bag or box, but now I have a place to store them all together for easy access. The bottom shelf is reserved for items waiting to be photographed – I had to remove several amigurumi before snapping this pic, as they aren’t quite ready to show their faces in public yet šŸ˜‰

It doesn’t look bad, and it cost nothing as I already had everything I needed. Obviously, this wouldn’t be sturdy enough for heavy storage, but a canvas organiser is perfect for yarn projects. I can already tell that I’m going to love being able to see all my WIP designs at a glance and not have to hunt to find the appropriate project bag when I need it!

Comments (10)

homemade cardboard cat scratcher

Maui loves his double-wide corrugated cardboard scratchers – it’s the only type he’ll use. The pet shops here are tiny, with very little selection, and this type of scratcher doesn’t seem to be available anywhere. Luckily, we have an almost-infinite supply of boxes stored in our garage, which I kept after our move for just such thrifty/crafty purposes…

homemade cat scratcher
Maui supervises as I get to work

The flaps of the moving boxes just happen to be exactly the same width as the length of Maui’s old scratcher, so I kept the old outer box and cut 1.75″ strips of corrugated cardboard to make a new scratching surface. Measure, mark, cut, repeat… I needed 60 strips to fill the old outer box.

homemade cat scratcher
Measuring and cutting strips of cardboard

After that, I just ran a line of white glue along the centre of the length of each strip, stacked them all together, and applied pressure for a couple of minutes so they are all packed tightly together. Edge on, you have the perfect scratching surface for the demanding kitty:

homemade cat scratcher
As good as bought!

Cutting 60 strips was a lot more effort than I thought it would be – I had to split the task over several days, as my hand holding the ruler in position would start to ache after 5 or 10 strips. If I still had access to buy a new scratcher instead, I would. But, as I don’t, it’s worth a little hard work to make one for Maui every now and then.

homemade cat scratcher
This is the state of the old one – better that Maui does this to the cardboard than to our furniture!

As a bonus, it’s fully reversible, so when it looks like the photo above, I can just flip it over, and Maui will have another new scratching surface to decimate before I have to make another one.

homemade cat scratcher
After extensive quality control testing, Maui proclaims it totally scratch-worthy.

A happy cat = time well spent!

Comments (19)

Crinkle Ball Cat Toy

Today is Maui’s birthday! As the most important member of our household, and to celebrate his bravery at coping with a hugely traumatic trans-continental move last year, I wanted to get him an extra-special present. Unfortunately, the pet shops here are lucky to have a ball and a mouse as their cat toy selection, and Maui already has loads of each of those.

maui helping me choose appropriate yarn colours
Maui also likes to supervise when I’m designing – here he makes sure that my yarn ball doesn’t get away from me while I crochet succulents

The balls I crocheted for my Yarn Over vs Yarn Under comparison had a dual purpose – I added some catnip as I stuffed them, so they could double up as new toys for Maui.

crocheted balls
Maui won’t care if I crocheted these with YO or YU, as long as there’s catnip inside!

But that wasn’t good enough – he already has crocheted balls to play with, and I wanted to give him a really special treat. So I put on my creative thinking cap and the result was pretty amazing – I think I may have created the best cat toy ever! It turned my 8-years-young lazypuss into a kitten again, and held his attention for far longer than any store-bought toy has.

crinkle ball cat toy tutorial by planetjune

If you have, or know, a cat, and you like to craft, you must try this. It’s really easy, it only takes 5 minutes, you’ll have a valid excuse for eating chocolates while you craft, and you’ll have the happiest cat in the neighbourhood! The foil makes an irresistible crinkly noise when the ball is played with.

crinkle ball cat toy tutorial by planetjune
The ball on the right has been thoroughly quality-tested by Maui, and after half an hour of kitty football, stalking, pouncing and batting, being carried by mouth, dropped into shoes and being fished out again, you can see that it hasn’t fallen apart at all!

Note: this is my first donationware craft tutorial. As I’ve had requests for PDFs of other tutorials, I’ll also be converting some of my older tutorials to donationware, as I find the time, so there’ll be a handy printable option for them too. As always with my donationware, the full tutorial is available online for free, whether or not you choose to pay for the PDF version!

Go to the Crinkle Ball Cat Toy tutorial >>

Comments (9)

beaded poinsettia

This is my 6th year of crafting a poinsettia every year, to mark the holidays – it’s my little personal crafty tradition. I try to come up with a different technique every year, and I like to share it with you in case you’d like to make one too, or to whet your appetite for a craft you may not be familiar with and may like to investigate further.

tsumami kanzashi poinsettia by planetjunecrocheted poinsettia by planetjune
polymer clay poinsettia by planetjunepunchneedle poinsettia by planetjune

Top (L-R): 2006 kanzashi poinsettia; 2007 crocheted poinsettiaĀ 
Middle (L-R) 2008 polymer clay poinsettia; 2009 punchneedle poinsettia
Bottom (L-R) 2010 felt poinsettia; 2011 …?

The 2011 PlanetJune Poinsettia is a 3D beaded design. I used beading wire, seed beads, and the Victorian beading technique to create a 7cm (just under 3″) diameter poinsettia.

Victorian beaded poinsettia by planetjune

Once you’ve mastered the simple Victorian beading technique, it’d be easy to change the look to create different flowers by using different colours of beads, and by altering the number of beads on each row to create differently-shaped petals and leaves.

As an aside, I think this will be my last poinsettia tutorial – I had a few hours of beading fun, and then it took me the best part of 2 days to photograph, write and edit the tutorial (definitely work, not fun, and it took far more time than I had to spare). So, while I hope I’ll be able to continue to create and share my annual holiday poinsettias, I’ll take the pressure off myself by just crafting them for fun in future šŸ™‚

Anyway, I hope you like my 2011 poinsettia design and that you’ll enjoy my final poinsettia tutorial!

Go to the Beaded Poinsettia tutorial >>

Comments (5)

book review: Crafting With Cat Hair

Let’s get this out of the way first: I was given a copy of this book to review. But I’m not being compensated for this review in any other way, and the following is based on my honest opinions!

Overview

Crafting With Cat Hair: Cute Handicrafts to Make with Your Cat by Kaori Tsutaya was originally published in Japanese, and has now been translated into English by Amy Hirschman. When they say “…to make with your cat” they really mean it, as all the projects in this book are designed to be created from the excess fur that’s removed when you brush your cat.

Crafting With Cat Hair review by PlanetJune
Cover, showing cat hair finger puppet

The included projects are:

  • Finger puppets
  • Book covers
  • Cat portraits
  • Tote bags
  • Coin purses
  • Knickknack boxes
  • Pincushions
  • Badges
  • Mittens & gloves
  • Hats & scarves

Note: the amazon description also mentions cat toys and photo frames, but this is incorrect.

Crafting With Cat Hair review by PlanetJune
My favourite project: pretty pincushions

Aside from the finger puppets, which are made by wet-felting, each project includes patterns to needle-felt the cat shapes onto the finished item, and some also include embellishments (eyes, collars, bells, etc).

Between each project, there’s an information spread. These cover the benefits of brushing your cat, a comparison of cat hair and sheep’s wool, seasonal shedding variations, and more. The info sections are brief and easy to read, and include lots of cat photos to enjoy.

Crafting With Cat Hair review by PlanetJune
Cat-embellished mini tote bags

Note: the publisher’s blurb says “All the projects are cat-friendly, eco-friendly, and require no special equipment or training”. But, for any of these projects apart from the finger puppets, you will need what I consider to be specialized equipment: a felting needle and some kind of foam or sponge to stab it into.

My Experience

Before I start, I should introduce you to the real star of this review, my handsome boy Maui:

Maui cat in the sunshine
Maui enjoying the South African sunshine – it’s a hard life…

I’d been collecting Maui’s fur for a couple of years, in case I thought of something to do with it, but then I moved abroad and decided to throw it all away before moving. Of course, now there’s something I could have done with it! Luckily Maui is a fur generator, and graciously consented to being brushed every day for a week so I could save his fur to test-drive this book for you. He’s a short-haired cat, so if his fur will work for these projects, I’m pretty sure that it’ll work for any cat hair.

From looking through the book, I got the impression that creating a clear outline for your needle-felted silhouette seems to be the hardest part, so I picked one of the largest patterns to give me the best chance of making it look good (the cat pattern that goes with the Coin Purse, p51). It’s nice that several cat shapes are provided for most of the projects, so you can choose a pose that looks like your own cat – the one I chose was very Maui-ish. I used a sheet of acrylic felt as my base, as I’m sensitive to wool. I gathered up my small pile of Maui’s fur, and I got to work.

I do have a little experience with needlefelting (I made a mini guinea pig), so I can tell you that needle-felting with cat hair is definitely much slower than with wool. The claim of “quick and quirky” projects is a little overly optimistic, in my opinion. Cat hair doesn’t really want to be felted; it takes more stabbing to get the strands to mesh together. But it does work, eventually!

I felt that the needlefelting instructions were a little brief – if I didn’t already know better I’d have assumed from reading the instructions that I’d stab the needle in a few times to anchor the fur, and that would be it. (If you don’t already know, you have to stab over and over again, all over the surface, to mesh all the strands together into a solid fabric.) There’s also no safety warning in the book, which I think is an oversight – this is a sharp serrated needle you’re stabbing very close to your fingers, and you do need to be vigilant. (Ask me how I know this…)

cat hair needlefelted silhouette by planetjune
Pretty kitty silhouette (with the dreaded stabbing device)

It took me about an hour of stabbing to make my small cat silhouette (just over 2″ long), and it’s not perfect – it’s very tricky to make the edges neat, and perfectionism has no place here. You can see stray hairs around the edges and they really don’t like to be tamed; I may have been able to improve it further, but I took my stabbed finger as a sign to stop. Even so, it is adorable: it’s a sweet little silhouette of my Maui, made from his own fur! This is very special and I will treasure it.

cat hair needlefelted silhouette by planetjune (back)
The back looks similar, but more fluffy and less defined

The back (above) looks almost as good as the front! I’m not convinced that the cat hairs have matted together at all; it seems more like stabbing them through to the back of the felt has pinned the hairs into place. (FYI, the cheap acrylic craft felt stood up to all the stabbing with no problems, so don’t be afraid to use it as a base to needlefelt onto.)

I haven’t decided how to finish my piece: I may add a felt border and some simple embroidery, inspired by the Badges project (p66), or make or find a frame for it, Ć  la Portraits (p36), or maybe a combination of the two. I also considered adding eyes and a tiny embroidered nose, but I think I’ll leave it as is; simple is sometimes better. If I change my mind, I’ll flip through the book again to give me ideas!

Peeves

Although there are 10 projects in this book, 1 involves wet-felting and the other 9 are all needle-felting projects. Yes, there are directions for making a pincushion, bag, coin purse, felt pin, etc, but the actual cat hair part of each of these projects is exactly the same: needle-felt a cat silhouette to the project you’ve made, or to a bought garment. This may be an inbuilt limitation of trying to craft with cat hair, as opposed to any lack of imagination on the part of the author: cat hair is too short to spin into yarn (unless you have a long-haired cat) and, as the book explains, it doesn’t felt as firmly as wool, so it may be that these limited projects are really all you can do with it. (I previously tried to make a felt ball with some of Maui’s fur, and, although it looked like it had felted firmly while it was wet, once it had dried some hairs popped out around the edges, and it really wasn’t pretty enough to do anything with.) Still, I had been hoping for a little more variety with what to do with the cat hair.

If you’ve never needle-felted before, I’d suggest you look up instructions online before you begin, and please, please be careful with the sharp needle!

After seeing how fluffy the finished piece is compared with felted wool, I’m also not entirely convinced how well the cat hair felt would hold up on any kind of garment or item that gets heavy use – I suspect you may end up shedding cat hair wherever you go..! But the ideas and the silhouettes are all very cute, so here’s my suggestion to get more mileage from the book: you could always use the provided cat silhouettes and instructions to needle-felt wool roving to your hat and mittens instead of the cat hair, to get a sturdier result, and maybe save the cat hair for the more ornamental projects.

Final Thoughts

I see one huge reason to buy this book: cat owners will go crazy for a little felted something made with their own sweet kitty’s fur! I love the little silhouette I made with Maui’s fur, and I’m sure that your non-crafty cat-mad friends and relatives would be equally delighted with a little replica ornament of their beloved feline companions – it would make a great Christmas gift (although maybe not a surprise, as you’ll need to gather a few days’ worth of cat fur brushings in advance)!

Crafting With Cat Hair is definitely a specialised book, and one that only cat-lovers will appreciate. But it’s fun to read for the cat info and photos, and the projects, while a little limited in scope, are very cute. If you like needlefelting, or want to try it for the first time, and you, or someone you know, loves cats, you’ll probably enjoy this book šŸ™‚

Comments (13)

review: The Knook

You may remember my knooking experiment from last year. Knooking (or knitting with a crochet hook) is a clever way to form real knitted stitches, by passing the live stitches onto a cord at the ‘wrong’ end of the crochet hook and then working back into them. The finished fabric is indistinguishable from a knitted fabric.

The main obstacle to knooking was the lack of proper equipment available. I used a locker hook, which worked well enough, but is only available in one size (approx G equivalent). The only other alternatives were to buy an expensive circular crochet hook set, or to hack a crochet hook into a knook yourself.

The Knook kit from LeisureArts

Now, finally, LeisureArts have come to the rescue with their new knooking kit, called simply The Knook. I should mention that LeisureArts kindly sent me a kit to review, but Iā€™m not being compensated for this review in any other way, and the following is based on my honest opinions!

If you’d like to buy one, The Knook is currently available from Walmart stores. If you’re looking for it, don’t assume, as I did from the pictures online, that this is a full-sized book: the knook hooks are the same length as a standard crochet hook (about 6″/15cm), and the booklet is the same height, so you’ll have to keep your eyes peeled to find the kit (it should be located with the other knitting and crochet tools), as it’s fairly small.

UPDATE 20 Sep 2011: Great news! The Knook kit is now available for pre-order on Amazon, and will be released on October 1st šŸ™‚

UPDATE 6 January 2012: Even better news: LeisureArts have now released more knooking books! Here’s what’s currently available:

  • The Knook kit (that’s what I’ve reviewed here; includes 3 knook hooks and basic instructions)
  • Learn to Knook (includes instructions for decreases and increases, finishing seams, changing colors, making cables, knitting in the round, and more)
  • Several knooking pattern books for hats and other items (although you can use any knitting patterns once you’ve learnt how to make the knitted stitches with your knook!).

The Equipment

The kit comes with 3 knooks, in sizes G/4mm, H/5mm, and I/5.5mm, and three coloured cords (there’s no difference between the cords except the colours, btw). The knooks themselves are made from bamboo, so they are very light and look quite stylish. There’s a slight depression for the thumbrest, which makes it more pleasant to hold than the locker hook I used for my previous knooking attempt. The hook tapers towards the bottom, to allow the doubled cord to pass through your stitches more easily, and the cords are smooth and shiny, which should make them ideal to slide through your stitches.

The ends of the cords are melted (so they won’t fray), and that rigidity made it slightly tricky to thread through the eye of the knook, but I found that by gently twisting the cord as I pushed, it slid through the eye easily enough.

The Book

The provided booklet includes step by step instructions for casting on and off, knit and purl stitches, and includes both right-handed and left-handed photos for every step (I heartily approve!). At the end of the book are 4 patterns (a scarf, washcloth, and two blankets.)

The Knook kit from LeisureArts

When I learnt to knook previously, I had obviously misunderstood something, because knitters looked at my Shaun the Sheep case and told me that my stitches were twisted. (I don’t mind – it still looks good!) I haven’t touched a knook since then and really don’t remember how to do it, so I can test these instructions as a beginner, and hopefully learn the correct method in the process…

The Instructions

I only had internet on my phone when I was testing the instructions, so I couldn’t access the accompanying YouTube videos. If you’re learning to knook, I suggest you use the videos in addition to the booklet to help you learn.

The Knook kit from LeisureArts

To knit, “insert the Knook from right to left into the first stitch”. What?! This motion felt entirely alien to me: it’s like working backwards (I’m left-handed), and the photo didn’t help. After watching the video later, I see that they inserted the hook under the cord too (not shown in the book), which is far easier than the clumsy way I did it to try to match the book’s photo – I had to hold the cord vertically (as you would a knitting needle) to get my hook into the stitch. So, watch the video too if you’re going to learn using this booklet; it really helps. After trying the video method, my knooking speed is now much faster.

first steps in knooking
My first steps: stitches picked up along the chain; stitches slid onto the cord; working back into the stitches

After a few rows of awkwardness, I moved onto the purl instructions. This was much easier than the knit stitch for me and I conquered it in no time.

I did a few rows in stockinette and then checked my swatch, only to find that I was twisting the stitches of every other row. I checked back with the book and noticed a very important highlighted box right at the beginning of the instructions:

If you already know how to crochet, please study the photos closely. From this point on, you will NOT be using the same yarn over typically used in crochet.

Oops… I read the instructions again and realised I’d been twisting the knit stitches by yarning over in my usual crochet way. I re-learned the knit stitch properly, then finished my swatch using the supplied bind-off method (although I had to do it twice because it didn’t mention that you have to bind off loosely and so my stitches ended up being too tight on my first attempt).

Using the Knooks

With my stitches down, I was ready to put the knooks and cords through their paces with a test project. The patterns in the booklet were all too large for impatient me (except the washcloth, which I knew I’d never use) so I decided to improvise. I used the H hook and teal Bernat Satin yarn to knook up a mug cosy of my own improvised design.

One of my knook hooks was slightly rough around the notch cut to make the hook shape, but I polished the bamboo smooth by rubbing it against my jeans so it wouldn’t catch on the yarn. (If you had a very rough knook tip, I’d recommend sanding it with fine sandpaper first.)

After smoothing, the knooks themselves worked very well – the non-hook end was far easier to pull through completed rows than the bulkier locker hook had been, and the silky cords slid through my stitches easily too.

knooked mug cozy

I completed my mug cozy in the time it took to watch a Lord of the Rings movie (so, 3 hours or so), and I’m happy with the result. It’s all knooked apart from the cord over the top of the mug handle, which I foundation single crocheted (still using the knook hook though – you can crochet with a knook too, of course). I expect I could make another mug cozy in about half the time now I’ve seen the video and know to knit by inserting my hook under the cord – live and learn!

Verdict

I highly recommend this kit for the knook hooks and cords. If you want to knook, this is definitely a worthwhile purchase and very inexpensive (people have reported paying around $7 for one at Walmart – well worth it). The booklet is useful too, and the inclusion of left-handed instruction earns it bonus points from me, although I’d recommend that you use the videos too (also available for left-handers). I found that the book photos are very useful to keep on hand as an instant reference for the yarn over directions (I had to check a few times to make sure I hadn’t reverted back to my crochet-style yarn overs, but it worked: no more twisted knit stitches for me).

The Knook kit gets a definite thumbs up from me.

What Next?

knooked Sampler Scarf from LeisureArtsOnce you have the equipment, the world is your knooking oyster! If you have any questions about knooking, I always recommend the Knooking group on Ravelry, which is full of knooking experts and newcomers alike.

LeisureArts are publishing more knooking patterns on their website, but I understand you can also knook (almost?) any knitting pattern.

On the LeisureArts site, I’m most excited about the Sampler Scarf pattern pictured to the right note: it’s free, but you do have to register and provide a billing address in order to download it. It includes instructions for combining (knooked) knitted sections with crocheted stitches, which isn’t as easy at it sounds, because crochet stitches are wider than knit stitches. The pattern has sections worked in Knit Check, Knit Diagonal Rib, Knit Basketweave, and Knit Pennant, with instructions for each, so that’s another 4 knooked stitch patterns I’m looking forward to trying out.

I’ll definitely be knooking more often now that I have a set of proper knooks! What do you think: are you tempted to try knitting the crochet way?

Comments (54)

Pom-pom Christmas Tree tutorial

I’m going through a bit of a rough time at the moment, trying to sort through all my stuff to sell/donate/pack so we can make the house look uncluttered and get it on the market before we make the big move to South Africa. Although I have about 10 blog posts’ worth of tutorials and information inside my head, it’s proving difficult to find the time to actually write any of them! If anyone tells you that moving to another country (that uses a different voltage, so everything electrical will have to be sold and re-bought at the other end) is easy and non-stressful, they are lying…

But anyway. I’ve managed to squeeze in the time to make an easy Christmas craft: a Pom-pom Christmas tree!

pom-pom christmas tree tutorial

A few weeks ago, I picked up some Clover Pom-Pom Makers, for no reason at all except they look like fun and I doubt I’d be able to find them in South Africa. They are very clever, by the way: very fast and so much easier than having to pass the yarn through the centre of a ring each time! I’ll review them properly in another post when I have more time…

And now to the Pom-Pom Christmas tree tutorial:

__(‘Read the rest of this entry »’)

Comments (14)

Next entries » · « Previous entries
  • Quick Links: Crochet

    navigation: arrow

    buy crochet patterns and accessories from my online store

    'Everyday Crochet' and 'The Essential Guide to Amigurumi' crochet books by June Gilbank

    Crochet video tutorials and step-by-step photo tutorials

    Free PlanetJune crochet patterns

    Frequently Asked Questions

    Quick Links: Crafts

    navigation: arrow

    Punchneedle Embroidery information, ebook & patterns

    Papercraft ebook & tutorials

    Free PlanetJune craft projects & tutorials

  • Blog Post Categories

  • Blog Archives

  • Welcome to PlanetJune!

    June Gilbank

    Hi, I'm June. Welcome to my world of nature-inspired crochet and crafting. I hope you enjoy your visit!

    If you'd like to get in touch, you can contact me here.
    crocheted Canadian flag by PlanetJune
  • A fanned-out pile of the books Everyday Crochet and The Essential Guide to Amigurumi, with text 'The answers to all your crochet questions at your fingertips - find out more'
  • Support PlanetJune!

    Want to say thanks? You can send me money in seconds at paypal.me/planetjune (over $20) or paypal.me/planetjune2 (under $20) or send me a donation through my shop.

    Or simply click through from my links before you shop at Amazon, Etsy, KnitPicks, LoveCrafts or Crochet.com, and I'll make a small commission on your purchase, at no cost to you! Start here:

    ♥ Support PlanetJune ♥

    Tip: This link is also in the footer of every page!

    Thank you so much for your support!