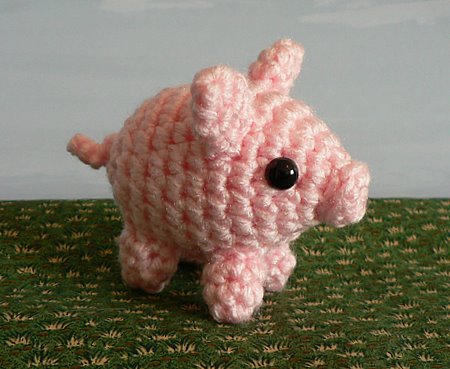
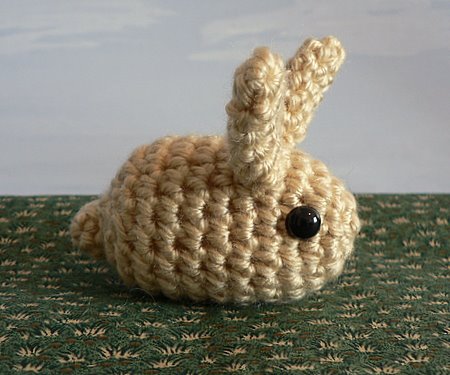
Yesterday’s amigurumi piglet needed a friend. Here is the smallest, simplest bunny I could dream up:
If you’re interested, there will be patterns for the pig and the bunny – sign up for my mailing list if you’d like to know when they are available 🙂
And now I have a question for you. I could keep designing these simple tiny ami for just about every variety of animal out there. They are a joy to make because they are so small and easy to whip up. Would you like to see some more (a whole new mini pattern range), or is two enough? Help me to decide!
PS – Catherine Andrews: please contact me with an alternate e-mail address. I keep getting a delivery failure when I try to send your patterns to the e-mail address you use for PayPal!
Sometimes a quick project is the most satisfying. He was quick to design and easy to crochet, but my amigurumi piglet does make me smile:
He may be small (about 3″ long) but he has big ambitions! This little piggy is hoping for a grand adventure – I’ll have to see what I can do about that…
In case you’ve never heard of needlefelting before, here’s the basic premise (ignore the rest of this paragraph if you already know all about it). By stabbing unspun wool repeatedly with a barbed needle, the wool fibres get tangled together and the wool begins to form a denser, more coherent piece. The more you stab, the firmer the piece becomes. By building up layers of wool in different colours and in different areas, it is possible to form complex sculptures with fine detail. That’s the theory, anyway!
There are some amazing examples of finished work in the Needle Felting Flickr group pool. I think I first heard of needlefelting over a year ago through articles in CRAFT magazine, but I’ve never tried it until now. I had my first attempt this weekend, using the supplies I got from the show last weekend. I couldn’t decide whether to start with something simple to learn the techniques, or to jump straight in and try to make something I actually wanted to make. In the end, I decided I didn’t want to ‘waste’ my wool on a test piece, so I dug out my photographs of Cinnamon (the best guinea pig ever) and started work.
I really liked needlefelting – I found it to be like a combination of my crocheted animals (texturally) and polymer clay sculpting (you can build up areas by adding more wool, in the same way as you can with a clay sculpture). It takes a lot of stabbing to get the wool to felt together firmly , but I discovered that, by compressing the wool first as much as possible, the wool begins to hold together after only a few stabs. I also discovered (after a few hours of make-it-up-as-I-go-along experimentation) that there are some very helpful videos on YouTube that show the process – I recommend watching a few if you plan to start needlefelting for the first time!
Now back to my guinea pig sculpture. It took a long time and a lot more wool than I expected. I tried to make the markings as accurate as possible, so I started with the white wool at the head and worked my way back, adding darker sections where they were needed. With hindsight, I think it would have been a lot easier to make and shape an all-white guinea pig body and then add thin patches of darker wool over the top to create the markings – I’ll know for next time!
I needlefelted in tiny black wool patches for the eyes, and then sewed round black onyx beads over the top to give them that realistic glint. I also used two strands of embroidery floss to stitch on a tiny nose and mouth. Apart from that, the whole mini-pig is solid wool.
I’m very pleased with this as my first piece, and I have enough wool left to make a few more little sculptures. It’s very satisfying when the piece comes together, and if the shape isn’t quite right, you can just add a litle more wool over the top to reshape it.
Another craft conquered! Well, the basics of it, at least. What shall I try next…? Any recommendations? Please leave them in the comments!
One of my personal challenges for my other blog, Crochet Along, is to come up with a banner design to reflect the new blog theme every two months. I try not to be influenced by my personal preferences for colour, style, etc and I think it’s helping to improve my graphic design skills.
I thought I’d share how I came up with my design for the new Summer Crochet theme.
First, find source graphics. I looked through stock photography sites for royalty-free photos that matched my design concept (‘orange’ in this case), and made sure to only save images that had no copyright restrictions or required credit to use – no copyright infringements here!
When I had saved about 20 images, I looked at them all together on the screen and eliminated them one by one until I had narrowed them down to my final source images (I took the crochet hooks photo myself):
After that, it’s time to cut, paste, resize, arrange, change colours, erase unwanted backgrounds, and add some text. Here’s the end result:
If you’d like to see the full sized banner, or you’d like some Summer-themed crocheting fun, head over and join the Crochet Along!
Or simply click through from my links before you shop at Amazon, Etsy, KnitPicks, LoveCrafts or Crochet.com, and I'll make a small commission on your purchase, at no cost to you! Start here: