PlanetJune Craft Blog

Latest news and updates from June

Archive for Paper Crafts

attempting advanced origami

Last year didn’t leave me with much time for ‘fun’ crafts, so I’m trying to pick that up again this year, and make time to make things just for the fun of it!

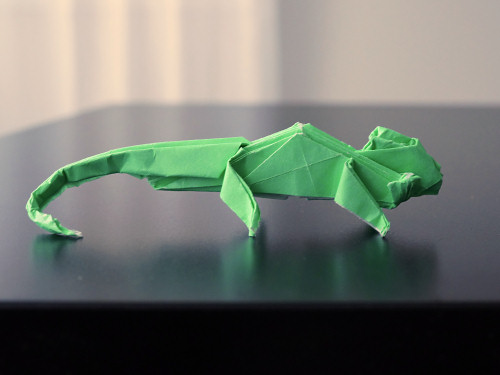
I received a pack of origami papers for Christmas, so I thought I’d try to learn more origami skills by picking a far more challenging pattern than I’ve attempted before. I chose to try a Cape Dwarf Chameleon (now I won’t be able to see real chameleons in my garden any more!) using a pattern by Quentin Trollip that’s rated as 4 out of 6 (advanced intermediate) on the origami difficulty scale.

Advanced intermediate is far beyond how I’d rate my origami skills, but there’s only one way to improve, and that’s to try something that’s out of your comfort zone! Although I’ve made lots of origami before, I usually stick to basic models with folds that you can understand with only wordless diagrams, so I was really jumping in at the deep end here.

At almost every step, I had to stop and google what each fold and instruction meant. Swivel fold? Inside reverse fold? Rabbit ear?! All new to me.

I found it difficult to understand all the new folds and spent ages staring at diagrams to try to see how one step could possibly lead to the next. But, finally, I figured out all the folds and, after a few hours, I had a finished model. It’s far from perfect, but if you squint you can just about recognise it as a chameleon!

origami chameleon

For comparison, here’s the perfect original from Quentin Origami:

Chameleon 2
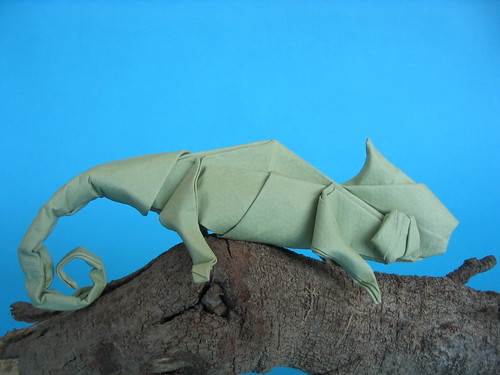
Haha, my attempt doesn’t look much like this!

Still, this is not a failure. I’ve learnt a lot from this project – persevering through learning so many new folds, and ending up with something close to what I was trying to make (although clearly a beginner-level attempt, with many mistakes).

So I thought I’d share it with you as an example of how there’s a learning process with every craft, and your first attempts may not look anywhere near perfect, but they’re a necessary step on the road to mastery, and nothing to be ashamed of.

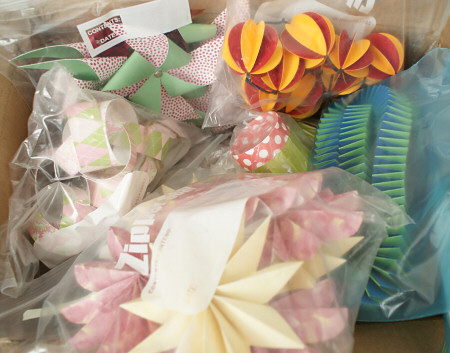
I’ve also discovered that I prefer to make modular origami – simple folded units that combine to form a more complex result – vs trying to achieve the entire shape with a single sheet of paper. There’s a lot of dexterity and artistry needed to make advanced origami look good, but I prefer to keep my paper folding at an easy relaxing level. You don’t need to aim for mastery in order to enjoy a craft!

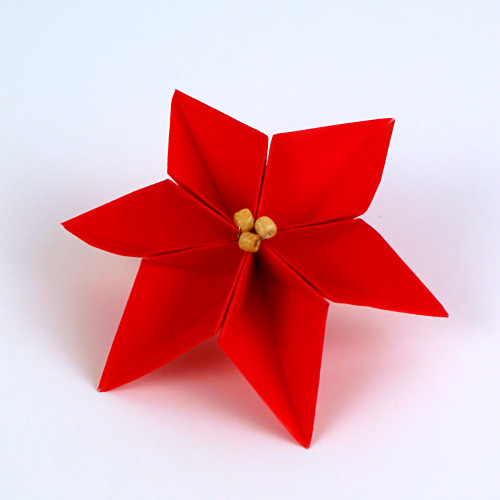
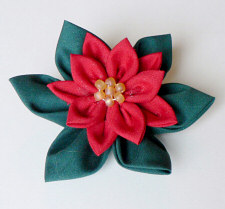
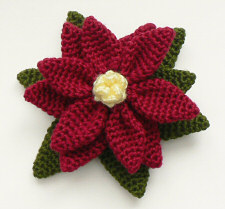
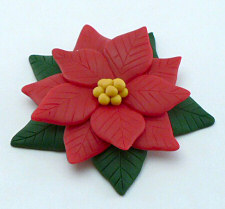
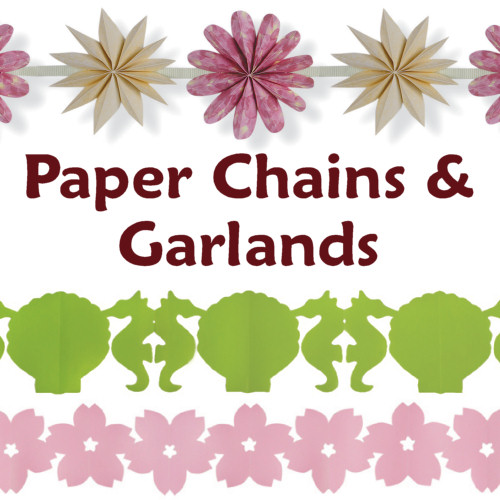
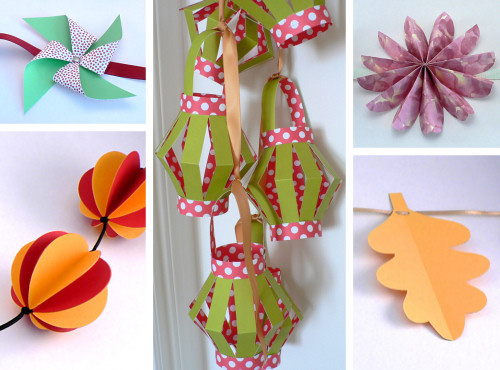
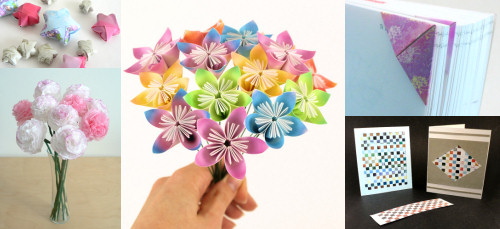
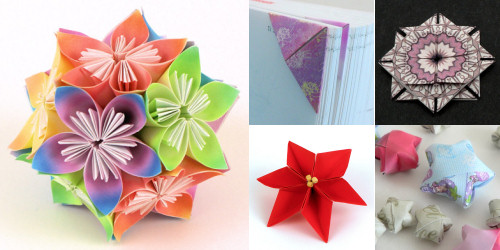
If you’d like to try some origami or paper-folding too, I have a few designs you may enjoy, such as these:

PlanetJune Papercraft: paper folding projects

See all my papercraft tutorials at PlanetJune Papercraft – I can promise they are far more beginner-friendly than an origami chameleon!

Comments (4)

Origami Poinsettia papercraft tutorial

In celebration of my new PlanetJune Papercraft ebook and donationware tutorials, I decided to design a papercraft poinsettia to add to my collection…

origami poinsettia by planetjune

The ‘petals’ of this Poinsettia are made with origami techniques, and the ‘flower’ is assembled with wire (with an option for sewing thread) – that can also be used to create a stem or hanging loop – and beads for the centre.

Did you know that the red ‘petals’ of a poinsettia are actually bracts – modified leaves – and only the central yellow parts are the flowers? So, while this isn’t actually a ‘flower’ in the case of a poinsettia, you can also make this design as a pretty flower at any time of year!

If you don’t have origami paper, inexpensive gift wrapping paper is the perfect thickness for paper folding. You only need to cut 3 squares to make a flower, and you’re bound to have some leftover wrapping paper before Christmas, so don’t throw it away! My origami poinsettia measures 3″ (7.5cm) in diameter, but it can be easily scaled to any size by starting with larger or smaller squares of paper. Beads or a button add the finishing touch to this lovely easy decoration.

The origami techniques in this design are very simple – this would be a fun introduction to paper folding if you haven’t tried it before – and once you’ve learnt how to fold a leaf you’ll be able to whip up a poinsettia (or several!) very quickly. If you’d like to give it a go, the link to the free tutorial is below, and, as always, if you choose to thank me with a donation, you’ll get the handy printable PDF version 🙂

Go to the Origami Poinsettia tutorial >>

The Poinsettia Collection

I only had one year off before I felt compelled to return to my tradition of crafting a new Poinsettia ornament every year. This new design brings the total up to 9! Here are all the previous PlanetJune Poinsettias:

tsumami kanzashi poinsettia by planetjunecrocheted poinsettia by planetjune
polymer clay poinsettia by planetjunepunchneedle poinsettia by planetjune
felt poinsettia by planetjunebeaded poinsettia by planetjune
thread crochet poinsettia by planetjuneknitted poinsettia by planetjune

Top (L-R): 2006 kanzashi poinsettia (no tutorial); 2007 crocheted poinsettia
2nd Row (L-R): 2008 polymer clay poinsettia; 2009 punchneedle poinsettia
3rd Row (L-R): 2010 felt poinsettia; 2011 beaded poinsettia
Bottom Row: 2012 thread crochet poinsettia; 2013 knitted poinsettia

(You can find all my Poinsettia designs as PDFs in my shop, or use the links above for the free online versions.)

Happy seasonal crafting!

Comments (5)

new ebook: Paper Chains & Garlands

Paper Chains and Garlands, papercraft ebook by June Gilbank

My first book, Paper Chains & Garlands, was published in 2009. It was released as a kit with several rolls and sheets of paper and was available exclusively through the US-based bookstore chain Barnes & Noble. This meant that it was only available within the US, and when it sold out within a year, Barnes and Noble chose not to reprint it, so it’s been unavailable since 2010.

I’ve finally been able to re-acquire the rights to my content, and I’m very excited to announce that I’ve repackaged Paper Chains & Garlands as an ebook that you can buy as a PDF file, directly from PlanetJune!

Paper Chains and Garlands projects, papercraft ebook by June Gilbank

Paper Chains & Garlands: Easy to make decorations, for parties, holidays, and home décor is an original ebook by June Gilbank.

Turn your next celebration into a creatively crafted occasion to remember. Create delightful decorations on themes that range from the seasonal (snowflakes, autumn leaves, cherry blossoms) to the decorative (pleated flowers, pinwheels, elephants). The illustrated instructions by expert crafter June Gilbank show you how to fold, cut, unfurl, and string chains and garlands like a pro. With tips on how to cut simple paper dolls as well as elegant Chinese lanterns, Paper Chains and Garlands is the perfect craft book for expert crafters as well as beginners.

(Want more details? Click through to my shop to view the complete Table of Contents and reviews of the first edition.)

Paper Chains and Garlands cover, papercraft ebook by June Gilbank

Second Edition: What’s New?

The new second edition ebook is even better than the original book, as I’ve fully revised and updated it, and it now includes bonus content and 10 pages of printable templates that are sized to print correctly onto either A4 or letter-sized paper and available in multiple sizes so you can easily create your paper decorations in a size you like.

Simply print the template you want, at the size you want, onto a sheet of cardstock and cut it out to create a long-lasting reusable template that you can draw around over and over again, to make as many decorations as you need!

Upgrade from the First Edition

Paper Chains and Garlands (first edition) by June Gilbank

Are you now kicking yourself because you bought the old, inferior, first edition? Don’t worry: if you can prove you bought my original Paper Chains and Garlands (email me a copy of e.g. your till receipt, a photo of you holding the book, or your order confirmation email from B&N) I’ll send you a discount code worth a massive 60% off the second edition – it’s definitely worth upgrading to have those printable templates and a handy PDF version!

Make Easy and Fun Papercrafts

If you’ve been looking for some fun craft projects to try with the kids, inexpensive ways to decorate for parties and holidays, or just want an easy introduction to papercrafting, look no further. Try your hand at origami, papercutting, and a variety of other papercrafting techniques, all explained in my clear, easy-to-follow style with step-by-step illustrations.

What are you waiting for? Pick up your copy now and enjoy some papercrafting! 🙂

Comments

announcing: PlanetJune Papercraft

I’m so happy to announce a new facet of the PlanetJune world today: PlanetJune Papercraft! My papercraft tutorials are an easy and fun way to make pretty, decorative items from little more than a few pieces of paper.

Papercraft Kusudama Flowers by PlanetJune

Unlike crochet, there’s no real learning curve to my paper tutorials – you can jump straight into any of them even if you’ve never made anything from paper before, and still get a great result. And you probably have all the basic materials – paper, scissors, glue – at home already!

 My paper background: Folding Trees

You may remember Folding Trees, the papercraft site I co-founded, together with my friend and colleague Eve Henley, in mid-2008, at a time when paper crafts were often neglected among modern crafters. We saw the need to showcase that paper crafting encompasses much more than just scrapbooking, and our goals were to collect the best tutorials, highlight inspirational paper creations from talented artists and crafters, and share our own paper crafts and tutorials.

Folding Trees banner

We accomplished our mission to bring modern, stylish paper crafts to the world. Folding Trees played a significant role in the resurgence of papercrafting in the online crafting community and led to my first book deal (for the sadly long out-of-print Paper Chains and Garlands – which is soon to be revived in a second edition as a brand new ebook… watch this space for details).

Paper Chains & Garlands by June Gilbank

Since we closed Folding Trees at the end of 2009, I’ve run it as an archive, but it’s taking time I can no longer justify spending, so we decided that now is the right time to close down the site for good. More and more of the tutorials we originally linked to have moved to a new URL or disappeared altogether, and maintaining the site has become a drain on my already limited time.

PlanetJune Papercraft

When one door closes, another opens… 

I’ve remade, revised and repackaged my best original tutorials from Folding Trees as PlanetJune donationware, so if you like papercrafting, or would like to try it out, take a look at my tutorials for some easy, fun and attractive paper projects!

PlanetJune Papercraft tutorials

And next week it’ll be even more exciting, when I’ll re-release my long out of print book Paper Chains & Garlands in a fully-revised second edition as a PlanetJune Papercraft-exclusive ebook!

It’s been fun getting back to my papercrafty roots over the past few months to get all this set up and prepared, and now PlanetJune Papercraft is here (and I’ve figured out a new and very easy to understand way to present origami-type instructions) I’m sure you’ll be seeing more paper tutorials from me in the future too!

I hope you’ll enjoy my paper tutorials – please click through to PlanetJune Papercraft to see what I have on offer. And if you’d like to see more PlanetJune Papercraft in the future, please leave a comment and let me know…

Comments (4)

reconstructing a yarn swift

Thanks to Heather and Jesse, I now have a very cool vintage umbrella swift, with one slight problem: the spinning part is missing, so all I had was the umbrella part to hold the yarn. I’ve been waiting for months to find the time to buy wood and get my handy husband to help me make 1) a new base that I can clamp to the table and 2) some sort of rotation mechanism so it can spin freely. So far, we’d only got as far as finding a Lazy Susan bearing mechanism.

Yesterday I got sick of waiting and decided to rig something from available materials: cardboard, craft glue, and thumbtacks. Less than an hour later, I had a functional yarn swift and ball winder combo:

yarn swift

All I did was build 2 cardboard blocks, each made from 3 layers of corrugated cardboard glued together. Corrugated cardboard is very strong, especially if you stack each piece at 90 degrees to the last so the ribs run perpendicular to each other. Here you can see the swift in action: the bottom block remains still, while the top block and swift both rotate as the ball winder pulls on the yarn:

yarn swift

This was my magic idea that would allow it to work without damaging the swift with glue or nails: before I assembled the top block, I cut a fitted hole into each layer of cardboard. With the swift snugly embedded into the cardboard, the two should be able to rotate together:

yarn swift

Here you can see the Lazy Susan ball-bearing mechanism between the two cardboard blocks. I attached it to the blocks with a simple thumbtack through the screw hole at each corner and pushed into the cardboard:

yarn swift

The moment of truth – does it really work? I wasn’t sure if it’d need some sort of non-slip mat underneath the bottom cardboard block, or a clamp to attach it to the table, but it was perfectly stable without either; as I turned the handle on the ball winder, the swift started to spin easily, allowing more yarn to be wound…

yarn swift

…until, within minutes, the entire hank had become a beautiful centre-pull ball. This is the first time I’ve ever been able to wind an entire 400m laceweight yarn hank without getting into a terrible tangle.

yarn swift

Once the umbrella is folded up, the whole thing is very conveniently small:

yarn swift

It’s so refreshing for me to take a break from my usual perfectionism and just MacGyver a ‘good-enough’ solution to a problem. It may not last forever, but I can easily make replacement cardboard pieces (or a sturdier solution, when I have time) – it’d only take seconds to remove the thumbtacks and have the bearing mechanism ready for reuse. But this is the perfect solution for now.

Mission accomplished: now I can crochet my gorgeous yarn into a new design!

Comments (8)

punchneedle globe WIP (part 2)

Punchneedle Globe menu:

So, as everyone guessed from my last post (yeah, I didn’t think it’d be much of a stumper!), my ongoing punchneedle project is going to be a 3D globe, embroidered onto two flat circles (with wedge-shaped gaps around the edges so I can stitch them into hemispheres later) and then stuffed and stitched into a full globe.

punchneedle project - work in progress

It’s pretty ambitious, and even more so than I first imagined when I decided on the size: as the fabric will be curved after punching it, the loopy stitches will end up splaying further apart than usual, so I’m punching my stitches very close together so you (hopefully) won’t be able to see the fabric between the stitches after the globe is assembled. It’s sloooow going, but also quite nice to have a ‘mindless’ project I can work on – designing projects all the time is tiring, and, now I’ve completed the design for the globe, this is a soothing project to work on when I’m watching TV, just filling in each area with the right colour.

As you can see from the picture below, I have completely finished 2 of the 12 sections of the southern hemisphere, and I’m partway through the rest. And – hey – is that Australia I spy?

Here’s something that’s made it more fun though: Jessica at How About Orange linked to these cute printable floss bobbins designed by Wild Olive, and I thought they’d inject a bit of cute into the process.

I printed a sheet of bobbins onto white cardstock and cut them out (yes, I did pick the 4 shades that were closest to my floss colours – silly things like that make me happy). In contrast to the globe, they were a very quick and satisfying project!

Here’s a little papercrafty tip for you: to cut a smooth curve like these bobbin edges, hold the scissors steady and rotate the cardboard as you cut.

punchneedle project (work in progress) + cardboard bobbins

As I punch with 3 of the 6 strands of floss at a time, I usually cut a 1.5m length of floss, split it into two, and then leave the other 3-strand length languishing in my project box until I need it. Now I can wind the spare length onto the bobbin, and it’ll be neatly stored until I need that colour again. And I’ve even pre-cut and split an entire skein of the blue floss and wound all the lengths onto my blue bobbin, so I won’t be interrupted with cutting new lengths during my next punchneedle session. (As I’m working on the southern hemisphere, there’s a lot of blue ocean to fill in!)

Printable cardboard floss bobbins: recommended! They may not last forever, but they make me smile and I can always print more when these wear out. Or – shock horror – use the other shades that I already printed… but I don’t know if my matchy-matchy self will allow me to do that: green thread on a red bobbin? That’s just crazy talk! 😀

Comments (8)

writing my first craft book

Last week, I got a big box in the mail. It contained all the sample projects I made for my book, Paper Chains & Garlands, and shipped off to New York over a year ago to be photographed. It’s so strange to see them again after all this time!

paperchain projects

It brought me right back to early 2009, when I was writing the book – it was my first experience of print publishing, after years of self-publishing patterns and writing web-based tutorials. I thought some of you may be interested in hearing a bit more about my experience of writing my first craft book…

paper chains and garlands

The timeline was very tight. I spent my days writing, designing, shopping for paper and tools, and learning more about how to use Adobe Illustrator for the book’s illustrations. Evenings were spent cutting, scoring, folding, gluing. I re-started every time my scissors slipped, because I was not going to have an imperfect sample in my book. I cried in frustration when my hands were too painful to hold the scissors any more, and I had to stop for the evening. I gritted my teeth and went paper shopping yet again when my editor told me that one of my colour schemes wasn’t going to work (when I’d already cut and folded over 100 pieces for the original sample!).

And then, after killing myself making 16 perfect sample garlands (of at least 5 ft long, and some much longer), the photographs in the book are all close-ups (at least my perfectionism paid off there!) and show no more than 1 ft of the garland in most cases, so most of my work was wasted… Although, now I finally have them back, I have ready-made paper decorations for every possible occasion 🙂

paperchain projects

All this had faded in my memory, but seeing all the paper projects brought it all back. Please don’t think I’m complaining: it was great experience and an eye-opening introduction to print publishing. The book is a Barnes & Noble exclusive (the big US bookstore chain), so it’s hard for me to gauge how successful it is, when it’s not even available to purchase here in Canada! But I see that its status at bn.com is ‘sold out’, so I assume that’s a good sign! I’ll let you know if/when it’s reprinted and available again.

paper chains and garlands

Don’t get me wrong; I’m very proud of my first craft book and happy to have been given the chance to write it. But let me just say this: if anyone tells you that writing craft books is easy and fun, they may not be telling you the whole truth…

Comments (13)

‘grass’ sticky page markers

I’ve been avoiding paper crafts since I stopped writing for Folding Trees. Trying to scan the web every day for paper craft resources to highlight was exhausting and ultimately put me off papercrafting. But I’ve started to miss coming up with my own crafty paper tutorials – I think I’m out of my paper funk!

Here’s a really simple paper project. The idea came from these GreenMarkers that Kari found in a Japanese online shop:

GreenMarkers from Yuruliku

When you need to mark up a lot of pages of a book, you end up with a swarm of sticky arrows sticking out of the edge of the book. I love the idea of forming a little clump of grass ‘growing’ out of the book instead, so here’s my simple 5-minute DIY version:

‘Grass’ Sticky Page Markers

grass sticky page markers by planetjune
They look especially cute in my papercraft book, Paper Chains and Garlands, don’t you think? 😀

You will need:

  • Green sticky notes (if you can’t find green ones, you could colour normal coloured notes with a green pencil or paint before you begin)
  • Pair of sharp scissors
  • Bone folder (optional)

I found these recycled paper Post-It notes that include a lovely spring green colour:

grass sticky page markers by planetjune

Take a sticky note and make sure the sticky edge is at the bottom:

grass sticky page markers by planetjune

Cut out blades of grass from the note. You need to make a long thin triangular shape with a slight curve, starting from the bottom (sticky) edge and tapering to a point. Cut the shapes freehand – if they aren’t exactly the same size and shape they will have a more organic, natural feel.

grass sticky page markers by planetjune

Note: Make all the blades curve in the same direction – it saves paper, and when you stick some on left-hand pages and some on right-hand pages of your book, you’ll end up with some blades curving in each direction anyway!

Stick the blades down on a piece of paper.

grass sticky page markers by planetjune

Turn the paper around so that the sticky edge of the blades is at the top. Use a bone folder or the wrong side of the edge of your scissors to score a line down the middle of each blade, drawing the folder towards you from the base to the tip of each blade.

grass sticky page markers by planetjune

You don’t have to be too exact! If you look carefully you can see my scored lines on the 4 rightmost blades:

grass sticky page markers by planetjune

With your fingers, pinch the sides of each blade slightly so that it folds up around the scored line. This adds a little dimension and realism to the grass!

grass sticky page markers by planetjune

Use your blades of grass to mark up your reference books without damaging them!

grass sticky page markers by planetjune

A touch of spring, whatever the weather! I hope you like my grass markers 🙂

Comments (13)

« Previous entries
  • Quick Links: Crochet

    navigation: arrow

    buy crochet patterns and accessories from my online store

    'Everyday Crochet' and 'The Essential Guide to Amigurumi' crochet books by June Gilbank

    Crochet video tutorials and step-by-step photo tutorials

    Free PlanetJune crochet patterns

    Frequently Asked Questions

    Quick Links: Crafts

    navigation: arrow

    Punchneedle Embroidery information, ebook & patterns

    Papercraft ebook & tutorials

    Free PlanetJune craft projects & tutorials

  • Blog Post Categories

  • Blog Archives

  • Welcome to PlanetJune!

    June Gilbank

    Hi, I'm June. Welcome to my world of nature-inspired crochet and crafting. I hope you enjoy your visit!

    If you'd like to get in touch, you can contact me here.
    crocheted Canadian flag by PlanetJune
  • A fanned-out pile of the books Everyday Crochet and The Essential Guide to Amigurumi, with text 'The answers to all your crochet questions at your fingertips - find out more'
  • Support PlanetJune!

    Want to say thanks? You can send me money in seconds at paypal.me/planetjune (over $20) or paypal.me/planetjune2 (under $20) or send me a donation through my shop.

    Or simply click through from my links before you shop at Amazon, Etsy, KnitPicks, LoveCrafts or Crochet.com, and I'll make a small commission on your purchase, at no cost to you! Start here:

    ♥ Support PlanetJune ♥

    Tip: This link is also in the footer of every page!

    Thank you so much for your support!