
PlanetJune by June Gilbank: Blog
PlanetJune Craft Blog
Latest news and updates from JuneKusudama Flowers Tutorial
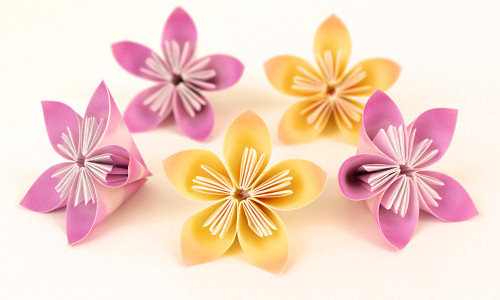
Japanese Kusudama balls are traditionally assembled from real flowers and herbs, and used as incense or pot pourri. A decorative paper version can be created by first folding origami flower petals and gluing them together into flowers, and then assembling 12 flowers into a decorative ball.
But these lovely paper flowers are so versatile and have many uses in addition to assembly into a kusudama ball:
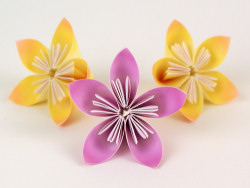
- Make a single kusudama flower, as shown here, as a lovely place setting, wedding favour, or buttonhole.
- Add floral wire stems to the bottom of each flower and assemble them into a paper bouquet.
- Glue 12 flowers together into a full kusudama ball to make a beautiful gift or stunning decor for parties and weddings.
(You may also recognise the Kusudama flower as the logo for the now-defunct papercraft site, Folding Trees, that I used to run with Eve Henley. With Eve’s agreement, this tutorial is my updated and revised version of the kusudama tutorials she originally posted there.)
This tutorial is Donationware – the instructions are available for free, but if you like it please consider sending me a donation to show your appreciation:
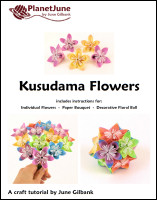
Send me a donation and receive the easy-to-print PDF version of the tutorial as a thank you! It includes some additional info that you’ll only find in the PDF version:
– Instructions and tips for adding stems and making a paper bouquet (pictured below)
– Step-by-step instructions for turning 12 flowers into a decorative floral ball (pictured below)
Donations of any size are much appreciated. Just add the amount you wish to donate, and, once you have checked out and paid, your PDF will instantly be available to download from your PlanetJune account.
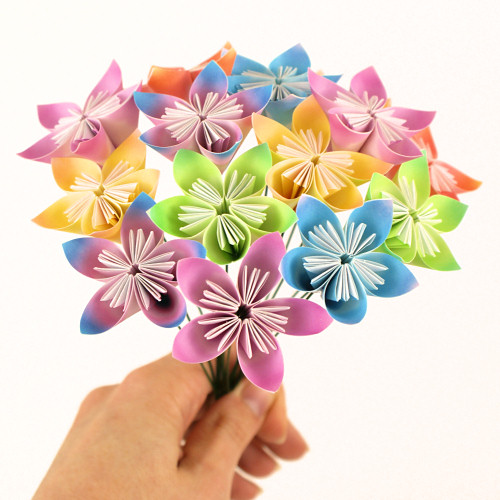
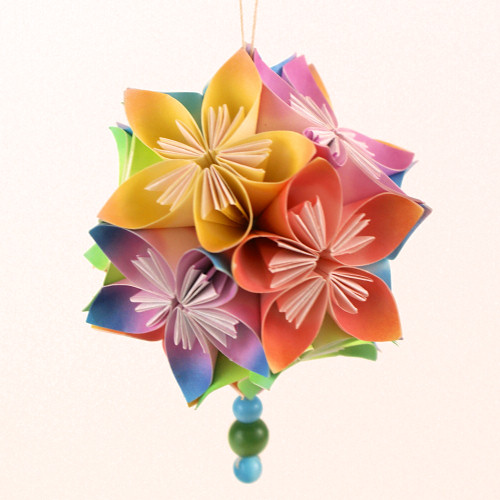
Make your flowers into a paper bouquet and floral ball (instructions available for any size donation)
The complete instructions for the kusudama flower are available below, regardless of whether or not you choose to pay for them 🙂
This is a PlanetJune original tutorial. Please do not share or reproduce this tutorial; instead post a link to www.planetjune.com/kusudama
Kusudama Flower
You will need
- 5 squares of origami paper per flower (your choice of size; I like to use 2″ or 3″ squares)
- White craft glue
- Optional: glue spreader
Instructions
Note: As with all origami, this works best if you strongly crease each fold by running your thumbnail along each fold before moving on to the next step.
Step 1. Start with a square of origami paper. Fold it in half on the diagonal to form a triangle, with the coloured side facing out.


Step 2. Fold the left and right corners up to meet the top point and form a square.


Step 3. Fold the front points out so each outer edge lines up with the edge of the square.


Step 4. Unfold the last fold so the points meet at the top again, then open each side up into a pocket (below, left).Flatten each pocket out along the crease lines you just made, to form a kite shape (below, right).


Step 5. Fold the tip of each kite shape forward along the line of the edge of the paper, to form a triangle.


Step 6. Fold the lower edge of each side up along the existing crease.


Step 7. Add a thin layer of glue along one of the front flaps (shown in blue, below, left), then bend the petal so the front flaps meet and create a petal shape (below, right). Hold in place until the glue dries.


Step 8. Repeat Steps 1-7 four more times, to make a total of five petals.
Step 9. Add a thin layer of glue (shown in blue) along the edge of one side of a petal, then add another petal next to it, so they meet at the centre. Hold in place until the glue dries.


Step 10. Repeat Step 9 for the remaining petals, to complete a 5-petalled flower. (I find it easiest if I first make a two- and a three-petal piece as shown, then glue the two together).

I hope you enjoyed this tutorial! Please leave me a comment if you did, and consider leaving me a donation. (The PDF version that you’ll get in return for any size donation also includes instructions for making your flowers into the bouquet and decorative ball.) Thanks!


Betina said
my kids are going to love this, thanks for sharing. 🙂
Zoe said
Love these Kusudama flowers! I made some using newspaper and they look so cool. I’ve just made some out of pages from my friend’s favourite book as a birthday present for her and put them into a vase
Betina Jessen said
Thank you for sharing this interesting and beautiful Kusudama Flowers Tutorial with us! I had never heard of Kusudama balls before, but they sound like a unique and fascinating craft. The traditional version made from real flowers and herbs sounds especially lovely. I’m looking forward to trying my hand at the decorative paper version, and I’m sure that others will be interested in giving it a try as well. Thank you for sharing this tutorial and for providing detailed instructions on how to create these beautiful Kusudama flowers. I’m sure they will be a source of enjoyment for many people.
Christina Stroup said
thank you for this tutorial. it was easy to follow. i made some flowers for a vintage book page wreath i am creating.
Eva said
Hi, I was just wondered what I could use instead of origami paper, any suggestions?
June said
Origami paper is easiest because it’s square-shaped, but if you don’t have any, you can use any other paper; you’ll just need to cut it into squares first!
Patricia said
Why not try 3 x 3 sticky note papers?
Goi Resume said
Thank you so much! I made a bottle vase aswell to put them in! I’m gonna do 6 all together, I’ve on,y done one but they look great! So amazing! Thanks my mum will love them
Teresa Genao said
Thanks for the wonderful tutorial.
Angelina said
Thanks so much for sharing this!! We are very excited about doing this. Thanks again!
Jessica said
my kids are going to love this, thanks for sharing.
Vic said
Hey June!
Thanks so much for sharing this!! We are very excited about doing this. Thanks again!
Maddy said
I absolutely love them. They are just beautiful and look amazing in my daughters nursery. Thank you!
Amol Singh said
Nice Tutorial for making a flower. I will try this to impress my girlfriend.
Rohit Kirat said
Thankyou For Sharing this information.
November said
my kids are going to love this, thanks for sharing.
John Petser said
Oh woow… I will try it and i am sure with the help of your guide i can make it. Is there any way to upload picture. I will click picture after i will make it.
Cathey Denniste said
Hi, thanks for the wonderful tutorial. It is explained so nicely that even a beginner can make this!!
Emily Graph said
I really enjoyed the way you explained it step by step. I tried other tutorials and YouTube videos, but most of them were either complicated or confusing. Your instructions were simple enough follow for someone less experienced like myself. Thank you!
Sharon Gore said
Thanks so much for sharing this!! We are very excited about doing this. Thanks again!
Karen Cline said
This is an awesome origami flower.. I love your blog. Thanks so much.
gitte said
hi
I have made this flowers, and like to make a ball, but every time i try it seems like i hav a lack af flowers do you have a tuturial of how to sampel a hole ball
June said
Hi Gitte, yes! The PDF version of this tutorial (available in return for any size donation – just click the ‘make a donation’ button above) includes a full step-by-step tutorial for assembling the kusudama flowers into a complete ball 🙂
Amber said
Wow these are super cool I
June said
Thanks Amber! You can use any paper to make these, provided you cut the paper into squares first (you can even make kusudama from post-it notes!)
anton said
i really like how you explain all the steps, some other books/ websites are complicated and it is hard to understand all the steps. also can you do more papercrafts so i can make them and i am always looking for art projects to do. 🙂
Izzy said
But what would you say was better for sticking, double sided sticky tape or pritt stick?
June said
Hmm, it depends on the strength of your brand of tape or glue stick, and how thick your paper is! Permanent glue stick may be strong enough, and some double-sided tapes, but I can’t guarantee either. I recommend white glue in the tutorial because, provided you hold it in place until the glue dries, it’ll definitely make a good strong bond that won’t spring back open.
Izzy said
Brilliant!
Ninie said
Merci!!! Your tuto is very clear ,thanks a lot!!!
Jill said
thanks for much for this. I am wondering what you do on the underside where the stick goes into the flower?
June said
The instructions for the Kusudama Bouquet and Kusudama Ball are given in the PDF version (available from the link above for any size donation) 🙂
Helena Orstem said
I love your blog it inspires me to create
Lynne buddin said
Thank you
such simple clear instructions
Rebecca Matlock said
Hi! Thank you so much for posting! Your very talented! Beautiful! I do have a question please. Would it be possible to get instructions through residential mail? I’m disable and also do not have a computer. The only way I’ve used these services are by my phone. I would very much like to learn how! I am in hope’s it will distract me from my health problems. Thank you kindly, Becky
June said
Thanks Becky! Please see my advice if you want printed copies of my patterns/tutorials in my FAQ.
tanveer said
Thank you I was dying to make …
Finally with your help I made it…
Stella said
I love your blog it inspires me to create
Asha said
its u gud supper …… its very easy to make … Thank you hw has upload dis …
Kay said
Love these flowers. Thank you for the tutorial. You are so kind to share your knowledge.
Cathy Stein said
This is an awesome origami flower. I lived in Japan for 3 years and learned some origami while I lived there. I will send donation soon. How do you except payment? Email me and let me know. Thank you. Cathy Stein
June said
Cathy, just click the ‘donate’ button above and you can select your donation amount, pay, and then download the PDF version. See my FAQ for details of how to pay.
sourev said
wow it’s not good but too good.
Leah said
Thank you so much! I made a bottle vase aswell to put them in! I’m gonna do 6 all together, I’ve on,y done one but they look great! So amazing! Thanks my mum will love them
Linda St-Denis said
I like you to tell than I like if you to be possible have a site french language I a known not the English language. Thank you. My adresse imail is l.stdenis@yahoo.ca
June said
I’m sorry, Linda, my site and patterns are available in English language only (please see my FAQ for my reasons why).
Janine Williams said
I live in Spain and run a ladies lunch group raising money for local charities.have seen some origami flowers which I think could be a good ‘fund raiser’
Would appreciate full details and if you know where to purchase supplies
Arpita Das said
Amazing,I would love to learn more of flower making.I find it very creative and soothing
Edwin Anthony said
I loooveee it… M so happy I made that… Mail me some such sweet hand craft..