For those of us with small businesses (crafty or not), advertising and marketing is always a difficult area. Very few of us can afford an advertising budget, so we have to try to make wise decisions that lead to maximum promotion with minimum expenditure.
Having said that, it could be that we’re missing out on effective advertising methods, so I thought I’d try an experiment with Facebook advertising on behalf of the entire crafting community, to see if it might be something we should be doing.
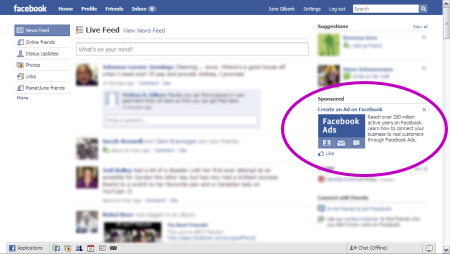
This is what an advertisement on Facebook looks like – I’ve circled the ad in purple
For this experiment, I spent $150 on Facebook advertising. Before you think I’m wealthy or foolish enough to waste $150 (that’s the revenue from close to 40 pattern sales!), I should mention that I received all the credit I used as promotional vouchers by signing up for Canada Post’s Venture One small business scheme and the VISA Business Network, so I haven’t actually lost anything as a result of this test.
Setting up the Ad
Facebook know their users, so you can tailor your ad to be shown to only a specific demographic. If you want to, you can specify your target age, gender, location, language, interests, etc, and only the FB users who match your profile will see your ad. In my case, I limited to residents of US, Canada, UK, Australia and New Zealand who listed Crochet, Crocheting, or Amigurumi in their interests. This is a very powerful screening tool!
You can also choose to pay by CPC (you pay each time your ad is clicked on) or CPM (you pay per 1000 views of your ad), your maximum CPC or CPM bid, and the daily maximum you’d like to spend.
Your ad consists of a title (up to 25 characters), an image (110 x 80 pixels), and body text (up to 135 characters). Facebook have some very specific rules about the content of their ads: no abbreviations allowed (e.g. ‘&’ instead of ‘and’ is not permitted!); full sentences and punctuation are required; no excessive capitalization – it’s worth checking to make sure you follow all their rules, because…
What Comes Next
Once you’ve set up the ad, you have to wait for it to be manually approved. This takes a minimum of several hours (in my experience), and if you change anything in the ad later, you have to wait for it to be approved again before it will run. So make sure you get it right first time!
Once the ad has been approved, you can monitor stats from your Ads page, and see how many times it’s been viewed, clicked on, and the average cost you’ve paid (Facebook, like other ad systems, only make you pay the minimum you need to ‘outbid’ other advertisers, so you don’t always pay your maximum bid price). You can also pause or delete your ad if you need to.
My Experience
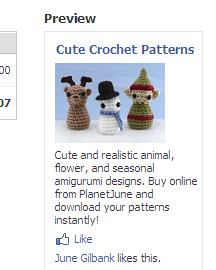
Facebook certainly has plenty of users. I was expecting to spend a few dollars a day, but I blew right through my initial $50 within 1 day! This is the ad I used:
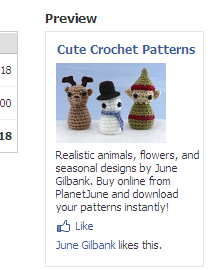
I used the CPC model and my $50 bought me 67,252 impressions (times that the ad was shown on anybody’s screen) and 241 clicks through to my site. Not one of these clicks generated a direct sale 🙁
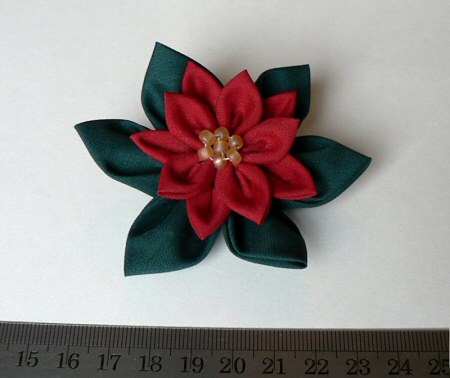
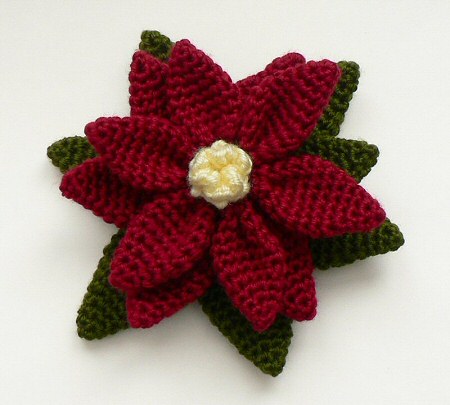
So, with my remaining $100, I switched a few things up. Carina pointed out that my ad did not contain the word amigurumi (well, duh, how did that happen?!), so here’s my revised ad text:
I tried running the ad with the two different pictures shown above, but after a couple of thousand views I could see that the PocketAmi Christmas image was getting better results, so I pulled the AmiDogs ad and kept running the Christmas ad.
I also switched to the CPM bid model, so instead of paying per click, I was paying per view of the advert. This didn’t seem like a good plan – after all, I wanted people to click through, so that was more valuable to me than the number of views – but it turned out that my views cost me a lot less with this model, and I also got more clickthroughs! Why? Here are my theories:
- The text was more appealing in the revised ad
- People had seen the ad more often by now and were more tempted to click it
- By chance: the people who happened to see the ad on Day 2 were more receptive to it
My $100 lasted for 2 days, although the morning of the first day the ad was ‘pending’ waiting for approval of my changes. The results were 290,241 impressions and 1206 clickthroughs – that’s twice as many views and 2.5x more clicks per dollar than with my first attempt!
I’m going to give you full disclosure of my revenue, in the interests of helping you make an informed decision: my Google Analytics report shows sales of only $70 resulting from these clicks, although it’s not 100% accurate (I’ve noticed it doesn’t pick up all my sales), so that could be a low estimate. So, on the surface, I didn’t even break even with my advertising budget, but this doesn’t account for the intangibles:
- People who signed up for an account or my mailing list and may become customers at a future date
- People who bookmarked or saved my site for later
- People who didn’t complete checkout at the time, and returned to my site later to complete the purchase (so the sale wouldn’t show up as coming from Facebook)
Conclusions
Facebook ads are definitely interesting. I love that you can specifically target the people who are your potential customers. But the advertising costs are just too expensive for smaller businesses to justify, unless they can somehow convert almost all their clicks into sales, or sell a very expensive product where one sale would cover the advertising budget for the day/week.
Obviously, this is just going from my personal experiences, and you may have different results if you try using Facebook ads. Personally, I won’t be advertising with FB again unless I can find another promotional voucher for free credit – it’s just too expensive for my budget. Having said that, I’m still hopeful that the almost 1500 clicks I received during the course of this experiment will lead to some more new customers at a later date, as well as the few direct sales I received on the day.
I hope you’ve found this report helpful in deciding where to spend your precious funds to try to grow your business! Have you tried FB ads too? I’d love to hear about it – please leave a comment and share your experience.