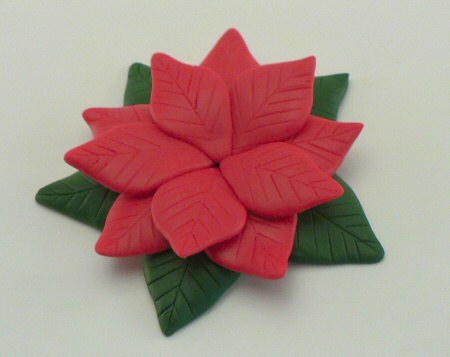
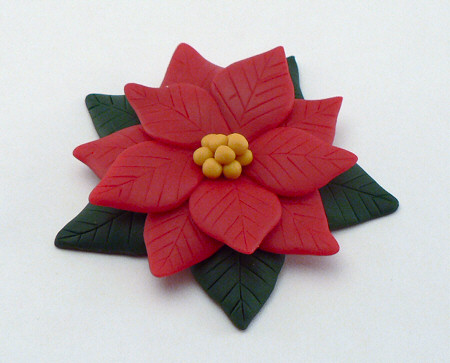
Polymer Clay Poinsettia Tutorial
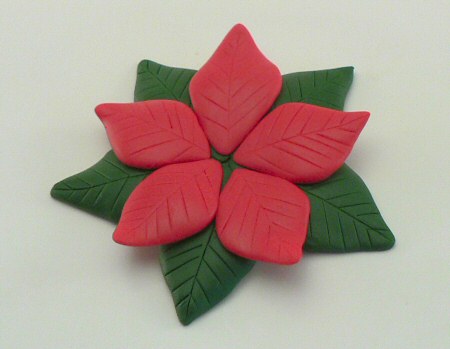
This poinsettia is just over 2″ (5cm) in diameter, and would make a lovely pin or fridge magnet, or just a pretty decoration.
This tutorial is Donationware – the instructions are available for free, but if you like it please consider sending me a donation to show your appreciation:
Send me a donation and receive the easy-to-print PDF version of the tutorial as a thank you!
Donations of any size are much appreciated. Just add the amount you wish to donate, and, once you have checked out and paid, your PDF will instantly be available to download from your PlanetJune account.
The complete instructions are available below, regardless of whether or not you choose to pay for them 🙂
This is a PlanetJune original tutorial. Please do not share or reproduce this tutorial; instead post a link to www.planetjune.com/polymerclaypoinsettia
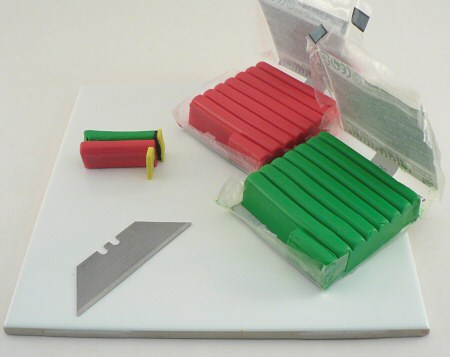
You will need:
- Polymer clay in red, green and yellow (Optional: if your green is too bright, you can add black to darken it)
- Knife (or another tool to cut the clay and score markings in the leaves)
- Ceramic tile (I use a regular tile from the home improvement store, but if you don’t have one you could use an oven-safe tray covered in foil)
Notes:
- I use FIMO Soft polymer clay, but you can use any brand 🙂
- Don’t worry about trying to cutting the pieces to be exactly the same size – after all, real leaves aren’t all identically sized and shaped!
Method:
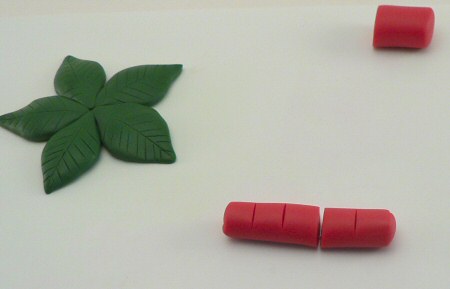
1. Cut equal quantities of red and green clay. I used just under 1/8 of a block of each colour. I added some black to my green to darken it, and a little yellow to stop it from looking too dull.
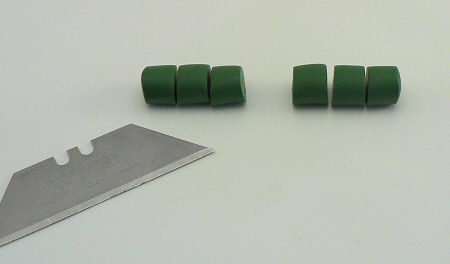
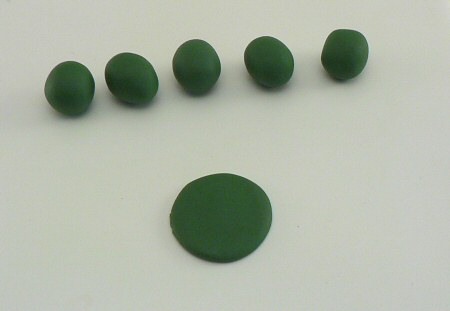
2. Roll and squish the green clay until it is soft, then roll it into a log. Cut the log into 6 roughly equal pieces (the easiest way to make six is to cut it in half, then cut each piece into three):
3. Roll one of the six pieces into a ball and then squash it into a flat circle on your tile (or foil baking surface).
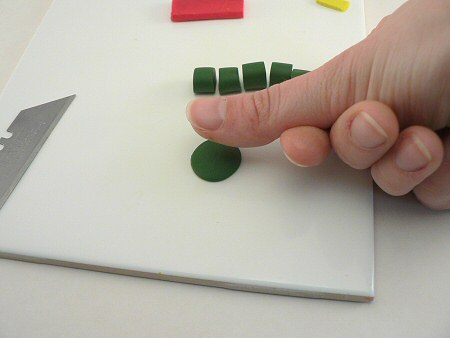
4. Roll the other 5 pieces into rough ball shapes.
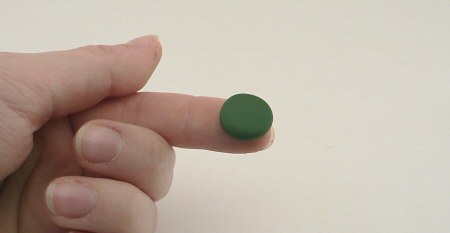
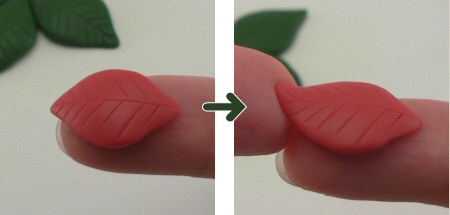
5. Flatten one ball into a circle on the index fingertip of your non-writing hand.
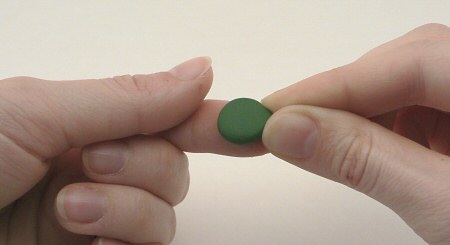
6. Pinch the tip of the circle between the finger and thumb of your writing hand.
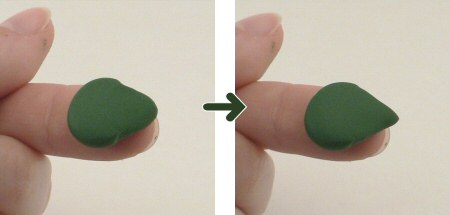
7. Flatten the pinched tip out and repeat (pinch then flatten, pinch then flatten) until you end up with a flat teardrop shape. Note: don’t worry if you mess it up completely the first time; just roll it back into a ball and try again!
8. Turn the shape around on your index finger, and make another point on the opposite side.
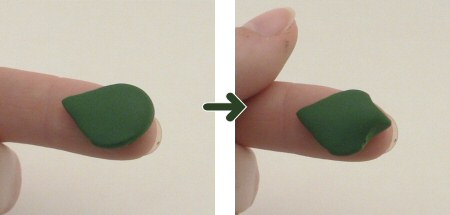
9. Pinch and flatten again until you have a sort of eye shape – or, in fact, a leaf shape! Very gently, use the pad of your thumb to rub over the top of the leaf surface. This will help to wipe out your fingerprints.

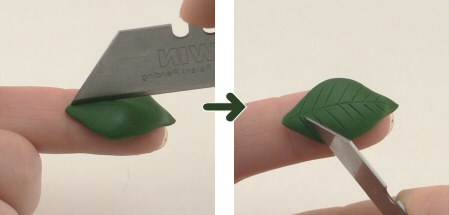
10. Use your knife to very carefully make markings on the leaf. Note: please be very careful – you don’t want to cut all the way through and cut your finger! You just need the slightest pressure to mark the surface of the clay.
11. Place the leaf onto the flat green circle on your tile, so the inner end is at the centre of the circle.
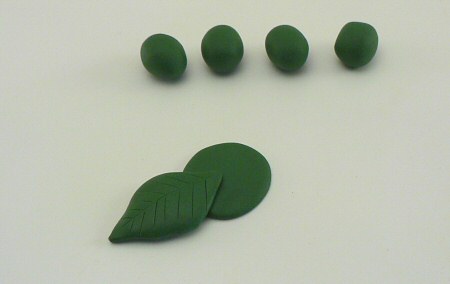
12. Repeat steps 5-10 with the other green balls to make the other 4 leaves, and arrange them in a star shape to completely cover the green clay circle. Push each leaf down slightly in the centre to ensure they are stuck to the circle (the centre will be covered by the red leaves, so don’t worry about leaving fingerprints).

13. Wash your hands with warm water and soap. There will be green clay residue on your hands, and you don’t want to transfer it to your red clay and turn the red colour muddy!
14. Now move onto the red clay. Roll and squish it until it is soft, then roll it into a log. Cut the log into two pieces, one slightly bigger than the other (about 60/40, but you don’t have to be exact).
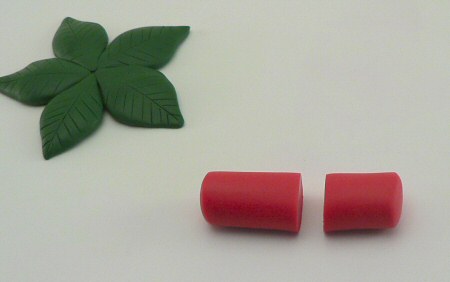
15. Take the larger piece, roll it a little longer and thinner, then cut it into 5 (the easiest way to do this is to first cut it in two, one a little bigger than the other, then cut the smaller piece in half and the larger piece in thirds).
16. Make the first red leaf in the same way as the green leaves (steps 4-10 above). The leaf will be a little smaller than the green leaves. When you remove it from your finger, it may curl up a little at the end. This is a good thing! It will help the leaves to look more realistic.
17. Arrange the red leaf between two of the green leaves Only press the centre edge down to touch the green leaves – the tip will look more realistic if it sticks up slightly. Make the other 4 red leaves and arrange in the same way.
Curling up the tips of the red leaves gives it a more 3D appearance:
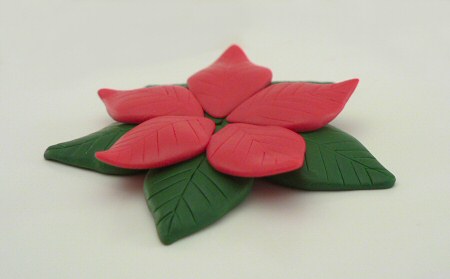
18. Cut the remaining piece of red clay into 5 pieces, and form the second layer of red leaves. Position them so they are offset from the first layer.
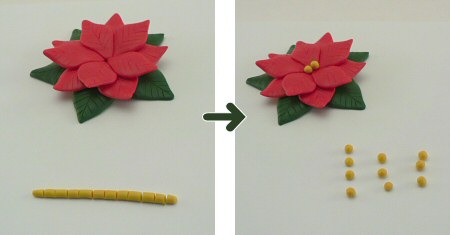
19. Roll and squish a small piece of yellow clay until it is soft. Roll it into a long thin sausage, then cut it into tiny pieces. Roll each piece into a ball, and begin to pile the tiny balls into the centre of the poinsettia. Keep going until it looks good – I used 10, but it depends on the size of your balls and how piled up you would like them to appear. Push down very gently on the balls so they make good contact with the red leaves. Don’t push too hard, or you will squash them!
Now it’s ready to be baked!
20. To bake your poinsettia, follow the manufacturer’s instructions for your brand of polymer clay. The advantage of forming your flower directly on your baking surface is that you don’t need to try to move it until it is baked – just put the tile directly in the oven. When the poinsettia has baked and cooled to room temperature, it should easily pop off the tile. If it doesn’t, gently slide the tip of your knife underneath, and it will free itself.
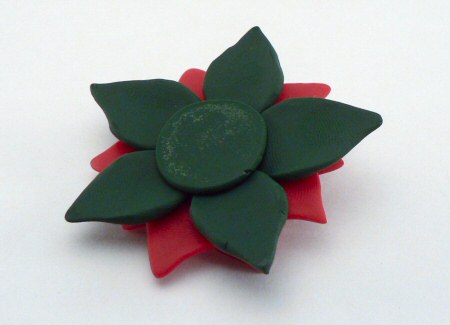
21. The circle on the back of the poinsettia adds strength, and gives a flat surface to attach a backing. Using a strong glue (such as E-6000), glue a pin back or magnet on to the circle.
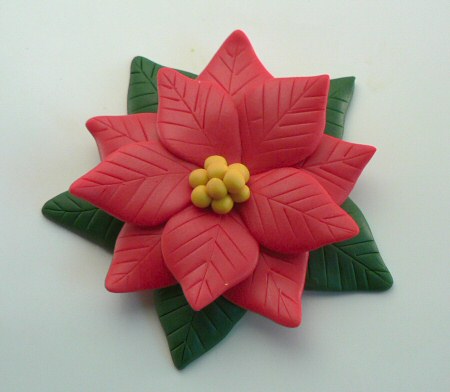
And you’re finished!
I hope you enjoyed this tutorial! Please leave me a comment if you did, and consider leaving me a donation. Thanks!
And, once you’ve made a poinsettia, please upload a photo to the PlanetJune Tutorials Flickr group so we can all see it!


Tinuola said
New to polymer clay, this is very nice and explicit, thanks
keykey said
wow! i tried it and it worked !!!!!!
June said
So glad you’re all enjoying this tutorial! I should make more polymer clay stuff – I really enjoy doing it!
Margo said
Very nice, I have one in the oven right now! Very easy to follow!
Thank you
Bri said
What an amazing tutorial! Whenever I work with clay I always find it hard to shape…..your style is amazing and you’ve sucsessfully made a beautiful poinsettia and a fabulously clear and well-written tutorial!
Daniel said
I’m always amazed at how “easy” things can be. I never seem to be able to figure it out myself though 🙂
val said
Great, I’ll try for the towels on table for Christmas (I don’t know if it’s correct in english !)
Thank you
Val
Martha said
I like your tutorials very much, your site was recommended by my sister in law and I love it!!! I have a question: Have you thought of making video tutorials for your projects?
Emily said
Nice tutorial!!
i will try making the poinsetta. By the way do you think you can make more tutorials especially food tutorials i can’t find any that good and are very repeatedly. Thank you please visit my blog at:
emilyknowsgoodcrafts.blogspot.com
Jana said
I was right. Your tutorial is fantastic, as always! I never thought of forming the leaves like that! And I DEFINITELY love the tile idea! I can’t tell you how many pieces got messed up by transferring them to a glass dish to bake! When I made my poinsettia earrings all those years ago, I simply rolled the clay and then cut the shapes out with my knife. But then I had to try and pick them up to lay on top of the others! Your method eliminates that “picking up” step that can squish your leaves! I brushed mine with that sparkle glaze. (If it’s still available) for a pretty shine. You are making me eager to get out my clay again! They are tiling all the buildings here, maybe I can find a chipped or broken piece that they can let me have! 🙂
lilad said
This is great! I’m trying it now.
Leanne said
Thanks June. I will have to make these for Family next year for ornaments!!
futuregirl said
Great tutorial, June! Very clear and well photographed. 🙂