PlanetJune Craft Blog
Latest news and updates from June

PlanetJune Blog: Latest News, Patterns and Tutorials

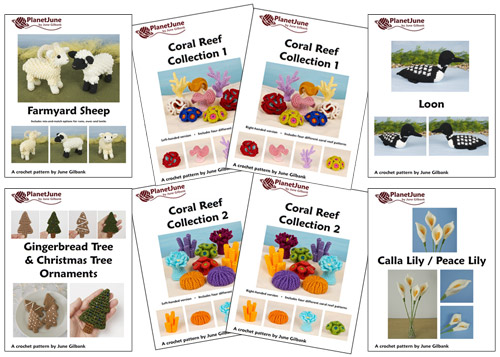
NEW: Pattern Project Galleries

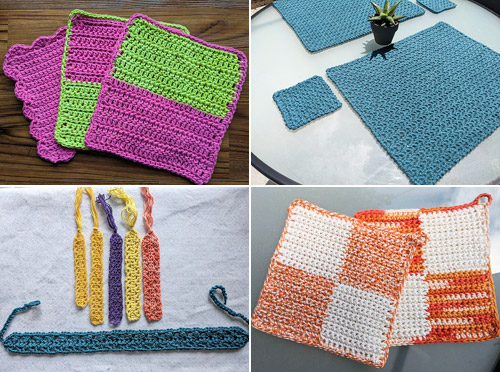
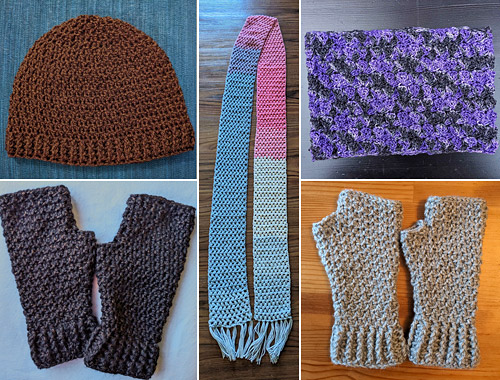
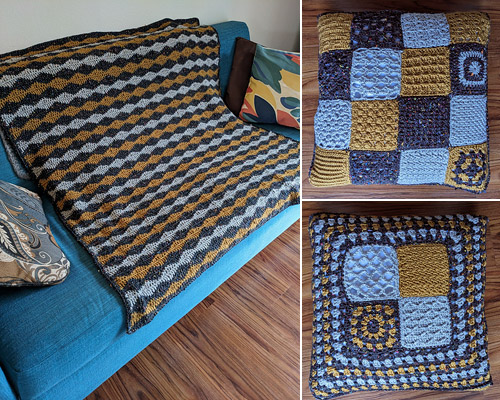
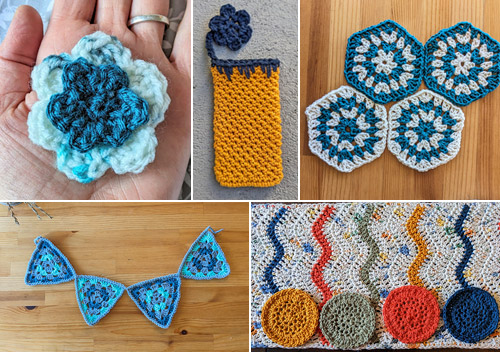
Isn’t it useful to see other people’s projects before you decide whether or not to buy a crochet pattern? Especially now, with the proliferation of scam sites and AI-generated ‘crochet’ images, seeing real projects from real people is the best way to know you can trust the designer you’re buying from.

I know I find the customer photos really helpful on larger e-commerce sites like Etsy and Amazon, so I spent the summer coding up this feature for PlanetJune too, and I’m so excited to have it up and running and filling up with gorgeous photos from my amazing customers!

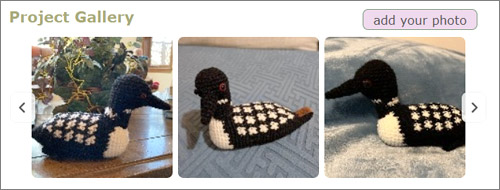
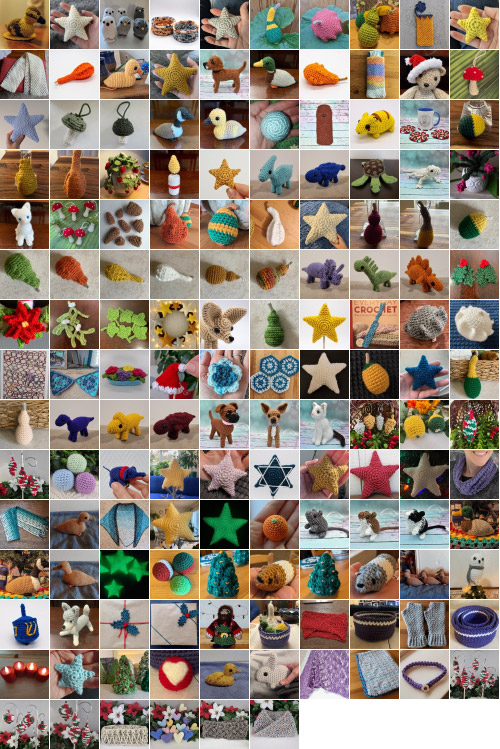
Now you can go to any pattern (or set) listing in the PJ shop and look for the Gallery & Reviews tab. You’ll see a scrollable carousel of customer pics:

PlanetJune customer project gallery example

(Then click any of the thumbnails to launch a lightbox so you can see the full-size photo, with credit given to the crocheter who made the project.)

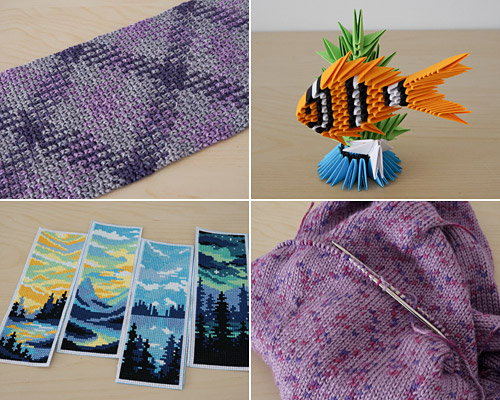
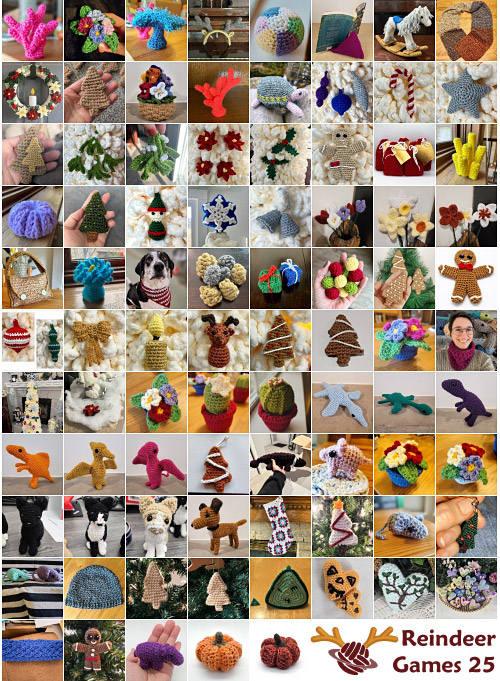
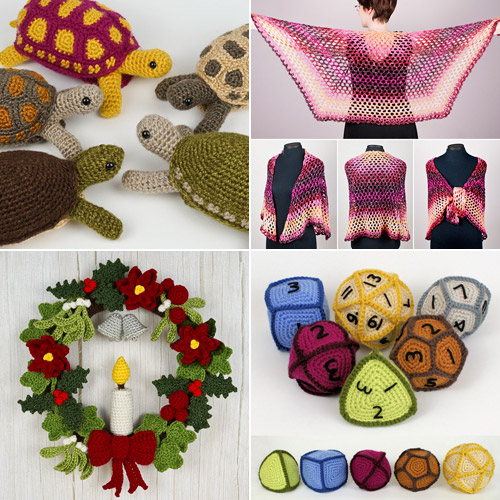
Here are a few more seasonal examples of beautiful customer-submitted photos you can see in the project galleries:

PlanetJune customer project gallery examples

Do visit any pattern listing in the shop to see its gallery in action! Here are links to all the patterns shown in the screenshots in this post, to get you started:

As the PlanetJune galleries are still new, there are currently only between 1 and 20 photos for most patterns, but I hope that we’ll see lots more submissions as time goes by and the galleries fill up with more beautiful projects – and I’d love to include your photos too!

Behind the Scenes

I’ve set up each gallery to display all the project photos for each pattern, randomly ordered, so there’s no preferential treatment, and each time a page loads you’ll see a different selection of projects popping up first.

Since the launch, I’ve also improved the functionality for pattern sets and multipacks, which now show a random selection of projects from all the included patterns, so you can get the flavour of all the patterns you can make without having to click away into each individual pattern in the set:

PlanetJune customer project multipack gallery examples

I’ll also be adding more features in future, for example I’m planning a main PlanetJune Customer Gallery that will show a random selection of customer projects from the previous month’s Top 50 patterns… but that’s another project for another day…

Add Your Projects

I hope you’ll upload your favourite photo for each PlanetJune project you’ve made!

Add your projects by clicking ‘add your photo’ from any shop page (see the first pic above), or visit your My Patterns page to see all your PJ patterns in one place. I’ve also completely revamped My Patterns with a cleaner look and new icons for each pattern for uploading your photo (camera) or writing your review (paper and pencil):

New 'My Patterns' options

(See the Gallery FAQ for submission guidelines, how to track your submissions, and full instructions.)

Bonus for Ravelry Users: If you’ve made lots of PlanetJune patterns (or even just a few), with your permission I’d love to grab all your PJ project pics (past and future) from your Ravelry projects without you lifting a finger – just email me with your Rav username and the email address you use for your PlanetJune account, and I’ll do everything else.


I’ve wished for years to have a way to see and display all your project photos, and now the project galleries are finally here and working beautifully, I hope you’ll find them really helpful too. I love seeing the submissions coming in, and I can’t wait to see your photos in the gallery!

Comments (6)

Coral Reef Collection crochet patterns

I’m very excited about my latest crochet designs – I’ve been planning and developing this pattern collection for a long time, and I’m so happy to be able to present the Coral Reef Collections today!

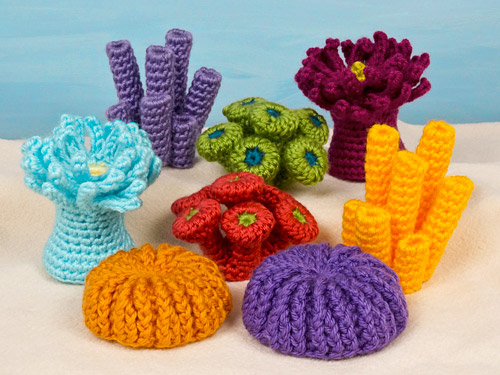
Coral Reef Collections 1 & 2 crochet patterns by PlanetJune

About Coral Reefs

Corals may look like beautiful underwater plants or colourful rocks, but they’re actually animals! Most corals are made up of thousands of tiny polyps that live together in colonies. There are soft corals that sway like plants in the water, and hard corals that build rigid, stony skeletons. These tiny polyps, working together, create reef ecosystems that support an incredible diversity of marine life.

Meet the Reef Dwellers

Each Coral Reef Collection design is inspired by a real reef inhabitant – from hard and soft corals to sponges, sea anemones, and zoanthids.

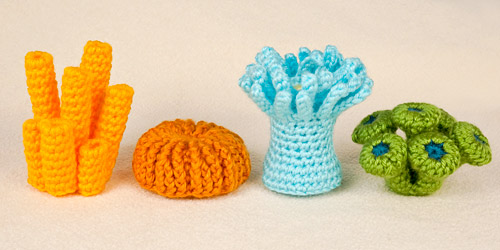
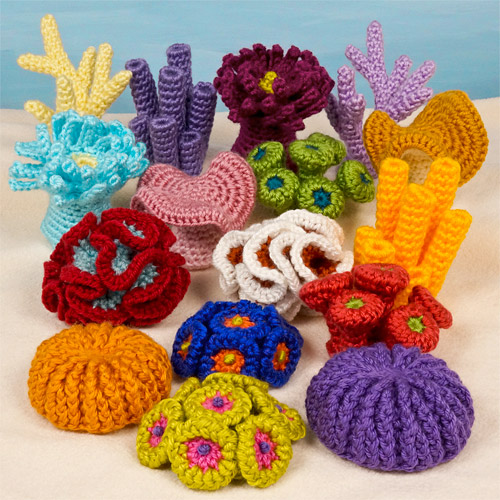
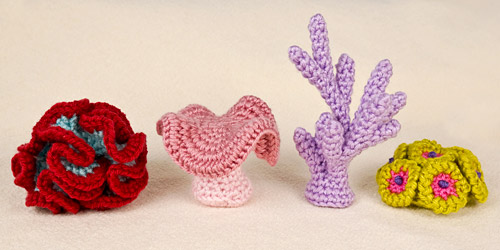
Coral Reef Collection 1 crochet pattern by PlanetJuneCoral Reef Collection 1 includes (L-R): Brain Coral (Symphyllia), Toadstool Leather Coral (Sarcophyton), Staghorn Coral (Acropora), and Button Polyps (Zoanthus) crochet patterns.

Coral Reef Collection 2 crochet pattern by PlanetJuneCoral Reef Collection 2 will include (L-R): Tube Sponge (Aplysina), Mushroom Coral (Fungia), Sea Anemone (Actinaria), and Trumpet Coral (Caulastraea) crochet patterns.
About the Designs

These innovative designs are all completely no-sew, and I’ve come up with lots of new techniques to bring these corals to life entirely through crochet! All you need is a hook, a few colours of yarn, and a little stuffing, and you can start creating your own reef.

Tip: These patterns are also great stashbusters – they’ll look amazing in almost any colour, and each piece needs no more than 35yds/30m of yarn per colour.

Coral Reef Collection 1 crochet pattern by PlanetJune

A single coral piece makes a lovely standalone decoration, and your reef display will become more and more spectacular as you add additional pieces in different colours!

With four patterns and dozens of step-by-step photos in each PDF, there’s a lot of details packed into these collections, so I’m releasing them as separate right-handed and left-handed editions. Choose your version before you checkout, and every photo will look exactly as you’ll see it while you’re crocheting.

Coral Reef Collection 2 crochet pattern by PlanetJune

Buy Now (and Save with the Preorder Bundle)

Getting all these details just right takes time, so I’m releasing Coral Reef Collection 1 now, with Coral Reef Collection 2 to follow in October. You’ll save $3.50 when you buy both together – but you don’t have to wait to get the deal!

Pick up the Coral Reef Collections 1 & 2 multipack today: you can download Collection 1 instantly so you can start crocheting your first four corals right away, and I’ll add the second PDF to your PlanetJune account as soon as it’s ready. I’ll also send you an email reminder with a download link when Collection 2 launches, so you can download it directly from your My Patterns page.

Here are the links:

Coral Reef Collections 1 & 2 crochet patterns by PlanetJune

I think these eight patterns are irresistibly cheerful and colourful, and I hope you’ll enjoy making all these corals and other reef inhabitants as much as I’ve enjoyed designing them all. I can’t wait to see your unique reef come to life!

Comments (6)

Loon crochet pattern

My new pattern is an unmistakable bird for Canadians (ETA: and Minnesotans!) – with a long, elegant silhouette and striking black-and-white markings, it could only be a Common Loon!

Loon amigurumi crochet pattern by PlanetJune

Loon Fun Facts

  • The Common Loon, also known as the Great Northern Diver, is mostly found on freshwater lakes in North America.
  • Loons are completely adapted for swimming and diving. Their feet are placed far back on their streamlined bodies which makes it difficult for them to walk on land, and they only come ashore to breed.
  • Loon parents carry their newly-hatched chicks on their backs to keep them safe from predators.
  • You might recognise the loon’s haunting call – it’s often (inappropriately!) used by filmmakers to convey an eerie or desolate atmosphere.
  • Here in Canada, our one-dollar coin is called a loonie because it features a common loon on the back!

About the Design

With this design, my goal was to capture the smooth lines of the loon and the iconic colour patterns that make the Common Loon so instantly recognisable, without making the pattern too complex.

Their breeding plumage is very distinctive: a white breast, white spots on the back, a white ‘necklace’ around the lower neck, and a narrower white ‘chinstrap’ at the top of the neck. Although I obviously simplified the markings for the pattern, I’ve included all the key features that you’d expect in a realistic loon pattern.

Note: Real loons have red eyes – that doesn’t fit my design aesthetic, but feel free to use red eyes for even more realism, if that appeals to you!

Loon amigurumi crochet pattern by PlanetJune

This design presented a few challenges:

  • The head and neck shape are more complex than they look – I had to come up with a new technique to keep my trademark smooth amigurumi appearance in a one-piece head and neck.
  • It took some careful planning and design to stop the spots from drifting to one side as the body progresses, without adding any colour jogs.
  • And I had a balance challenge to overcome too, as loon feet sit so far back on the body! But I got there: this loon can sit straight without tipping forwards or sideways 🙂

Loon amigurumi crochet pattern by PlanetJune

About the Pattern

Don’t be intimidated by all the colour changes! I’ve included lots of tips to help you manage the yarns as you crochet the neck, chest, and body spots, so you can get a beautiful result without cutting the yarn unnecessarily.

I’ve also included a complete step-by-step walkthrough for the special neck technique in separate appendices for right- and left-handers at the end of the pattern, so you’ll always know exactly what to do.

And, best of all, there are only 5 parts to this pattern, so once you’ve finished crocheting, you can stitch the parts together very quickly and your loon will be ready to display!

Loon amigurumi crochet pattern by PlanetJune

Ready to Crochet?

You can pick up the Loon pattern from my shop right now and start making your own black-and-white beauty!

Or, if you’re not ready to buy just yet, please add my Loon design to your queue or favourites on Ravelry, so you don’t forget about it:

I’m so pleased with how this unique bird design turned out, and I hope you’ll enjoy making it too 🙂

Comments (6)

How To Crochet Double-Size Amigurumi

I love crocheting soft and squishy Giant Amigurumi versions of my patterns using blanket yarn! They’re super fun and huggable, but giant amigurumi are more like decorations than playable toys: using a hook that’s wider than a finger always leaves gaps between the stitches that little kids could stick their fingers in.

giant amigurumi based on AmiDogs Corgi, Triceratops, Gingerbread Man amigurumi patterns by PlanetJune

So I started to wonder: what if I could crochet a version that’s still big and soft, but with the firmness and structure of a standard amigurumi? Could I use the same super bulky blanket yarn with a small enough hook to eliminate those gaps and create a perfectly cuddly kids’ toy?

I did some tests to find out, and here’s the result, courtesy of a not-so-Baby Octopus (from my Baby Cephalopods collection):

Double vs Standard Octopus from Baby Cephalopods Set 1 crochet pattern by PlanetJuneA double-sized octopus (left) has twice the size and twice the snuggliness of a standard-sized octopus (right)!

It only took me an hour to make my octopus, and I’m so happy with the result! Trying to see chain stitches in chenille yarn made the tentacles a little more challenging – I had to frog a couple of the arms and try again, but I got there in the end, and everything else came together beautifully.

Double vs Standard Baby Cephalopods crochet patterns by PlanetJune

I forgot how clean and simple these Baby Cephalopods are – such a joy to make! If you haven’t tried these patterns yet, I can highly recommend them. Set 1 includes the Octopus and Squid, and Set 2 has the Cuttlefish and Nautilus, or you can get the multipack that includes all four sweet tentacled babies.

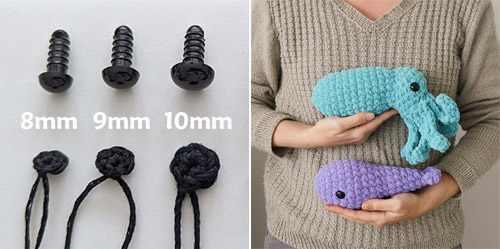
Now, back to my experiment: I found that using a 6.5mm (K) hook gave the best results for toy-making:

  • Smaller hooks make the gaps between stitches so small that it’s harder to insert your hook – especially with chenille yarn, where the texture makes the stitches harder to see.
  • Larger hooks create the softer ‘giant amigurumi’-style fabric with more space between the stitches.

The K (6.5mm) hook was the sweet spot – small enough to make a satisfyingly sturdy, gap-free fabric, but large enough to offer an easy, enjoyable crochet experience.

And, as a bonus: working with blanket yarn and a K hook, you end up with an ami that’s almost exactly twice the size of the original (for a standard sized amigurumi, worked in worsted weight yarn with an E hook). To demonstrate, here’s a comparison of three versions of my Tiny Whale pattern: Standard, Double, and Giant.

Standard vs Double vs Giant amigurumi whales by PlanetJune

As you can see, the Double whale (centre) is about twice the size of the Standard one, and significantly smaller than the Giant version. It’s a nice middle ground if you want something bigger and cuddlier than a regular amigurumi but not as yarn-hungry as a giant ami!

As this is the ‘goldilocks’ size, I’ve refined my amigurumi scale chart and replaced the old Mini Giant scale (which was such a clunky name anyway!) with the slightly smaller but much more satisfying Double scale:

Have you tried making standard amigurumi patterns with blanket yarn? If giant amigurumi feel a bit ridiculous, double-sized amigurumi could be just right for you! They use much less yarn and create a lovely plush huggable toy.

The Complete Guide to Giant Amigurumi ebook by June Gilbank - available in right-handed and left-handed versions

And here’s the best part: all the techniques I developed for giant amigurumi work beautifully at this scale too, especially my game-changing secure magic ring that’s perfect for chenille yarn. If you have my Complete Guide to Giant Amigurumi ebook, you’re already equipped with everything you need to make Double-sized amis too.

double-sized amigurumi crochet patterns by PlanetJune

I think double-sized amigurumi using blanket yarn and a K US/6.5mm hook might be the perfect fit for sweet cuddly toys – give it a go and let me know what you think!

Comments (3)

free crochet pattern: Calla Lily / Peace Lily

Here’s a new addition to my stemmed flower patterns: an elegant sculptural lily flower! With my new crochet pattern you can make Calla, Peace, or Arum Lily flower stems that look stunning in a tall vase and are perfect for modern floral arrangements, wedding bouquets, or Easter dĂ©cor.

calla lily / peace lily crochet pattern by planetjune

A fun fact about these flowers: the Calla Lily (or Arum Lily) from South Africa shares its elegant flower shape with the unrelated Peace Lily from the tropical Americas. Despite their names, neither of these plants is a true lily!

I made mine in classic white (off-white, actually – for that extra touch of elegance), the colour of Peace Lilies and the wild Calla Lilies that I remember from my time in Africa. You can also get creative with your colours: hybrid calla lilies come in a variety of colours including yellow, orange, pink and dark purple, so you can pick your favourites!

calla lily / peace lily crochet pattern by planetjune

While a few of these stems look lovely displayed alone in a narrow vase like this, you can also mix and match them with my other cut flower crochet patterns to create your own custom bouquet:

basic rose, daffodils, carnations and tulips crochet patterns by planetjuneHere are all my other stemmed flowers: Basic Rose, Daffodils, Carnations and Tulips.

As I like to reward people who chose to donate for my donationware patterns, the PDF version of the Calla Lily / Peace Lily pattern includes additional assembly photos, bonus tips if you want to make a more resilient flower, and my special technique for fastening off the yarn neatly at the base of the stem. As always, the pattern is free for you to use, and you need only donate if you’d like to thank me for my time in creating it, or if you’d like the easy-to-print PDF version.

Go to the free Calla Lily / Peace Lily crochet pattern >>

Or jump straight to donate:

Order the Calla Lily / Peace Lily pattern >>

Not ready to make it yet? Add it to your Ravelry queue:

Comments (4)

Nesting Season with Our Dove Family!

When we first moved into our forever home, we saw a pair of mourning doves trying to nest in next door’s porch. They failed. The sticks they piled on the ledge above the door kept blowing down, and, after a couple of days of trying, they gave up and moved on.

But this sparked my dream that one day doves would nest in my front porch. In all the countries we’ve lived, visiting doves (of different types) have always been a constant friendly presence, with their big eyes and soft cooing calls. These days, mourning doves regularly visit our garden: sunbathing and taking baths in summer; huddling together and fluffing up to stay warm in winter. Watching them raise babies would be a next-level privilege.

And I still can’t quite believe this, but my dream has come true, and it’s even better than I could have hoped for…

a pair of mourning doves sitting on a wooden nesting platform

If you’d like to follow along in real-time as this year’s chicks hatch and grow, I’m sharing live updates and short video clips of my dove family in the PlanetJune Discord – more on that later. But first, let me take you back to how it all began…

Building the Nesting Platform

I did some research to find a dove nest box design that would work well (I chose this open platform design from 70birds), and asked Dave to build it. He recycled some of the wood from our old IKEA futon frame, which had finally fallen apart on the journey back from South Africa. (Don’t you just love the idea that our old bed has now become a dove bed?)

Dave also mounted a motion-activated security camera facing the platform so we could monitor anything interesting that happened.

The first year we put up the platform, nothing happened – with hindsight, that was my fault. I’d asked Dave to mount the box where I could see into it, which meant it wasn’t high enough for the doves to feel secure. Last year, we moved it much higher on the wall, and what a difference – a pair of doves moved in as soon as nesting season began!

Nest Building

For a few days, the male brought twigs, and the female arranged them. This was incredibly frustrating to watch – she placed the twigs haphazardly and didn’t anchor them at all against the wind, so every day we found a new scattering of sticks strewn on the porch beneath the nest.

a pair of mourning doves starting to build their nest from twigs

But the pair persisted, and, with more determination than skill, they eventually had enough twigs to form a nest of sorts, and the female settled in…

Raising Babies

I’m so impressed with the dedication and care of the parents! Both birds took shifts all day to protect the eggs, and then the chicks, and mama dove kept them warm every night. It was hard to even get a glimpse of the eggs or chicks, as the parents rarely left them unguarded for more than a few seconds!

Here are a few key candid moments captured on the security camera:

dove nest with first one egg, and then two1st egg laid… 2nd egg laid…
dove flying away from the nest with half an empty eggshell in its beakAs soon as a chick hatched, the parents removed the shells to a safe distance (so they wouldn’t alert predators to the nest location)

The nest box was an unqualified success. Starlings, house finches and a robin took an interest, but the doves refused to give up their prime real estate! Within 2 days of the babies fledging, the parents would return to start their next clutch of eggs.

Doves always lay just two eggs, and with the exception of one infertile egg in the first brood, all our eggs hatched and were raised successfully.

Baby Dove Photo Gallery

Although the nest location and protective parents didn’t make photography easy, I did manage, with the aid of a stepladder, to get enough photos to show you the whole egg-to-fledge story (click any of the pics to see the full-size images):

The dove nest has been an absolute delight: saying hello to the doves every time we left the house; trying to catch a glimpse of a little head with pretty blue-lined eyes peeking over the edge of the platform; being serenaded by soft coos from the porch while we sat in our living room; and watching nine chicks grow and fledge over the summer!

Dove Nest Statistics

I studied all my camera footage to quantify the 2024 season:

Nest started March 31st
First egg laid April 2nd
Last chick fledged September 10th
Egg hatch time 14 days*
Chick fledge time 14 days*
Time between broods 2 days*
Number of broods 5
Total eggs laid 10
Fledged chicks 9

* Average times across the whole season

Congratulations to our superstar dove parents!


Dove Watch 2025

Now it’s nesting season again, and our doves (I romantically assume it’s the same pair) have already laid claim to the platform again. Hearing their warm calls once more and seeing them build their nest and settle into their egg brooding routine has reminded me of the joy I found in watching our dove family growing over the course of last year – I hope I’ve shared a glimpse of that with you in this story.

But this year will be even better! Last year’s video footage was good enough for me to monitor the doves and get some stats, but the clips were grainy and indistinct. We’ve just installed a new high quality camera with optical zoom, plus a server to store the footage.

mourning dove nest with a pair of doves and two white eggs

As you can see, the new camera gives a perfect view into the nest, so I can monitor the progress without disturbing the birds, and save high quality video clips of every stage. I can already tell the male and female apart by their subtle differences in colouring – something I couldn’t see at all last year – so I can get a much better understanding of their lives and routines.

Once the season ends, I’ll have thousands of video clips that I can pull from to produce my own little wildlife documentary!

Follow Along in Real-Time!

The first eggs in the above image should hatch any day now, and I’ll be sharing progress reports and short video clips in the PlanetJune Discord. If you’d like to follow my dove family’s story as it unfolds over the year, please join us there, and you’ll get the first look at this year’s chicks!


Nature is amazing, and I feel so privileged to share in the life of my pair of beautiful mourning doves as they patiently and devotedly raise their chicks. I hope you’ve enjoyed this glimpse into the life of our dove family, and that you’ll join me to follow their magical journey this year.

Comments (9)

first mid-gauge knitting machine projects!

I have a new (to me) knitting machine! The Studio LK150 is a mid-gauge machine, and a big step up from my Ultimate Sweater Machine, which is so basic it’s sometimes called a ‘toy’ (although it’s definitely not a toy, and I’ve made several sweaters with it).

LK150 knitting machineMy ‘new’ (to me) LK150 knitting machine

This machine had been in storage for about 30 years (it even came with a VHS instruction tape!), so I wasn’t sure how much maintenance it would need, but it was in pretty good condition: it was missing one needle and had a few more with slight rust spots. But the main problem was the sponge bar, which had never been replaced:

an old worn out knitting machine sponge bar

Most knitting machines have a sponge bar that runs across the tops of the needles and presses them down while still allowing them some flexibility as the carriage passes by. The sponge is a disposable part that should ideally be replaced every year or so when it loses its elasticity.

Tip: If you have a knitting machine, try tipping the whole machine forward. If the needles stay in place, your sponge bar is still good! If any of the needles slide forward, it’s time to replace your sponge bar.

comparing an old worn out knitting machine sponge bar with a brand new sponge bar

You can see how flat the 30+ year old sponge bar is compared with its new replacement! The middle of the old sponge completely disintegrated as I pulled it out.

With a brand new strip of sponge installed, all that was left to do was to replace the damaged needles, clean and oil the machine, and see if it worked…

And it did! I’ve made two test projects so far: a new dog sweater with worsted weight yarn, which is pushing the upper yarn weight limit for this machine…

dog sweater knitted with an LK150 knitting machineMaggie loves her winter walks!

…and a basic V neck sweater for myself using light #3 (DK) weight yarn – the first time I’ve tried to machine knit a sweater in a finer yarn than worsted weight.

sweater knitted with an LK150 knitting machine

This sweater may look familiar if you have a good memory – I unintentionally recreated this sweater – which was, coincidentally, my first ever attempt at using a knitting machine. But although the colour and styles of the two sweaters are almost identical, the yarn weight isn’t! Compare the stitch size of the new sleeve with the stitches in the old sweater body behind it:

sweater knitted with an LK150 knitting machineOn top: DK-weight sleeve; below: worsted weight sweater body

With the finer yarn, the stitches are much smaller, and I think the new sweater looks really neat as a result.

I prefer to finish all my knitting by hand – knitting the ribbed collar and cuffs on circular needles is almost as fast as converting plain machine-knit rows into ribbing, and knitting is much more enjoyable and relaxing than manipulating stitches.

For this sweater, I also used a centred double decrease to add a vertical bar in the middle of the V neck. I think I prefer it without the bar, but it does make a nice crisp centre line:

sweater knitted with an LK150 knitting machineA centred double decrease makes a straight line emerging from the tip of the V

‘Machine knitting’ sounds like a fully-automatic process and not real crafting, but using a manual knitting machine is surprisingly hands-on: you’re still counting all the rows, manipulating the needles and yarn to place every increase and decrease, moving weights and checking for dropped stitches. And I find it to be quite exhausting manual work! The key for me is to notice I’m tiring and walk away before I start making mistakes – it can take so long to fix a mistake that sometimes it’s faster to start the piece again from scratch.

I really like my combination of machine and hand-knitting: by knitting all the stockinette parts on the machine, I still get to design the sweater pieces myself and spend enjoyable hours hand-knitting the collars, cuffs, button bands and any fancy stitches, but I get to speed up the overall process.

I’m very happy with my new machine, and now I’m trying to decide what I should make next! Something a little more adventurous next time, I think – although that means I need to do some serious planning and designing before I can start…

Comments (6)

Farmyard Sheep crochet pattern

I’m so excited to have a new addition to the PlanetJune Farmyard today, and a new addition to my crochet patterns inspired by fibre-producing animals…

Farmyard Sheep amigurumi crochet pattern by PlanetJune

Farmyard Sheep is a mix-and-match pattern that lets you choose the options you want, to make different types of rams, ewes and lambs:

  • Horns: Add horns for a ram, or leave them off for most ewes and all lambs.
  • Horn length: To make shorter horns, stop crocheting whenever the horns reach the length you prefer!
  • Tail: You can choose to leave off the tail entirely.
  • Contrast colours: You can choose to make the fleece a different colour from the other body parts, or make the entire sheep in a single colour. You can also choose to make the hooves in a separate colour (to match the horns, if your sheep has horns!), or to have self-coloured hooves.

Farmyard Sheep amigurumi crochet pattern by PlanetJune

You choose! Make any of my pictured options in any colour(s), or assemble your own custom sheep and lambs from the included options – it’s up to you.

Farmyard Sheep amigurumi crochet pattern by PlanetJune

Tip: To make a sheep family with smaller lambs, crochet them with finer yarn with a smaller hook (or scale up your adult sheep with heavier yarn and a larger hook) – see my Scaling Amigurumi article for details.

About the Design

This pattern has been a long time coming – I’ve been adding to my notes with ideas for my sheep design since 2014 (that’s 11 years)! In that time I’ve tried several times to try to figure out how to make the fleece, but although my ideas all sounded promising on paper, none of them gave me a result I was happy with.

In the end, after a lot of experimentation, I developed my own crochet stitch to create a fleece that had specific properties I couldn’t find anywhere else:

  • crocheted as you go
  • finely textured surface
  • firm amigurumi-style fabric
  • no gaps between stitches where stuffing will peek out

Farmyard Sheep amigurumi crochet pattern by PlanetJune

I’ve called the end result the pip stitch, as it creates very small bobbles on the surface without forming a loose or gappy fabric. But even that wasn’t the end of the story; I still needed to figure out how to use this stitch to create the sheep design of my dreams, and that took the best part of another year to get right!

My first prototype looked very realistic, but just didn’t have my trademark PlanetJune cuteness, so it was back to the drawing board until I could find my signature blend of cuteness and realism… and I’m thrilled with the result! I actually gasped aloud when I added the nose and saw that adorable little face looking back at me for the first time.

Farmyard Sheep amigurumi crochet pattern by PlanetJune

And I’m delighted to report that those impressively-curved horns are achieved without any wires. All you need is yarn, a crochet hook, and a little technique magic – you’re going to love how it works!

Farmyard Sheep amigurumi crochet pattern by PlanetJune

Fun Fact: Unlike goat horns, which tend to point up and back, sheep horns usually curve around the head.

Design Reflections

There is a magic in design… It doesn’t come easy for me – creating clear instructions is my natural forte, not imagination – but I keep going, trying different things and tweaking my prototypes until it all comes together and it suddenly becomes exactly what it was always supposed to be. Although I don’t know it until I see it, suddenly it’s completely obvious: how could a PlanetJune sheep look any way other than this?

From the end result, it looks simple and straightforward, but you can’t see the 90% of mistakes and failed attempts that form the hidden mass of my design icebergs. But the delight when it all comes together makes it all worthwhile – there’s no other feeling like this!

Ready to Crochet?

You can pick up the Farmyard Sheep pattern from my shop right now and start on your own cute spring lamb or curly-horned ram in your favourite sheep colours!

Or, if you’re not ready to buy just yet, please add my Farmyard Sheep to your queue or favourites on Ravelry, so you don’t forget about it:

I hope you’ll enjoy my Farmyard Sheep pattern as much as I enjoyed designing it! Which version is your favourite?

Comments (13)

    navigation: arrow

    buy crochet patterns and accessories from my online store

    'Everyday Crochet' and 'The Essential Guide to Amigurumi' crochet books by June Gilbank

    Crochet video tutorials and step-by-step photo tutorials

    Free PlanetJune crochet patterns

    Frequently Asked Questions

    navigation: arrow

    Punchneedle Embroidery information, ebook & patterns

    Papercraft ebook & tutorials

    Free PlanetJune craft projects & tutorials

    Ravellenic Games: Team PlanetJune
    PlanetJune Reindeer Games
    PlanetJune Temperature Snake CAL

    June Gilbank

    Hi, I'm June. Welcome to my world of nature-inspired crochet and crafting. I hope you enjoy your visit!

    If you'd like to get in touch, you can contact me here.
    crocheted Canadian flag by PlanetJune
    Proudly made in Canada!
    A fanned-out pile of the books Everyday Crochet and The Essential Guide to Amigurumi, with text 'The answers to all your crochet questions at your fingertips - find out more'

    Want to say thanks? You can send me money in seconds at paypal.me/planetjune (over $20) or paypal.me/planetjune2 (under $20) or send me a donation through my shop.

    Or simply click through from my links before you shop at Amazon, Etsy, KnitPicks, LoveCrafts and more, and I'll make a small commission on your purchase, at no cost to you! Start here:

    ♥ Support PlanetJune ♥

    Tip: This link is also in the footer of every page!

    Thank you so much for your support!