PlanetJune Craft Blog
Latest news and updates from June

PlanetJune Blog: Latest News, Patterns and Tutorials

review & giveaway: Crochet for Bears to Wear

Let’s get this out of the way first: I was given a copy of this book to review. But I’m not being compensated for this review in any other way, and the following is based on my honest opinions!
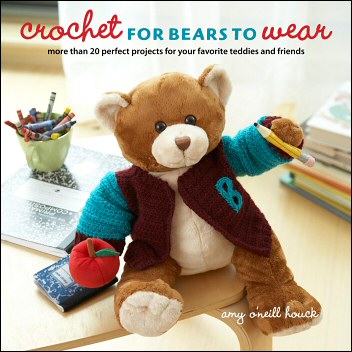
crochet for bears to wear

Crochet for Bears to Wear: More Than 20 Perfect Projects for Your Favorite Teddies and Friends is the new book by Amy O’Neill Houck. A totally original concept, this is a book of crochet clothing patterns in teddy bear sizes. Amy has previously written the companion book Knits for Bears to Wear, so it was about time we saw a crochet version!

In this review, I’ll cover an overview of the book, my experience in making one of the garments for my Fuzzy Bear, and keep reading to the end, because I’ll be giving away a copy to one of my readers!

Overview

Coincidentally, the first crocheted garment I ever attempted was one of Amy’s designs! (I still wear my Sweet Sweater around the house during the winter, although I added a few extra rounds to the bottom and sleeves since taking that photo, to make it extra snuggly.) I was impressed that the pattern was written so that, using a swatch, your own measurements, and some basic calculations, you can easily tailor the pattern to fit you perfectly. Although the patterns in this book are designed for standard 18″ tall bears and dolls, Amy uses the same approach here so that you can customize the garments to fit any favourite teddy, or even a small child.

What I like most about this book is that it uses the same crochet techniques and garment constructions that are used for real clothing, so it’s a great way to learn the basics without making the commitment of a full-sized sweater. If the thought of crocheting clothing intimidates you, seeing how a small, quick bear outfit comes together will hopefully give you the confidence to try crocheting something similar in a larger size for yourself!

It’s hard to be very critical of this book! My one comment would be that I had assumed that the ‘more than 20’ projects would mean there are over 20 outfits included. In fact, each item counts as a project, so, for example, the baseball jersey, cap, mitt and ball count as 4 projects. There are actually 13 individual outfits in the book, although contributions from guest designers Robin Chachula and Drew Emborsky and a real variety of styles and techniques ensure that there’s very little repetition, and every outfit your teddy bear could possibly need is represented.

Making a Garment: My Experience

Although it’s assumed that you’ll be making garments for purchased teddy bears and dolls, crocheting clothing for your own crocheted toys makes it extra special. My Fuzzy Bear, at only 11″ tall (standing), is far smaller than a standard 18″ teddy bear, so I thought that making a garment for him would really put the custom-sizing instructions in the book to the test! I chose the Gone Fishing Vest, although I used a silky acrylic yarn in a rich colour to give it a different look – Fuzzy Bear isn’t really the outdoorsy type 😉
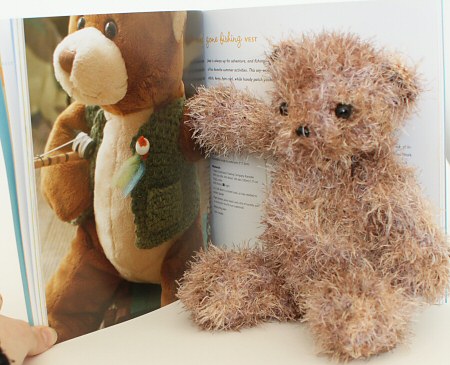
choosing a pattern
Fuzzy Bear says “This one please, but in plum!”

As the book explains, before starting to crochet a garment, you always need to make a gauge swatch using your yarn and the recommended hook size. Everybody crochets differently, and if you don’t check that your measurements match the gauge in the book, you could end up with a piece that’s far too large or small. My first gauge swatch, using the recommended ‘light’ weight yarn (Bernat Satin Sport, in my case) and the recommended G hook, was far too small. I actually made 3 swatches (with G, H, I hooks) before I met the required gauge, so it’s a good job I checked!

Next, to take Fuzzy Bear’s measurements using the handy panel in the book, so I could calculate my starting chain length. Here I hit my first little problem: in the front of the book, it explains all the measurements you may need for all the patterns, including the Chest Circumference and Chest Width. But the sidebar for my pattern just told me to “Measure your bear’s chest at the widest point” – hmm, is that the circumference or width? At first I assumed width. The pattern doesn’t explicitly mention that you start crocheting from the bottom and work up, which would have made it easier for me to figure out that it actually means the chest circumference (as the vest is worked in one piece, and the starting chain runs all around the bottom). Note: most of the other pattern customization boxes don’t have this ambiguity, saying e.g. “Measure the circumference of your toy’s chest” instead.

Calculations complete, I started crocheting. I loved the granite stitch used in this pattern – it really adds visual interest while still giving a non-lacy fabric and being easy to crochet. I made the back and then started on the decreases for the first armhole and neck. Here I hit my second problem: as Fuzzy Bear is so much smaller than standard, I had far fewer stitches than the standard pattern. By the time I’d decreased for the armhole AND neck, I had no stitches left to make the top of the shoulder, even after I tried to tweak the pattern!
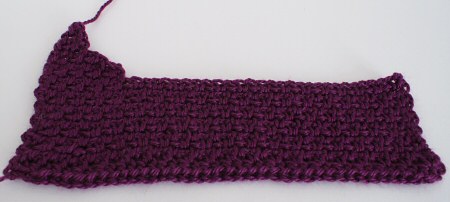
first attempt
That shoulder (top left) looks horrible – time to frog this attempt

Now, here’s where the customization panel gets even more useful. It takes different gauges into account: I could have stuck with my first swatch instead of trying to meet the gauge, and then used the customization panel to give me the size I wanted! This is a really useful feature if you want to make one of the patterns using a different thickness of yarn – even if your bear is exactly 18″ tall you can still customize the pattern to fit your yarn!

So I returned to my initial G hook (which, as an added bonus, actually gave me a far more even, less floppy fabric) and started over, using my own gauge and Fuzzy Bear’s measurements. I had no problem this time – the numbers all worked out perfectly and the piece came together easily. The instructions were all clear and easy to follow, and the main part of the vest worked up in no time!
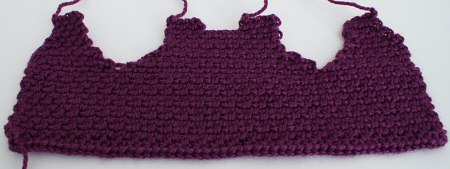
main piece completed
A diagram showing that this is the shape you should end up with would have been nice

From there it was just a simple matter of sewing up the seams, and crocheting the patch pockets. The customization panel didn’t mention that I’d have to resize the pockets too, to match the scale of the vest (although that should have been obvious – silly me!) so I made one supersized pocket before I realised my mistake 🙂

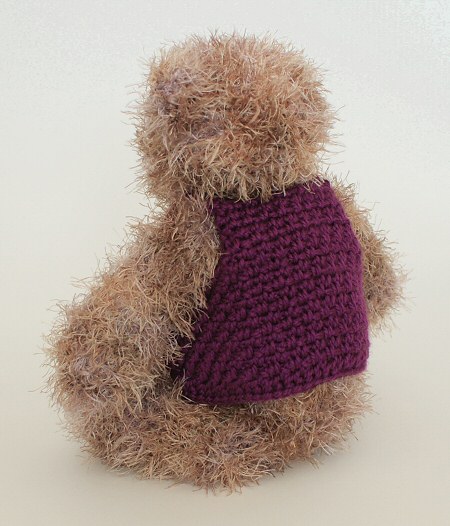
I’m really impressed with the result. Considering that Fuzzy Bear is less than 2/3 of the size of bear the pattern was intended for, you can see that the customization panel really does work! And doesn’t he look adorable in his new vest?
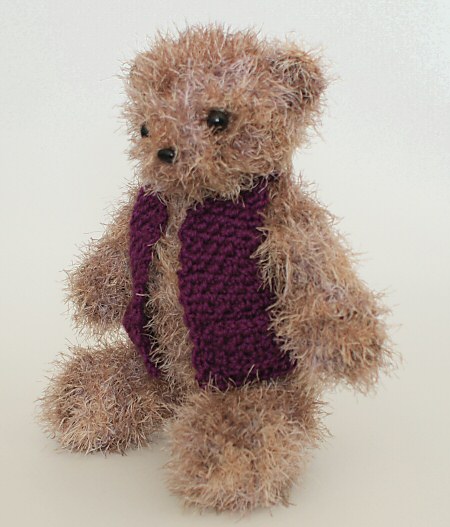
Fuzzy Bear in his new vest
A perfect fit!

Fuzzy Bear in his new vest
I love this stitch pattern

Win a Copy!

Now for the fun part! I have a bonus copy of Crochet for Bears to Wear to give away to one of you! To be entered, simply leave a comment on this post before 6am 12 noon EST on Monday April 26, 2010. Make sure you give your real email address in the ’email’ box (only I will be able to see it) so that I can contact you if you win! The contest is open worldwide. Good luck!

Comments (85)

poll: new card designs

I’m running low on business cards again, so I thought it might be time to try out another new design. I’ve put a few together and I’d love to hear your opinion: Which do you like best? Which (if any) do a good job of representing me and my crochet patterns?

In case you’re wondering why there’s no information on the card, the back of all my cards looks like this:

planetjune business card: back

Here are the three potential designs for your viewing pleasure:

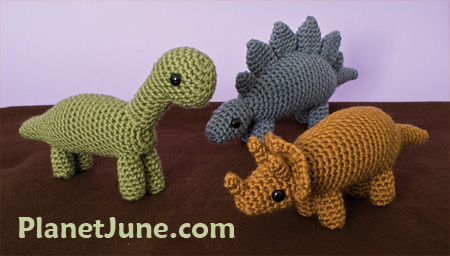
planetjune dinosaurs card
Dinosaurs

planetjune bears card
Bears

planetjune pocketami card
PocketAmi

Please cast your vote in the poll below (check as many options as you like!):

[poll=3]

Anything else to add? Please feel free to leave me a comment too. Don’t worry, I’m not emotionally tied to any of the designs, so criticism won’t upset me. Thank you so much – I really appreciate your opinions!

Edited to add: Please, if you vote ‘None of them!’, let me know in the comments what I could do better! If I don’t know what you don’t like, I won’t know how to fix it…

Comments (26)

review and win!

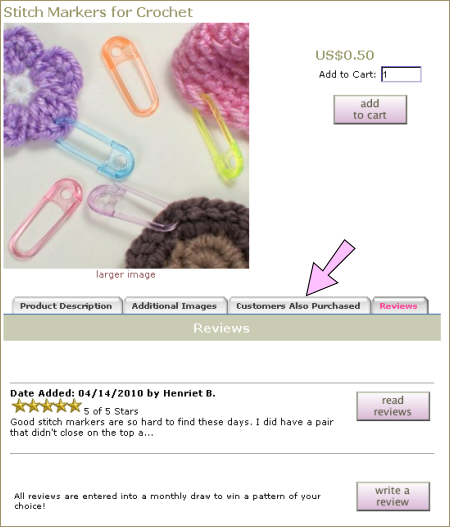
I’ve been upgrading the PlanetJune shop to make things a bit clearer. There’s a new tabbed interface for each product, so you can quickly find the information you need without having to scroll down the page:

planetjune reviews

I’ve also added a review capability, so you can see what other people thought of my products before you buy. I only launched this yesterday, so I only have 9 reviews as I write this post. A review system is no help to anyone unless there are actually some reviews for potential customers to read, so I’d like to ask for your help…

Have you bought any of my patterns, eyes, noses, stitch markers or stuffing tools? Is there anything about them that you’d like to share with the world? Please write a review! It’s easy to do – just browse to the item you want to review, click the Reviews tab and then click write a review.

As a small incentive (and this will be an ongoing thing, not a one-off promotion), all reviews will automatically be entered into a monthly draw to win a free pattern of your choice. So review 10 of my products and you’ll get 10 entries into the draw!

I hope these reviews will be useful to other people, and I encourage you to be honest – I will only moderate them for profanity or other inappropriate comments. Although I hope you won’t feel the need to leave a 1 star review, if that’s what you truly think of a product, that’s okay with me. And you’ll still be entered into the draw 🙂

Thanks very much for your help – I really appreciate it – and good luck in the monthly draws!

Comments

crochet for bears blog tour

A quick aside first: have you noticed I’ve made a favicon for PlanetJune? It was a challenge coming up with something recognisable at such a small size, so I just made a little bear in my site colours:

planetjune favicon

I think it’s cute! I hope it’ll help people to spot PlanetJune in the vast sea of websites out there. That’s one more task I can cross off my to-do list 🙂

The real point of this post is to let you know about the blog tour for Amy O’Neill Houck’s new book, Crochet for Bears to Wear. The tour starts today at Craftzine, where you can download a free pattern from the book!

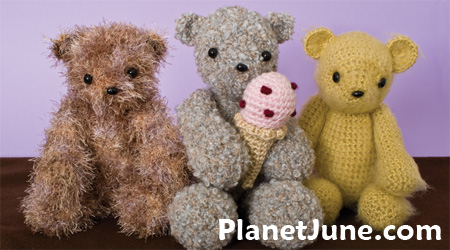
crochet for bears to wear

Amy has a list of all the daily stops on her blog tour. There are some fantastic crochet bloggers represented here, so visit all the stops and, as an added bonus, you might find some new blogs to follow!

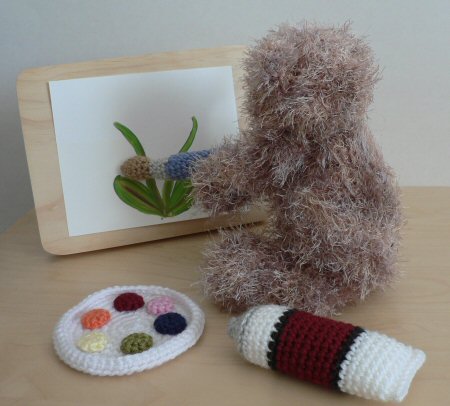
My stop is next Monday, when I’ll be reviewing the book and testing one of the patterns. As you can see from the photos below, my Fuzzy Bear loves accessories, so I’ll be crocheting him his own custom-sized piece of clothing…

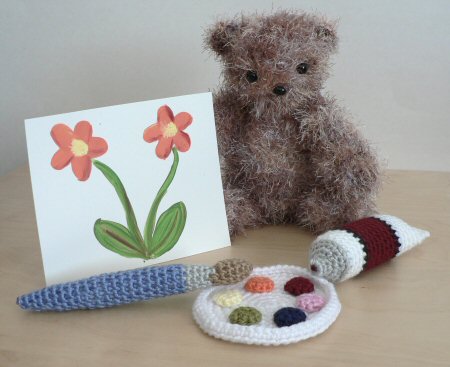
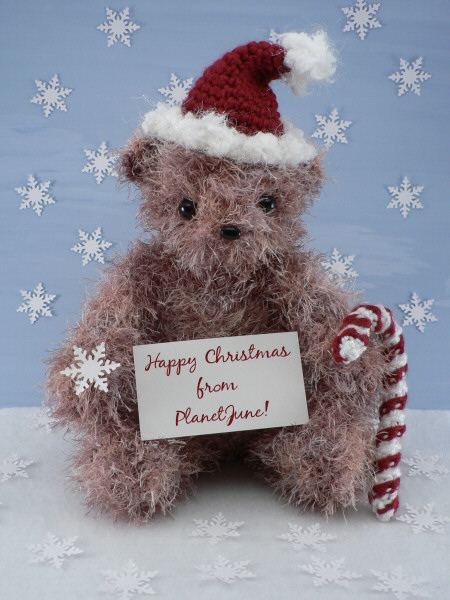
fuzzy bear painting fuzzy bear paints fuzzy bear at christmas
Fuzzy Bear loves to play dress-up

I’ll also have a copy of Crochet for Bears to Wear to give away to one of my lovely readers, so don’t forget to check back here on Monday for a chance to win! 🙂

Comments (6)

adventures in knooking

I bet many of you (unless you saw my tweets last weekend) are thinking ‘huh?’ right about now… But if you’re like me (a crocheter who doesn’t knit) you’re going to love this craft: knooking is knitting with a crochet hook. No, it’s not tunisian crochet, or any other type of crochet; when you knook you form genuine knitted stitches. The finished product is indistinguishable from a knit piece. Isn’t that cool?

I just don’t get along with the pointy sticks and I’ve often wished I could just put a hook on the end of a knitting needle so I could snag those stitches more easily, so the idea of knooking was very appealing. You do need to use a special hook to knook with – it has to be straight all the way down the length (i.e. no wider thumb grip) and have some way to attach a cord to the non-hooked end. You can modify a regular crochet hook, or a locker hook makes the perfect starter tool – you can find it in most craft stores, and it’s approximately equivalent in size to a G hook.

This weekend I had some time on my hands and thought I’d finally give knooking a try. I must be a bit of a masochist – I didn’t want to start with a boring swatch or dishcloth pattern; I wanted something that I could actually use once I’d finished it. I’d seen a free knitting pattern a few weeks ago for a Shaun the Sheep DS case and it seemed like it may be a feasible (and cute!) first project. Luckily it starts with the back, which is plain, before moving to the colourwork on the front, so I figured I’d have time to get used to the knit and purl stitches before introducing another element of difficulty.

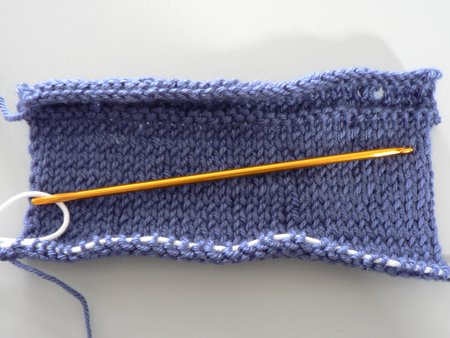
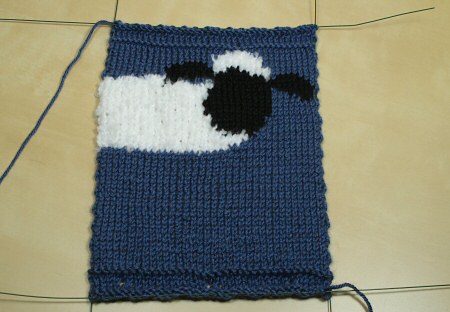
knooked shaun the sheep bag, pre-blocking
First knooking attempt in progress

Here it is after getting 2/3 through the back. (The hole at the top right is a buttonhole, not a mistake.) You can see my white cord running through the active stitches at the bottom of the picture. Each time you complete a row, you slide the stitches down off the bottom of the hook onto the cord, and then work into them again for the next row.

I think I may have wrapped the yarn wrongly a couple of times, because there are a couple of flubs in my beautiful knitted fabric. Also, my yarn was a bit splitty, which didn’t help when trying to form those awkward purl stitches. I was surprised that my stitches looked so even, considering this was my first ever attempt at knooking.

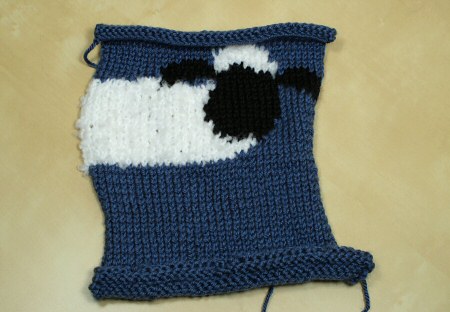
The colourwork was easier than I’d anticipated. I worked the design backwards (mirror image) because I’m left-handed and wasn’t 100% sure if knit stitches are symmetrical (although I think they are) so I thought I’d play it safe. I left yarn ends dangling on the inside while I knooked, and wove them all in later. My only difficulty was my choice of a bouclé yarn for the ‘wool’: it turns out that bouclé is just as challenging to knook with as it is to crochet with!

knooked shaun the sheep bag, pre-blocking
Before blocking

My finished piece was curling up a lot at the edges, so I used makeshift blocking wires (actually floral wire – I don’t have much need for real blocking wires in my daily life) and some steam blocking to straighten it out (yes, you can steam block acrylic!).

knooked shaun the sheep bag, wires attached for blocking
Blocking wires in place

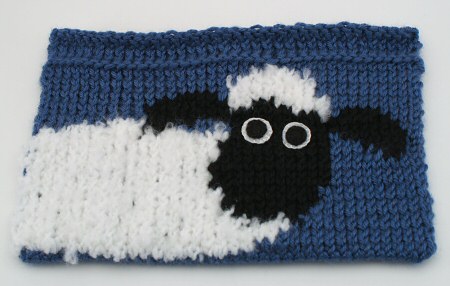
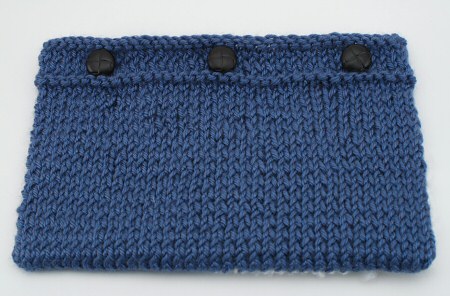
When it was dry, I seamed the sides and attached some buttons to the top. I wasn’t sure how to make the eyes, but in the end I made some from black and white felt strengthened with embroidered buttonhole stitches around the edges. The whole project cost me nothing: all the materials came from my stash (yay!) – even the buttons!

knooked shaun the sheep bag, front
Front

I could see by the end (the top border) that I’d really got the hang of it: my stitches were much more consistent than they had been on the back of the piece, although they really hadn’t been bad to start with. I think I can say that I’ve conquered the basics of knooking, and I’m looking forward to trying out another knitting pattern with my hook!

knooked shaun the sheep bag, back
Back

Have I captured your interest? If you’d like to try knooking, I recommend you check out the Knooking blog (I learnt how to knook from Jen’s excellent how-to videos) and Knooking Ravelry group 🙂

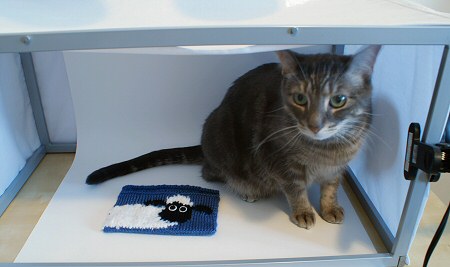
cat in light box
Maui insisted on ‘helping’ with the photoshoot!

Comments (42)

the ultimate finish for amigurumi

Would you prefer to see the video tutorial demonstrating this method? If not, read on:

I’ve written before about how there are several ways you can finish off a closed piece in amigurumi, and there’s no one ‘best’ method for closing that remaining hole to give the neatest finish. I’d like to officially change my opinion on that point! Here are my previous results:

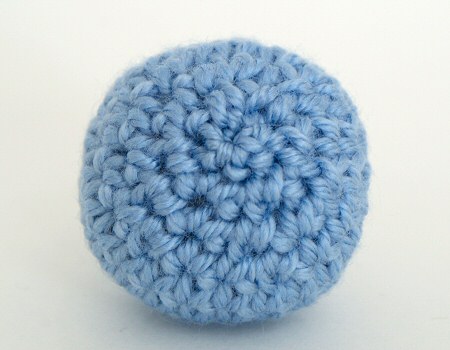
Since I wrote that post, I’ve been doing more experimenting, and I think I’ve finally found the definitive method to give the best possible finish to a closed piece in amigurumi. It works almost like a Magic Ring (and we all know how good that is!) so that’s why I’ve named this technique the Ultimate Finish for amigurumi:

ultimate finish for amigurumi by planetjune
Where’s the hole? This is the beauty of the Ultimate Finish

(Of course, to get the best finish, you’ll also want to use the Invisible Decrease instead of sc2tog for all your decreases – but that goes without saying, right?)

It’s nothing revolutionary, but this method really does give the best finish I’ve found. Give it a go and let me know what you think of my Ultimate Finish!

Continue to the Ultimate Finish tutorial >>

Comments (71)

all new!

Welcome to the new PlanetJune webserver! You should notice a huge speed difference from the old site – no more sluggish pageloads and pageload errors (I hope!). This was a desperate emergency move on my part to try to fix the problems, but I’ve now got a reliable new webhost, a virtual server of my own, and plenty of room to grow without causing any more problems, so it was all worthwhile!

PlanetJune crochet designs group on Ravelry

I have also finally set up a PlanetJune group on Ravelry. If you have a Ravelry account, please feel free to join!

And now onto some new products available in the PlanetJune store:

I’ve been listening to your requests for amigurumi noses and smaller clear eyes, so I’ve just added 6mm and 8mm clear eyes to the shop, and also two shapes of safety noses (oval and triangle).

clear safety eyes from planetjune

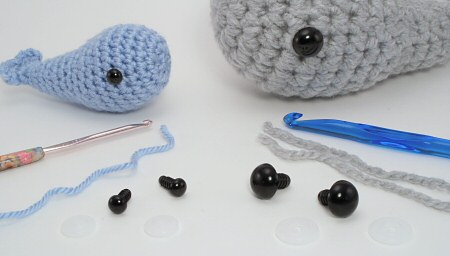
In case you don’t know about clear eyes, they are very versatile – they have a black pupil and clear iris, and by painting the backs (the flat side) or putting felt behind them, you can colour the irises any shade you wish! I now carry all sizes from 6mm to 15mm, so that should cover any project you need eyes for. (Of course, I still have all sizes 4.5mm-15mm in solid black too.)

oval safety nose from planetjune

triangular safety nose from planetjune

Safety noses work exactly like safety eyes – they come in 2 parts: a front, and a locking washer. If you need a nice black shiny nose for your amigurumi, check these out! I have oval and triangular noses in stock, in two different sizes for each shape.

aquaami polar bear crochet pattern by planetjune
Here’s a triangular nose in action!

You can find all my eyes and noses in the Eyes, Tools & Accessories category of my shop 🙂

Comments (3)

technical details

Some of you may have experienced problems when trying to access PlanetJune lately. I’ve been complaining to my webhost for months about intermittent errors that happen sometimes, for some people, and they haven’t been able to help at all – all they said was that there were no server problems. It’s been highly frustrating!

They finally admitted on Thursday (coincidentally, just after I renewed with them for another year – I hope they will give me a refund!) that my website is just too popular for them to handle:

You are receiving a very large amount of daily traffic to your sites and this is the cause of the long loading times and 503 errors. This kind of traffic is much too large for a shared hosting environment. I would recommend moving your sites to a VPS or dedicated hosting provider.

So, I’ve just signed up for a new and expensive VPS (virtual private server). This means that I won’t be sharing system resources with any other people any more, and I should have more than enough resources for PlanetJune.com pages (and FoldingTrees.com pages, incidentally) to always load quickly and without errors 🙂

I have another announcement and a new amigurumi tutorial for you, but I’ll save them until you can see them on the new server – there’s a waiting period until “planetjune.com” points to the new server (it takes a couple of days). If you’ve been having problems loading my shop or any other pages, these should all be resolved shortly – thank you so much for your patience!

Comments (4)

    navigation: arrow

    buy crochet patterns and accessories from my online store

    'Everyday Crochet' and 'The Essential Guide to Amigurumi' crochet books by June Gilbank

    Crochet video tutorials and step-by-step photo tutorials

    Free PlanetJune crochet patterns

    Frequently Asked Questions

    navigation: arrow

    Punchneedle Embroidery information, ebook & patterns

    Papercraft ebook & tutorials

    Free PlanetJune craft projects & tutorials

    PlanetJune Under the Sea CAL
    Ravellenic Games: Team PlanetJune
    PlanetJune Reindeer Games
    PlanetJune Temperature Snake CAL

    June Gilbank

    Hi, I'm June. Welcome to my world of nature-inspired crochet and crafting. I hope you enjoy your visit!

    If you'd like to get in touch, you can contact me here.
    crocheted Canadian flag by PlanetJune
    Proudly made in Canada!
    A fanned-out pile of the books Everyday Crochet and The Essential Guide to Amigurumi, with text 'The answers to all your crochet questions at your fingertips - find out more'

    Has my work helped you?

    You can also send me a donation through my shop, or simply click ♥ Support PlanetJune ♥ before you shop at Amazon, Etsy, KnitPicks, and more, and I'll make a small commission on your purchase, at no cost to you!

    Tip: This link is also in the footer of every page!

    Thank you so much for your support!