A couple of years ago, I bought 2 bottles of IKEA Pyssla – more commonly known as Perler or Hama beads, or the generic name, fuse beads. If you’re not familiar with them, they’re little plastic beads that you arrange into a pattern or picture on a special pegboard, then heat using your iron to melt and fuse the beads together. You end up with a plastic sheet you can use for keychains, coasters, or as decoration.
On a regular pegboard, each bead melts into a square shape, so you can use any pixelated sprite (a character from an 8-bit video game, for example) as an instant pattern. One square per pixel – it’s like an instant gratification version of cross-stitching, as you can complete a coaster-sized picture in just a few minutes.
So I borrowed some ideas from sprites other people have made, and searched for game sprite images to make some of my own. Here are my first few:
New coasters! Don’t worry, I’ve tested them and the heat of the hottest mug of tea isn’t enough to melt them 🙂 And, because they’re made of plastic, they’ll be easy to wash clean if they get dirty. You can add a background colour to make your coasters into squares, but I purposely chose round-ish sprites that are large enough to function as a coaster without a background – saves time and beads!
My tips if you’d like to try fuse bead crafting:
If you have access to IKEA, PYSSLA beads and shape boards are much cheaper than the Perler/Hama equivalents (and the bottle of beads is huge and will probably last forever!)
Pre-sort your beads by colour – it makes it much easier to create your designs.
Use tweezers to position the beads onto the pegboard more easily.
I ironed my coasters for longer than the instructions suggest, so they’d melt together more and bond together more strongly.
We all (I hope) know by now about the invisible decrease, to smooth out your amigurumi decreases and make your amigurumi look much neater. But what about increasing? Increasing doesn’t have as much of a problem as decreasing, but forcing 2 stitches into one hole does stretch out the hole and leave a slight gap beneath it compared with the surrounding stitches.
Is there any way to reduce this gap and make your increases less visible? Let’s do an experiment to find out…
The Setup
A standard increase consists of two single crochet stitches, both worked into both loops of the stitch below. But either or both of those single crochets could instead be worked into the front loop (FL) or back loop (BL) of the stitch below. Here are all the possible permutations of loops to work into to make a sc increase:
Option
1st stitch
2nd stitch
1
both
both
2
FL
both
3
BL
both
4
FL
FL
5
FL
BL
6
BL
FL
7
both
FL
8
both
BL
9
BL
BL
Option 1 is the standard increase, included for reference as the control: the yardstick to compare against, to see if we find a better option.
We’ll omit Option 9 (both stitches in BL only) from the remainder of the experiment, as I already know that the unworked front loop will leave a visible bar on the surface, so it clearly isn’t an ‘invisible’ candidate. That leaves us with 8 candidates, including the control, to include in our experiment…
The Experiment
I crocheted an amigurumi-style shape with a flat top and bottom, and 8 columns of increases around the sides (one column for each option 1-8). Each column includes 3 sample increase stitches, separated by a non-increased round above and below each increase so I could isolate each specific increase stitch. I noted any difficulty with creating each stitch combination as I crocheted.
Then I stuffed and finished the test piece as though it were a regular amigurumi, and then inspected the finished piece to see which columns of increases were least visible.
Results
You may not be able to see the differences clearly here – my observed results (below) are far easier to see by eye than by looking at the photos.
To reduce the hole size, one of the stitches must be made through both loops. => #4, #5, #6 rejected
If either stitch is made through the back loop only, it will leave a visible bar on the front of the work. (Note: Those visible bars may not look too bad in my sample, but would be far more prominent if the increase round and previous round are worked in different colours, as they’d show up as a bar of the wrong colour.)Â => #3, #8 rejected
It is easier to work the FL/BL stitch first followed by the both loops stitch than vice versa. => #2 is better than #7
#2 and #7 had the best appearance, but #2 is easier to work than #7, so that gives it the edge and makes it the winner in this competition. But, hang on, is there a genuine improvement over a standard increase?
Introducing… the Invisible Increase!
I know it’s hard to see the differences between all the options in the above photo – they’re much more noticeable when you look at the piece in 3D. To make it clearer that there really is a difference, I’ve drawn around the edges of the ‘hole’ beneath a standard increase and the new invisible increase:
You can see that the hole is much smaller if you use the invisible increase; in fact, if anything, I’d say it’s smaller than the hole beneath a normal sc stitch. Mission accomplished!
So, if you’re looking for a less visible increase for your amigurumi, here’s your answer:
Invisible increase: sc in front loop only of next stitch, sc in both loops of same stitch.
Unlike the invisible decrease, which I recommend you always use for amigurumi (unless there’s a specific reason not to, e.g. turning your work between rounds), I’d definitely call the invisible increase an optional technique, but if you ever notice that the holes below your increases look too large, give my invisible increase method a try and see if it alleviates the problem!
Loved this tutorial? I have so many more amigurumi tips and tricks to share with you!
Boost your amigurumi skills with my latest book, The Essential Guide to Amigurumi, your comprehensive guide to amigurumi techniques and tips.
Do you find my tutorials helpful? If so, please consider making a contribution towards my time so I can continue to create clear and concise tutorials for you:
Thank you so much for your support! Now click below for loads more crochet video and photo tutorials (and do let me know what else you’d like me to cover in future tutorials…)
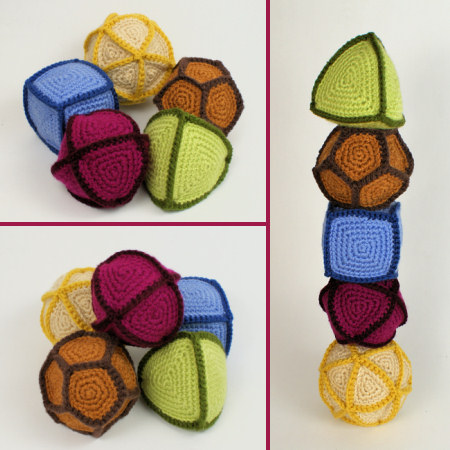
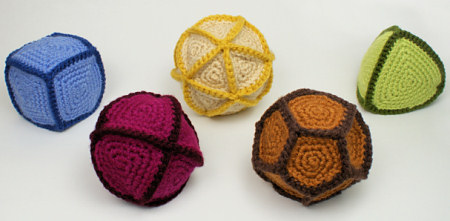
Not only fun to roll, stack, throw, and catch, these Polyhedral (‘many-faced’) Balls are very special: they are crocheted versions of the five Platonic solids; the only five geometric solid shapes possible where every face is identical and the same number of faces meet at each vertex (corner). Fun and educational!
Not ready to make it yet? Add it to your Ravelry queue!

I carefully designed the component shapes so that (within the limits of 1 round of crochet) the finished balls are all the same size. And my construction and edging methods mean that they don’t turn into spheres when you stuff them – the sides stay relatively flat without any hidden reinforcements, which not only makes them simpler to crochet together, but with no rigid plastic inside the balls, these are totally child-safe toys, made from only yarn and stuffing.
As well as being great as toys for kids to play with, they make good stress toys for adults! Plus I’ve discovered an excellent concentration/relaxation game: try balancing them all, one on top of the other – it is possible (provided the tetrahedron is always on the top), but surprisingly difficult to get all 5 to balance. You’ll see I managed it for my cover pictures – there’s no photo trickery there 🙂
If you’re not tempted yet by the fun or math-geeky aspects of these balls, here’s one more fact that might persuade you: these are no-sew patterns. 100% crocheted, you only need a yarn needle to weave in a few ends and you’re finished! And most of the ends are cunningly hidden on the inside, so even the end-weaving is very minimal too.
This pattern includes:
Crochet instructions for the 5 component shapes
A step-by-step photo tutorial for how to crochet the special edging
Right- and left-handed step-by-step assembly diagrams, if you’d like to assemble your balls in the same order I did (leaving the minimum number of ends to weave in)
Tips for speedier assembly and less yarn ends
A special technique to improve the look of the finished corners
This is also a modular pattern: although it includes all the detailed instructions you need to be able to recreate these balls perfectly – 16 pages total – if you’d like to save on paper and ink, you can choose to print only the pages with the pieces you need: a) the crochet patterns, b) the general assembly photo tutorial and tips, c) the right-handed assembly order diagrams and/or d) the left-handed assembly order diagrams. If all you want to do is print the crochet patterns for the 5 component shapes, that’s all included on one page! I’m doing my bit for the environment 🙂
Gamers take note!
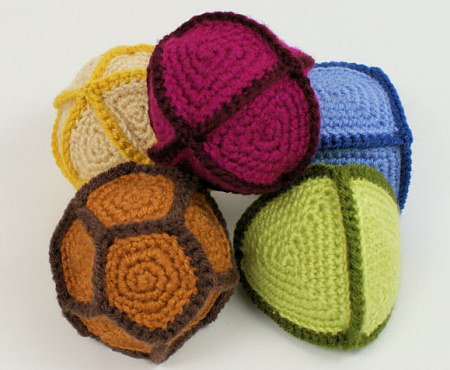
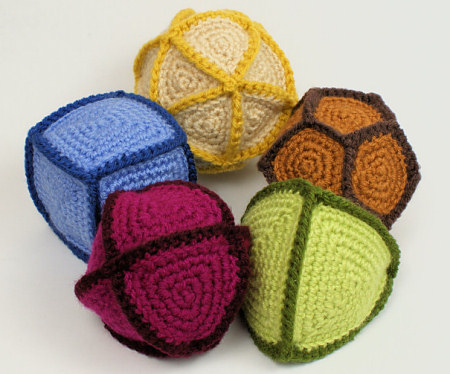
Now, I don’t know how much of a geek/RPG audience I have, but there’s an obvious application to these balls that is just missing one little piece: with this set, we have a d4, d6, d8, d12, and d20… We’re just missing a d10 to have a complete set of gaming dice! The construction and ridged edging of these balls mean that, as well as being a cute decorative set, they can actually even be used like real dice: they’ll always land on one face. (To actually use one as a die it’s best to throw it up in the air, spinning, and let it land – as it’s large but lightweight, unless you have a large area to roll it across, you’ll get a more random result if you throw it in the air first.)
The only problem is that a d10 is not a platonic solid – its shape is a little more complicated, as each of the 10 sides are slightly truncated kite shapes. I can do it, of course, but it would take a little more time, and trial and error, to figure out a) the right shape for a d10, and b) the right size so that the finished ball would match the rest of the set. So, the question is, would there be a demand for a 10-sided dice ball to complete this set?
If so, I’ll design an add-on to this pattern that would include:
A truncated pentagonal trapezohedron (better known as a d10 to gamers) ball
Instructions for how to properly label the sides of all 6 balls to turn them into a set of functional gaming dice (embroidered numbers would look great for this, or fabric painted numbers would be a far easier option if you’re not confident in your embroidery skills!)
So please do let me know in the comments if you’d be interested in buying the add-on pattern. I mentioned it on Facebook yesterday and I’ve already had a small positive response, so I need to know if there are more interested gamers/geeks (or people with gamers in the family – what better Christmas present than a set of giant crocheted gaming dice?!) before I design the d10. I’d do it with my commissions process, but of course I’m not going to charge anyone $6 for an add-on pattern!
This is the twelfth post in my monthly series on the fascinating nature I encounter here in South Africa.
That’s a whole year of photos, and so I think this is a good point to take a step back and make some changes…
I really enjoy sharing my photos with you, but the monthly deadline has added too much pressure to my overly-busy life, so, after today, I’m changing the format to an occasional series instead of a monthly one. That means I’ll be able to do a post when I have something amazing to show you and have the hours necessary to first choose and edit a handful of photos from the hundreds I’ve taken, and then research and write the accompanying text.
I know this decision will disappoint some people, but writing these posts has become more of a burden than a joy, and continuing like that makes no sense. One post a month doesn’t sound like much, but my business has me working through most of my waking hours at the moment: I need to do less, so I can reclaim my life. With the deadline pressure removed, I’ll be able to write my nature posts when I want to, and they’ll be better for it.
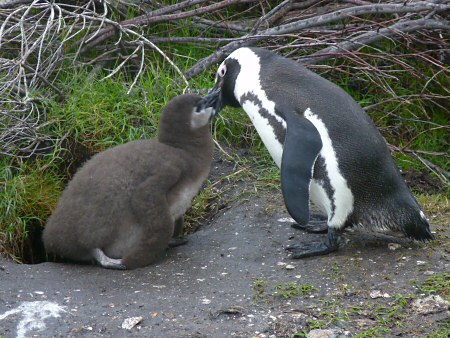
For my final monthly post, I’ve selected the most interesting photos I haven’t had a chance to show you yet, starting with one from today! We checked in on the penguin colony (see my previous photos here) and the first babies are hatching – African Penguins are endangered, so this is wonderful to see:
A fluffy African Penguin chick emerges from his burrow (left) into the rain, to be fed by one of his doting parents.
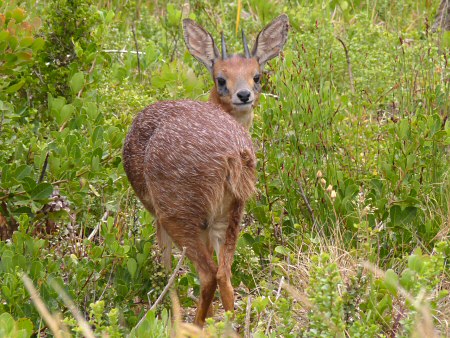
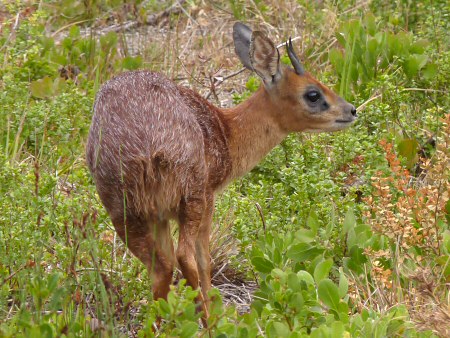
A couple of months ago, I saw, in the distance, a tiny antelope cross the road I was driving along, and noted where it had disappeared into the bushes. I pulled over when I reached that point, and discovered that it was grazing in full view a couple of metres back from the road! We’d have driven right past it if I hadn’t happened to see it and known where to stop and look:
This adorable mini antelope was easy to identify as a Cape Grysbok (male) – it looks exactly like all the Cape Grysbok photos I’ve seen online, which makes our Christmas mystery antelope even more of a mystery, as it’s clearly not the same species as this cute little guy…
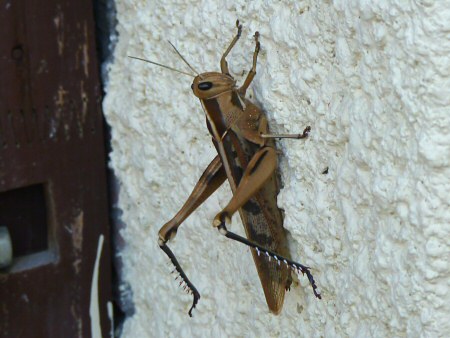
Okay, now scroll down quickly if you hate giant bugs…
This grasshopper (in my garden) is absolutely enormous – at least 3″ long! Very interesting at a distance, but the time it flew directly at my face was not fun…
Okay, you’re safe, we’re back to cute now:
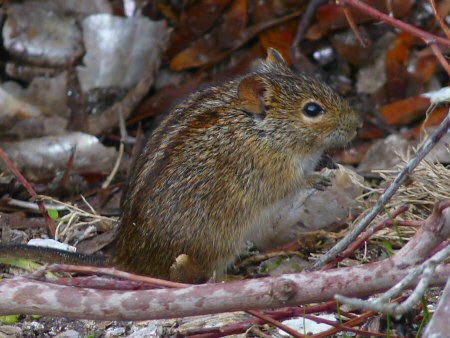
At first sight, we thought this was a chipmunk, but it’s actually a striped mouse (there aren’t any chipmunks here). Very cute!
We have access to such a variety of wildlife here, all within a couple of hours (or much less) from home. Both of these photos were taken less than half an hour’s drive from our house:
Not the greatest photo, but I hope you can just about see an adult (left) and 2 baby dolphins (back, front) in this photo.
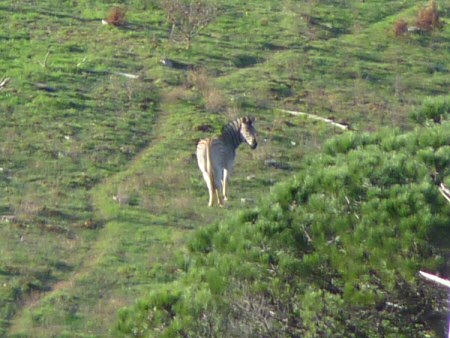
And this is a terrible photo apart from the content: a real wild zebra! We’ve seen them a couple of times before, but only from the road, so this weekend I had my first opportunity to capture one with my camera (from a great distance, hence the photo quality), on the slopes of Table Mountain.
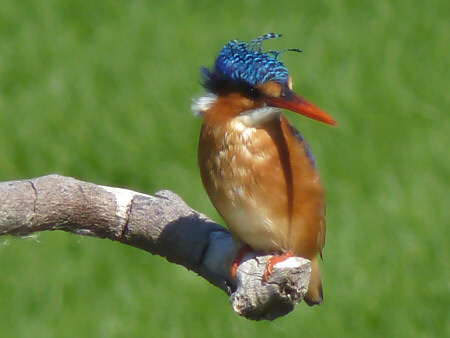
I’ll be aiming to get some better photos of both dolphins and zebras in time. If you’ve been avidly reading these posts, you may remember the sub-standard kingfisher photos I showed you a year ago. A tiny, lightning-fast, nervous bird is not easy to photograph, but, thanks to a bird hide, some patience, and figuring out the manual focus setting on my camera, I was finally able to take some good Malachite Kingfisher photos:
I think this is my favourite – not the most dignified shot, but I love how the tiny striped feathers on his head are blowing about in the wind!
Putting these posts together has been a lot of work, but also a nice record of our first year in South Africa. I’ll obviously never stop appreciating and photographing wildlife – both for fun and as inspiration for future designs – so I’m sure I’ll have more photos to show you soon as time permits.
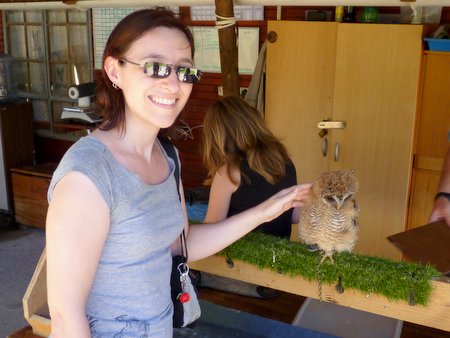
At a bird sanctuary, I stroked a little wood owl! It was incredibly soft and fluffy.
As a grand finale to this year of nature appreciation, I thought you might like to see this time-lapse video I recorded of a spectacular sunrise over the city of Cape Town. I recorded it exactly one year ago today, but hadn’t found the time to edit it until now. This was taken from the apartment we lived in when we first arrived in South Africa, which, although cold and inconveniently situated miles from the observatory, had a spectacular view out over the city and harbour:
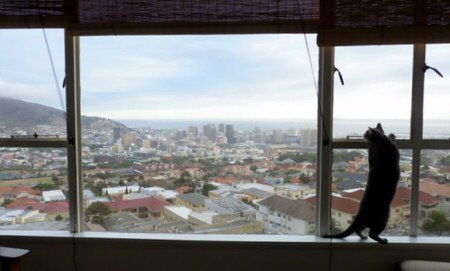
Maui liked the view too
Now we’ve exchanged the commute and the view for our own little house in the suburbs, a garden full of wildlife, and a beautiful river just down the road. It was a good trade, but I’m glad I have this video to remember the city sunrise by, and I hope you’ll enjoy watching it too:
Click through or full-screen it to see the full size version
Thank you for accompanying me through my year of nature photos – please leave me a comment if you’ve enjoyed this series!
Maui loves his double-wide corrugated cardboard scratchers – it’s the only type he’ll use. The pet shops here are tiny, with very little selection, and this type of scratcher doesn’t seem to be available anywhere. Luckily, we have an almost-infinite supply of boxes stored in our garage, which I kept after our move for just such thrifty/crafty purposes…
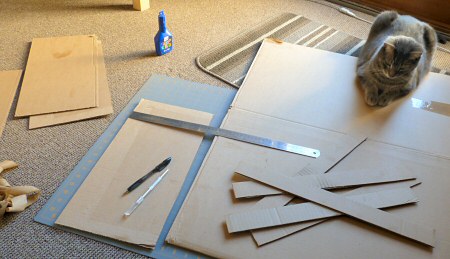
Maui supervises as I get to work
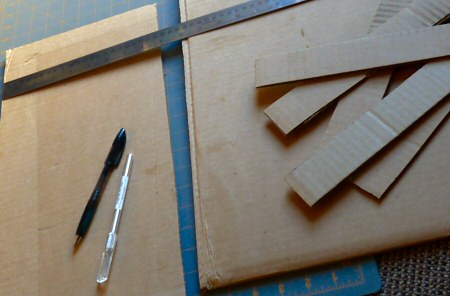
The flaps of the moving boxes just happen to be exactly the same width as the length of Maui’s old scratcher, so I kept the old outer box and cut 1.75″ strips of corrugated cardboard to make a new scratching surface. Measure, mark, cut, repeat… I needed 60 strips to fill the old outer box.
Measuring and cutting strips of cardboard
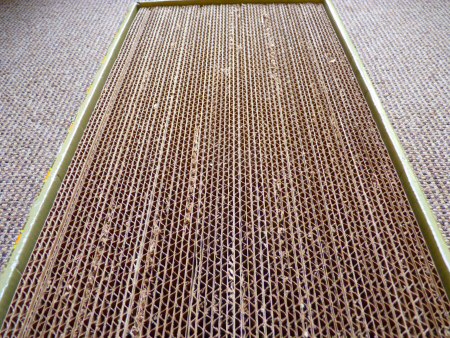
After that, I just ran a line of white glue along the centre of the length of each strip, stacked them all together, and applied pressure for a couple of minutes so they are all packed tightly together. Edge on, you have the perfect scratching surface for the demanding kitty:
As good as bought!
Cutting 60 strips was a lot more effort than I thought it would be – I had to split the task over several days, as my hand holding the ruler in position would start to ache after 5 or 10 strips. If I still had access to buy a new scratcher instead, I would. But, as I don’t, it’s worth a little hard work to make one for Maui every now and then.
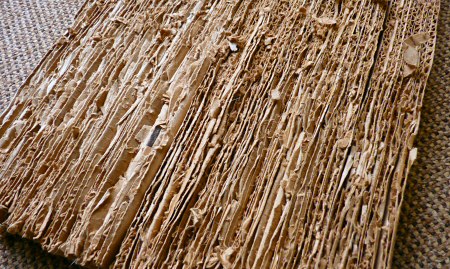
This is the state of the old one – better that Maui does this to the cardboard than to our furniture!
As a bonus, it’s fully reversible, so when it looks like the photo above, I can just flip it over, and Maui will have another new scratching surface to decimate before I have to make another one.
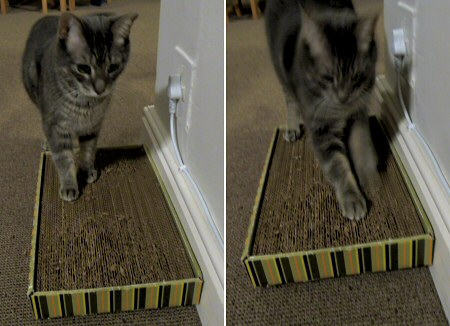
After extensive quality control testing, Maui proclaims it totally scratch-worthy.
I have a new Crochet Quickies video for you today, showing how to make clean colour changes for amigurumi. This is the same basic technique I explain in my original Changing Colour tutorial, and after the video I’ve also added all my advice on what to do with all the yarn tails you end up with when you’re changing colour.
In this short video, I demo the colour change technique, and show you what happens if you don’t use this method!
(I’ve made this video now for a reason: you’ll need to know this as background info for a brand new exclusive crochet technique that I’ll be demonstrating in my next crochet video…)
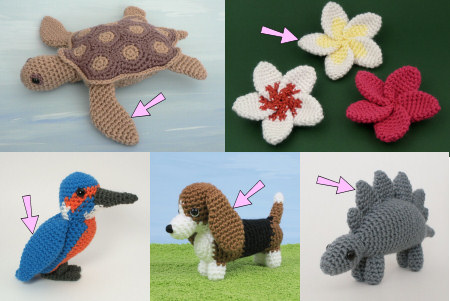
Flattened shapes are a basic in amigurumi for creating rigid, flat elements like ears, beaks, wings, hands, feet, flower petals, leaves, etc. Here are a few examples from some of my patterns that use flattened shapes:
All these amigurumi use flattened pieces in different shapes and sizes (marked here by arrows). Clockwise from top left: flipper, petal, plate, ear, wing.
There seems to be some confusion about how to flatten the shapes after crocheting them (see the comments left on my Plumeria pattern for an example of this!) so I thought I’d spell it out with this tutorial so I can refer back to it whenever people email me for help in future.
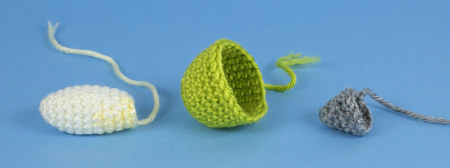
For any shape that will be flattened, it’ll start out looking like a cone or cup shape. The exact shape and dimensions depend on the pattern and the required shape for the finished piece; it may be:
very long and thin or short and wide
pointy tip or rounded tip
tube-shaped or cone-shaped or widening and then narrowing
… or something in between! Here are a few examples:
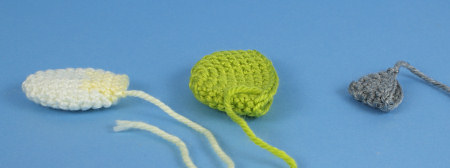
All the pre-flattened shapes in this picture have the magic ring on the left and the open edge on the right.
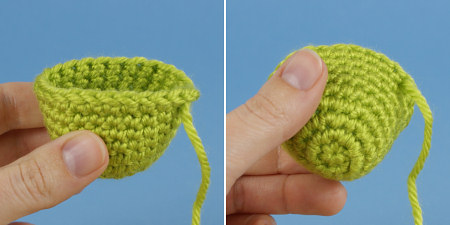
But, whatever the specific shape, it will always have the magic ring at the bottom, and an open edge (which you crochet around) at the top:
Before flattening – note how the open edge runs around the top and the magic ring is at the bottom.
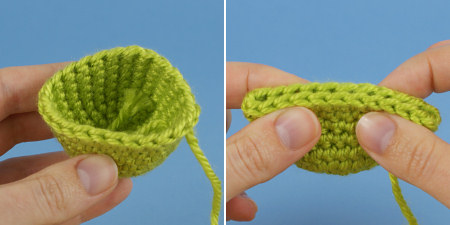
When you flatten it, you’ll always bring the two sides of that open edge together:
Squash the front and back of the open edge together to flatten the piece.
And then continue to flatten the entire piece, right down to the magic ring.
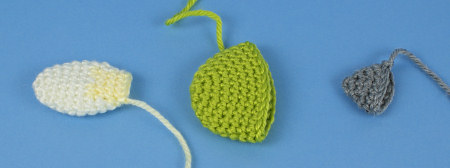
All the flattened pieces from the top…
…and from the side. Note that, in these pictures, the magic rings are all still on the left, and the open edges on the right.
The magic ring will form the tip of the item (ear, petal etc), and you’ll stitch it to the base piece (head, flower, etc) by the open edge – which now looks like two parallel rows of stitches.
That’s all there is to it! I hope this clears up any remaining confusion about how to flatten and attach these pieces to your amigurumi.
Loved this tutorial? I have so many more amigurumi tips and tricks to share with you!
Boost your amigurumi skills with my latest book, The Essential Guide to Amigurumi, your comprehensive guide to amigurumi techniques and tips.
Do you find my tutorials helpful? If so, please consider making a contribution towards my time so I can continue to create clear and concise tutorials for you:
Thank you so much for your support! Now click below for loads more crochet video and photo tutorials (and do let me know what else you’d like me to cover in future tutorials…)
Finally! 2 months after I announced my new logo, I’ve finally launched the new blog layout today. (If you’re reading this in a feed reader, please click through to get the full impact!)
Hopefully this won’t look too new and strange to you; the purpose of this redesign wasn’t to give my blog a new look, but to make it easier for you to use, and to incorporate the new logo.
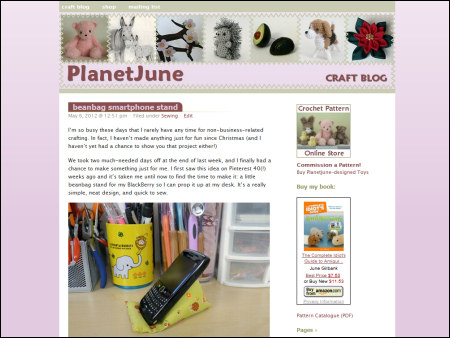
Here’s the old look, as a quick reminder:
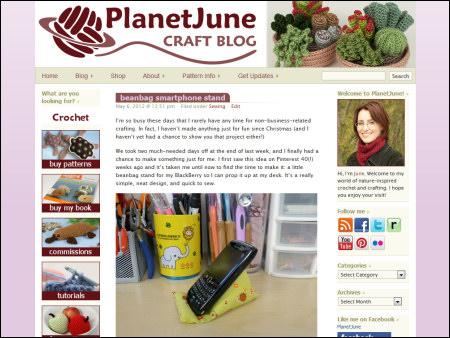
And here’s the new and improved version:
The new layout is slightly wider, which gave me space to add an extra sidebar down the left-hand side with quick links to the things people most often look for on my site. The actual sidebar contents are still in progress – I’d like to add some more prominent links to my Ravelry group and Flickr group, a link to an as-yet unwritten page for my crocheted art, and other things as and when I think of them – but that can wait until I have time.
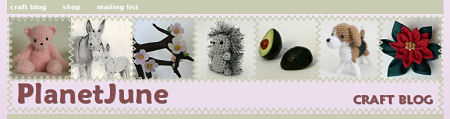
I think the biggest improvement is to the header area. Gone is the ‘patchwork’ of images at the top that confused people into thinking they were all pictures of crochet patterns:
Now there’s just one large clear photo, but if you refresh the page (or click to a different page on the blog) you’ll see that the image changes – you get a random one each time – so it hopefully still gives a feel for the variety of my patterns.
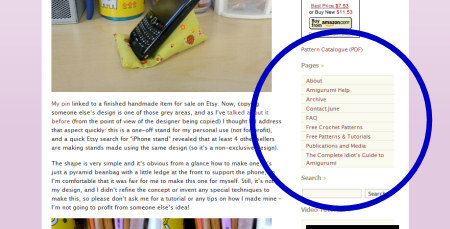
The almost-invisible main menu located above the header is gone (did you ever even notice it was there?!), and these impossible-to-find text links in the sidebar (I finally realised that a heading called ‘Pages’ means nothing to non-bloggers!):
Ugh, big block of random text links (circled in blue)
All replaced by a more complete menu bar below the header. Everything you need to navigate my site is organised into drop-down menus, and there’s a more prominent Search box on the right.
I still have to redo the rest of PlanetJune to match the new blog design and make it all more useable, but that’ll take a lot longer – I’d anticipated I’d need 2 weeks to complete the blog redesign, and it’s taken 2 months! I also need to figure out a better way to organise my crochet tutorials – now I have lots of photo tutorials and a growing collection of video tutorials, I’m going to need to find a clearer way to present them to you. Piece by piece, I’ll keep working on it all in between everything else – my goal is to have it all completed by the end of the year.
But, for now, I hope you’ll at least find the blog much easier to navigate! I’ve built up a lot of excellent resources on my blog (crochet and craft tutorials, free patterns, videos, etc), but they aren’t much use if you can’t find them 🙂