blue lace-sleeved cardigan
Before I start, I’d just like to say Happy Thanksgiving to my fellow Canadians!
This is sweater #7 of my ‘learn to knit by making a dozen self-designed sweaters’ project. (Here are links to #1, #2, #3, #4, #5 and #6, if you’d like to see my progress.)
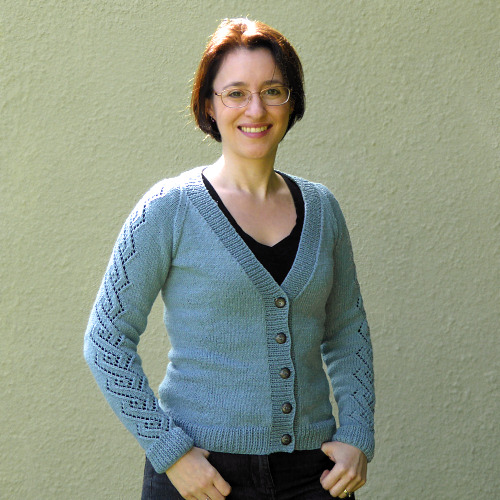
This cardigan demonstrates the difference between being inspired by someone else’s design, and copying it. I’d seen a cardigan (Primavera by Sarah Cooke) and really liked certain aspects of it, namely the light fingering-weight yarn and the lace panel that runs right up to the shoulders.
I like the idea of combining a lightweight cardigan for summer with a more open stitch pattern, but the pattern I’d seen wasn’t a cardigan for me: the length is far too long for my short frame; the neckline is way too open; I don’t like decorative pockets; I prefer internal shaping to side shaping. So I just took the basic concept (v-neck fingering-weight raglan cardigan with a lace panel up each arm) and designed one using my own measurements and stitch patterns. If you compare my cardigan with my inspiration, you’ll see that it’s completely different; not a copy at all.
After the success of my small 5-stitch, 4-row lace panel on my purple cardigan, I decided to try being a bit more adventurous, and picked a 16-stitch, 16-row repeat lace panel to travel up the arms of this cardigan.
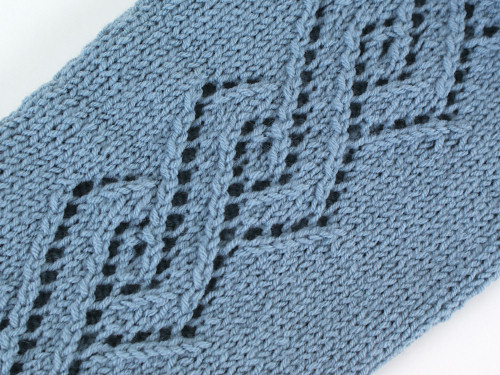
While beautiful, this was quite an eye-opener for me! I found myself utterly unable to memorize the stitch pattern, and had to refer to the pattern for every row of both sleeves. This was not the relaxing knitting I’ve been enjoying (although the end result is pretty spectacular, so it was worth it). I’d certainly tackle another project with lace panels, but I can’t see an all-over lace pattern in my future, unless the stitch pattern is much simpler so it’s easier to memorise.
As I’m still a relative novice, it took me a long time to be able to ‘read’ the stitches of the previous rows so I could recognise which row of the lace pattern I’d reached. Several times, I had to rip back a few rows when I realised I’d repeated a pair of rows and skewed the lace pattern. But worst of all was when I held up my two-thirds finished sleeve to admire how amazingly magical lace is, and suddenly noticed I’d repeated a pair of rows right down by the cuff..! I’m not the kind of person who can live with the knowledge of a massive mistake like that, so I gritted my teeth and pulled out hours of work so I could fix it.
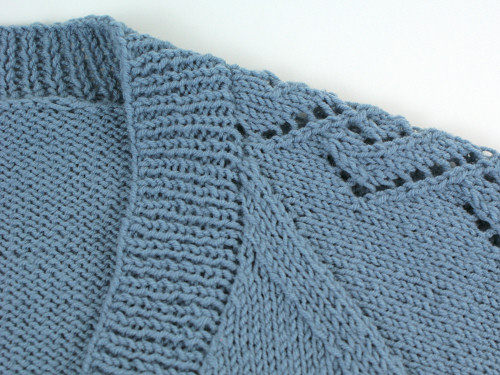
I’m not a fan of raglans, because they make it tricky to control the fit through the shoulders, but I really wanted to continue the lace panels right up to the neckband of this cardigan, and a raglan seam is the way to do that. On a whim, I decided to make the raglan seams a defined feature instead of trying to minimise them, forming strong diagonal bands from underarm to neck to contrast with the lace, and I quite like the result.
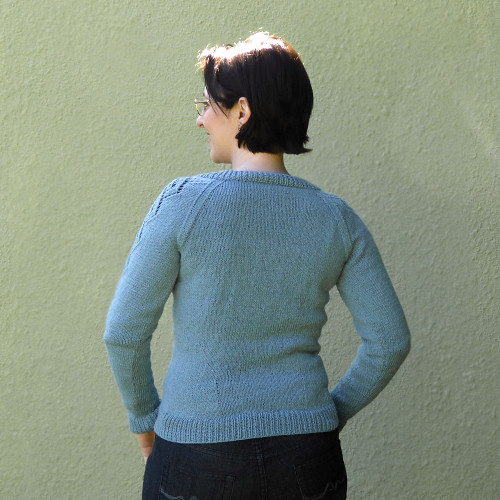
I worked 1×1 rib (first time!) bands from my provisionally cast-off cuff and bottom band edges, then picked up stitches (another first!) for the button band.
A left-handed aside…
Being a left-hander who knits right-handed, certain techniques in knitting don’t work properly for me, because I can’t do them with my right hand. My provisional cast-ons (done with a crochet hook) are twisted, so they can’t be pulled out cleanly – that’s because I have to hold the hook in my left hand instead of my right. I’m also utterly unable to pick up and knit by picking up from right to left; my right hand just doesn’t have the fine control.
As I spot these things, I can try to work out how to fix them so I have a way to knit that works for me and my limitations. I’ve discovered that I can pick up and knit with my left hand instead, then switch to right-handed knitting; I just have to concentrate so I remember to twist each stitch to the right-handed direction as I pick it up. Next I have to try to do the same for my provisional cast-on!
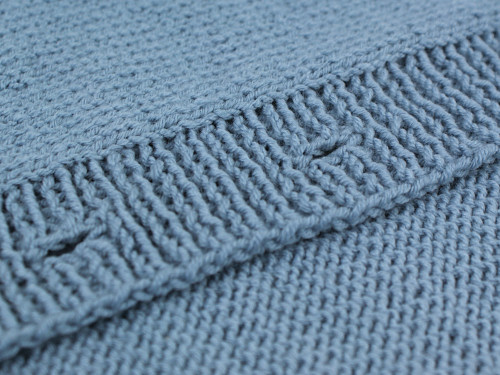
I tried one more new technique for this cardigan: Ysolda’s one row buttonhole. I’ll definitely be using this one again.
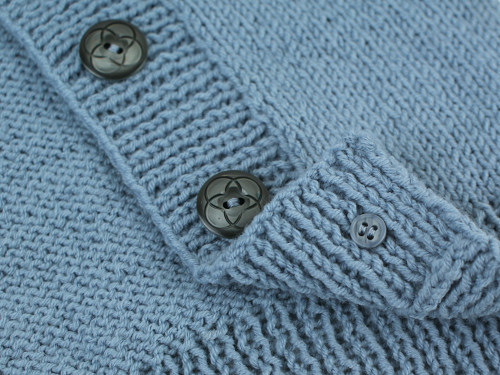
I’m not 100% convinced about my button choices here; I love the buttons, but they may not be the ideal choice for this cardigan – I think a faded blue might look better here. I’ll probably end up swapping the buttons eventually (I’ll keep an eye out for a better match, or make some from polymer clay) but I’ll keep these tiny anchor buttons I used on the back. I always seem to manage to find the perfect anchor buttons in my button stash. At last: I have a use for all those boring tiny buttons!
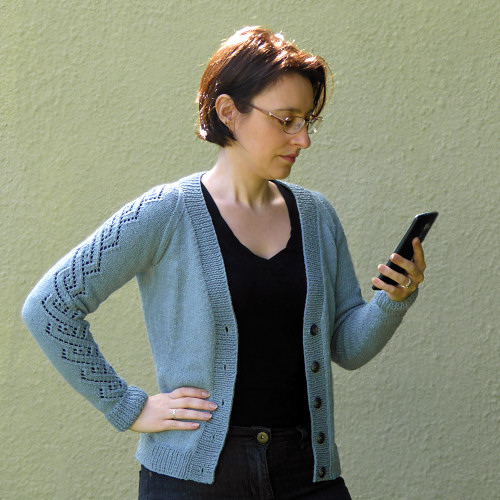
Keeping it real: another mistake photo, but the cardigan looks good! (My camera is remote-controlled by an app on my phone…)
Overall though, I’m very pleased with how this one turned out! I’ve finished it at the perfect time for spring in South Africa, so I can see this becoming my staple lightweight cardigan to throw on over a T-shirt.
This sweater knitting project was one of the best ideas I’ve ever had: I’m learning so much with every new piece, and becoming a much more confident knitter. There’s still a long way to go before I’d consider myself truly proficient, but I’m loving every step of this journey.
I hope you’re enjoying following along with my progress, and maybe I’ve inspired you to knit/crochet/sew a garment for yourself too? Give it a go!

