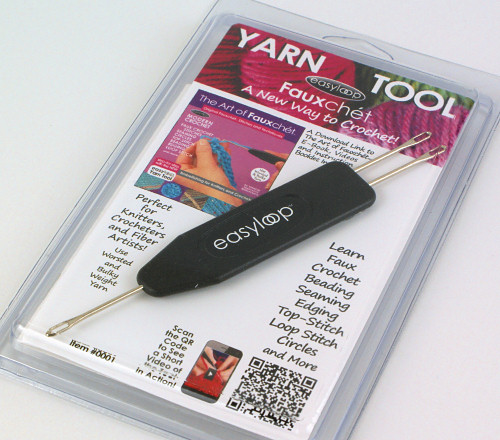
I’m always interested to see and try new innovations in yarncrafting, so when I heard about Fauxchet, I was intrigued. Billed as ‘a new way to crochet’, fauxcheting uses a special tool in place of a crochet hook. Just as knooking is the process of forming actual knit stitches with a modified crochet hook (see my review of The Knook here), the Fauxchet easyloop tool forms actual crochet stitches using a completely different method.
(If you have a knitting machine you may recognise the special tool as a stitch transfer tool for making cables etc, but this is a clever repurposing.)
Now, as a crocheter, you may be wondering why on earth you’d want to do this! I wondered the same, which is why I was eager to test out this tool for myself and see if it offers anything new and different from standard crochet.
After trying it out, the main benefits I see are that:
- It’s very easy to learn, as there’s just one movement: pushing the tool into the work, grabbing the loop with your other hand, then pulling the tool back out. I think this would make it a fun entry into yarncrafting for children and non-crocheters.
- It uses completely different muscles and movements from crochet. If you have problems with mobility or pain in your hands or wrists, Fauxchet could be a good solution. You don’t need to tension the yarn, as the stitch size is controlled by the size of the loops you form by pushing the tool into the fabric – the further you push the tool, the larger your stitch. You don’t need to rotate the tool at all, and the only motions are pushing/pulling with your dominant hand, and pinching/releasing with the thumb and forefinger of your other hand.
- As you’ll see below, I love the fabric that it forms!
My Experience
I started out by trying all the basic stitches (chain, slip stitch in back and both loops, single crochet in back and both loops). Although there is a slight learning curve, I found that I could form nice even stitches within a couple of rows of my sample:
Prior crochet experience is not at all necessary, as Fauxchet is worked completely differently. The back of the fabric faces you while you crochet, and you work left-to-right across your fabric (right-to-left for left-handers!), so it doesn’t feel at all like crocheting.
You thread the end of the yarn through the eye at the front of the tool before you begin:
Then, instead of building up loops on your hook as you form each stitch, you grip the loops with the thumb and forefinger of your non-dominant hand. This sounds like it may be a bit tricky, but is very simple once you’ve practiced for a few minutes.
The basic Fauxchet motion is very simple: your dominant hand pushes the tip of the tool into a stitch, then pulls it back out again, while your other hand pinches the loop that’s formed between thumb and forefinger. Those are the only motions involved! Take a look:
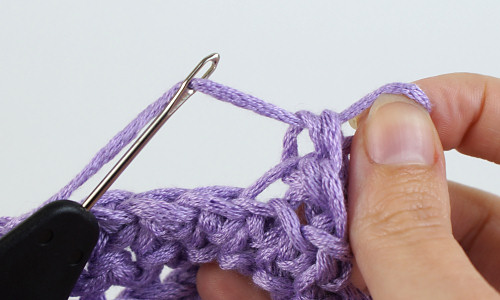
Insert the tool into a stitch:
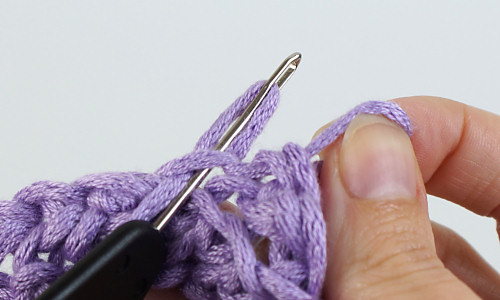
Grip the loop with your other hand, then withdraw the tool:
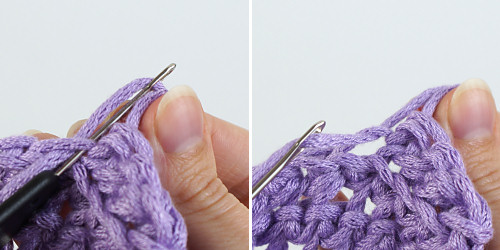
Note: I’m left-handed, and these photos are not intended as a tutorial – just to give you a basic idea of the very simple technique.
I highly recommend you watch the video demos on the Fauxchet site to see how easy the stitches are in practice, with the instruction book to hand as well. Although the instruction book does explain the stitches step-by-step, it makes them sound more complicated than they actually are (e.g. inserting your hook into the next stitch and through the loop you’re holding is accomplished in one easy movement, but it’s split into two steps in the instructions).
My experience was also complicated by the fact that there are no left-handed instructions (in the books or the videos) so I had to constantly reverse all the directions. But as the stitches are so simple – as you’ll see if you watch the videos – it wasn’t too difficult to swap every ‘left’ and ‘right’ in the instructions.
My Fauxchet tip is to make the starting chain extremely loosely. In fact, if you’re fairly new to fauxchet, I recommend you make the first few rows (or a swatch) to get your tension even, then unravel it all and start again with the same yarn once you’ve got into the rhythm.
I found the process of ‘fauxcheting’ very soothing once I got into the rhythm. It made a nice change from crocheting and knitting, and the fabric formed is so loose and drapey that it looks very pretty, even with using only the simplest crochet stitches.
Fauxchet vs Crochet
Although Fauxchet does produce actual crochet stitches, it’s far more limited than a crochet hook. As there’s no mechanism for a yarn over, you can only use it to make short stitches: chain, slip stitch, single crochet, and loop stitch (although, by working into back, front or both loops, that still allows for a range of results). And, just as with crochet, you can make combination stitches from the basic stitches (sc clusters, picots, etc).
I compared a swatch of normal crochet with my Fauxcheted swatch and learnt a few things:
- Working with worsted weight yarn, the Fauxchet tool gave me the same gauge as crocheting with a size M (9mm) crochet hook. That’s a lot larger than you’d usually use with ww yarn!
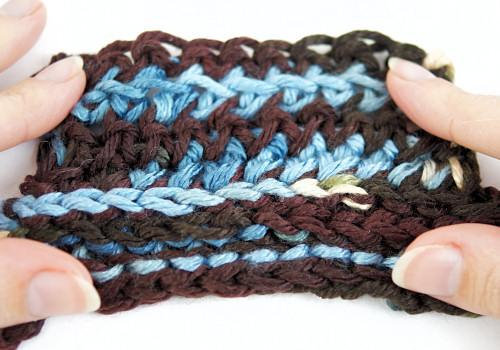
- The fauxchet stitches are twisted compared with standard single crochet stitches (see photo comparison, below) – possibly why the stitch is called ‘single Fauxchet’ instead of ‘single crochet’ in the instructions, as they aren’t exactly the same stitch.
- Fauxcheted fabric is both drapier and less gappy than the equivalent crocheted fabric made with the same yarn to the same gauge. With my M hook, the crochet feels more like knots and spaces, while Fauxchet stitches feel looser and give more even coverage. I have a theory for this: I suspect that using an extra-large hook forces big holes into your fabric, thus pulling the previous stitches into knots, whereas the slim Fauxchet needle doesn’t disturb the previous stitches, keeping the fabric more regular.
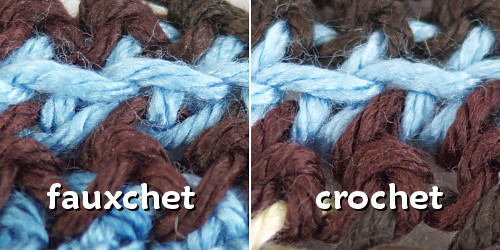
Fauxchet vs crochet – look at the blue ‘V’ shapes and you’ll see the fauxchet Vs are twisted at the bottom compared with the crochet Vs.
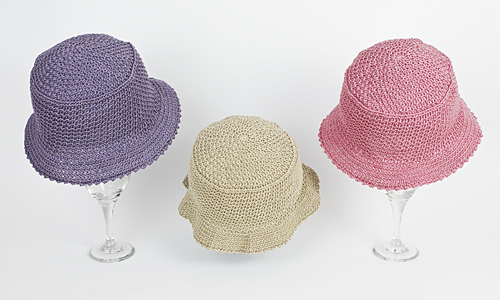
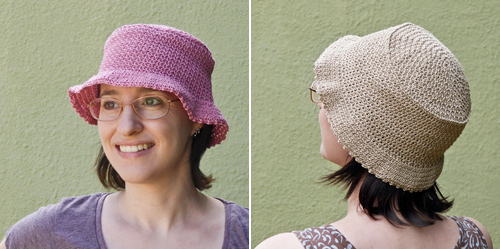
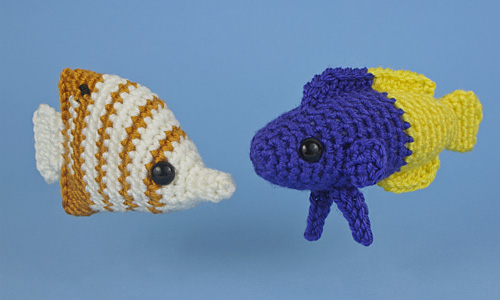
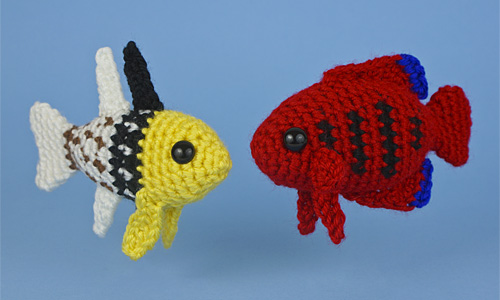
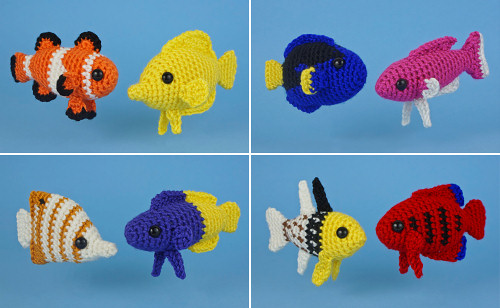
While the large size of the Fauxchet stitches means that it’s unsuitable for making amigurumi (where the whole point is to make small stitches so you produce a stiff, well-shaped fabric), it is ideally suited for making wearable accessories, as the gauge is so loose that your stitches will have beautiful drape with no effort on your part!
Fauxchet In Practice
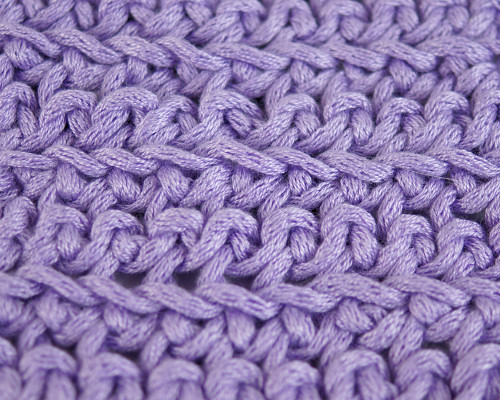
My favourite stitch from my swatch was the ‘ridged single Fauxchet’, which is the equivalent of front loop only twisted single crochet (but much easier than that name makes it sound!)
I love the look of the fabric this stitch makes, so I thought I’d try making a quick ridged single Fauxchet scarf in a bulky chainette bamboo yarn I had in my stash. The yarn is lovely and soft, but although it’s labelled DK it’s on the heavy end of bulky, and it’s been too heavy for me to crochet with (giant chunky stitches aren’t my style). Here’s the resulting scarf:
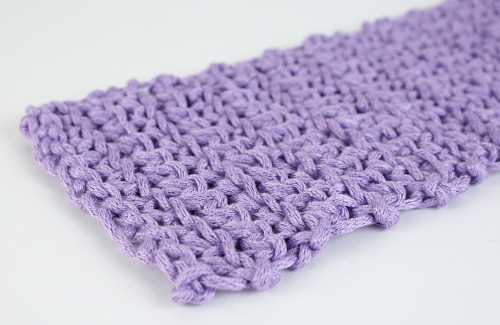
The fabric is even and not at all stiff. I’m very impressed with how it looks:
Fauxchet on Canvas
I was excited to see that you can also use Fauxchet to make rugs. It’s much faster than latch hooking, because you make loop stitches into the rug canvas directly from the ball of yarn, instead of tying on individual strands of yarn. The end result is a loopy rug, or you can cut the loops if you’d like a more conventional shag rug.
I did have a little play with the loop stitches, but I didn’t quite get the hang of it – I won’t even show you my swatch, because it’s too embarrassing. Every time I pulled a knot tight to lock a loop in place, I shrank the loop at the same time… I think my problem is that the motion uses your non-dominant hand, and I’m not very skilled with my right hand!
I can see from the videos that it’s possible to do it correctly and consistently, so I’d just need some more practice before attempting a rug. While there definitely is a learning curve to this technique, if you persevered and got the hang of it, it’d be a lot faster and less fiddly than conventional latch hooking.
Fauxchet: My Verdict
Pros:
- Easy to learn
- Different (and small) movements may be useful for those suffering from hand and wrist problems
- Makes fabric with beautiful drape
Cons:
- Limited range of stitches (chain, slip stitch, twisted single crochet, loop stitch)
- The Fauxchet tool is only intended for use with worsted and bulky weight yarn
- As the yarn is threaded through the tool, the tool is locked into the project until you finish an entire ball of yarn or cut the yarn
- Working backwards and using such a different gauge means you can’t easily follow a standard crochet pattern
So, is Fauxchet a replacement for crochet? No, definitely not – and nobody is claiming that it is. But it does have its own advantages, and I’ll definitely be keeping my Fauxchet tool in my craft collection.
I think that making a fauxcheted blanket would be a good relaxing long-term project that’d give me a nice soothing break from the other crafts I enjoy. From my experience with my swatches and scarf, I already know that the end result will have beautiful drape and no excess bulk or holes, which are perfect properties for a blanket, so I’m looking forward to the slow meditative process of push/pull, grip/release and watching the rows slowly grow.
Where to Buy
If you’d like to try the Fauxchet tool, you can buy it from Amazon (it’s very inexpensive!), and I recommend you watch the free videos and try some of the free patterns from the Fauxchet site. If you enjoy fauxcheting, you can buy downloadable patterns and ebooks from Amazon (or direct from LeisureArts).