I’m so excited (and a little bit nervous) to finally reveal my big secret project that I’ve been working on for the past few months. Although I love my amigurumi patterns, I have more to give in the crochet field, so I’ve come up with a new design line: PlanetJune Accessories. Don’t forget to read to the end to take advantage of my launch week discount codes!
I’ve designed my accessories to showcase what I consider to be the beauty and variety of crochet, and also as teaching tools. So don’t feel intimidated if you’ve never moved beyond amigurumi before – my patterns are specifically designed to teach you all the techniques you need to be able to complete them. (For experienced crocheters, the patterns are all modular, so you can save paper and ink by printing only the parts you need, and ignoring the additional instructions if you don’t need them!)
As you probably know, I’m a technical writer and the creator of numerous crochet tutorials, and I love to explain techniques with clear, easy to follow, well-illustrated instructions. You’ll see this in all my amigurumi patterns and the tutorials on this site, and I’ve also carried this through into my Accessories patterns.
All the patterns include full written instructions, photos, illustrations, and charted stitch diagrams where needed, options for right-handers and left-handers (including right- and left-handed stitch diagrams where appropriate), and, as always, are backed up by unlimited support by email, should you have any questions.
For this first PlanetJune Accessories collection, I’ve tried to come up with a mix of designs so there’ll be something to appeal to everyone, and a nice range of options for crocheting gifts for everyone on your Christmas list (and you know it’s coming up fast!).
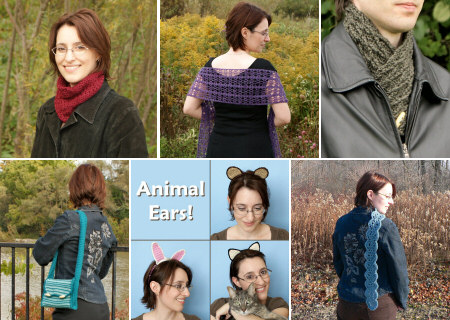
So now, please allow me to present the PlanetJune Accessories Fall 2010 Collection!
I’d like to start with a FREE taster for you, the Scalloped Scarf. Make this pretty and versatile scarf with almost any yarn you have to hand – it’s a quick and stylish one-skein project, and makes a perfect gift! This pattern is free for you to use, but if you send me a donation in appreciation of my work, you’ll get a handy, easy-to-print PDF version as a thank you.
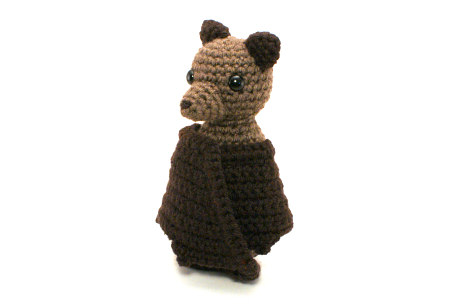
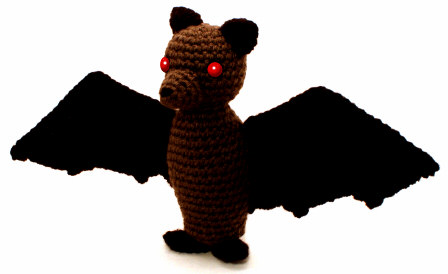
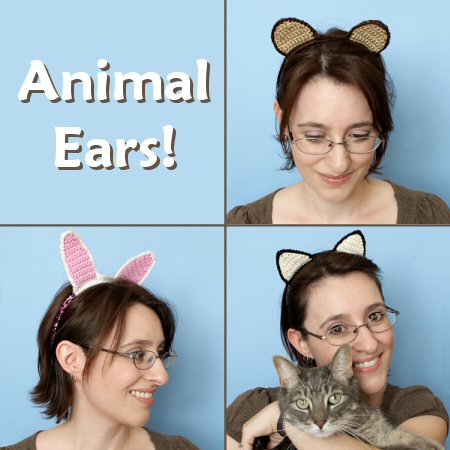
For the young, and the young at heart, Animal Ears. This no-sew pattern is quick to whip up, and would make a cute basic Halloween costume – all you need is a basic plastic or fabric-covered hairband (I bought mine from the dollar store!), an E hook, and some worsted weight yarn. The pattern includes three ear types: pointed (cat), long (bunny) and round (bear or mouse), and also includes bonus instructions to make the ears individually so you can stitch them onto a basic crocheted hat made in the same colour (and wouldn’t that make a great Christmas gift..?)
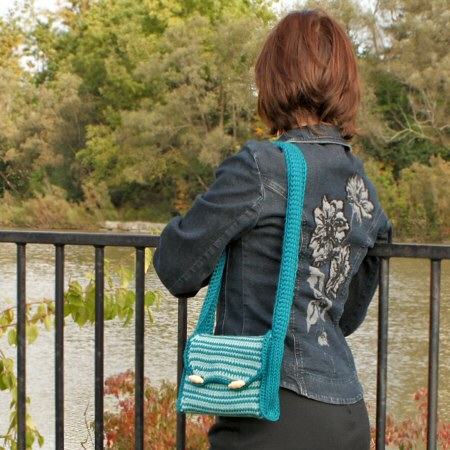
For the look of knit but formed with a crochet hook, the Tunisian Stripe Purse. This is a great introduction to Tunisian crochet – all you need is a size J afghan hook or double-ended crochet hook (available in most craft stores) and worsted weight yarn to make this pretty and functional purse. The clever construction means it’s all crocheted – there’s no sewing involved in the assembly! – and, as an added bonus, the sturdy, thick nature of the crocheted fabric means that there’s no need for a fabric lining either. (If you’re new to Tunisian crochet, the pattern comes with 2 bonus PDFs (left-handed and right-handed) including fully illustrated instructions for all the stitches you need for the pattern.)
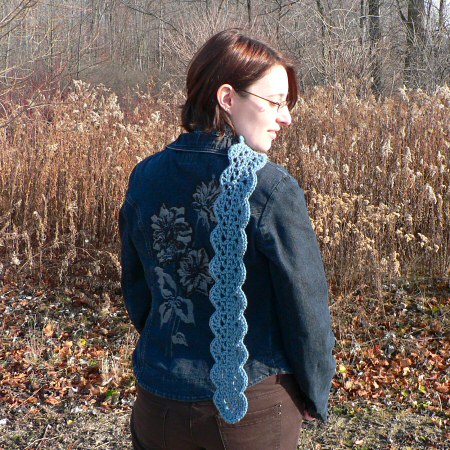
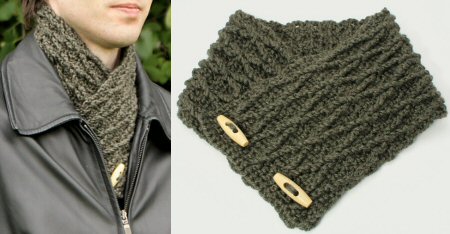
For the gentlemen in your life (and maybe for yourself too), the Diamond Lattice Neckwarmer. A striking lattice texture that’s bold enough for a man to wear, but isn’t too chunky for ladies, this is a fast project – you can whip one up in an evening – that looks far more complicated than it really is (shh, don’t tell!). This neckwarmer will keep you toasty warm without the length and bulk of a full scarf, and it makes a lovely gift that’s sure to be appreciated. The pattern includes a full stitch diagram as well as clear written instructions. If you’ve never used post stitches before, this pattern is a great introduction to them – you’ll be an expert by the time you’ve completed your first neckwarmer.
And finally, for a touch of elegance, try my two crocheted lace designs: the Gossamer Lace Wrap and the Lacy Bobbles Cowl. Crocheted lace can seem intimidating – my hand was starting to hurt at even the thought of the fine yarns and tiny hooks involved! But it doesn’t have to be like that: my lace patterns are all designed to be worked with normal-sized hooks into the spaces between stitches, which means that, after the foundation row, there’s no hunting for those tiny fine loops to work into, and it’s actually a pleasure to work. (I can report that, as a crocheter with a tendency to suffer from various hand and wrist pains, crocheting the samples for patterns did not cause me any pain, and I’m now a total lace convert!) There are some beautiful laceweight yarns out there – I used baby alpaca for both my designs, which is soft and amazingly warm, but visit your local yarn store to see other options. Don’t be put off by the price, either: you’ll only need one 50g skein of laceweight yarn for each design, so it can actually be very inexpensive. And just look at what you can make:
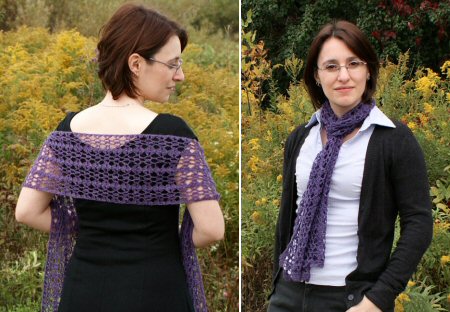
You can wear the Gossamer Lace Wrap as a beautifully light and lacy shoulder wrap, or as a frothy lace scarf (the layers make it surprisingly toasty as a scarf!). The lace pattern has a 2-row repeat, so you’ll pick it up in no time and be able to enjoy crocheting without having to worry about a complicated pattern.

I designed the Lacy Bobbles Cowl so the lacework isn’t too open, so you can pull it up to cover your head to stay warm, or let the layers of lace pool around your neck. It’s worked in the round, so there’s no need to stitch it together at the end, and the stitch pattern has a clever almost-invisible seam built right into each round.
*****
Launch Week Discounts! (NB the Scalloped Scarf pattern is excluded from these discounts as it’s donationware, so you set your own price anyway)
These automatic discount codes are valid until this Sunday, October 3rd.
Buy any PlanetJune Accessories pattern, save 5% with code PJAC05
Buy any 2 PlanetJune Accessories patterns, save 10% with code PJAC10
Buy any 3 PlanetJune Accessories patterns, save 15% with code PJAC15
Buy any 4 PlanetJune Accessories patterns, save 20% with code PJAC20
Buy all 5 PlanetJune Accessories patterns, save 25% with code PJAC25
You’ll find all the PlanetJune Accessories patterns in my shop.
*****
Okay, now you’ve seen my first Accessories collection, it’s time me to ask you for the scary part: please let me know what you think in the comments! Thank you 🙂