PlanetJune Craft Blog

Latest news and updates from June

Archive for Knitting

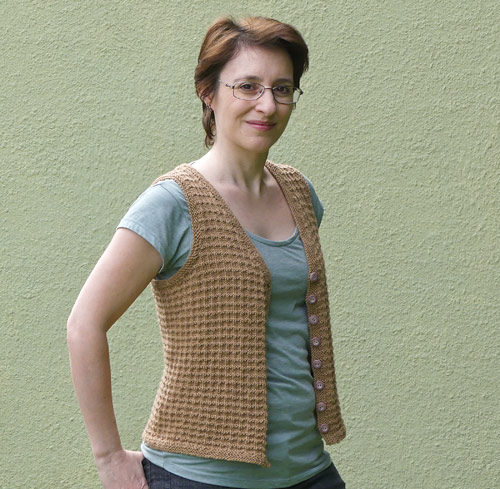
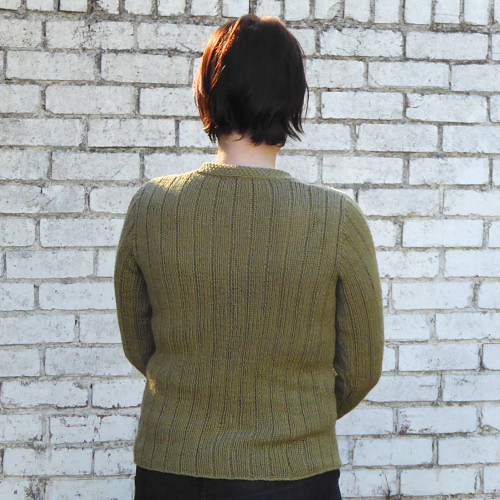
knit camel vest

This is sweater #12 of my ‘learn to knit by making a dozen self-designed sweaters’ project. (Here are links to #1, #2, #3, #4, #5, #6, #7 #8, #9, #10, and #11, if you’d like to see my progress.)

What could I do for my 12th sweater project that I haven’t already done?! I started thinking this would have to be a spectacular finale to the project, and that put so much pressure on me, I couldn’t get started! So I decided to step back and just make something I wanted to make, as I did for all the others.

camel vest

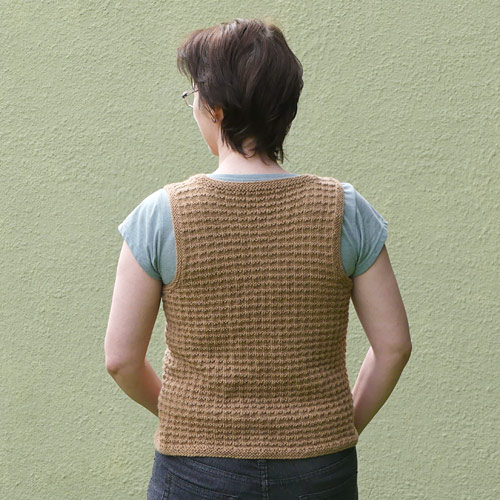
Now, you could argue that a vest is not really a sweater, but all it’s missing is the sleeves (and I definitely know how to knit sleeves by now) so I don’t think this is cheating – I could have added sleeves if I had more yarn, and I had plenty to learn from designing and knitting this vest, which was really the point of my whole project.

I had about 500m of deliciously soft baby camel yarn left over from my amigurumi Camel (I’d bought 5 hanks to take advantage of a wholesale discount price – it was far too expensive to justify buying 100% baby camel yarn for a toy at retail price). I’d hoped to think of some way to use this extremely warm yarn to make something useful, but the low yardage was going to be a challenge, so I decided it’d have to be a fairly close-fitting vest, and I’d do some calculations on the fly to make sure I could use as much of the yarn as possible without running out.

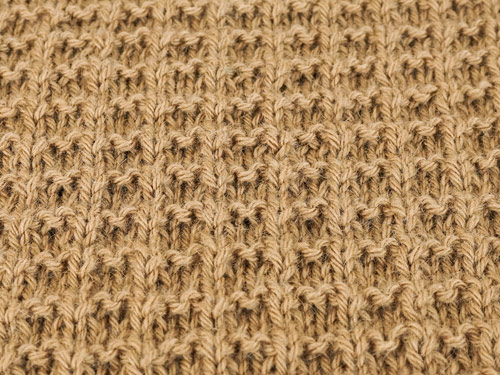
To keep it interesting and build my skills, I chose an all-over textured stitch pattern instead of plain stockinette.

camel vest

Instead of joining a new ball of yarn at the end of a row, I used the Russian join to minimise wasted yarn (and had to consult my own book for the instructions – it’s been a long time since I’ve used this join and I couldn’t quite remember how to do it!)

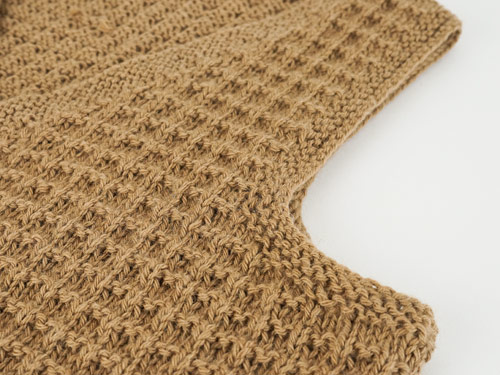
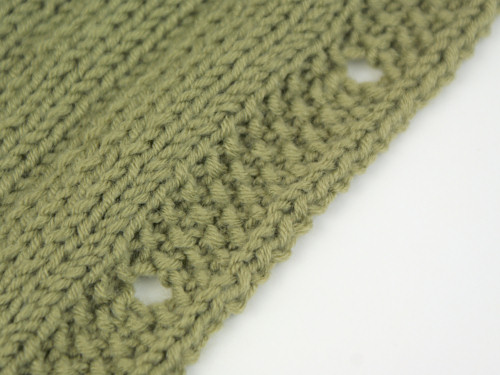
And my plan worked, eventually! It took some re-knitting: I started my textured stitch pattern in a way that caused the whole bottom border to flip up (a fact that didn’t reveal itself in my swatch or until I was way past the point of wanting to unravel it all and restart). I kept going and then unravelled from the bottom cast-on edge up until the point where I could fix the problem (and also to recover some yarn to use for a more substantial neckband than I’d budgeted for – I didn’t like the look of the narrow one I tried first), then I reknitted the bottom border and added the neckband.

camel vest

I added a new tool to my knitting toolkit: an interchangeable crochet hook (size E/3.5mm) for picking up stitches. Being a left-hander, but a right-handed knitter, I’ve found that picking up stitches along an edge (as a way to start e.g. a button band or armhole edging) with a needle is too challenging for me. Until now, I’d been picking up a few stitches at a time with a normal crochet hook, then dropping them off the hook and picking them up on the needle, but this was slow and fiddly.

Now, I can just unscrew the needle tip from the cable, screw on the hook, pick up all the stitches with ease and slide them onto the cable as I go, and then switch back to the needle tip to begin knitting! The interchangeable hook has been a brilliant addition to my interchangeable needle collection.

In the end, I used 99% of my yarn (woohoo!) to complete the vest, and I’m happy with the result – it’s extremely soft and very warm without being bulky. It isn’t the sort of thing I’d usually wear – either in style or colour – but this extra-warm layer is turning out to be very useful, and it’s the natural colour of the baby camels who donated their yarn so that I could knit this vest, so that’s pretty cool!

camel vest

Skills I learnt in this project:

  • Working an all-over texture throughout a piece (I really like the result of the stitch pattern I used – I think it looks like a yummy waffle).
  • Garter stitch… I know, it’s the most basic stitch, and yet I’ve actually never knitted anything in garter stitch until I decided to use garter edgings on this vest. I haven’t been a big fan of the look of garter, although I’m willing to change my mind on that point, because I love how flat my edgings are compared with stockinette! There are definite benefits to not being an anti-garter stitch snob.
  • Decreasing in pattern for the V-neck (note to self: if I was doing it again, I’d have left two stitches of stockinette at the edge instead of one: one for the selvedge and one to make a neat border at the base of the edging).
  • Weighing the work so far and adapting the design on the fly to account for the lack of yarn.
  • Picking up stitches around an armhole.
  • Making an armhole edging.
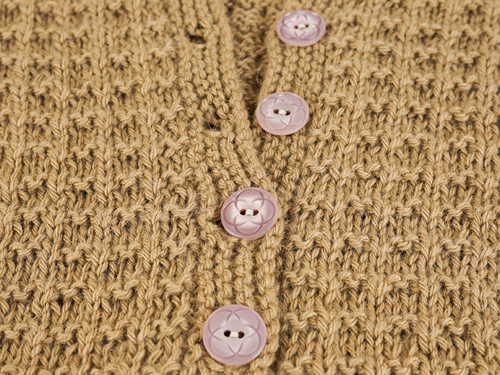
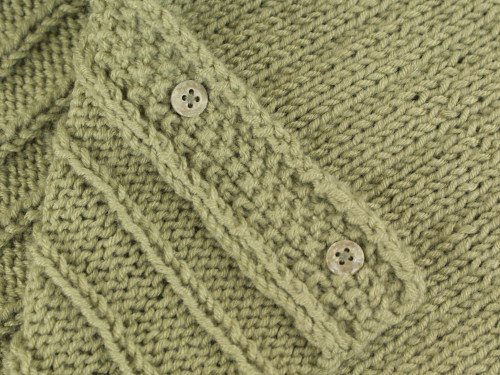
  • Making a buttonhole in garter stitch.

camel vest

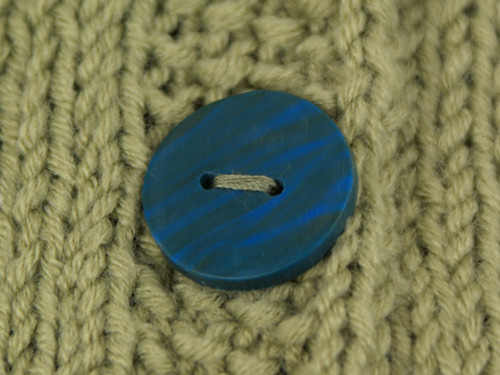
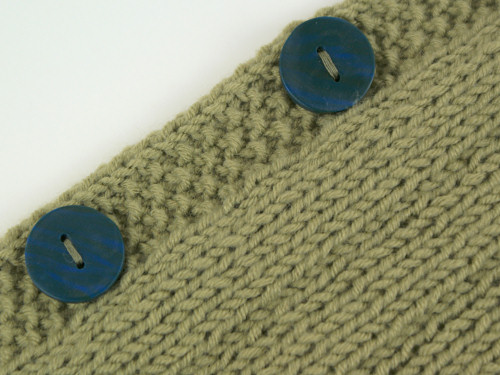
I was hoping to find some colourful buttons (maybe turquoise or dark purple) to contrast with the yarn colour, but there wasn’t anything in the right size and colour in the button shop, so I went with this dusty pink. I think it looks okay, although I may make some polymer clay buttons and swap them at some point. But, for now, it’s finished.

camel vest

And, with that, my 12 sweater project is complete. Isn’t that amazing?!

I have a lot to say about the experience of the project and where I’ll go from here, but I’ll save those thoughts for a wrap-up post…

Comments (3)

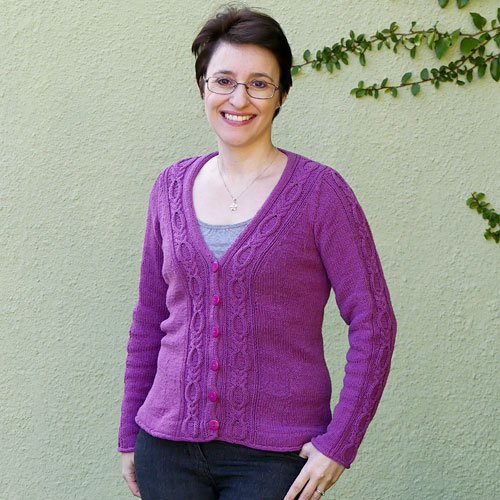
pink cabled cardigan

This is sweater #11 of my ‘learn to knit by making a dozen self-designed sweaters’ project. (Here are links to #1, #2, #3, #4, #5, #6, #7 #8, #9, and #10, if you’d like to see my progress.)

pink cabled cardigan

With only 2 sweaters left to go, I didn’t think I could really claim to have conquered knitting if I’d never tried to cable, and I couldn’t put that off any longer!

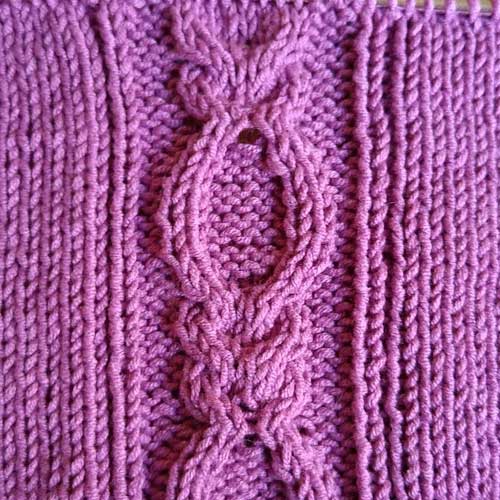
I used Ysolda’s instructions for cabling without a cable needle – I’ve done all my knitting so far with just my interchangeable circular needles, and I like the idea of not needing any extra equipment where possible. Cabling is kind of fun – I don’t know why I waited so long to try it!

pink cabled cardigan

Aside from the cables, I tested out a few more new (to me) techniques with this design:

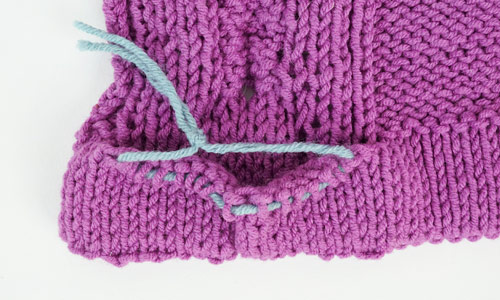
  • I read that, when making a turned hem after a provisional cast-on, using one size larger needles for the joining row gives a less visible result, so I tried that. Verdict: I’m not sure it made much difference….
  • I didn’t know how to tackle joining the part of the facing that sits behind the cable, so I left those stitches on some waste yarn and then sewed them to the back of the cable later.
    pink cabled cardigan
    pink cabled cardigan
    Verdict: I’m really happy with how neat it looks!
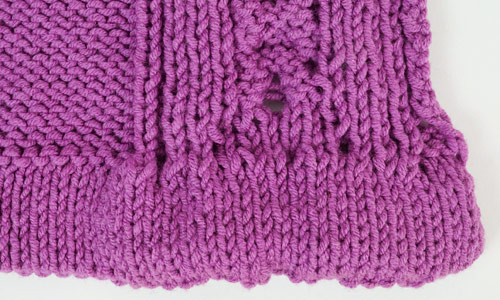
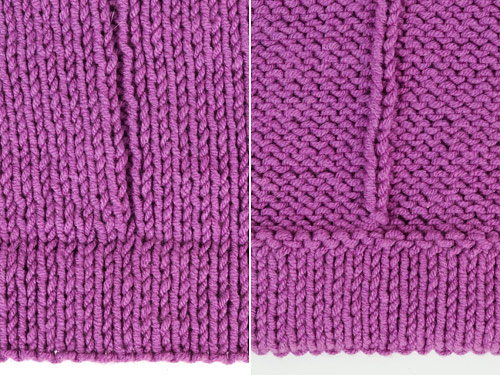
  • I worked the cardigan as one piece up to the armholes, but I tried using a ‘basting’ stitch at each side – one extra column of purl stitches, to be ‘seamed’ later to add stability where the side seams would normally be. pink cabled cardigan
    ‘basting’ column (L: right side, before seaming it invisibly away, R: wrong side)

    Verdict: It worked, but I think I prefer working in pieces and seaming. Call me weird, but I love mattress stitch!

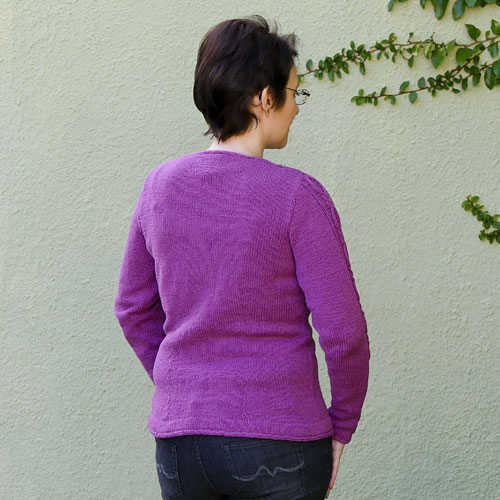
Apart from that, I used techniques I’ve used before: waist shaping, and an attached icord edging all the way around (including the bottom edge and sleeve cuffs), leaving the icord detached to form buttonholes – a throwback to my very first sweater! In this case though, I think the icord echoes the width of the cables and gives a nice finish.

pink cabled cardigan

I really like the finished sweater, but keeping track of the 20 rows of the cable proved a bit frustrating at times – I’m not fully able to read the cable stitches yet to see where I am, as the shaping of the cable only really becomes apparent in later rows. I tried dropping down to fix mistakes, but because cabling takes a different amount of yarn than regular stitches, I wasn’t happy with the results and ended up having to frog 4 rows a couple of times when I’d made the open circle in the cable pattern too long or too short, and only realised much later.

I also found the cabling took too much time away from the meditative action of knitting, so I don’t think I’ll be designing many heavily-cabled pieces in the future (although, a simpler cable with an easier repeat may be an option).

pink cabled cardigan

But I’m happy with the end result, and the yarn (a cotton/acrylic blend) will make this a nice lightweight piece for warmer weather (although completely inappropriate for the current Canadian winter – I’ll look forward to wearing it next spring!)


So that was 11 of my 12 sweaters for this ‘learn-to-knit’ project completed, and at this point I was in a quandary as to what to design for the final piece in the collection. Was I still missing any essential knitting skills? (Colourwork is the obvious one, but I want these to all be wardrobe staples I’ll wear all the time, and I really don’t wear multi-coloured sweaters.)

I’ll reveal what I chose to make for the last piece in my next knitting update…

Comments (4)

teal ribbed sweater

This is sweater #10 of my ‘learn to knit by making a dozen self-designed sweaters’ project. (Here are links to #1, #2, #3, #4, #5, #6, #7 #8 and #9, if you’d like to see my progress.)

teal ribbed sweater

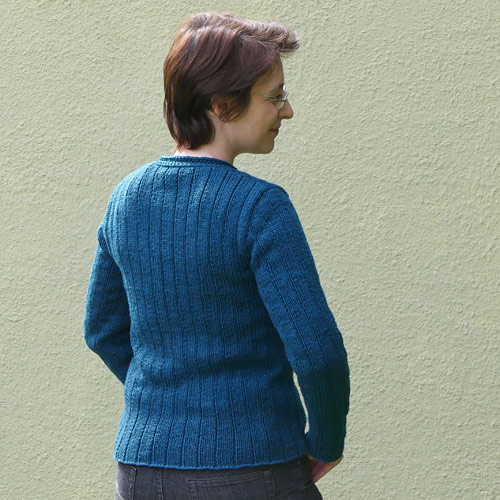
After the success of my most complex design yet, I thought I’d try something a bit simpler, and test out the quality of my notes from an earlier design that I’ve got a lot of use from: my green ribbed cardigan (#5).

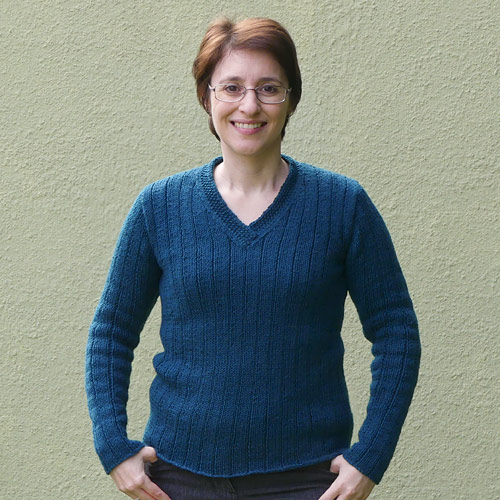
I decided to make a pullover version, with just a couple of modifications: I added a couple of inches more length (the green one was slightly shorter than I’d have liked as I was working with the constraint of only having 4 balls of yarn!), adding a little more ease so the extra length wouldn’t be too tight over my hips, and modifying the positions of the rib stripes so the side seams would continue the stitch pattern flawlessly.

Other than that, and making a pullover with a single front instead of two half-fronts for the cardigan, I followed my previous notes exactly. I used the same yarn in a different shade and assumed my gauge would be the same (it was!) instead of swatching again.

teal ribbed sweater

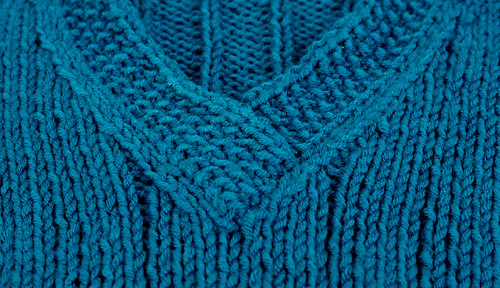
To make the neckband, I again followed the style of my cardigan’s neckband. I overlapped the neckband at the point of the V instead of trying to make a mitred corner in pattern. Although it’s a little bulkier this way, it looks neat, and I stitched down the excess fabric on the inside so it doesn’t get in the way.

teal ribbed sweater

It’s good to know I can follow my own notes if I want to remake any of these sweaters, and it was refreshing to work from a pattern (of sorts) and not have to make design decisions and size calculations at every step.

But now I only need 2 more sweaters to complete this project (wow – I’m so close now!) so no more laziness; for the next sweater it’s time to tackle the one big design element I’ve never even tried to date: cables…

Comments (4)

circle-front alpaca cardigan

This post is long overdue, but I haven’t been able to face the thought of wearing alpaca in summer in Africa, so all my knitting posts have sat waiting for photos! But better late than never, it’s very cold here now, so it’s the perfect time to start photographing (and wearing!) my knits. There’ll be a few more of these posts coming soon – I have lots to catch you up on…

This is sweater #9 of my ‘learn to knit by making a dozen self-designed sweaters’ project. (Here are links to #1, #2, #3, #4, #5, #6, #7 and #8, if you’d like to see my progress.)

circle-front cardigan

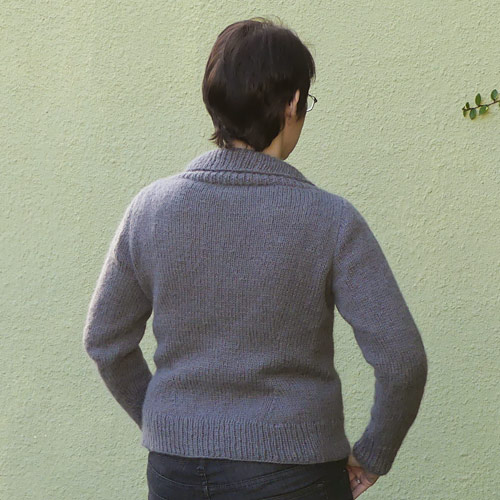
With a basic pullover out of the way, I felt ready to try a slightly more ambitious design. I envisaged a circle-front cardigan with a cosy shawl collar, made in the same dreamy KnitPicks alpaca yarn I used for sweater #3, but with the benefit of both more knitting knowledge and more knowledge of how the yarn behaves.

I considered a patterned stitch, but the fluffiness of the alpaca would mask the stitch pattern, and I didn’t want to distract from the dramatic shape, or make life too difficult for myself. So I kept the body of the cardigan in plain stockinette, but with interior shaping to keep the silhouette from being too bulky.

circle-front cardigan

Keeping track of the curved front edges, the interior shaping, the armholes and the V neck would have been tricky, so I tried working both fronts at once, in the same way as I’ve seen people knitting two-at-a-time socks: you have both on one circular needle, and knit the same row of each before moving onto the next row, so they always turn out exactly the same. (Definitely worth remembering that technique – it works well.)

circle-front cardigan

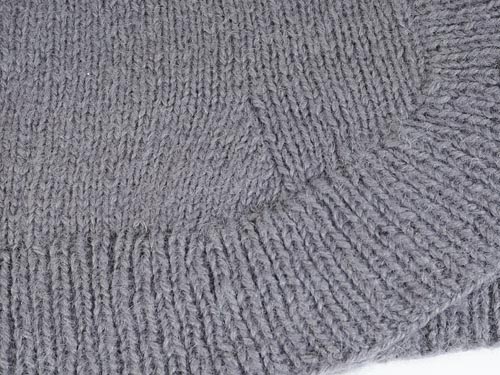
I seamed the fronts and back together and then added a 3″ deep ribbed border all the way around the cardigan. I guesstimated pickup rates for the different areas and kept my fingers crossed that I’d crammed in enough extra stitches around the bottoms of the curved front to allow the finished border to lie flat – I didn’t relish the thought of frogging 3″ of fluffy alpaca!

circle-front cardigan

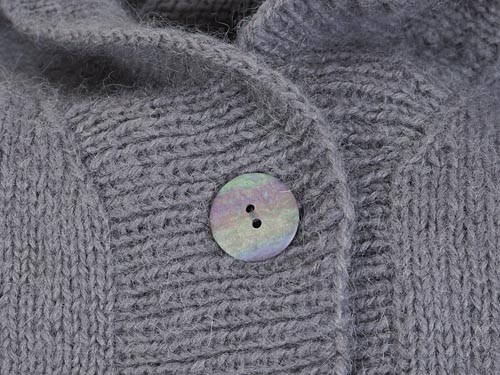
But it all worked out first time, and I remembered to also add three buttonholes at appropriate points (to fit these beautiful large pearlescent buttons I’d been waiting for the right project to use), and an extra 3″ of short rows to form the shawl collar.

circle-front cardigan

This design felt like an ambitious gamble for me, but the end result is cosy and fitted and almost exactly as I’d imagined it. Mission accomplished – I’m so excited with how this all came together!

Comments (6)

basic knitted v-neck pullover

This is sweater #8 of my ‘learn to knit by making a dozen self-designed sweaters’ project. (Here are links to #1, #2, #3, #4, #5, #6 and #7, if you’d like to see my progress.)

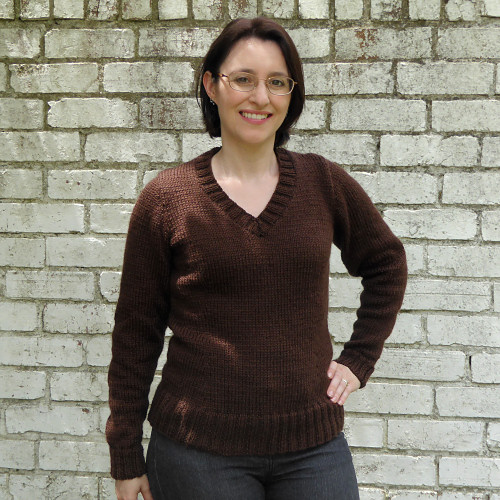
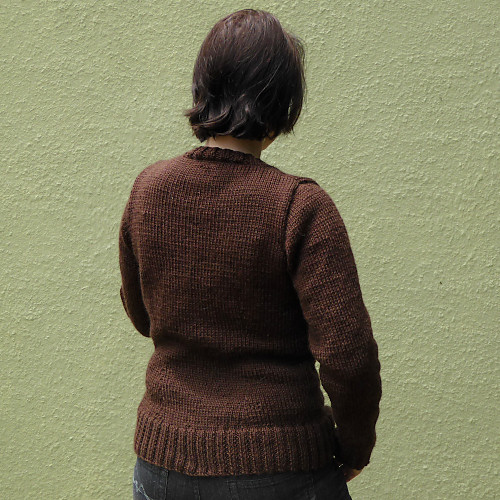
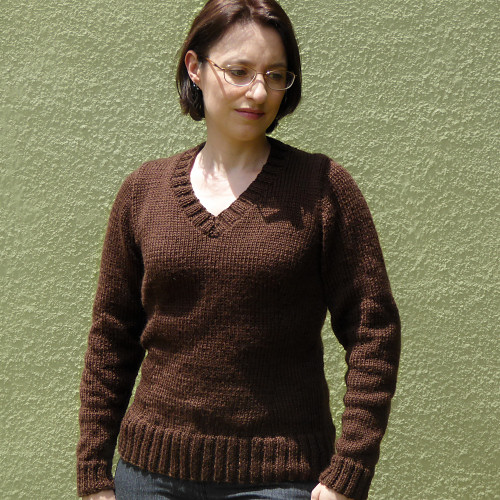
basic brown knitter pullover by planetjune

After the fine yarn and lace of my last cardigan, I wanted a more relaxing knit for my next project. I decided to go for a really basic V-neck pullover, not too fitted so I can wear layers and long-sleeves underneath when it’s cold, but with some shaping so it fits over my hips but isn’t too boxy.

Even though the end result is simple – plain stockinette throughout with 2×2 rib for the collar, hem and cuffs – I still got to try some new techniques and expand my skills. I’d just bought Sally Melville’s Craftsy class ‘Essential Techniques Every Knitter Should Know‘ (and, as an aside, I loved this class – highly recommended, particularly if you’re interested in knitting sweaters).

Some of Sally’s recommendations made me feel less like I’m muddling through my knitting journey, as I’d reached the same conclusions as her (so I must be doing something right!), while other tips were new to me, and I tried a few in this sweater.

(In fact, Sally’s thinking on knitwear design decisions seems like such a good match for mine that I’ve since also bought her book, Knitting Pattern Essentials: Adapting and Drafting Knitting Patterns for Great Knitwear – I can recommend that too!)

basic brown knitter pullover by planetjune

My new techniques with this sweater:

  • I used lifted increases for the first time, on Sally’s recommendation, and tried her shortcut for simplifying them. Thumbs up to that.
  • I also tried her technique for faster mattress stitch seaming (although I love seaming my knits – it’s like magic! – so I’ll probably stick with my usual slower method, going through every row, in most cases).
  • I refined the cuffs and hem I used for my shawl-collar pullover by switching to smaller needles to reduce the bulk. Definitely an improvement.
  • I did my first pick-up-and-knit for the neckband (I usually knit it as a strip then sew it on) and that worked fine – I even managed a sort of mitered corner at the point of the V.
  • And I decided to weave in the ends as I finished each part of the sweater. Although that’s a bit scary because you have to trust you won’t want to change anything later, it worked well for a simple sweater like this, and made the finishing process at the end much easier!

basic brown knitter pullover by planetjune

I feel like this one came together in no time (making it in worsted weight yarn didn’t hurt) and the finished sweater is warm, cosy, and snuggly – just what I was hoping for.

Of course, it’s now summer in South Africa, and far too hot to be wearing something like this! So please excuse me if I look less than comfortable in these photos (especially the one above – the sun came out and I was roasting!) but I’ll be very happy to wear this properly once the weather cools down again here – my house is freezing in winter and this will be just what I need to keep warm.

The confidence I got from making this simple design quickly and well made me think I was ready to take a bit of a leap for my next design and try something completely different. It’s not finished yet, but I’ll show you how that turned out, soon…

I can hardly believe I’m two-thirds through this project now! I’ve knitted 8 wearable sweaters for myself in just over 3 years – when I started, I didn’t seriously think I’d ever get this far – and I’m enjoying every minute of this learning experience.

Comments (4)

blue lace-sleeved cardigan

Before I start, I’d just like to say Happy Thanksgiving to my fellow Canadians!

This is sweater #7 of my ‘learn to knit by making a dozen self-designed sweaters’ project. (Here are links to #1, #2, #3, #4, #5 and #6, if you’d like to see my progress.)

bluelacecardigan1

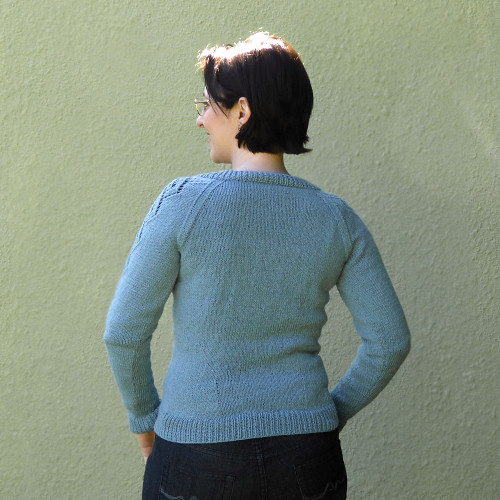
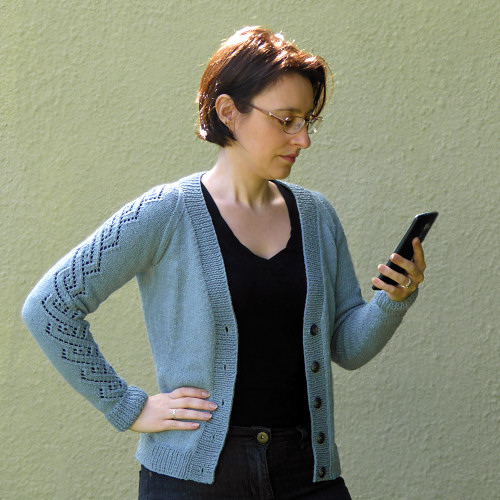
This cardigan demonstrates the difference between being inspired by someone else’s design, and copying it. I’d seen a cardigan (Primavera by Sarah Cooke) and really liked certain aspects of it, namely the light fingering-weight yarn and the lace panel that runs right up to the shoulders.

I like the idea of combining a lightweight cardigan for summer with a more open stitch pattern, but the pattern I’d seen wasn’t a cardigan for me: the length is far too long for my short frame; the neckline is way too open; I don’t like decorative pockets; I prefer internal shaping to side shaping. So I just took the basic concept (v-neck fingering-weight raglan cardigan with a lace panel up each arm) and designed one using my own measurements and stitch patterns. If you compare my cardigan with my inspiration, you’ll see that it’s completely different; not a copy at all.

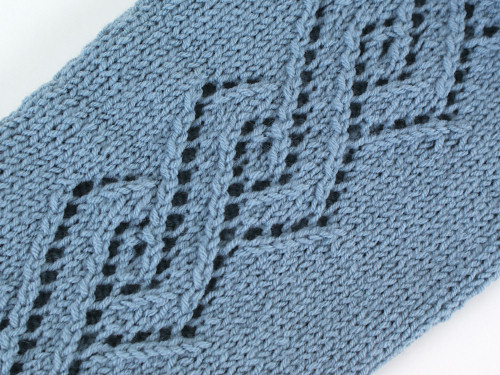
After the success of my small 5-stitch, 4-row lace panel on my purple cardigan, I decided to try being a bit more adventurous, and picked a 16-stitch, 16-row repeat lace panel to travel up the arms of this cardigan.

bluelacecardigan_detail1

While beautiful, this was quite an eye-opener for me! I found myself utterly unable to memorize the stitch pattern, and had to refer to the pattern for every row of both sleeves. This was not the relaxing knitting I’ve been enjoying (although the end result is pretty spectacular, so it was worth it). I’d certainly tackle another project with lace panels, but I can’t see an all-over lace pattern in my future, unless the stitch pattern is much simpler so it’s easier to memorise.

As I’m still a relative novice, it took me a long time to be able to ‘read’ the stitches of the previous rows so I could recognise which row of the lace pattern I’d reached. Several times, I had to rip back a few rows when I realised I’d repeated a pair of rows and skewed the lace pattern. But worst of all was when I held up my two-thirds finished sleeve to admire how amazingly magical lace is, and suddenly noticed I’d repeated a pair of rows right down by the cuff..! I’m not the kind of person who can live with the knowledge of a massive mistake like that, so I gritted my teeth and pulled out hours of work so I could fix it.

bluelacecardigan_detail2

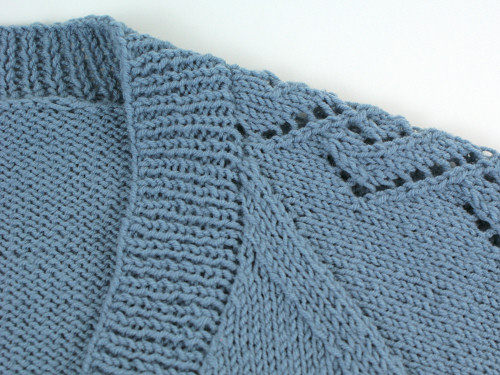
I’m not a fan of raglans, because they make it tricky to control the fit through the shoulders, but I really wanted to continue the lace panels right up to the neckband of this cardigan, and a raglan seam is the way to do that. On a whim, I decided to make the raglan seams a defined feature instead of trying to minimise them, forming strong diagonal bands from underarm to neck to contrast with the lace, and I quite like the result.

bluelacecardigan2

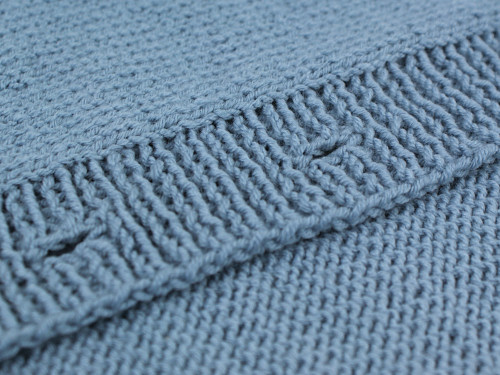
I worked 1×1 rib (first time!) bands from my provisionally cast-off cuff and bottom band edges, then picked up stitches (another first!) for the button band.


A left-handed aside…

Being a left-hander who knits right-handed, certain techniques in knitting don’t work properly for me, because I can’t do them with my right hand. My provisional cast-ons (done with a crochet hook) are twisted, so they can’t be pulled out cleanly – that’s because I have to hold the hook in my left hand instead of my right. I’m also utterly unable to pick up and knit by picking up from right to left; my right hand just doesn’t have the fine control.

As I spot these things, I can try to work out how to fix them so I have a way to knit that works for me and my limitations. I’ve discovered that I can pick up and knit with my left hand instead, then switch to right-handed knitting; I just have to concentrate so I remember to twist each stitch to the right-handed direction as I pick it up. Next I have to try to do the same for my provisional cast-on!


bluelacecardigan_detail4

I tried one more new technique for this cardigan: Ysolda’s one row buttonhole. I’ll definitely be using this one again.

bluelacecardigan_detail3

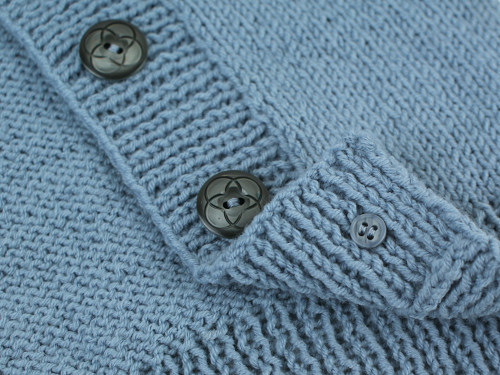
I’m not 100% convinced about my button choices here; I love the buttons, but they may not be the ideal choice for this cardigan – I think a faded blue might look better here. I’ll probably end up swapping the buttons eventually (I’ll keep an eye out for a better match, or make some from polymer clay) but I’ll keep these tiny anchor buttons I used on the back. I always seem to manage to find the perfect anchor buttons in my button stash. At last: I have a use for all those boring tiny buttons!

bluelacecardigan3
Keeping it real: another mistake photo, but the cardigan looks good! (My camera is remote-controlled by an app on my phone…)

Overall though, I’m very pleased with how this one turned out! I’ve finished it at the perfect time for spring in South Africa, so I can see this becoming my staple lightweight cardigan to throw on over a T-shirt.

This sweater knitting project was one of the best ideas I’ve ever had: I’m learning so much with every new piece, and becoming a much more confident knitter. There’s still a long way to go before I’d consider myself truly proficient, but I’m loving every step of this journey.

I hope you’re enjoying following along with my progress, and maybe I’ve inspired you to knit/crochet/sew a garment for yourself too? Give it a go!

Comments (1)

purple cardigan with lace detail

This is sweater #6 of my ‘learn to knit by making a dozen self-designed sweaters’ project. (Here are links to #1, #2, #3, #4 and #5, if you’d like to see my progress.)

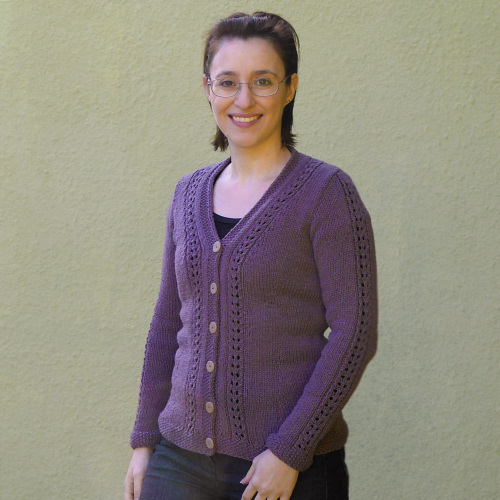
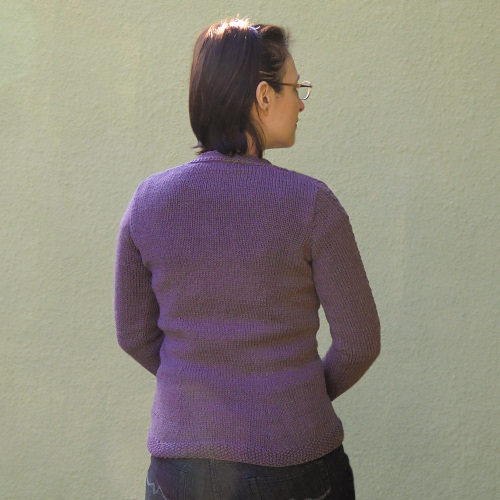
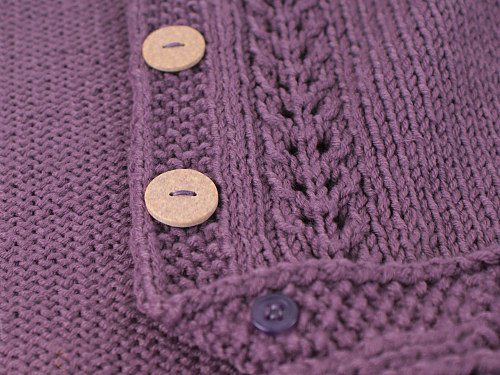
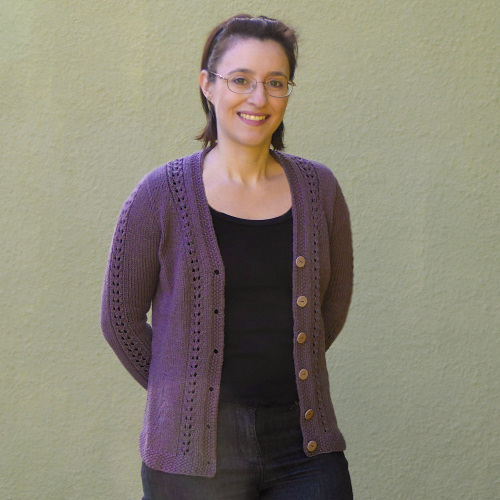
I wanted to stretch myself – but not too much! – with this cardigan, so I decided to include a narrow lace panel up both arms and on either side of the button band on the front as a test to see how I’d like doing something that takes a bit of extra concentration. And look at the result!

purple cardigan

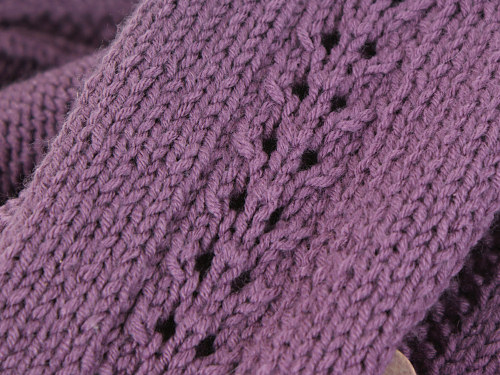
It looks almost professional, doesn’t it? I picked a very simple stitch pattern that’s only 5 stitches wide, and only 1 in every 4 rows actually involves doing anything other than knits and purls, but it made a huge difference to the look of the cardigan.

purple cardigan - detail

This lovely lace panel runs all the way up each sleeve.

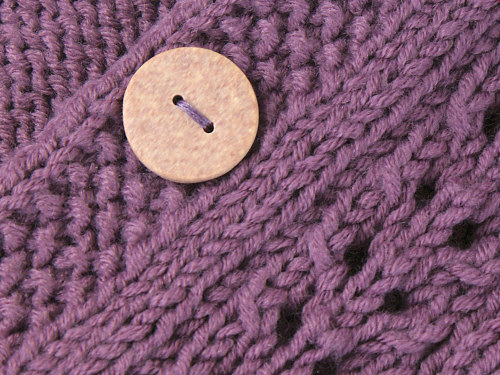
(And yes, I know the yarn colour looks completely different in these close-up pics, but purple is notoriously difficult to photograph, and the different lighting conditions inside and outside didn’t help with that! The true yarn colour is somewhere between the two – a very muted plum colour.)

purple cardigan

The rest of the cardigan is just stockinette (with my usual waist shaping for fit) and the non-lace parts knitted up fairly quickly. I really liked the seed stitch button band from my previous cardigan, so I used the same band for this one, and also made matching seed stitch cuffs and bottom band, to tie it all together.

purple cardigan - detail

I wanted to make polymer clay buttons again, but I didn’t think I’d ever be able to match the purple of the yarn with my buttons so I decided that a neutral contrasting colour would be safest. In case you think everything goes right first time for me, I’ll have to show you my disastrous first attempt at making the buttons for this cardigan… but I’ll save that for another post! Luckily, things went much better second time around.

I used Sculpey Granitex which has a built-in stone effect, so I decided to keep it simple and just cut plain circular buttons with two holes – no further embellishment required.

purple cardigan - detail

I finished with the same details I’ve used in the past: sewing thread to match the yarn instead of the button, and hidden anchor buttons inside the button band to avoid putting too much stress on the yarn. Those little details always make me happy, even though I know nobody else will notice them, but it’s an added pleasure every time I put on something I’ve made and get to enjoy the little finishing touches.

purple cardigan

This is the halfway point of my learn-to-knit project and I’m so pleased with how this cardigan turned out. Knowing how to make a sweater that fits me makes all the difference – this is a cardigan that can button all the way down without drowning me at the bust and waist or pulling at the hips. It’s revolutionary!

It’s really worth learning how to make clothes (whether you’re sewing, knitting or crocheting) that fit you properly and don’t make you feel that (for example) your hips must be the size of a house because you can never fasten the bottom button on any store-bought cardigan. My problem now is that I think I may have to learn to sew clothes too, because I’d really like all my clothes to fit properly after discovering how good that feels! Maybe that’ll be my next learn-to-craft project, once my dozen sweaters are finished…

After this success, I’ve been inspired to get a little more adventurous with the lace in my next cardigan – and you’ll see the results of that when I finish #7!

Comments (9)

green ribbed cardigan

This is sweater #5 of my ‘learn to knit by making a dozen self-designed sweaters’ project. (Here are links to #1, #2, #3 and #4, if you’d like to see my progress.) There’s a funny story behind this cardigan: I bought 4 balls of this drab green yarn on clearance – it was all they had left in the shop. I thought it’d be a tight fit to get a whole sweater from so little yarn, so I made all my design choices based on helping the yarn to go as far as possible…

Knitting is supposed to be my relaxing hobby, and I was worried that getting into complex stitch patterns might require too much concentration to be really relaxing for me, but I did want to try venturing away from the pure stockinette fabric of all my previous sweaters, so I thought I’d try an all-over 4×1 rib pattern (that’s 4 stitches of knit, then 1 stitch of purl, repeated, to give narrow vertical purl stripes in the cardigan). The stretchy fabric should also give a nicely fitted result without needing any shaping to be built in, so I could concentrate on just getting the purl stitches in the right place without needing to keep track of anything else.

green ribbed cardigan

I started with the body, and designed it to be close-fitting and shorter than my usual preferred length, to minimise the amount of yarn it used – once the body was finished, I’d be able to judge how much yarn I had left for the sleeves and plan accordingly (either to make short/no sleeves, or make the sleeves in a different colour, if necessary). Keeping it minimal, I opted to avoid a decorative border around the bottom – the all-over rib is enough to keep the fabric from curling up at the edges, and the cable cast-on makes a tidy edge.

green ribbed cardigan

After finishing the body, there seemed to be plenty of yarn left for full-length sleeves, which was a relief. I made the sleeves close-fitting too, to match the style of the body, and I used what I learnt from the mistake in my last sweater to make very neatly set-in sleeves – I think I’ve nailed this technique now!

Once the sleeves were finished, I made my first real button band (my previous buttoned cardigan used an attached i-cord, with detached sections to form the buttonholes, so I’d never tried to knit a buttonhole before). I decided to make the button band in seed stitch with a smooth stockinette edge, and, after a few attempts, came up with a tiny, neat, stretchy buttonhole to fit into my band.

green ribbed cardigan

Instead of picking up stitches for the button band, I knitted it separately (as hundreds of 8 stitch wide rows!) and then stitched it on so it lay flat without my needing to calculate a ratio to pick up stitches beforehand. Stitching the ‘button’ half of the button band down before I knitted the ‘buttonhole’ half let me calculate exactly where to place my buttonholes as I knitted. This is a really nice method if you’re winging it and not following a pattern – I love the freedom of just making it all up as I go along! It’s such a break from keeping accurate notes of all my stitches for my crochet pattern.

And the irony: far from running out of yarn as I’d feared, I actually ended up with an entire ball left over! I guess my yarn quantity estimation skills still need a little polishing 😉

The finishing touch for the cardigan was to make polymer clay buttons, inspired by Lisa Clarke’s knitted cardigans with polymer clay buttons. It’s such a pleasure to be able to combine two of my hobbies in one project!

green ribbed cardigan

I decided not to try to match the yarn colour, and cut my buttons from a sheet of marbled clay: bright turquoisey blue and darker green. I had to brighten the photo above so you can see the marbling more clearly, as the very bright blue became muted with the marbling, and the green darkened more than I expected in the oven, so the overall result is quite subtle. I still really like them though, even if hardly anyone else will notice the marbled effect.

green ribbed cardigan

I found some perfect small buttons in my button bag to act as anchor buttons on the inside of the button band – I know nobody but me will ever see them, but it’s a tiny thrill to know that these little hidden buttons match my yarn so well.

green ribbed cardigan

And using a sewing thread that matched my yarn to stitch the buttons to the cardigan tied the whole thing together perfectly.

green ribbed cardigan

I’m really happy with how this cardigan turned out – although shorter than I’d usually prefer, it’s not too short. It’s snug and fits well, and it feels a little lighter than my other sweaters, so it’s nice for a chilly, but not cold, day. And it’s very satisfying to see how my knitting skills are progressing with each finished piece: I’m learning new techniques as I need them, and perfecting the ones I didn’t fully understand while making my previous sweaters. Onto #6!

Comments (14)

Next entries » · « Previous entries
  • Quick Links: Crochet

    navigation: arrow

    buy crochet patterns and accessories from my online store

    'Everyday Crochet' and 'The Essential Guide to Amigurumi' crochet books by June Gilbank

    Crochet video tutorials and step-by-step photo tutorials

    Free PlanetJune crochet patterns

    Frequently Asked Questions

    Quick Links: Crafts

    navigation: arrow

    Punchneedle Embroidery information, ebook & patterns

    Papercraft ebook & tutorials

    Free PlanetJune craft projects & tutorials

  • Blog Post Categories

  • Blog Archives

  • Welcome to PlanetJune!

    June Gilbank

    Hi, I'm June. Welcome to my world of nature-inspired crochet and crafting. I hope you enjoy your visit!

    If you'd like to get in touch, you can contact me here.
    crocheted Canadian flag by PlanetJune
  • A fanned-out pile of the books Everyday Crochet and The Essential Guide to Amigurumi, with text 'The answers to all your crochet questions at your fingertips - find out more'
  • Support PlanetJune!

    Want to say thanks? You can send me money in seconds at paypal.me/planetjune (over $20) or paypal.me/planetjune2 (under $20) or send me a donation through my shop.

    Or simply click through from my links before you shop at Amazon, Etsy, KnitPicks, LoveCrafts or Crochet.com, and I'll make a small commission on your purchase, at no cost to you! Start here:

    ♥ Support PlanetJune ♥

    Tip: This link is also in the footer of every page!

    Thank you so much for your support!