new PlanetJune Accessories Collection!
It’s been a long time coming, but I’m so happy and proud (and a little scared) to announce that the second PlanetJune Accessories Collection is finally ready! Don’t forget to read to the end to take advantage of my launch week discount codes!
The detailed patterns include full written instructions, photos, illustrations, and large, clear charted stitch diagrams where needed, and, as always, are backed up by unlimited support by email, should you have any questions.
So now, please allow me to present the PlanetJune Accessories Fall 2011 Collection! (By the way, there are lots more pictures of each design, if you click through to the individual pattern pages.)
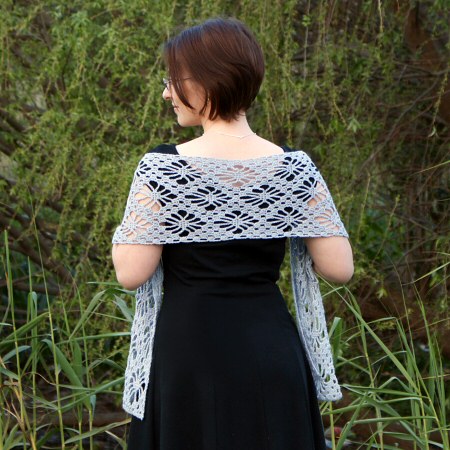
The Diamond Flowers Scarf/Wrap can be worn as a shoulder wrap to show off the stunning diamond flower pattern to the full, or as a lacy scarf. Take advantage of a beautiful sock yarn colourway to make yours look spectacular! I used a bamboo sock yarn for mine, so it’s beautifully silky and soft against my skin. This pattern includes two complete versions: the standard width (as pictured), and an increased width option that allows you to make a wrap of any width.
The elegant Climbing Eyelets Triangular Shawl is worked upwards in rows from the bottom tip, which means the size is infinitely customizable – from a cute and tiny child-sized version to a giant oversized shawl to snuggle into, you’ll just keep crocheting until it reaches the size you want, then add the simple border. The lace pattern has a 2-row repeat, so you’ll pick it up in no time and be able to enjoy crocheting without having to worry about a complicated pattern. I made mine long enough that it covers the gap between the bottom of my shirt and top of my pants when I’m sitting at the computer (like right now)!

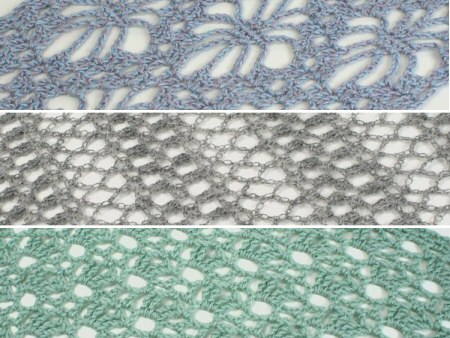
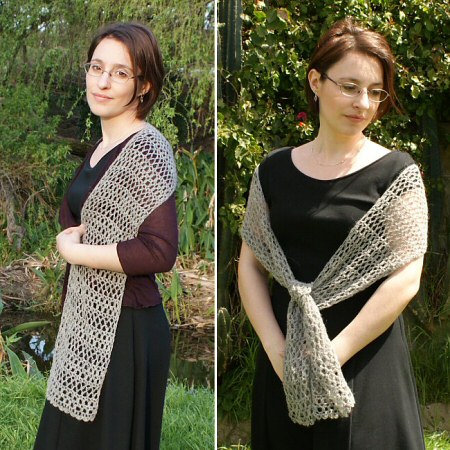
The Banded Lace Wrap continues my ‘easy crocheted lace’ trend from last year’s popular Gossamer Lace Wrap. Wear it as an elegantly light and lacy shoulder wrap, or as a frothy lace scarf (the layers make it surprisingly toasty as a scarf!). It’s easy to crochet in any width you want, from a skinny scarf to a full-width rectangular shawl. Although each pair of bands uses an 8-row repeat, there are only three different stitch patterns to memorise, so you’ll be flying through it in no time.
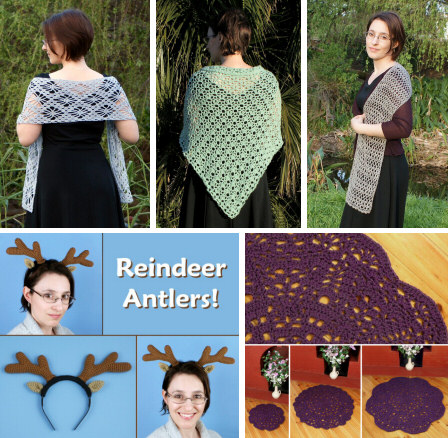
I think the Reindeer Antlers speak for themselves! For an instant cute costume for the kids (or a costume party for adults), crochet these reindeer antlers and ears. All you need is a wide plastic headband and your crochet supplies. Make this lighthearted design and everyone will want to try on the antlers and be instantly transformed into a real-life amigurumi – how can you resist?

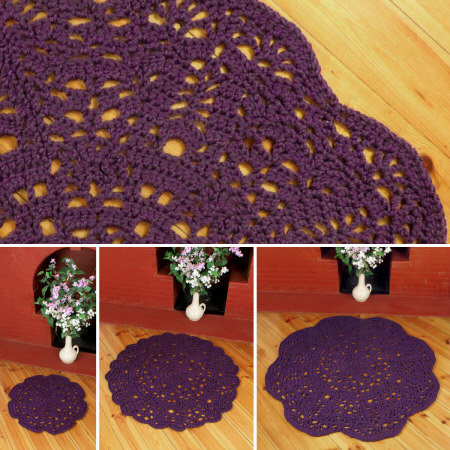
And finally, my Chunky Elegance Rug Trio is three crochet patterns in one! Not just resized doilies, this trio of rug patterns has been specifically designed for comfort: they are soft and cozy to sit or stand on, and there are no large holes that your foot could slip through to touch the cold floor. Each round is different, to keep your interest up as you crochet! The pattern includes coordinated designs in 20″, 30″ and 40″ (50cm, 75cm, 100cm) sizes.
There is one more pattern in the making that was intended to be part of this collection, but I didn’t want to delay the launch any longer. The ‘missing’ design will be my next donationware pattern, and it’ll be perfect to make a few as quick stocking-stuffer gifts, so remember to look out for it nearer to Christmas 🙂
*****
Launch Week Discounts! These discounts are valid on all my Accessories patterns, not just the new collection (excluding last year’s Scalloped Scarf pattern as it’s donationware, so you set your own price anyway).
These automatic discount codes are valid until this Sunday, October 9th.
Buy any PlanetJune Accessories pattern, save 5% with code PJAC05
Buy any 2 PlanetJune Accessories patterns, save 10% with code PJAC10
Buy any 3 PlanetJune Accessories patterns, save 15% with code PJAC15
Buy any 4 PlanetJune Accessories patterns, save 20% with code PJAC20
Buy any 5 or more PlanetJune Accessories patterns, save 25% with code PJAC25
You’ll find all the PlanetJune Accessories patterns in my shop.
*****
I really hope you like the new collection – I’ve worked so hard for the past couple of months to make it as good as possible. Please let me know what you think in the comments and, if you have requests for future accessories designs, ask away!