Ravellenic Games training
I’m back from visiting my family! It was lovely to see them, but, wanting to make the most of my rare time with my parents, sister, and brother-in-law, I didn’t slow down when I got first a sore throat and then a cold, and as a result I’ve ended up with full-blown bronchitis (not much fun). Now I have to try to recover while trying to catch up on everything from the last week, but it was worth it to have some special family time 🙂

I haven’t had a chance yet to remind you about the Ravellenic Games, which start tomorrow! If you’d like to challenge yourself to crochet anything from any of my patterns, there’s still time to join Team PlanetJune and compete along with us to complete crochet projects and earn medals during the timeframe of the Olympic Games.
Prizes!
If you complete one or more events for Team PlanetJune, you’ll be entered into the draw to win special prizes from PlanetJune and Suncatcher Eyes.
There are a total of six prizes on offer:
- $10 gift certificate for the PlanetJune shop (1 winner)
- A free pattern of your choice from PlanetJune (2 winners)
- 10 pairs of eyes (your choice of colours and sizes) from Suncatcher Eyes (1 winner)
- 5 pairs of eyes (your choice of colours and sizes) from Suncatcher Eyes (2 winners)
And all other medalling (not meddling!) Team PJ members will receive the runner-up prize of a PlanetJune discount coupon – there are no losers here 😀
Events
There are lots of Events you can participate in (and we have a handy events’ list for the ones that are applicable for Team PlanetJune), but I thought I’d give you a couple of examples with the projects I’m hoping to medal in:
WIPs Wrestling
RULE: not touched since May 15 2012; projects can’t cross compete in other events
As my original amigurumi kingfisher unfortunately went MIA after being photographed for a certain magazine, I’ve been wanting to crochet a replacement. I started last year, but I’ve been so busy since then that I haven’t had a chance to work on it for months, so the Ravellenic Games will be the perfect opportunity (and incentive) to get him finished.
I don’t think I’ve touched this kingfisher project bag since 2011!
Toy Toss
I won’t be crocheting any other existing PlanetJune patterns for the games, but this is the event category you can use for all my amigurumi! There is no design event, so I’ll be entering my next commissioned design, the Sea Otter, in the Toy Toss event too. To medal in this event, my challenge to myself will be to complete the actual design and sample otter, and not necessarily to publish the pattern by the end of the games (there’s no point in including the pattern writing in the challenge, as I need the instructions to be clear and perfect, and I can’t rush that).
Synchronized Stash Busting
RULE: use only stash yarn that is over a year old
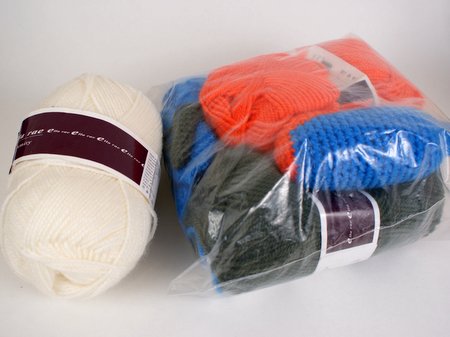
You can qualify for the stashbusting event with a project that’s already entered in another event, so my Sea Otter design will also qualify here, as I originally bought yarn with a sea otter design in mind in 2008 (as part of an AquaAmi Set 2 that I never finished). I just never got around to actually designing it until it was commissioned – one of the reasons I love my new commissions process! But the yarn is still sitting in my stash, ready to go.
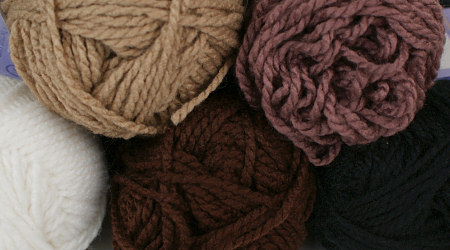
Some, but not all, of these yarn colours will be turned into a cute sea otter…
Training
We’re not allowed to start our projects until the Olympic opening ceremony (9pm tomorrow, UK time, i.e. 3PM Eastern, noon Pacific), but training (i.e. research, swatching, choosing yarns, etc) is allowed! So I’ll be relaxing on the sofa with my laptop and trying to get this bronchitis under control while training for the Toy Toss by doing lots of sea otter research. It’ll be fun – sea otters are totally adorable and I’m looking forward to learning more about them, to make sure my design will be perfect.
I’ll also be hunting through my big yarn stash bags to see if I can locate the cream colour I had bought for my otter’s face. Otherwise I’ll just give him a light taupe face instead, which is fine – sea otters’ faces lighten with age, so mine can just be a younger one 😉
Join us?
We’ll all be cheering each other on with our projects, so if you’d like some added motivation to help you crochet something special over the next couple of weeks, please join Team PlanetJune – we’d love to have you, and you may win a prize too! You can join at any time during the games, which end on August 12th, so don’t worry if you miss the opening ceremonies tomorrow.
It’ll be fun to see how many medals we can amass between us by the end of the games. Go Team PlanetJune!