PlanetJune Craft Blog
Latest news and updates from June

PlanetJune Blog: Latest News, Patterns and Tutorials

Pine Cone Collection crochet pattern

I’ve had to reshuffle my plans a bit this month, as I polled my Ravelry group and discovered that mid-November (my intended release date for this year’s festive pattern) was far too late, so here we are, a month earlier, and it’s time to announce my Christmas design, complete with a launch week discount…

My Pine Cone Collection crochet pattern includes 6 different pine cone designs (3 thin and 3 round). Each cone is worked in one piece, with a clever, easy-to-memorize stitch pattern that results in highly realistic pine cones with perfectly offset scales.

pine cone collection crochet pattern by planetjune

I’m very happy with how realistic these pine cones look in any shade of solid or variegated brown (I used 6 shades of Red Heart Soft and Bernat Satin for my cones; the exact shades are also given in the pattern) and I just couldn’t stop making them once I got started. Once you grasp the concept for the scales it’s really simple, with no counting involved, so they make a perfect TV-watching project where you don’t have to concentrate much on what you’re doing.

Make them in any colour(s), and pile them in a bowl or vase, make them into a wreath, hang them from your Christmas tree, or string them into a garland.

pine cone collection crochet pattern by planetjune

Of course, pine cones don’t only make lovely Christmas decorations – especially in natural colours, they can be used as decoration throughout autumn and winter, or for natural woodland-look decor at any time of year.

If you are thinking about Christmas, wouldn’t they’d also look wonderful in bright and/or sparkly yarns as tree ornaments, or grouped together into wreaths or garlands? (You’ll have to use your imagination a bit here: apparently mid-October is far too early to find Christmas trees in South African shops!)

pine cone collection crochet pattern by planetjune

Pine Cone Collection includes the complete patterns for the 6 different sizes of pine cones pictured, 3 thin and 3 round, with sizes varying from 2-4″ (5-10cm) tall. The pattern also includes modifications that will enable you to make cones of any size, with the same overlapping scale pattern.

pine cone collection crochet pattern by planetjune
Thin cones: A (long), B (medium), C (short)
Round cones: D (small), E (medium), F (large)

If you like it, please don’t forget to favourite/queue Pine Cone Collection on Ravelry:

This week only, you can pick up the Pine Cone Collection pattern with a special launch week discount. (There’s no code needed; you’ll see the special price automatically in the shop.) I love my bowl of pine cones – I think they are perfect for fall/winter decor – and I hope you’ll enjoy the pattern too!

Comments (15)

polymer clay shawl pin

A few weeks ago I was browsing the time-suck known as Pinterest and this caught my eye:

faux wood by art-rukodelie
Faux wood grain polymer clay tutorial from art-rukodelie

I loved the wood-grain effect and it gave me an idea: I had a shawl that needed photographing, and I hadn’t played with my polymer clay for months, so it seemed like a good use of my time to see if I could make my own polymer clay shawl pin.

Now, in case you’re expecting a highly-skilled project from me, I should probably preface my results by saying that I like to use polymer clay in a similar way to how I crochet amigurumi: I combine shaped pieces into 3D sculptures. Patterned clay isn’t something I’m good with – you have to get the shape right immediately, because you lose the colour pattern if you try to do much reshaping or add/remove pieces. Okay, now onto my pin…

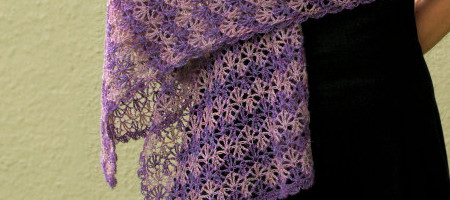
I made a ring shape from leftover scrap clay, and covered it with a sheet of faux wood clay that I made by (loosely) following the tutorial, which was written in Russian but you can easily get the gist of it from the photos. Here’s the result, on my Rippled Lace shawl:

shawl pin

I’m fairly pleased with how it turned out – it polished up nicely, although it doesn’t have the warmth and depth of real wood. I was a bit disappointed to see that the pattern I ended up with on my ring doesn’t really show any of the concentric ring grain alignment from the tutorial(!), but it’s still an interesting pattern and fairly realistic.

I had to scrap my original idea for the actual pin (I was planning to make it from clay-covered wire) as I couldn’t get the clay to form around the wire without completely smooshing my wood-grain pattern into a murky brown mess. So, before my clay veneer got too brittle to work with, I cut two more small disks from it and baked them at the same time as the main piece so I could try to figure out a solution for a matching pin later.

(I couldn’t wait any longer to release my shawl pattern, so I had to stage the photos without the aid of a shawl pin. So much for my justification for embarking on this project, but at least it’ll be ready for my next shawl design!)

In the end, I figured out what to do to make the pin: I found a single ivory-coloured knitting needle in a thrift shop that complemented the natural look of my ‘wood’ quite well. I cut the needle in half, then carved a groove into the back of each of my baked disks and sandwiched them together around the cut end of the needle with some more clay smoothed into the join. After baking, it made a secure and decorative pinhead, so the pin matches the ring.

shawl pin

I enjoyed making this, and it works exactly as I’d hoped it would – it holds my shawls securely in place without damaging them. Hopefully it’ll look photogenic enough to use in future pattern photography too – if not, I’ll just have to treat myself to a real one 😉

I think my handmade pin looks pretty good for a first attempt, but this project has reminded me why I prefer sculpting to patterning, and I think I’ll stick with what I’m good at for future clay projects. Hopefully I won’t wait so long before I play with the clay again… I wonder what I’ll be inspired to make next time!

Comments (9)

October update

Earn more with the PlanetJune Affiliate program

Did you know you can join the PlanetJune Affiliate program, and make 5% of the total of any orders that come when you refer people to my shop?

When I sent out the third-quarter payments to members, I noticed that some affiliates hadn’t reached the $2 minimum for payout, and a few hadn’t made any sales through their affiliate links. I want you to succeed – larger affiliate payments to you means more new customers for me, so we all win!

I’ve come up with some Top Earning Tips to help you earn more through the program. If you’re a new affiliate, or would like to earn more through the program, read on for my top 3 tips for success…

Go to PlanetJune Affiliates: Top Earning Tips >>

Review and Win contest

October’s ‘Review and Win’ winner is Brigitta W, with her review of the pattern that launched my PlanetJune business, Fuzzy Bear:

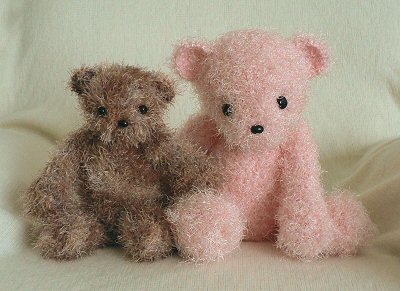
fuzzy bear amigurumi crochet pattern by planetjune

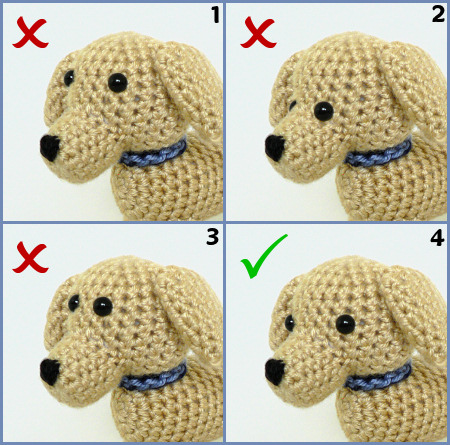
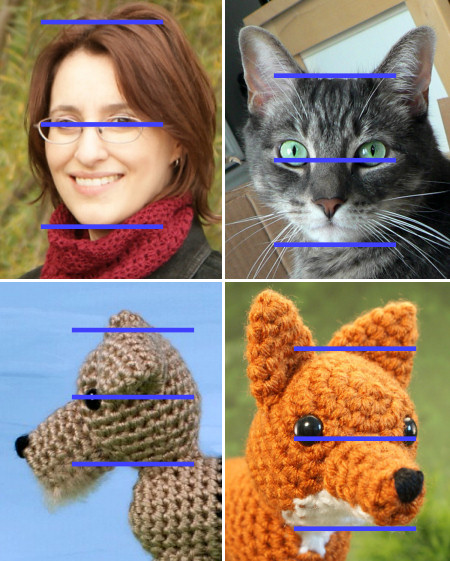
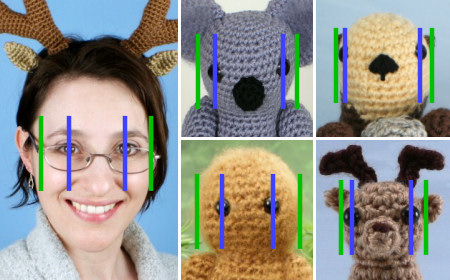
Just finished my first bear and it looks just like the pictures! (which is not always the case, lol) The pattern is written so well and was so easy to follow I completed the bear in only a couple of hours. As it was for a baby I used a soft baby yarn with very little fuzz. (I didn’t want alot of fuzz for the baby to suck on) Although the stiches could be seen it did not take away fron the cuteness of the bear. I also stictched on the eyes and nose with yarn (and thanks to Junes recent post on eye placement, went very smoothly) I did have a little trouble with attaching the pieces but nothing that caused a great problem and I figured out some tricks to help me the next time. This will be a pattern I will use again and again. I highly recomend it!

Congrats Brigitta – I’ll email you to find out which pattern you’d like as your prize 🙂

To be entered into this month’s draw for a free pattern of your choice, just write a review of any product in my shop – thank you!

New Donationware

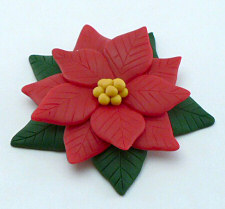
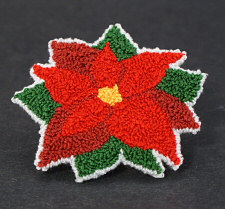
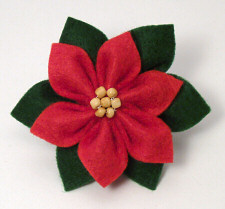
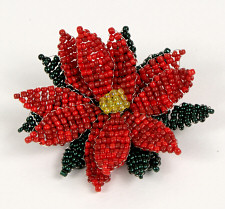
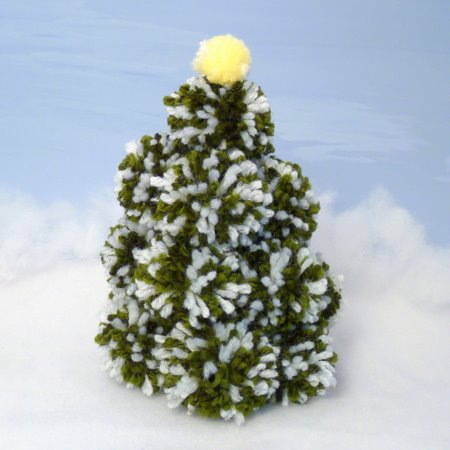
With Christmas approaching, I wanted to make sure I had all my seasonal craft tutorials available as easy-to-print donationware for you. Now you can find all 5 Poinsettias (made with crochet, punchneedle, beaded, felt, and polymer clay) and my Pom-Pom Christmas Tree instructions available as PDFs in the shop for a minimum donation of $1 apiece:

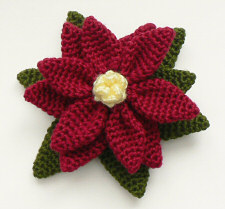
crochet poinsettia by planetjune polymer clay poinsettia by planetjune punchneedle poinsettia by planetjune
felt poinsettia by planetjune beaded poinsettia by planetjune pom-pom christmas tree by planetjune

You can easily find them all – and my other seasonal patterns – by searching for Christmas in my shop.

And my new Christmas crochet pattern is on its way too – all being well, I hope to launch it later this week…

Comments (3)

amigurumi acorn donationware

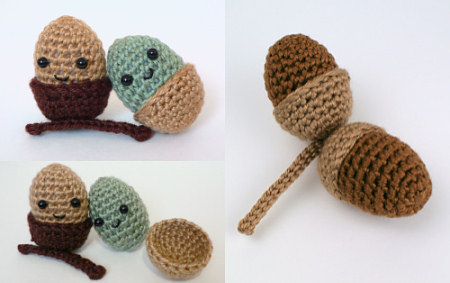
Amigurumi Acorn was one of my first free patterns, from 2007. I created it before I came up with the idea of donationware patterns and I’ve been meaning to add it to my donationware library for a long time. I wanted to show that this popular pattern is far more versatile than just the cute smiley acorns I originally made, so I’ve made a second example set of acorns to showcase the more realistic look you can also easily achieve with this pattern:

amigurumi acorn crochet pattern by planetjune
Cute acorns and realistic acorns – both from the same pattern

To bring the pattern up to standard before adding it to my shop, I’ve revisited and updated the text, and reprocessed the photos to be brighter and clearer. If you’d like to donate for this sweet pattern, I’ve also included lots of additional bonus info in the PDF version:

  • Eye positioning tips
  • How to invisibly stitch the acorn to the cup
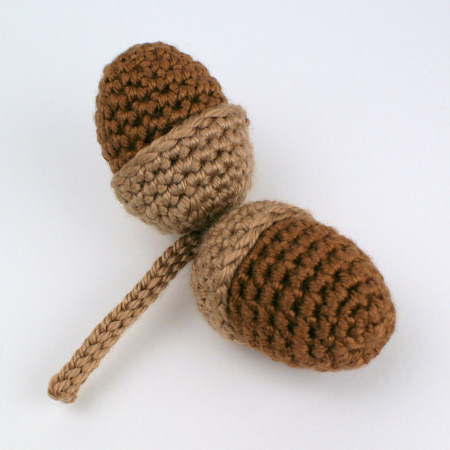
  • An unwired (child-safe) twig pattern (you can see this on my realistic acorns, below)
  • Suggestions for use, and bonus tips

amigurumi acorns crochet pattern by planetjune
My new realistic acorns have a child-safe wire-free twig (bonus pattern only in the PDF)

The improved Amigurumi Acorn pattern is perfect for an autumn wreath or other fall-themed decor; I hear that some people even have an autumn-themed Christmas tree! Although the worsted weight acorns are about 2″ tall, you can miniaturise the pattern with finer yarn or thread and a smaller hook and make adorable acorns that are closer to life-sized.

As always, the basic pattern is free for your use, but you’ll get the bonus tips if you choose to donate for the PDF version. I hope you’ll enjoy it!

Go to Amigurumi Acorn crochet pattern >>

Comments (2)

free pattern: Frosty Windows Scarf

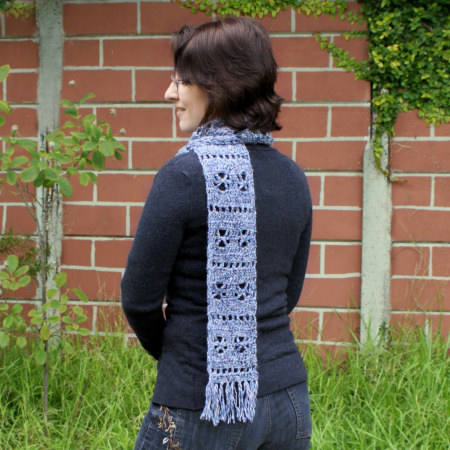
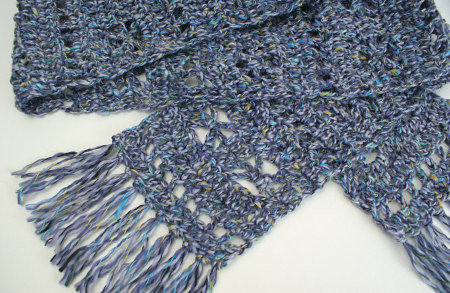
Today I have a new PlanetJune Accessories donationware pattern for you: the Frosty Windows Scarf. With a pretty but easy-to-memorise stitch pattern, you can work up this scarf in almost any yarn. Once you’ve crocheted a couple of repeats, you’ll fly through it – it’s a perfect pattern for handmade gifts or for stashbusting!

PlanetJune Accessories Frosty Windows Scarf crochet pattern

Work it in any weight yarn – although I’d recommend DK weight (#3 light) or heavier for a snuggly scarf – with an appropriately sized hook. As with all my accessory patterns, this pattern has both written instructions and stitch diagrams, and it also includes full instructions for increasing the length and width if you’d like to make a wrap or shawl version!

Frosty Windows Scarf by PlanetJune

As always with my donationware, the Frosty Windows Scarf pattern is free for your use, but if you’d like to send me a donation towards it (completely optional), you’ll receive the nicely formatted and easy-to-print PDF version of the pattern as a thank you. As a bonus, the PDF also includes some additional exclusive info:

  • Step by step photo tutorial for the ‘tr2tog over next 5 st’
  • How to calculate how much fringe you’ll need
  • Step by step photos for making and attaching the fringe

I hope you’ll enjoy crocheting this scarf for yourself, and maybe you’ll make a few extras as Christmas gifts for friends and family?

Go to Frosty Windows Scarf pattern >>

Crochet Along with us!

Please share photos of scarves you’ve made from this pattern in the Accessory-Along CAL in the PJ ravelry group. We’ll be crocheting accessories from now until the end of the year, so you have plenty of time to join in and make even the largest, most ambitious accessory projects – or maybe multiples of the faster ones to give as gifts…

PlanetJune Accessories CrochetAlong
You can find all these patterns in the PlanetJune Accessories section of my shop.

Please join us at the Accessory-Along thread in the PlanetJune Ravelry group if you’d like to crochet a Frosty Windows Scarf – or any other PlanetJune Accessories – along with us!

Comments (1)

BotaniCAL roundup

This extended 6-week CAL was a BotaniCAL including all my patterns that fit the botanic theme (flowers, plants, fruits etc):

PlanetJune BotaniCAL crochet-along patterns

For October, the Ravelry group have decided to have two CALs: the main Accessory-Along, and a bonus Halloween CAL. (If you’d like to take part in one – or both! – see the end of this post for more details.)

Okay, now back to the BotaniCAL roundup! Check out all the Posy Blossoms projects – I created this pattern (and the Crocheted Embellishments tutorial) with the hope that people would use the blossoms to embellish all sorts of things, and that’s exactly what’s happened: we have lampshades, slippers, baby dresses, afghans, paperweights, pacifier clips, toys, hair and jewellery accessories, and more…

Read the rest of this entry »

Comments (2)

ultimate finish for amigurumi [video]

Link easily to this tutorial in your patterns: www.planetjune.com/finish

Continuing with my plan to make video tutorials for every essential amigurumi technique, here’s the latest one: the Ultimate Finish. This is the neatest way to fasten off and close the remaining hole when you’ve finished crocheting a piece of amigurumi. Together with the invisible decrease, you’ll be able to make the bottom of your amigurumi look almost as neat as the top, with a smooth, gap-free base.

ultimate finish for amigurumi video tutorial, by planetjune

(If you already know this technique, you can skip this video, if you like – there’s nothing extra that I didn’t show you in my original ultimate finish photo tutorial – it’s just another addition to my essential crochet tutorials video library, with right-handed and left-handed versions of the video.)

Continue to the Ultimate Finish for Amigurumi >>

Comments

Rippled Lace Rectangular Shawl crochet pattern

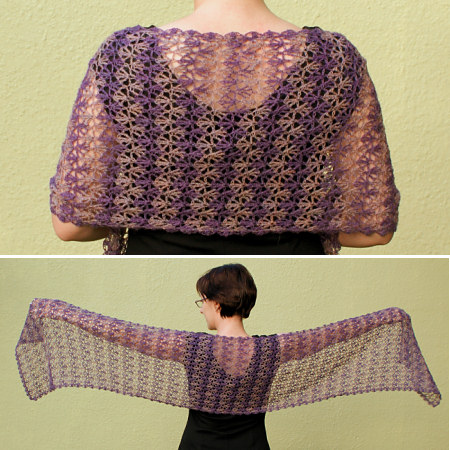
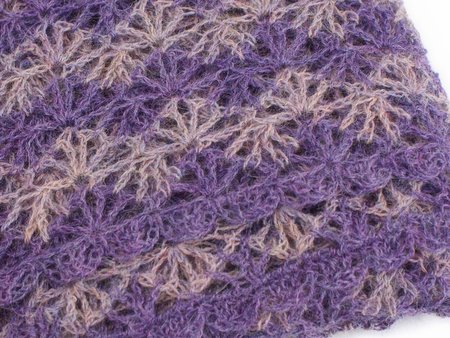
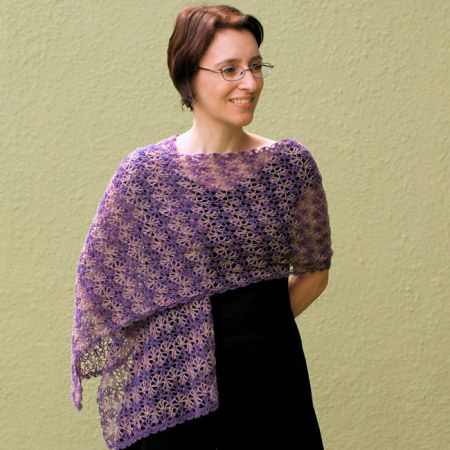
With the Accessory-Along crochet-along about to begin on October 1st, this was perfect timing for me to launch my latest PlanetJune Accessories design, the Rippled Lace Rectangular Shawl. Two harmonising shades of yarn undulate together to create a beautiful gossamer-fine shawl with airy lightness and amazing drape.

Rippled Lace Rectangular Shawl crochet pattern by June Gilbank

The lace pattern has a 2-row repeat, so you’ll pick it up in no time and be able to enjoy crocheting without having to worry about a complicated pattern. The clever stitch pattern is worked continuously from 2 balls of yarn; there’s no fastening off between stripes, or lengths of stranded yarn to worry about hiding. You can even omit the edging and the shawl will still look good!

My lace patterns are designed to be worked with normal-sized hooks into the spaces between stitches, which means that, after the foundation row, there’s no hunting for those tiny fine loops to work into, and they are a pleasure to work.

Rippled Lace Rectangular Shawl crochet pattern by June Gilbank

As always, I include full instructions for modifying the size of the shawl in both length and width – you can make it as narrow as a scarf, or as wide as a blanket, and the length is only determined by how long you want it (and how much yarn you have available).

My shawl uses an entire 400m/50g skein of the main darker colour, and 86% of the contrast colour skein – you can see that it’s very long and a shorter version would still be ample for most people. I used a laceweight baby alpaca yarn (KnitPicks Alpaca Cloud in Foxtrot Heather and Iris Heather) which is surprisingly warm, even with such an open lacy design – I’m really going to enjoy wearing this!

Rippled Lace Rectangular Shawl crochet pattern by June Gilbank

The Rippled Lace Rectangular Shawl is a versatile pattern; here are a few modification suggestions to get you started:

  • Use contrasting colours of yarn to punch up the ‘wow’ factor of the rippled stripe effect.
  • Work the design in a heavier yarn (fingering weight/sock yarns would look lovely) to give a more substantial shawl with more warmth and coverage.
  • Omit the edging, or edge with a third colour, and you’ll be able to make the most of your 2 skeins of yarn in the shawl body.
  • For a faster project, make a narrower scarf-width version.

Rippled Lace Rectangular Shawl crochet pattern by June Gilbank

I hope you’ll enjoy this shawl as much as I do! You can buy the Rippled Lace Rectangular Shawl pattern individually from my shop, or buy it as part of a custom set of any three PlanetJune Accessories designs for a bargain price.

If you’re not quite ready to buy though, how about queuing it on ravelry so you don’t forget about it?

If you’d like to make this shawl, or any of my other accessory designs, I hope you’ll join us in the PlanetJune Ravelry group for the Accessories crochet-along. The CAL officially starts on October 1st, but if you can’t wait to get going, feel free to start crocheting early!

Comments (5)

    navigation: arrow

    buy crochet patterns and accessories from my online store

    'Everyday Crochet' and 'The Essential Guide to Amigurumi' crochet books by June Gilbank

    Crochet video tutorials and step-by-step photo tutorials

    Free PlanetJune crochet patterns

    Frequently Asked Questions

    navigation: arrow

    Punchneedle Embroidery information, ebook & patterns

    Papercraft ebook & tutorials

    Free PlanetJune craft projects & tutorials

    PlanetJune Under the Sea CAL
    Ravellenic Games: Team PlanetJune
    PlanetJune Reindeer Games
    PlanetJune Temperature Snake CAL

    June Gilbank

    Hi, I'm June. Welcome to my world of nature-inspired crochet and crafting. I hope you enjoy your visit!

    If you'd like to get in touch, you can contact me here.
    crocheted Canadian flag by PlanetJune
    Proudly made in Canada!
    A fanned-out pile of the books Everyday Crochet and The Essential Guide to Amigurumi, with text 'The answers to all your crochet questions at your fingertips - find out more'

    Has my work helped you?

    You can also send me a donation through my shop, or simply click ♥ Support PlanetJune ♥ before you shop at Amazon, Etsy, KnitPicks, and more, and I'll make a small commission on your purchase, at no cost to you!

    Tip: This link is also in the footer of every page!

    Thank you so much for your support!