review: ruffle yarn
The team at Kollabora thought I might enjoy playing with a crochet kit (and they were right!), so they sent me their tutorial for making One-Skein Finger Crochet Scarves, and 2 skeins of Red Heart Boutique Sashay yarn. I’ve been curious about these new novelty ruffle yarns, so I thought I’d review the yarn for you and these two very different scarf projects I used it for…
Ruffle yarn scarves
About Ruffle Yarn
As this yarn is so unusual, let’s take a better look at it…

Straight off the skein, it looks like a ribbon
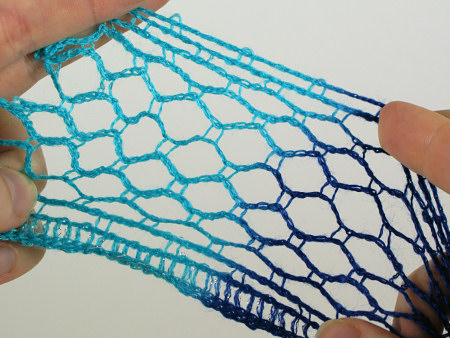
Opened out – you knit or crochet into the top edge; the decorative sparkly bottom edge will be on the outside of the ruffles
If you want to try out a ruffle yarn, Red Heart Boutique Sashay isn’t the only yarn of this type – ruffles are a hot novelty yarn trend and many yarn producers have jumped on board, so you can probably find similar yarns, from different brands, wherever you live.
Project One: Finger Crochet Scarf
I’ve never tried finger crochet, so I thought this would be fun. And it really was! The yarn was actually a perfect match for this project – straight from the skein without stretching the mesh out, it’s very thick and works up quickly. The colour changed every couple of stitches to keep things interesting. If you have kids, this project would be a great way to get them chaining, maybe as a prelude to teaching them to crochet with a hook. Even small children could easily make a necklace/scarf they could wear proudly afterwards.
You can find the One-Skein Finger Crochet Scarves instructions on Kollabora. As an experiment, I tried varying my tension from tight loops, through normal tension, and then then intentionally elongating each loop. The end results are noticeably different, but all 3 look good:
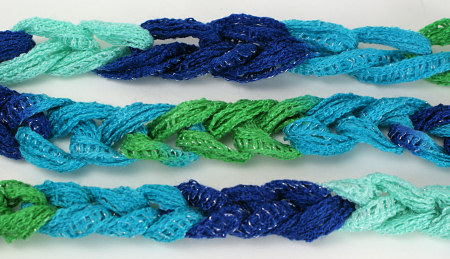
Tension variations, top to bottom: loose, normal, tight
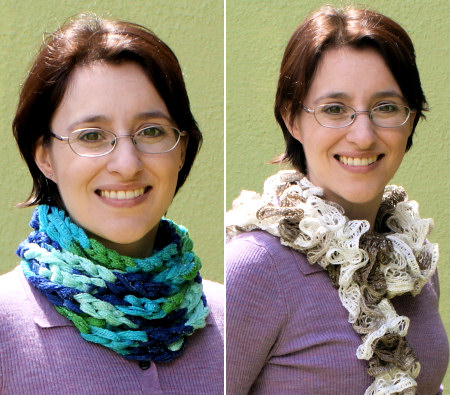
I must admit, I didn’t think this scarf/necklace thing was for me, especially in such bright colours (this colourway is called Twist) – I intended to unravel it and reuse the yarn in the ruffly way it’s intended. But then, just for fun, I tied the ends together, coiled it into 4 giant loops, then wound those 3 times each around my neck to make a giant cowl with 12 wraps, and I kind of love it!
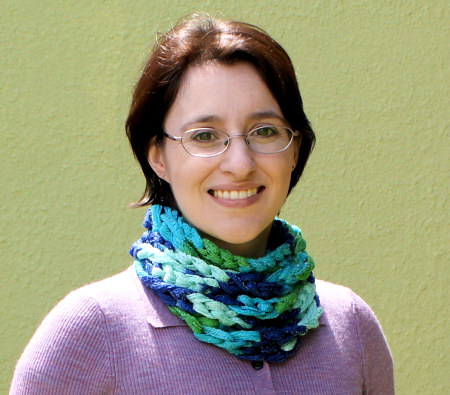
Finger crocheted cowl (12 wraps of giant chain stitches)
Even with my tension experiments, it looks good, but perfectionist me thinks I might just unravel it all and redo it at even tension – it was so fast and fun that it wouldn’t be a hardship to remake it anyway.
Project Two: Frilly Ruffle Scarf
I thought that using the ruffle yarn without opening it out to reveal the texture was a bit of a waste of the special ruffly properties, so I decided to try the knitted ruffle scarf pattern from the yarn’s ball band with my second skein. (It’s the free Frilly Knit Scarf pattern. If you don’t knit, Red Heart have a companion free Frilly Crochet Scarf pattern, but I didn’t realise that until I’d already knitted mine..!)
The knitting part is really really simple – knit 6 stitches and turn – so if you’ve ever knitted before, you won’t have a problem with that. It’s also very fast, and the end result looks much more impressive and complicated than it really is. The most difficult part is wrapping your head around the fact that you don’t use this type of yarn like a conventional yarn: you only insert your needle or hook into the holes along the top edge of the yarn, and ignore the rest of the mesh (which will form the frilly ruffles) – I recommend you look on YouTube for assistance if this confuses you.
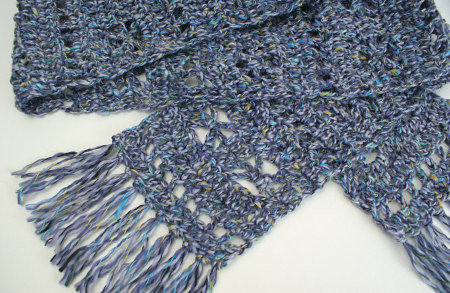
Ruffles!
A little tip: if you’re trying to knit this particular frilly scarf, knit into every other space at the edge of the yarn. (The pattern doesn’t mention this.) If you knit into each space, you’ll end up with a dense spiral and no ruffles! I only figured this out after I’d knit about a foot of scarf and realised it looked nothing like the photo… Luckily it’s very easy to frog, as the mesh is smooth, so there are no fluffy fibre strands to get snarled together. After restarting:
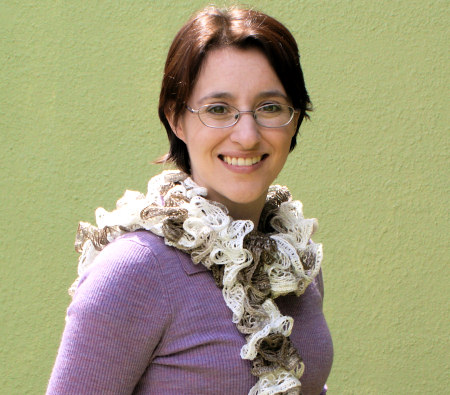
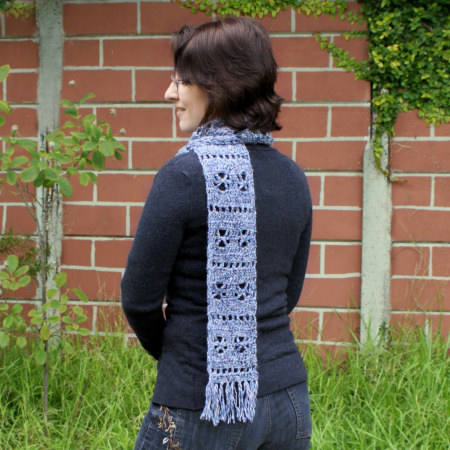
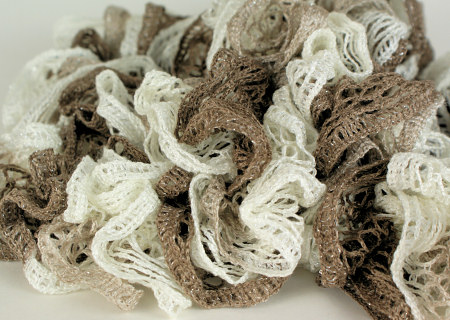
Frilly ruffle scarf
Ooh! The finished scarf is wonderfully lacy and ruffly, but, even in in this lovely muted colourway (called Shuffle) I think it’s a bit too dramatic for my typical understated style – I felt like I was wearing a feather boa 🙂
Ruffle Yarn Verdict
Although it’s a ‘waste’ of the ruffles, a finger-crocheted scarf made from unstretched variegated ruffle yarn is fun, and would be a great first yarn craft project for children. You could easily get 2 scarves from one skein – I’m sure 6 wraps of chained scarf around my neck would have been plenty instead of the 12 I got from using the full skein!
A frilly ruffle scarf – either knitted or crocheted – would make a great gift for the right person, without a huge time commitment in making it. And you can really impress your non-crafty friends who don’t realise how simple it is to make – the yarn does almost all the work for you!
I also think that, in cream or white, this type of yarn would be a perfect way to make easy frilly ‘lace’ collars and cuffs for costumes, but I can’t think of many other uses for it. Even the patterns on the Red Heart site only show it used as an edging, to make a quick flower, or in several (apparently identical except for colour) frilly scarves…
I’d been wondering about these new novelty yarns, so I really enjoyed playing with the Boutique Sashay. As it works up quickly (both in ribbon and mesh forms) you can complete a project in no time, and with only one skein of yarn. It’s a bit limited in use, but, provided you have the right project for it, it’s fun and easy to work with (once you’ve figured out where to insert your hook/needle!)
Thanks very much to Kollabora for sending me these yarn projects to try out.
About Kollabora

Kollabora is a new community site for makers offering DIY inspiration, learning, sharing, and supplies. They offer curated fashion-forward projects in sewing, jewellery and knitting categories (‘knitting’ includes crochet, btw) and, if you feel inspired, you can buy the pattern and all the supplies you’ll need directly from their page.
Their blog includes trend-spotting, how-tos, maker interviews and more, and they also have some wonderful original projects and patterns available at no cost – for example, I love the knitted Anchored Beach Wrap by Ruby Submarine.
Here’s what they have to say:
We believe that we are what we make, and that people should have a creative alternative to just buying products. They should have the opportunity to make what they’re inspired by. Every project on Kollabora feeds and fosters your creativity, and, above all, offers you the choice to make it yourself—a fun, unique and truly fulfilling alternative to simply buying an end product. We hope that you’ll share your adventurous experiences and expertise as we continue to craft our site into a wondrous, one-stop destination for everything you need to make something awesome.
I love this idea! In this time of disposable one-season fashions and cheap, low-quality imports, people are looking to make clothes and accessories instead of buying, and Kollabora’s projects show that you can be just as fashion-forward and on-trend when you choose to make it yourself.
I’ve only explored the knitting (& crochet) section of Kollabora so far, so I’m looking forward to checking out the sewing and jewellery categories to see what else I get inspired to make…