It sounds like many of you are wondering about the ergonomic crochet hooks I bought a few weeks ago, so I’ll give you my opinions so far. Please bear in mind that this is only based on my personal experience with it (the Eleggant Hooks ergonomic crochet hook set).
First impressions
The wooden egg feels good in my hand. It picks up some heat and is warm and comfortable to hold. I’m not entirely sure where my forefinger and thumb are supposed to rest on the hook – is there a preferred way to hold it? My fingers would naturally rest on the textured area used to open and close the mechanism, but that is heavily textured and not comfortable. I shifted my grip to hold further along the shaft, and that was more comfortable.
The initial problem I see is that this hook design is very dependent on your hand size. My hands are small, and, with the egg in the palm of my hand, I wanted to hold the hook too low down (a crocheter with very large hands may find the opposite). The amount of hook shaft that extends from the mechanism is quite short too, which, once I have my fingertip resting on the shaft, makes it really short. That’s not a problem – it’s just something different to get used to.
When I first received the hooks, some of them had quite a sharp ridge over the head, which was catching and snagging on the yarn. I filed the ridge down to smooth it and it was much improved, although it still seems more pointy than what I am used to, and so more prone to split the yarn.
Hook shape
My main difficulty is with the ‘hook’ part. I am very loyal to the Susan Bates hook shape, but this shape is completely different. It’s thin, pointy, and the shaft is narrower than the size of the hook, which makes it more difficult for me to maintain my usual tension.
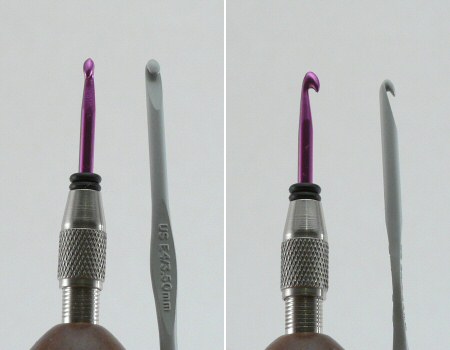
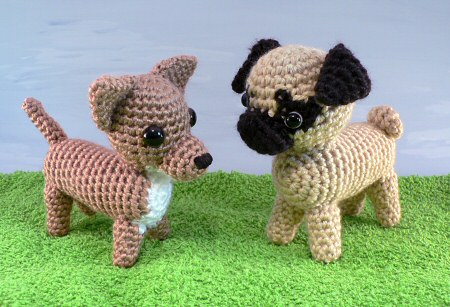
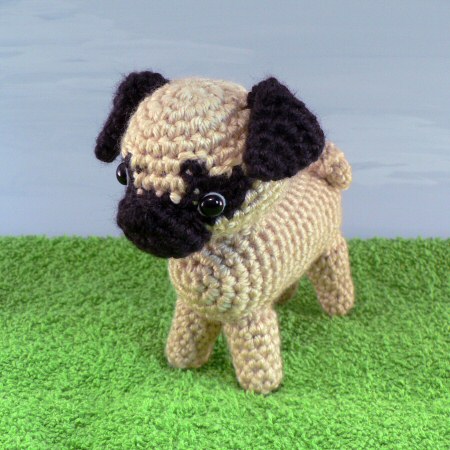
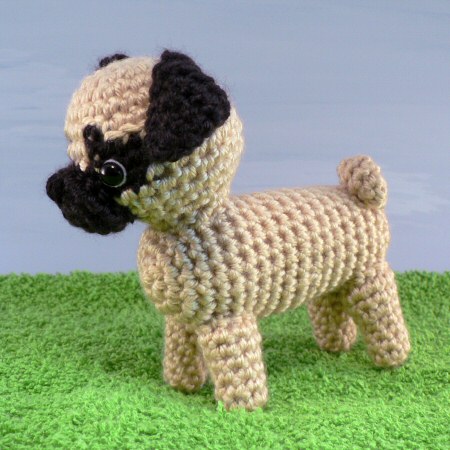
For each picture above, L: 3.5mm ergonomic hook, R: 3.5mm Susan Bates hook
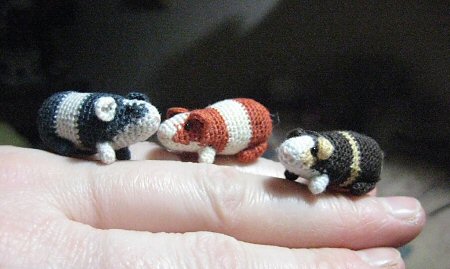
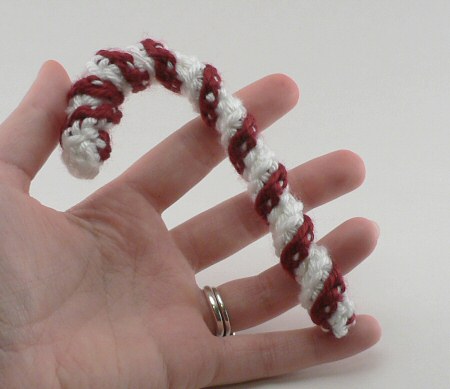
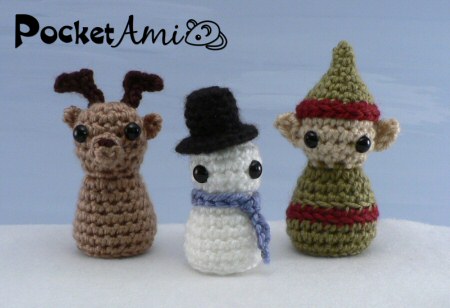
If you like this style of hook (closer to a Boye hook) you shouldn’t have a problem with that though. However, the combination of narrow shaft and very pointy tip of the hook meant that the tip would split my yarn every time I tried to draw back up through a loop. In consequence it took at least twice as long as usual to complete a stitch, trying not to snag the yarn as I drew the hook up through each loop, and my tension was much tighter than normal. You can see the result of this clearly with my Christmas PocketAmi: I made the entire snowman with the new hook, and then gave up and used a regular Susan Bates hook for the other two. See how small the snowman’s body is in comparison (even though they all have the same number of rounds)?
I just want to reiterate at this point that this is not a design flaw with the hook – it’s just the style of hook that I am used to. If you like the Boye hook style, you may love this hook shape….
Ergonomics
My main hand problem when I crochet is actually with my non-crocheting hand; the hand that holds the work in place rigidly grips the work without moving for long periods of time, and that is the main cause of my (crochet-related) pain. So, unfortunately, no hook would address my main concern. If you experience pain in your hooking hand or problems gripping a regular hook, I definitely think the egg shape would help you – it is comfortable to hold and lets you control more of the positioning with the palm of your hand, so there is less pressure on your forefinger and thumb.
One point I should note: either because of the hook shape or the egg, I found myself making more exaggerated twisting motions with my wrist than I normally do when I crochet. I wonder if this could lead to a wrist problem in the long term? I really don’t know.
Overall
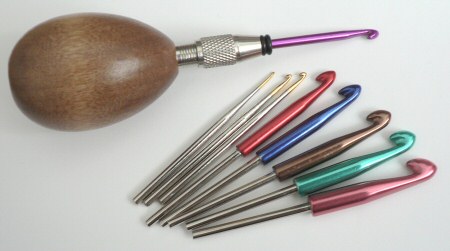
The kit itself is small and convenient, and I do like the support of the wooden egg. I’m considering buying a new Susan Bates E hook and trying to hack it into the mechanism (the shaft is slightly too wide to fit without modifications) – if that works I would have a fair test to see if my difficulties were caused by the shape and style of the hook attachments, or the design of the system itself. I have a feeling I would really like it with my favourite hook attached, and it may also solve the extra twisting motions I experienced.
If I can get my preferred hook to work with the egg, I will definitely report back – I don’t want to put people off buying one just because I don’t get along with the narrow Boye-style hooks!
I can’t recommend you buy or avoid this hook set – I really think so much depends on the user. If you like the hook style it’s supplied with, you may love it. If your hand is not abnormally large or small, you may love it. If you are lucky enough to have a chance to do so, I’d suggest you try crocheting with one before you buy. I had held mine in my hand, but I didn’t try actually crocheting with it.
Crocheting is a repetitive activity, and as such can lead to repetitive strain injuries. The most important thing to remember – whatever hook you use – is to take regular breaks, and stretch your hands (and probably your arms and back too, if you are like me and end up hunched up over your work). Your body will thank you for it!
Over to you…
Do you have any experience with ergonomic crochet hooks, or solutions for crochet-related hand/wrist pain? Please share in the comments!