I bought a cute summer top last week. It was very inexpensive, the colour was lovely, the fabric had a nice texture, and it looked like it would be a cool, pretty, summer top.
And then I tried it on. Um…
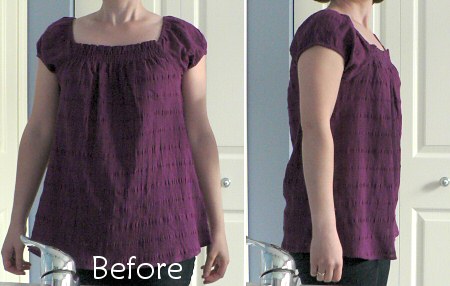
Please excuse the bathroom fixtures in these photos – it’s the only place I have to take photos of myself in the mirror!
I don’t know which body types the ‘potato sack’ look would flatter, but it’s certainly not mine. Is it a maternity top? No it’s not – I did check after seeing the fit, or lack thereof! Do I need a smaller size? No – it’s a size XS. Ridiculous.
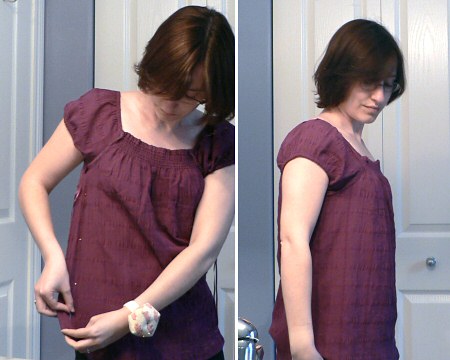
I thought of returning the top, but then I decided to try a little refashioning instead to see if I could improve it. The fabric doesn’t stretch, so I had to take care not to make it too fitted – I need to be able to get it on and off!
Step 1: Measure for new side seams. I turned the top inside out, tried it on, and pinned new seamlines down each side. I took in about an inch and a half on each side, tapering out a bit at the bottom because I didn’t want it to get too tight around my hips. (Turning the top inside out first lets you pin the new shape while you wear the top, and means that you can stitch directly along your pin lines once you take it off.)
Step 2: Sew new side seams and cut off excess fabric. I stitched along my pinned lines with a straight stitch, and then cut off the excess fabric 1/4″ outside my new seams. A serger would be helpful here, but I don’t have one, so I used a zig zag stitch to overcast the new raw edges so they wouldn’t unravel after cutting the fabric.
L: pinning the new seams; R: the top after sewing the new seams
Already a little improvement, but I think we can do more…
Step 3: Add an elastic empire waist at the front. I tried on the top and pinned an empire waistline under the bust, from one side seam to the other. Next, I measured myself along that line and cut a piece of 1/4″ elastic to the same length. I pinned the ends of the elastic to the side seams at the front along the empire waistline. To keep the resulting gathers in the fabric even, I stretched the elastic so that the fabric was flat, and pinned the two together at several points along the elastic.
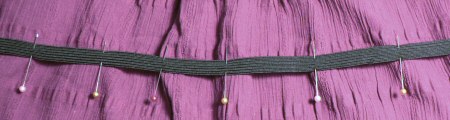
Step 4: Stitch elastic in place. I picked a pretty stretch stitch that happened to match the texture of my fabric, and stitched the elastic to the front of the top, stretching the elastic as I went so that the fabric lay flat as I sewed.

Now the front looked good, but the back was still bulging with excess fabric.
Step 5: Make ribbon ties. I salvaged the strips of fabric I had cut from each side and unpicked the original seams so I had 2 strips of fabric from each side of the top. I ironed them flat and trimmed each pieces into a 1″ wide strip. Then I stitched each pair together to make two longer strips, and ironed the long edges into the middle (using my 1/2″ bias tape maker to keep the strips straight). I couldn’t hide the raw edges because I didn’t have enough fabric width to fold the strip in half again, so I just zigzag stitched down the middle of each strip, catching both raw edges as I went. I ended up with two 24″ ribbons to tie together at the back of the top.

Step 6: Attach ribbon ties. I unpicked enough of each side seam just underneath the elastic to insert the unfinished end of the tie to the inside. I then turned the top inside out and re-stitched the side seams, trapping each tie in place as I sewed.
Turn it back the right way out and… Ta-da!
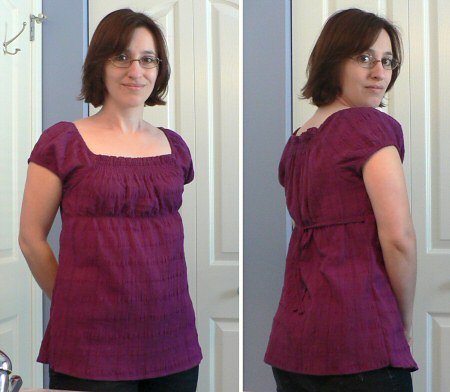
Still loose and floaty, but it has enough shape to not make me look horribly dumpy – which, as I’m only 5’2″ tall, is a prime consideration for me! Potato sack into cute summer top in 6 easy steps 🙂