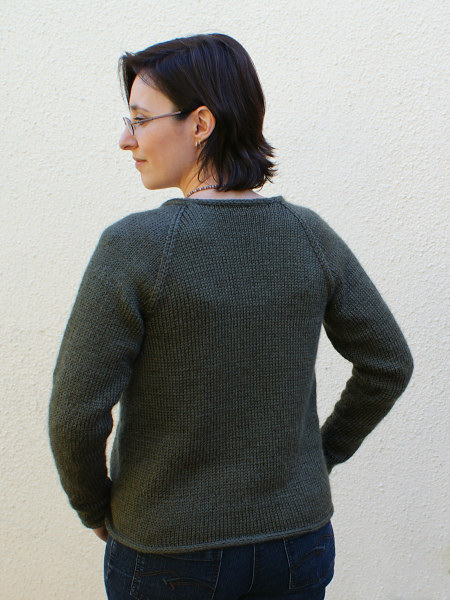
Look what I made!
This was my second ever knitting project, after the wristwarmers I made last year. I lost my knitting momentum as I waited 3 months for the needles I’d ordered to arrive in South Africa, and found it very difficult to pick it back up again, especially as my plan was pretty daunting: to make a cardigan from scratch with no pattern.
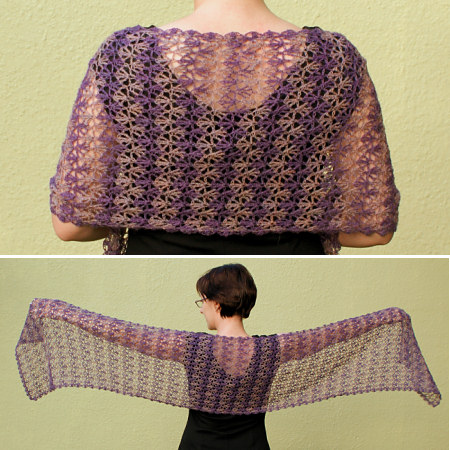
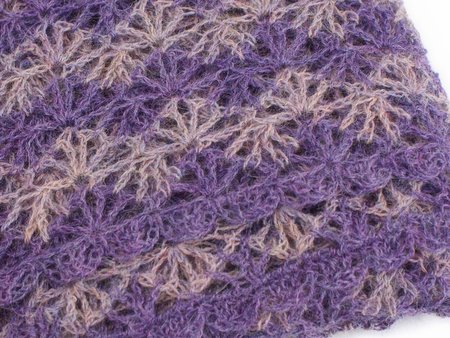
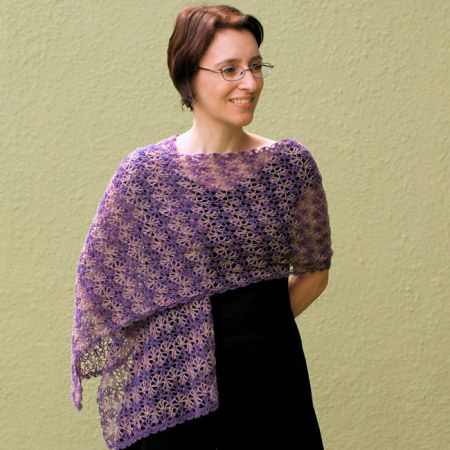
Actually, the plan was for 2 cardigans, one knit and one crochet, as relaxation projects to keep me occupied outside working hours so I don’t end up working all the time. Although the crocheted cardigan was much faster to create (I finished it in July), I haven’t quite finished weaving in the ends on that one, so the knitted one gets to make its debut first 🙂
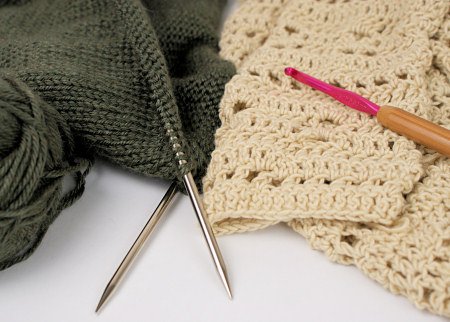
Self-designed knitted and crocheted cardigans in progress
When I finally decided to make a start on the cardigan project in June, I measured some of my existing clothes to give me an idea of size and then just started with the back of each, with no real idea of what to do after that. My plan with this knitted cardigan was to make it a learn-as-I-go piece: picking up new knitting skills along the way as I needed them, and hopefully ending up with something wearable too; or at the very least a good idea for how to make the next one good enough to wear without embarrassment. And, somewhat to my surprise, this strategy worked!
Project Details
Yarn: Bernat Satin in Forest Mist Heather
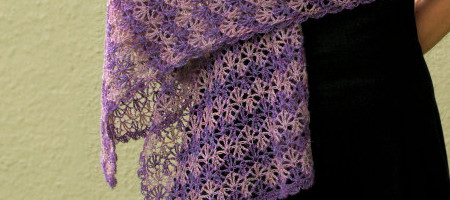
I bought 6 skeins of this yarn at a yarn factory outlet sale in 2010. One became my Diamond Lattice Neckwarmer, so I had 5 left, and I hoped that would be enough. (If not, my plan was to add some stripes of a different colour near the edges.) As it turned out, I only needed 3.7 skeins – less than 700m of yarn – so that’ll be handy to keep in mind for my next sweater.
Needles: KnitPicks interchangeables, 5mm, with 2×24″ and 2×32″ cables
I’m really enjoying these KnitPicks needles. I have the nickel-plated tips and they’re lovely and smooth and very easy to knit with (not that I have anything to compare them with). I made full use of the interchangeable needle tips and cables with this cardigan:
- I held each piece on one of the spare cables until it was time to join them together. To start the next piece, I switched the needle tips to a different cable and screwed the stoppers on each end of the old cable.
- I used cable connectors to make extra-long cables and to join the cables temporarily so I could slide my live stitches from one cable to another.
At some points I had all 4 of my cables in use; I think I’ll need to invest in some more, and longer, cables before my next project.
Pattern: None! I made it up as I went along.
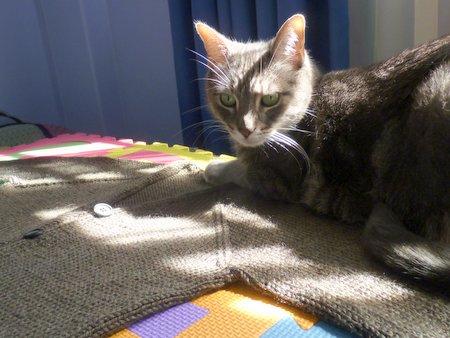
Maui volunteered to keep the finished cardigan held flat while it dried…
Techniques
Here’s my journey of new knitting skills:
Provisional cast-on: I decided to use a provisional cast-on (a crocheted chain made in a different yarn) to give me some flexibility with the length and put off the decision of how to edge the piece until I got further into the project (and hence a little more knitting practice).
Purl: As a cardigan is worked in rows, this was my first attempt at purling (my wristwarmers were worked in the round, so they only used the knit stitch). I made the body in one seamless piece, bottom up, up to the armholes, then set it aside to start the sleeves.
Increases: I knitted my first increases for the sleeves, using Knitting Help’s incredibly useful increase reference to pick the increases I liked best (M1L and M1R, in case you were wondering).
Mattress stitch: I had planned to knit the sleeves in the round as I did for my wristwarmers, but, after working flat, I couldn’t remember how I managed to knit in the round (with Magic Loop) without getting any ladders at either side – it had seemed so easy before! I decided to worry about that later and keep my momentum going by working the seams flat and learning how to stitch side seams invisibly with mattress stitch instead.
A little detour… After making most of the first sleeve, I basted it closed to make sure it was wide enough at the bicep. It turns out that, although my gauge calculations were spot on, the size of my arms is apparently a little wider than I’d thought, as the sleeve was going to fit very closely – not a very flattering look. I ripped it all out, added 20% to all my width calculations and started again…
Decreases: I joined the body and sleeves to make a raglan yoke. It was time to learn how to make left-leaning and right-leaning decreases, so I referred back to Knitting Help to choose my favourites (k2tog and SKP).
Kitchener stitch: After finishing the yoke, I had to stitch the sleeves to the body at the underarms, so it was time to learn how to stitch invisible horizontal seams with Kitchener stitch. I wish crocheted seams were this simple and invisible!
Ribbing: I decided a 1×1 rib might look nice for the edging (with the advantage that I’d then be able to try TECHknitting’s tubular cast-off that I had my eye on). (In the end, I decided against using it in the finished sweater – I just didn’t like the finished look of it, so I ripped the cuffs out and redid them later.)
Magic Loop (again): By the time I got to edging the cuffs, I’d already seamed the sleeves together, so working flat was no longer an option. I relearnt Magic Loop so I could complete the cuff edging in the round.
Tubular Cast-off: I really liked the idea of this cast-off because it has no edge to look messy (and as an added bonus, I got to learn double knitting as part of the technique). The instructions I used didn’t explain one crucial step (bring the yarn to the front before slipping the purl stitches; bring the yarn to the back before slipping the knit stitches) so it took me a while to figure out what I was doing wrong. In the end, although I did master the technique, I didn’t love the look, so I decided to lose the ribbing and tubular cast-off and try something with a cleaner look instead…
I-cord Cast-off: Did you know there are apparently infinite variants of how to do this? Knitting some, or all, of the stitches through the back loop, decrease with k2tog, ssk, or skp… Every tutorial and video I looked at had a slightly different method. I decided to try the KnitPicks tutorial (except with a provisional cast-on) and it looked fine, so I went with that method.
Picking up stitches: Edging the cuffs and bottom was easy – I just ripped out my provisional crocheted cast-on and continued knitting downwards from there. But, to make the collar edging and button band, I needed to pick up stitches along the side edge, so I could add an applied i-cord. My gauge was a perfect 18 sts and 24 rows in 4″ (exactly as the ball band of my yarn claimed!) so I picked up stitches on 3 of every 4 rows so my vertical edging wouldn’t pucker.
Buttonholes: I sort of cheated in my buttonholes: all I did was to not pick up the stitches at the points where I wanted the buttonholes to be, and worked the i-cord without attaching it for 3 rows to leave a vertical gap. I’ll have to learn a proper method in my next project!
Weaving in ends: Thanks to adding edgings, changing my mind, starting new balls of yarn, etc, I had a whopping 26 ends to weave in. Luckily, I already had an excellent tutorial bookmarked from The Purl Bee that clearly shows several different techniques. My favourite was duplicate stitch on the wrong side.
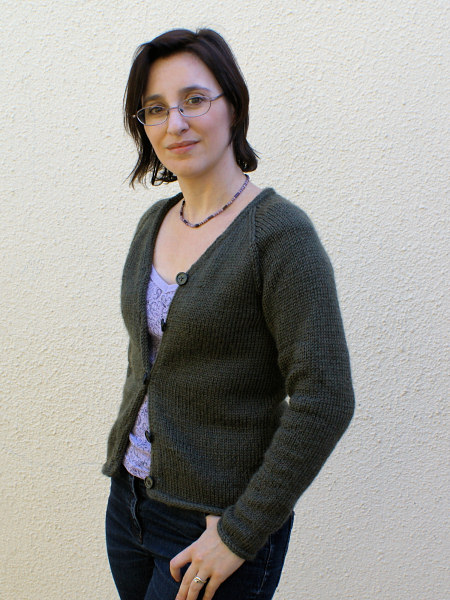
Finishing touches: I was hoping to find some decorative shank buttons to liven up the cardigan slightly, but when I went shopping I found a clear sign that wasn’t the way to go. These buttons cost 5c each (that’s less than 1 US cent apiece!) and amazingly were a perfect match for the greenish grey shade of my yarn. I used sewing thread to attach them, with a crochet hook as a spacer to make a thread shank, and small anchor buttons on the back so my thread wouldn’t cut through the yarn with wear. To finish it off, I knotted yarn all the way up each thread shank both to stop it from being floppy and to disguise the thread.
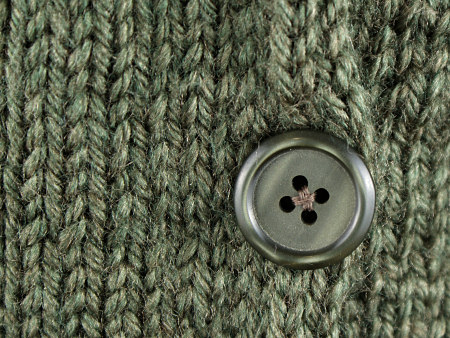
Perfect match! (This photo is untouched – the subtle heathered greenish grey of the yarn shows clearly here.)
Result
13 new knitting techniques learnt, and what do I have to show at the end of it all? A totally wearable cardigan!
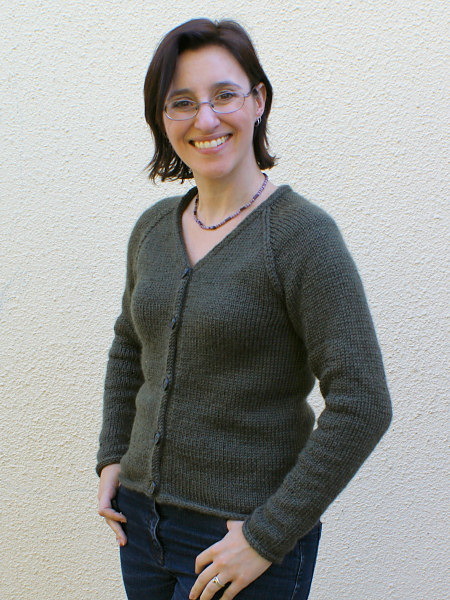
Happy June says “I made this!”
It’s not perfect in terms of design: I forgot to start neck shaping while I was wrestling with the first few rows of the joined sleeves and body, so the V is a little shallower than I’d have preferred. Also, the i-cord isn’t quite enough to stop the stockinette from curling at the bottom, although it does stay fairly flat while I’m wearing it so I don’t think I’ll bother adding a facing to stabilise it.
But it fits very nicely, it doesn’t look embarrassingly ‘homemade’, and it’s been doing a great job of keeping me warm all week. And, in the end, isn’t that exactly what a cardigan should do?
Verdict
As a self-teaching tool, this project worked exactly as I’d hoped – I gradually, over the course of making the cardigan, taught myself a huge number of knitting techniques. If I’d tried to learn them all before tackling the project I’d probably have been too daunted to ever make a start on it. I had the advantage that I’ve read lots of knitting tutorials over the past few years, so, even though I didn’t know how to knit ahead of time, I did know the theory (e.g. you need to pair a left-leaning and right-leaning decrease; you use mattress stitch for a vertical seam and Kitchener stitch for a horizontal seam, etc) – so it was just a matter of googling each new technique as I needed it.
I had no doubt that I’d be able to do something like this in crochet, but designing a knitted cardigan when I didn’t even know how to purl before I started did seem like a bit of a crazy challenge… Knowing that I had a goal (a piece of wearable clothing) in mind kept me moving forward and trying new techniques in a far shorter amount of time than I would have managed to learn them otherwise.
I guess I can say I’ve graduated from the ‘beginner’ knitter category now? Plus, I have the added bonus of a nice warm cardigan that fits! And I suppose I could even call myself a knitwear designer now too, although strictly for fun, not profit 🙂