How to modify the size of an accessory crochet pattern, choose an alternate yarn, and find the right hook for your yarn.
Many accessory patterns – especially shawls, scarves and wraps – are easy to modify: you can use a different weight of yarn and/or make it in a different size. By choosing yarn in a colour and weight you like, you can make a unique accessory from a pattern!
In this post I’ll walk you through the easiest ways to customize a pattern, with examples of the differences you can achieve.
How to Customize a Pattern
Change the Colour
Don’t let yourself be put off from trying a pattern if the sample isn’t in a colour you like – the simplest way to make your accessory unique is to crochet it in your favourite colour (or your recipient’s favourite, if it’s a gift).
Personalizing with colour gives you an original look without modifying the pattern at all, and there are no wrong choices!
Look how different – but equally lovely – my Sweetheart Lace Shawl looks in two different colourways.
Resize the Pattern
If you want to make the piece a different size (for example a narrow scarf instead of a rectangular shawl, or a bandanna instead of a triangular shawl), you’ll need to increase or decrease the number of repeats in the pattern so you end up with a larger or smaller piece.
The exact way to do this depends on the shape of the pattern and the way it’s worked. (All PlanetJune Accessories patterns include instructions for how to modify the pattern to make the pattern larger or smaller.)
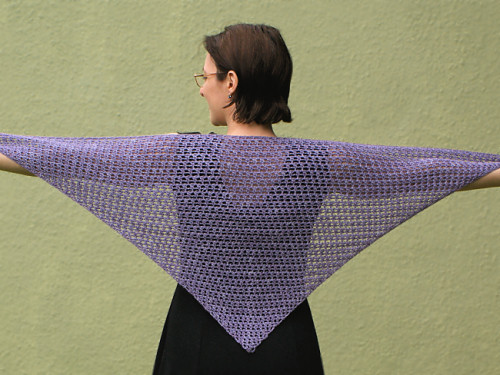
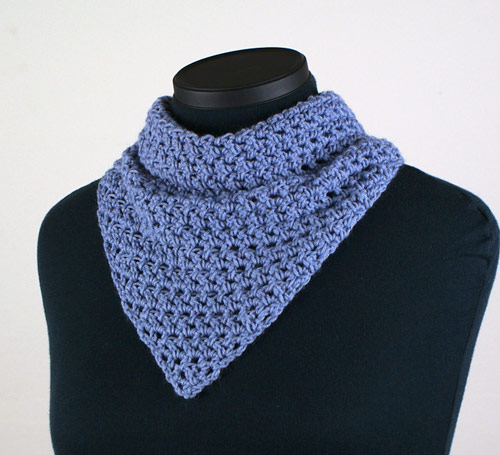
The full-size Cozy Mesh shawl (above) uses the same pattern as the kerchief-style mini shawl (below) – the larger shawl just has more rows!
Substitute a Different Yarn
The thickness, composition and texture of your yarn, together with your crocheting style and tension, will all affect the end result of your piece.
When you’re making an accessory, if you want to use a different weight of yarn, all you need to do is choose a suitable hook for the yarn you’re using, and then modify the pattern so you end up with the correct size.
- If you choose a finer yarn with a smaller hook, you’ll need more repeats and more rows to reach the same finished size.
- If you choose a heavier yarn with a larger hook, you’ll need fewer repeats and fewer rows to reach the same finished size.
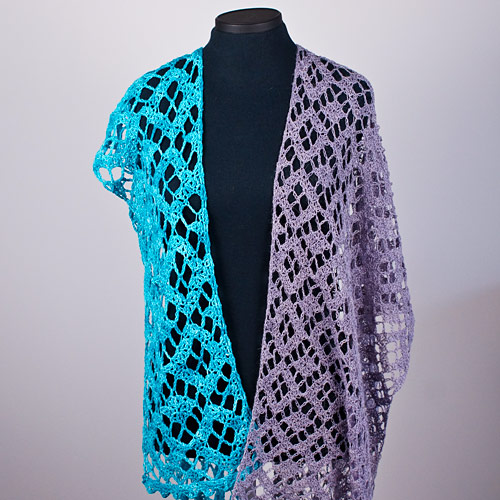
These two shawls are both made from my Half Hexagon Shawl pattern. The shawl on the left uses a thicker yarn and larger hook than the shawl on the right, so it needs fewer pattern repeats to end up with the same size shawl.
Change Yarn Weight and Resize
You can make an accessory look even more different by changing both the yarn weight and the finished size of the piece.
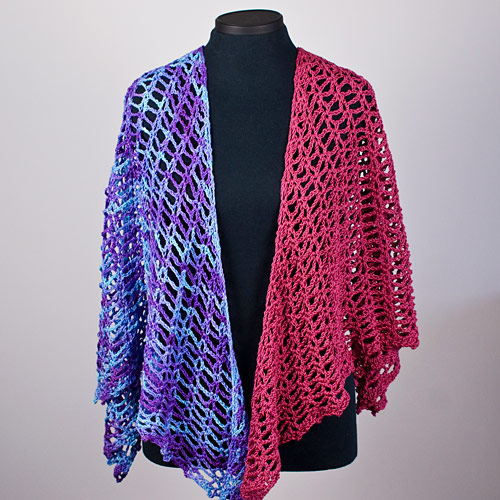
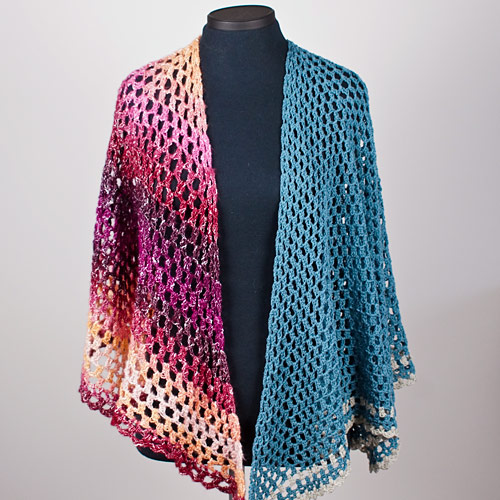
Both these wraps are made from my Diamond Lace Wrap pattern. By changing the yarn weight and the finished size, they have a completely different look even though they use the same stitch pattern! The wrap on the right uses fine yarn and a small hook to give a more delicate look, even though this shawl-sized wrap is much larger overall than the scarf-sized wrap on the left with its bolder stitches.
Swatch to Find Your Hook Size
Swatching to Match Gauge
For almost any crochet pattern apart from amigurumi, the pattern will usually include gauge information: the number of stitches and rows you should have per inch, if you want your piece to end up the same size as the pattern sample.
If you use the same yarn weight as the pattern suggests, and you make a swatch (a sample square using the same stitch as the pattern), you can measure it and compare it with the gauge size given in the pattern.
- If your gauge is smaller (more stitches per inch), then redo the swatch with a larger hook until your gauge matches that in the pattern.
- If your gauge is larger (fewer stitches per inch), then redo the swatch with a smaller hook until your gauge matches that in the pattern.
If you don’t match the gauge given in the pattern, your finished piece won’t match the dimensions listed in the pattern.
Is Swatching Necessary?
Yes and no…
- Are you unconcerned about meeting the designer’s gauge?
- Are you using a completely different yarn weight?
- Are you adapting the pattern to give you a different size anyway?
In any of those cases, making a gauge swatch to make sure you match the designer’s gauge isn’t something you need to do.
But, there’s still a very good reason to do at least a bit of swatching, even if you’re making a scarf or shawl where you don’t care if it’s a couple of inches larger or smaller than it’s ‘supposed’ to be…
Test Your Yarn/Hook Combination
With an accessory pattern, the exact size of the finished piece generally isn’t as important as the look and feel. You don’t want to end up with a stiff heavy blanket if you were hoping for a soft, airy shawl!
So, although you may not care about swatching for gauge, it’s still a good idea to swatch to make sure you’ve chosen the right hook size for your project.
Tip: The ‘right’ hook size depends on the exact yarn you’re using, how tightly you crochet, and your personal preference. There’s no right or wrong answer here – if you’re happy, you’ve made the right choice!
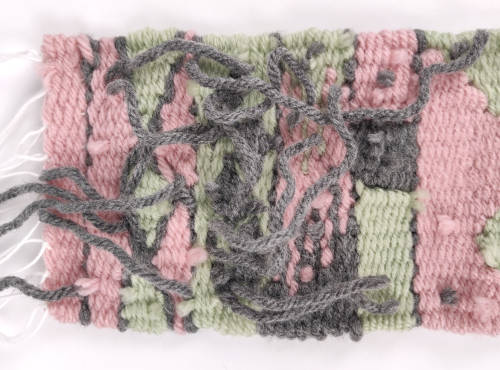
No matter which yarn you’re using, I do recommend you try out just a few rows of the pattern and see if it feels too stiff and firm. If so, try going up a hook size or two, and keep experimenting until you find a yarn/hook combination that gives you a nice-feeling fabric, then unravel everything and start again using the hook you liked best.
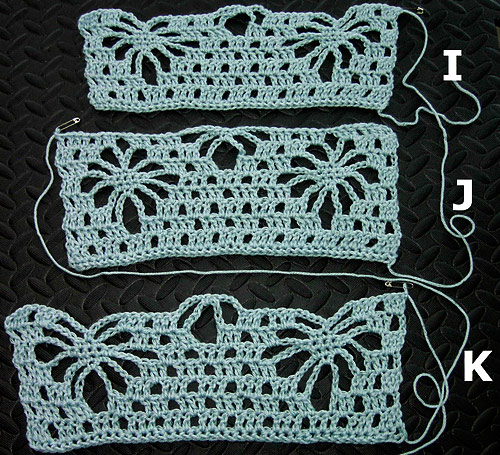
Jamie from my Ravelry group worked up three quick samples of my Diamond Flowers Scarf/Wrap in the same yarn with 3 different hook sizes (I, J, K). You can see how much difference going up or down a hook size can make!
But what is a ‘nice-feeling’ fabric? Here’s how I decide…
3 Rules to Find the ‘Right’ Hook Size
How do you know if you’re happy with your yarn/hook combination?
Here are my rules of thumb that I use to help me choose the perfect hook for a project:
- First, I usually go by feel – I wiggle and smush (yes, those are my technical terms!) the swatch to try to see if it’s at all stiff, or soft and drapey. Generally, you’ll want your shawl or scarf to drape cosily against your body, so try to avoid a hook that produces a stiff fabric.
- Next, from any options that are large enough to feel nice, I look closely at the stitches to see if the looser ones look messy, and I pick the best option (no stiffness, but stitches are small enough to look neat and tidy). Note: Your stitches will all even up a bit if you choose to block your piece after crocheting, but they should still look reasonably neat at this stage!
- Finally, if I can’t choose, the third factor is that you can make a larger piece in less time with a larger hook, so if two hook sizes both feel good, and the stitches look good in close-up, that may be the deciding factor!
It’s not so much about the yarn as it is about the combination of yarn and hook. If your projects turn out too stiff, that means you’re using a hook that’s too small for the yarn you’re using. Everyone crochets differently, so it may be that you crochet very tightly, and always need to use a larger hook to compensate.
It’s worth putting in that bit of extra work before you start, so you don’t end up wasting hours making something you’re not happy with!
Crocheted scarves, shawls and wraps make a lovely holiday gift – and they’re even more special if you personalise them by using your giftee’s favourite colours.
I hope this post has inspired you to consider using your own creativity to customize your next crocheted accessory project with the size and colour you’d prefer!
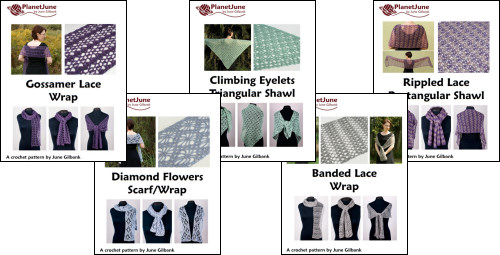
All the examples in this post were taken from my PlanetJune Accessories pattern collection. Take a look now and see if your next crochet project is waiting for you there – or mix-and-match your own Custom Set of any 3 PlanetJune Accessories patterns for a special price. 🙂