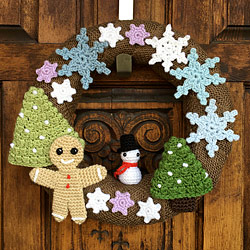
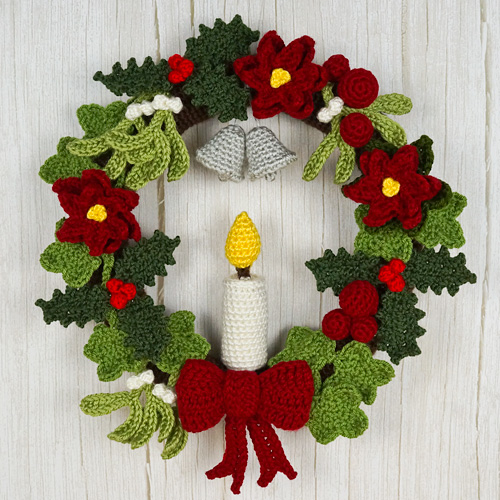
With Christmas rapidly approaching, I thought I’d share my tips on how to arrange a (crocheted) wreath so it looks balanced and beautiful, using my Christmas Decor wreath as an example.
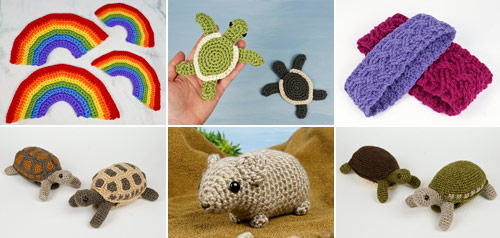
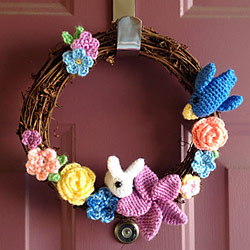
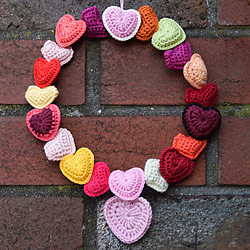
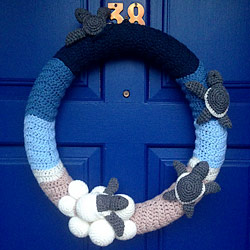
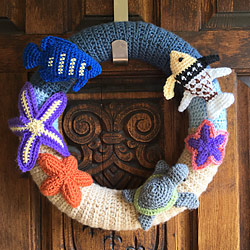
Wreath Inspiration Gallery
Of course, wreaths aren’t only for Christmas, and there’s no one right way to design or arrange a wreath! Depending on your aesthetic, you may like your wreath packed full or sparse, colourful or minimal, with one big focal piece or a sea of little ones.
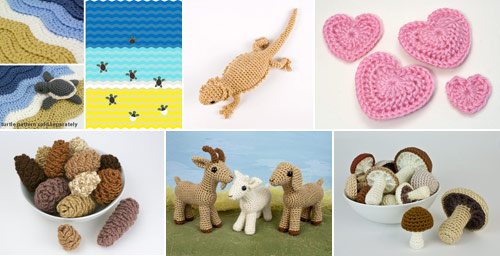
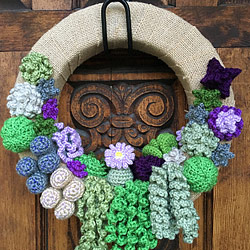
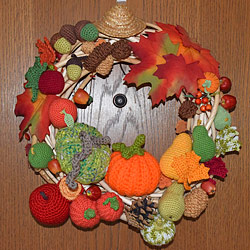
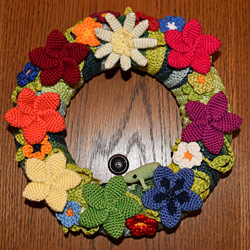
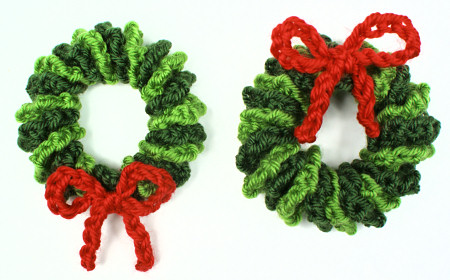
Here are some beautiful wreaths made from PlanetJune patterns, and designed and crocheted by members of the PlanetJune Ravelry group, so you can see how versatile and fun crocheted wreaths can be:
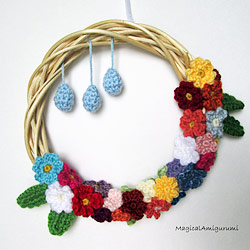
Image credits (L-R, row by row): 1 MagicalAmigurumi; 2, 6, 7, 10 sujavo; 3, 8, 9 petrOlly; 4 aaBrink; 5 Marli2311
Pattern credits: You can find all the crochet patterns in my shop! (Ask me in the comments below if you don’t recognise something specific, and I’ll let you know which pattern it is!)
Different styles, different seasons, different themes, different results, and yet don’t they all look gorgeous? (Well done, PJers!) As you can see, with a little imagination and a few crochet patterns you can create a crocheted wreath for any occasion…
Ready to Crochet Your Own Wreath?
If you’re short on time, space or funds for your holiday decorating this year, how about whipping up my (free) Mini Wreath Ornament crochet pattern instead? It’s only 3″ across, works up in no time, and comes together like magic with almost no sewing required!
But if you’d like to decorate a larger wreath and don’t feel confident to create a design that looks balanced, I’ll give you some tips below. You can copy my method completely for your next wreath, or you can take any of my ideas that you like and make your wreath in your own style.
Design Your Wreath
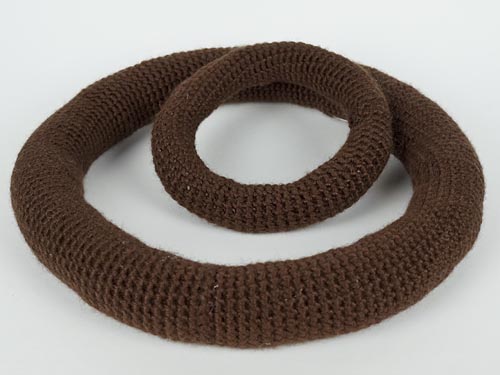
Start with a wreath base
If you’d like to make your wreath completely from scratch, check out my free Crocheted Wreath Base pattern. Otherwise, you can buy a wreath form from a craft store as a starting point – there are lots of options (see the gallery above for some ideas).
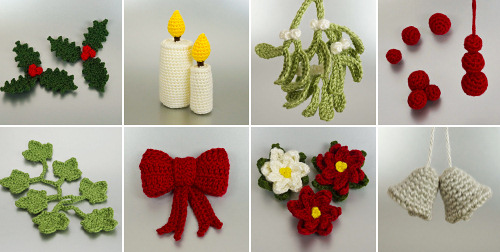
Choose your patterns
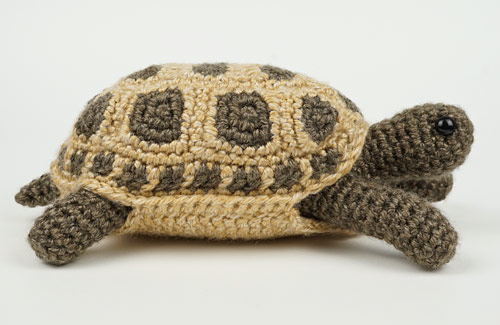
In this tutorial I’m using all eight of the patterns from my Christmas Decor Collection, but you can use any patterns that fit your theme.
Decide on your overall colour scheme
Your wreath will look more harmonious if you crochet all the embellishments from a limited colour palette – see the gallery above for some great examples of the effect of different palettes.
To make the different elements stand out and give the wreath more interest, try using tones of your main colours – lighter or darker versions of the same colour.
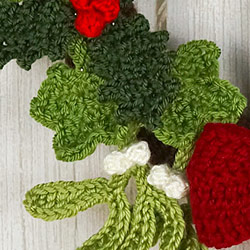
e.g. I used three shades of green (and two different reds) to crochet my pieces. This helps you to tell the mistletoe, holly and ivy apart, even when they overlap each other.
Add highlights
To draw the eye and stop everything from blending together too much, you’ll need some highlights in a contrasting colour.
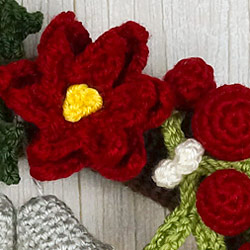
e.g. The small pops of yellow and white in my wreath bring it to life.
Less (colour) is more
Don’t go overboard with the colours – if your wreath gets too busy, your eyes won’t know where to look! Repeating colours around the wreath help to give it a cohesive look.
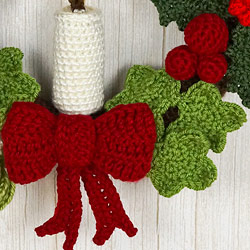
e.g. I used the same shade of red for the poinsettias, baubles, and bow.
Arrange Your Wreath
Arrange the elements
If you have a main focal piece, place that first, then arrange the other elements around it.
Space each type of component out around the wreath so there aren’t any clusters where the same item or the same colour are touching. Go for balance but try to avoid too much symmetry or repetition – the aim is to make your wreath look natural and not too ‘perfect’.
Start by placing the larger pieces, spacing them out around the wreath, and then start to fill in the gaps with smaller pieces.
e.g. This diagram shows the positions of my larger pieces – the bow, holly and poinsettias. First I placed the bow at the bottom centre of my wreath. Using three of each of my larger components (instead of two or four) made it easier to spread them out around the wreath without arranging all the components in a repeating pattern or perfect mirror-image.
Fill all the spaces (or don’t)
Your design may be intentionally sparse, so parts of the wreath form are visible. This can look lovely if you buy a pretty wreath base, or crochet the form in a cheerful colour – maybe with stripes or other colourplay – and make the form a feature of the design. (There are some beautiful examples of all these in the gallery above!)
If you don’t want to make the wreath form part of the design, try to fill all the large spaces with more embellishments. You can either choose part of one of your patterns, e.g. a single holly or ivy leaf or tiny bauble would work well in my case, or add other tiny pieces from simple patterns – e.g. a small flower, leaf, or heart – in a colour to match your design!
When adding the smaller pieces, you can choose which pieces go where semi-randomly, but do your best to choose different colours wherever pieces are going to touch or overlap.
It’s always okay to leave small spaces where the wreath form shows – if your form is a dark colour like mine, it’ll recede into the shadows, or if you make it match your components, it’ll blend in nicely.
Rules are made to be broken!
e.g. Breaking my colour palette ‘rule’, my silver bells don’t fit my colour scheme, but I think it makes them stand out more than if I’d made them in yellow, white or red, don’t you?
In the end, the best design for you is one you like the look of, so
don’t be afraid to play around, try moving pieces about and pinning them in different places to see how they’d look. Stand back and look at the whole wreath from a distance to see if any elements look out of place.
It’ll probably take a little tweaking before you come up with a layout you’re happy with, but I think it’s worth it!
And please ignore any of my tips that don’t feel right in your wreath – they’re only suggestions, and you can see from the gallery above that there are countless different ways to make a very attractive-looking wreath.
A wreath can be a lovely way to display small crocheted amigurumi, appliques and other embellishments, to celebrate an occasion or just to look pretty.
I hope this post has given you some inspiration, and, if you decide to crochet a wreath, I’d love to see it! Please tag me (I’m @PlanetJune on all the socials) or email me a photo 🙂
And enter it into the PlanetJune End-of-Year CAL too! You’ll get a contest entry for each PlanetJune pattern you use (and there are prizes for everyone, so don’t miss out…)