PlanetJune Craft Blog

Latest news and updates from June

Archive for April, 2012

Pocket-Along CAL roundup

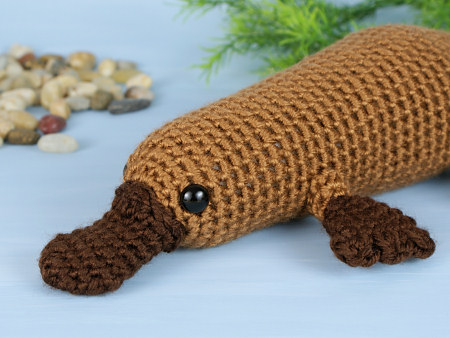
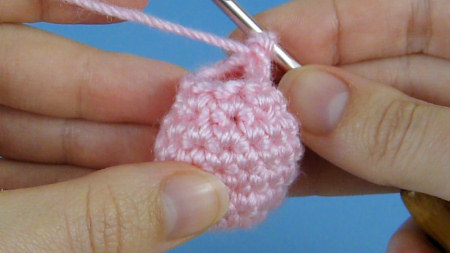
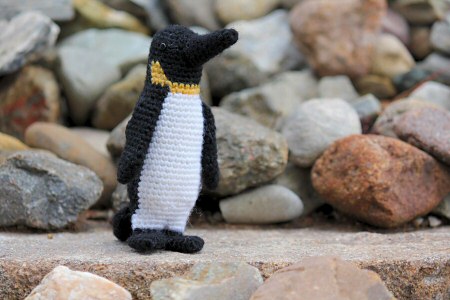
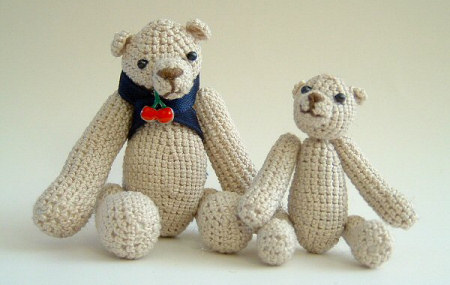
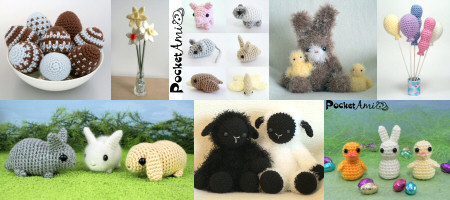
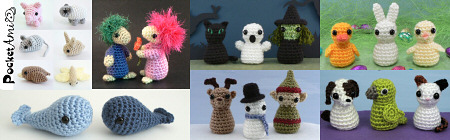
The challenge with the Pocket-Along CAL was to either crochet animals from my pocket-sized patterns, or to miniaturize any of my other patterns by using fine yarn and a tiny hook. What I wasn’t expecting was how many people would do both – take the pocket-sized patterns and shrink them even further! You’ll see a lot of photos here with the crocheter’s hand for scale – most of the entries are keyring-sized, and in fact, you’ll see several with keychains attached.

Pocket-Along CAL at PlanetJune

For the first time this month, I’ve asked participants to follow my new guidelines for CAL photo submissions. By having all the photos supplied at a standard 4:3 ratio, I was able to write some code that will automatically generate all the photos and participant credits below – you can’t imagine how much time this will save me over time, with one of these roundup posts to write every month! (I should mention that my code orders the entries randomly, so don’t look for any patterns here.)

Don’t forget to keep reading to the end of this post for details of the May CAL – starting tomorrow!

Now onto the roundup…

__(‘Read the rest of this entry »’)

Comments (2)

Amigurumi Platypus crochet pattern

Here’s my second design commissioned using my new Commissions process: a Platypus! Thank you to everyone who commissioned this design from me – I hope you like the end result…

Platypus amigurumi crochet pattern by PlanetJune

You probably already know that the platypus is a highly unusual-looking animal. When it was first discovered, the specimen was thought to be a hoax (like a jackalope) assembled from a beaver and a duck!

Platypus Fun Facts

  • Platypus (Ornithorhynchus anatinus) are only found in eastern Australia.
  • They are monotremes (egg-laying mammals).
  • Platypus are semi-aquatic. They live in burrows and hunt for their food (insects and shellfish) along river bottoms.
  • It’s almost impossible to breed platypus in captivity, which is why very few people have seen one in real life – you won’t see them in many zoos.
  • The plural of platypus is sometimes written as platypus, platypuses, platypi, or platypodes!

I thought I had a pretty good idea what a platypus should look like, based on toys, cartoons, and the description of ‘beaver + duck’, but when I started my research I found I was wrong; a google image search shows a huge confusing variety, so I had to learn a lot more about them before I could truly understand what I was looking at. I watched the platypus section of David Attenborough’s wonderful The Life of Mammals over and over to see what they look like in motion, and spent a long time researching platypus features so I could make my design accurate. Here’s what I found:

  • Although all 4 platypus feet are webbed, the front feet are hugely oversized and used for paddling. The back feet are smaller and used only for steering while swimming.
  • A platypus uses its tail to store fat reserves, so a healthy platypus does not have a flat tail like a beaver’s tail.
  • Platypus eyes are located just back from the beak. It keeps its eyes closed while swimming and uses electrolocation to detect food with receptors on its sensitive bill.
  • It’s very easy to understand why people thought the platypus was a hoax: the base of the bill has a really interesting shape which makes the bill look like it’s been stuck onto the front of the face and doesn’t belong there.

So I took all these facts and built them into my design to make it more realistic. My design uses a couple of neat tricks for shaping the beak and feet/legs, but it’s still easy to crochet – I always try to find that balance for my patterns.

Platypus amigurumi crochet pattern by PlanetJune

Platypus amigurumi crochet pattern by PlanetJune

It turned out to be more of a design challenge than I’d anticipated, but, several beak and foot prototypes later, I’m very happy with the result – the final shaping techniques are simple and elegant, and I think he looks really sweet. As a fun extra touch, his webbed feet are also slightly poseable – you can move them around to make him ‘swim’ 🙂

Platypus amigurumi crochet pattern by PlanetJune

I wonder which design will be commissioned next… (By the way, I have many more designs I’m also working on, so don’t worry if nothing else from the list is fully pledged for a while – there are other PlanetJune designs in the works!)

Platypus amigurumi crochet pattern by PlanetJune

If you pledged towards the commission, you should have already received your copy of the pattern. Otherwise, if you’d like to make a platypus of your own, you can now pick up the Platypus crochet pattern from the PlanetJune shop! I hope you like it 🙂

If you’re not quite ready to buy though, how about queuing Platypus on ravelry so you don’t forget about it?

Comments (6)

invisible decrease for amigurumi [video]

Link easily to this tutorial in your patterns: www.planetjune.com/invdec

After the magic ring, what’s the one other technique you need if you want to create beautifully finished amigurumi? The invisible decrease (abbreviated invdec) – it’s absolutely invaluable. Nobody likes to look at a lumpy bottom, and that’s true even for amigurumi rear ends! The invisible decrease is as good as its name – you’ll have no more bumpy or gappy decreases once you’ve mastered this technique.

invisible decrease for amigurumi video tutorial, by planetjune

In addition to the obvious use in amigurumi, you can also use the invisible decrease for any piece worked in single crochet, in the round, without turning (e.g. hats). As it leaves unworked loops on the back of the piece, you won’t want to use it for anything where you turn between rows/rounds, or where both sides will be on display.

(If you already know how to invdec, you can skip this video, if you like – there’s nothing extra that I didn’t show you in my original invisible decrease photo tutorial – but I’m building my crochet tutorials video library and that has to include the essential basics as well as clever tips and new techniques. My next video will show you a brand new crochet technique I just developed!)

And now to the video tutorial (in right- and left-handed versions, of course):

Invisible Decrease for Amigurumi (right-handed)

Click to watch this video on YouTube.

Invisible Decrease for Amigurumi (left-handed)

Click to watch this video on YouTube.

Note: The videos may look a little small embedded in the blog: if so, you can fullscreen them or click through to YouTube to watch them full-sized 🙂

UPDATE: If your invisible decreases aren’t quite invisible and still look a little gappy, see my follow-up tutorial for tips to perfect your invdec stitches.

If you enjoy my crochet tutorial videos, please help to spread the word about them, and/or subscribe to the PlanetJune YouTube channel.


Do you find my tutorials helpful? If so, please consider making a contribution towards my time so I can continue to create clear and concise tutorials for you:

Thank you so much for your support! Now click below for loads more crochet video and photo tutorials (and do let me know what else you’d like me to cover in future tutorials…)

See more helpful PlanetJune crochet tips and technique tutorials

Comments (40)

PlanetJune Stories: Cherie Fishlock

Today’s PlanetJune Story is from Cherie Fishlock and comes to us from Australia. (Isn’t it amazing how crafting connects us all into one big global community?)

Cherie writes:

I’ve been crocheting for a year and am self taught. June’s book, The Complete Idiot’s Guide to Amigurumi, was my go-to guide when crocheting amigurumi especially after I discovered the brilliance of the invisible decrease.

Thanks to June’s amazing emperor penguin pattern I won first prize at the Royal Show in Canberra, Australia in the beginner’s crochet class. I also won champion. It was great seeing the penguin amongst all the crocheted blankets.

I just want to thank June for the well written pattern. I must confess that I crocheted it at the last minute and her clear instructions made the process so much easier especially since I had never done colour changes before.

Unfortunately I couldn’t give June the credit she deserves; I wrote on the entry that it was designed by planetjune.com however that was not displayed.

Considering it was the first show I had ever entered I must say I’m now hooked. 😉

I am impressed: my Emperor Penguin, with its white belly and black back, is my most ambitious pattern for colour changes and Cherie obviously handled them like a pro to scoop the prizes with her lovely penguin.

Congratulations, Cherie – I’m really glad that my pattern could help you showcase your crochet skills and capture the attention of the judges 🙂

PlanetJune stories
Cherie’s Emperor Penguin.

PlanetJune stories
Cherie showing off her prize-winning penguin at the show!

PlanetJune stories
Excellent achievements: certificate, ribbon and rosette.

All very well-deserved, I think, don’t you? Please leave Cherie a comment if you’ve enjoyed this post!

Do you have a PlanetJune Story you’d like to share? I’d love to hear it! Please email your story to june@planetjune.com, together with one or more high quality photos showing what you’ve made from PlanetJune patterns. If I choose your story to feature here on the blog, I’ll send you your choice of pattern from my shop to say thank you!

Comments (7)

Cape Town wildlife XI

This is the eleventh post in my monthly series on the fascinating nature I encounter here in South Africa.

It’s hard to believe, but we’ve now been in South Africa for a whole year! Table Mountain, recently voted as one of the 7 new wonders of the world, towers over Cape Town and the entire city is arrayed around its base. When you live somewhere (as opposed to visiting on vacation) you somehow never get around to doing the major tourist attractions, so we’d never been up it. Then we had a visitor, which meant we also got to do lots of sightseeing around the city, including a trip up the mountain. It’s pretty spectacular, and I thought it deserves its own post, so you can enjoy it too…

Table Mountain is named for its 3km long flat top, which means once you get up the mountain, you can walk along the top without having to do any climbing (yay!) There are paths to walk up the mountain, but we opted for the cable car.

table mountain
The cable car is torture if you, like me, hate heights and get motion sickness, as it has big glass windows and rotates as it climbs. It’s worth it though…

table mountain
Hello Cape Town! The mountain you can see here is called Devil’s Peak and I can see the other side of it from my kitchen window 🙂

The Cape Peninsula has its own ecosystem and a massive amount of biodiversity. The plant life is called fynbos and occurs nowhere else on Earth.

table mountain
Beautiful flowers sprout from cracks in the rocks

table mountain
Naturally-occuring bonsai trees

table mountain
Lovely succulents

And there’s lots of wildlife up here too…

table mountain
Speckled Pigeon

table mountain
Red-winged Starling

table mountain
Black Girdled Lizard

table mountain
Southern Rock Agama

table mountain
My favourite, a dassie! (Click through if you didn’t read about them in my October post.)

table mountain
I included this dassie photo so you can see how sure-footed they are climbing and running among the rocks – those feet really are adapted for mountain climbing.

table mountain
Hummingbirds are native to the Americas. The African equivalents are called sunbirds and they are similar in size and colouring to hummingbirds. This is a female (hence the drabness) – I hope I’ll be able to show you some photos of a more colourful male at some point!

table mountain
Although they don’t really hover like hummers, sunbirds do have similarly adapted beaks so they can reach down into the base of flowers for the nectar.

We spent 3 glorious hours walking around on the mountain top, looking at all the different views and unusual plants, watching the wildlife, and taking in the unspoilt atmosphere. We all managed to get very sunburnt despite our sunblock, but it was well worth it – I definitely agree that Table Mountain should be known as a wonder of the world!

I hope you’ve enjoyed this month’s photos – please leave me a comment if you liked them.

Comments (12)

Worsted weight yarn comparison

NEW! See my fully updated resource comparing dozens more yarns:
Worsted Weight Yarn Comparison

Worsted weight acrylic yarn is what I use and recommend for my amigurumi designs. That’s 100% acrylic yarn, marked as worsted weight, medium weight, or number 4. (Outside North America, it may also be called 10 ply or aran weight.)

worsted weight acrylic yarns

That makes it sound pretty locked down, and that any yarn you choose that fits those requirements will be exactly the same. Of course, if you’ve ever touched, let alone used, two brands of worsted weight acrylic, you’ll know that’s not the case. Thickness, loft (bounciness), stretchiness, softness, shininess – all these properties vary wildly between different yarns all marked as worsted weight acrylic, and that’s why I usually recommend that you don’t mix yarns within an amigurumi.

I thought it might be interesting to try to quantify some of this, as scientifically as possible. So, time for a yarn experiment!

The Contenders

I took 8 samples of worsted weight acrylic yarns, choosing a different colour for each so we can recognise them later:

worsted weight acrylic yarns

  1. Lion Brand Vanna’s Choice (yellow)
  2. Caron Simply Soft (purple)
  3. Hobby Lobby I Love This Yarn! (grey)
  4. Patons Canadiana (beige)
  5. Red Heart Soft (brown)
  6. KnitPicks Brava (red)
  7. Loops & Threads Impeccable (green) – Michaels’ store brand
  8. Bernat Satin (lime)

Test 1: wraps per inch (WPI)

Yarn thickness is often measured in terms of wraps per inch (WPI). To find the WPI, you wrap the yarn around something (e.g. a ruler) so the wraps are touching but not squashed tightly together, and count how many wraps fit into 1 inch. A higher WPI number means a finer yarn.

measuring yarn thickness: wraps per inch
Here there are 12 wraps between the 3″ and 4″ markers on the ruler.

My WPI results were consistently higher than the ones I found on Ravelry, e.g. Bernat Satin (pictured above) apparently has a WPI of 9, not the 12 I measured. But as I’m looking for a trend, not the actual numbers, that doesn’t matter – I measured each of my samples using consistent methodology, so the thicker yarns will have a smaller WPI number in my test.

Test 2: crocheted sample

I crochet with very consistent tension, as you can see by how even the stitches look in my amigurumi. So crocheting an amigurumi-style sample was the best way for me to ensure a consistent result for this test, plus it’s more relevant for amigurumi than a flat square swatch would be. I used an E (3.5mm) hook and crocheted a cup shape with each yarn, using the same pattern for each cup, and making sure the sample was large enough to measure the finished single crochet stitch width and height.

cup-shaped amigurumi sample

As you can see, the samples varied in size considerably:

cup-shaped amigurumi samples
These two samples were crocheted using the same hook and pattern, but the different yarns make a huge difference to the finished size! The Bernat Satin sample easily fits inside the Lion Brand Vanna’s Choice sample.

I flattened each cup to remove any inaccuracy from the 3D shape (it’s hard to measure an accurate diameter). To get an accurate measurement, I measured over 10 stitches and 6 rows to get my average stitch heights and widths.

An Aside: Watch Out!

Even within the same yarn, I’ve found that there can be slight thickness differences between different colours, but here’s an example of a larger difference: for years I’ve been talking with friends about how Bernat Satin seems thinner than it used to when I first started buying it, so I decided to try the WPI test with a sample of Bernat Satin that I bought in 2007.

After verifying that the change in the yarn was real (old WPI 11, new WPI 12), I checked the ball bands from several skeins of old and new Satin. All Bernat Satin has a weight of 100g, but the older balls were labelled as between 149 and 152m per 100g skein. All the newer balls are labelled as 182m per 100g skein. That’s 30 metres more yarn with the same total weight, which means the yarn really has got thinner (and the gauge information was never modified, although the gauge is definitely different since the change!)

So my little caution is to watch out – even if you’re buying the same brand and type of yarn, it may not have exactly the same thickness.

The Results

Yarn Sample Colour WPI Stitch width / mm Stitch height / mm
LB Vanna’s Choice yellow 11 6.2 5.5
C Simply Soft purple 13 5.4 4.8
HL I Love This Yarn! grey 12 5.9 5.0
P Canadiana beige 13 5.3 4.7
RH Soft brown 13 5.3 4.7
KP Brava Worsted red 13 5.6 5.0
L&T Impeccable green 11 6.3 5.5
B Satin lime 12 5.3 4.7

I arranged all the flattened samples by size here so you can see the difference visually too – 0.3mm per stitch may not sound like much, but you can see that it really makes a difference, even in a small amigurumi piece:

worsted weight acrylic yarns
Flattened samples from the top – the height of the samples shows the stitch width variation

worsted weight acrylic yarns
Flattened samples from the side – the height of the samples shows the stitch length variation

Now here’s the table again, this time with the yarns arranged in the same order as in the photos above. Italics show the thinnest yarns, and bold shows the thickest.

Yarn Sample Colour WPI Stitch width / mm Stitch height / mm
B Satin lime 12 5.3 4.7
P Canadiana beige 13 5.3 4.7
RH Soft brown 13 5.3 4.7
C Simply Soft purple 13 5.4 4.8
KP Brava Worsted red 13 5.6 5.0
HL I Love This Yarn! grey 12 5.9 5.0
LB Vanna’s Choice yellow 11 6.2 5.5
L&T Impeccable green 11 6.3 5.5

But it’s not just weight that plays a part; the yarns’ appearance and feel also vary. Old-fashioned acrylics felt hard and looked matte, whereas many modern ‘soft’ acrylics feel silkier to work with, and have more of a sheen to them. You may prefer a firmer, more rigid yarn for amigurumi, or like the shinier, softer look and feel. For me, I like both, but I’d never want to mix them in one project.

This final table of results is more subjective, but it’s my attempt to classify the yarns by which are similar enough to use within one project, both in terms of softness/shininess and weight. These are just my opinion, and I may have invented the term ‘light worsted’, but I feel it applies for subdividing the ‘worsted’ weight into strata of weights that match each other more closely.

Yarn Sample Colour Shininess Weight
B Satin lime sheen light worsted
P Canadiana beige sheen light worsted
RH Soft brown sheen light worsted
C Simply Soft purple sheen light worsted
KP Brava Worsted rust slight sheen worsted
HL I Love This Yarn! grey slight sheen worsted
LB Vanna’s Choice yellow slight sheen heavy worsted
L&T Impeccable green no sheen heavy worsted

So, I’d use any of the top 4 yarns (Bernat, Patons, Red Heart, Caron) interchangeably – they have a similar weight and sheen to them, and the size difference is no more than that between different shades of the same type of yarn. Of the remaining four, they make 2 pairs in terms of weight, but the KnitPicks and Lion Brand are far softer than the Hobby Lobby and Michaels’ store brands, and have more sheen, so I wouldn’t mix them.

Recommendations

  • Although some worsted weight yarns are thicker than others, all make good amigurumi! The only difference is the size of the finished result – they will scale correctly so using the same pattern with a thicker yarn will give you a taller, wider and deeper amigurumi – it will remain in proportion to the original design.
  • These results aren’t so important if you’re making simple amigurumi e.g. a brown bird with a yellow beak and feet, but if you’re making multi-coloured amigurumi with colour changes within the pieces, or more complex shaping, I recommend you use my results (and/or do your own test first), to make sure the yarns you’ve selected are comparable in thickness, feel, and appearance before you start.
  • Don’t believe the gauge info when you’re comparing yarns for amigurumi! Only half the yarns I tested had crochet-specific gauge info, but according to those that did, you’d expect Vanna’s Choice (one of the heaviest yarns I tested) to be thinner than Red Heart Soft (among the lightest yarns in my test) – that’s clearly incorrect. The other gauge information (for recommended hook/needle sizes and knitting) seemed equally random/incorrect compared with my tests.

I hope you found my little experiment useful! I know it’s answered some questions for me, and now I’ll feel more confident about deciding to mix, or not mix, certain yarns in my future amigurumi projects.


Do you find my tutorials helpful? If so, please consider making a contribution towards my time so I can continue to create clear and concise tutorials for you:

Thank you so much for your support! Now click below for loads more crochet video and photo tutorials (and do let me know what else you’d like me to cover in future tutorials…)

See more helpful PlanetJune crochet tips and technique tutorials

Comments (132)

interview with June, part 2

As I’m a 99% self-published designer, I don’t often get profiled in crochet magazines etc, so my Ravelry group decided to interview me to find out a little more about who I am and what I do – my own PlanetJune Story, if you like! I’ll be posting the answers to some of their questions every now and again, and grouping them by theme if they fit together nicely. Here are the questions I’ll be answering today:

Why Amigurumi? (from Monica, theMarkofSMB)
How did you find out about Amigurumi? (from Monica, theMarkofSMB)
Do you crochet from other designers’ patterns? (from Aleksandra, petrOlly)
How did you get into designing patterns? (from Chrisie, CrochetChrisie)
What is your favorite animal? (from Monica, theMarkofSMB)

In 2005, the online craft scene was very different. Imagine a world with no Ravelry, no Etsy, only a handful of craft blogs (and no way to subscribe to them), no social media… It’s strange to think how much things have changed in only a few years!

Back then, amigurumi was pretty much unknown outside Japan, but when I got bored with afghans and scarves, I managed to find something different in crochet that piqued my interest: thread bears – tiny bears crocheted with thread and steel hooks. Free patterns weren’t common back then, and thread bear design seemed to be a closely guarded secret – there was no free way to find out how to make them. As the idea of working in rounds was completely new to me, I had no idea where to even start on making a crocheted toy, so I bought one pattern from a designer on eBay so I could see how these crocheted bears worked.

Now, I really don’t like to follow patterns – crochet or otherwise. I can’t help myself – I have to tweak and ‘improve’. Even my first thread bear didn’t quite follow the pattern I’d bought, and then I started changing them to make them simpler and cuter (unknowingly, I was creating something closer to amigurumi style!)…

thread bears by planetjune
L: loosely based on a pattern I bought; R: my first attempt at a design

thread bear and bunny by planetjune
Further refinements (all are between 4 and 6cm tall as seated)

I got curious and tried making a regular-sized bear of my own design with eyelash yarn and a larger hook:

blue crocheted bear by planetjune
Blue Bear – a very early amigurumi prototype, ahead of its time!

…and that was the end of the story for well over a year. With no blog or online community, nobody saw what I was making, and there was nobody to tell me I was onto something and I should keep going in this direction, so I didn’t.

But then things started to change – we had forums like Crochetville and Craftster to share what we were making, and more people (including me) started their own craft blogs. I began to hear about amigurumi, and crocheted toys were starting to get more popular.

I didn’t really like the style of any other amigurumi I’d seen, so I wasn’t too interested in them. Then I remembered my fuzzy Blue Bear – nobody was making anything like that, despite the proliferation of eyelash yarns around that time – and decided to try remaking it from scratch with more structure and better proportions. And look what happened:

fuzzy crocheted bears by planetjune
Hey, it’s Fuzzy Bear!

I submitted an early version of Fuzzy Bear to the Crochet Pattern-a-Day Calendar, but didn’t hear anything back from them. People on Crochetville and my fledgling blog seemed interested in a pattern anyway, so I thought I’d self-publish it as a PDF and see what happened…

(As it turns out, Fuzzy Bear not only made it into the calendar that year, but also made the back cover! Luckily, by the time I found out, I was already well down this road as a self-published crochet designer.)

It turned out I had a perfect combination of skills for doing this: my science/mathematical background worked well for figuring out all the numbers for patterns, and my technical writing background let me write clear, concise, accurate instructions. And, not only that, but all my other crafty pursuits lent themselves to my designs too:

My love of all animals (and, to answer the question, cats are my favourite ‘pet’ animal and orang utans my favourite ‘non-pet’) and observation skills I used to make my painstaking animal pencil sketches came in handy when I decided to make more realistic animals instead of traditional ‘toy’ shapes.

pencil sketches by June Gilbank
Some of my pencil sketches: cat with flowers, donkeys

And I’d also done lots of 3D modelling before, both in recreating toys from much-loved childhood TV shows:

pencil sketches by June Gilbank
Hand-sewn Charlie Mouse from Bagpuss – my own design (inset pic shows the real Charlie Mouse from the show)

…and making polymer clay sculptures:

polymer clay sculptures by June Gilbank
My versions of the flying pig from an old Telus commercial and Gingy from Shrek

So even though I started down this road by accident, it does make sense, looking back, that I could combine all my skills and interests in this way and find something that was a perfect fit for me – making models of my favourite things is something I’ve always done, many years before I even learned to crochet, let alone knew it could be used to create 3D models. Crochet lends itself to pattern-making more easily than clay sculpture, but, apart from that, the design process is pretty similar for me.

planetjune toy shelves
Some (nowhere near all!) of my amigurumi designs

Although I’m still amazed and grateful that I’ve been able to create a career from this, I’d still be making amigurumi even if nobody bought my patterns, because I just love to do it. Finding out about, and spending time with, animals and nature; crochet; sculpting; design challenges; and a good excuse to fill my house with the cutest toys I can imagine – what could be better?

I hope you’ve enjoyed hearing a bit about my introduction to amigurumi. If you have any questions you’d like to add to the interview pool, please submit them on Ravelry or in the comments of this post – I’ll do another interview post in a little while!

Comments (8)

Easter CAL roundup

Welcome to BunnyFest 2012! Okay, this is actually the Easter CAL roundup, but I’ve never seen a pattern catch the imagination of so many people so quickly the way my Baby Bunnies design has – as you’ll see from this roundup, crocheted bunnies are taking over the world this year.

Easter CAL at PlanetJune

It’s so much fun to see how people are putting their own twists on my pattern to create all kinds of different bunnies. But let’s look at the other CAL entries first, and I’ll save the bunny gallery for the end! Here goes…

__(‘Read the rest of this entry »’)

Comments (7)

« Previous entries
  • Quick Links: Crochet

    navigation: arrow

    buy crochet patterns and accessories from my online store

    'Everyday Crochet' and 'The Essential Guide to Amigurumi' crochet books by June Gilbank

    Crochet video tutorials and step-by-step photo tutorials

    Free PlanetJune crochet patterns

    Frequently Asked Questions

    Quick Links: Crafts

    navigation: arrow

    Punchneedle Embroidery information, ebook & patterns

    Papercraft ebook & tutorials

    Free PlanetJune craft projects & tutorials

  • Blog Post Categories

  • Blog Archives

  • Welcome to PlanetJune!

    June Gilbank

    Hi, I'm June. Welcome to my world of nature-inspired crochet and crafting. I hope you enjoy your visit!

    If you'd like to get in touch, you can contact me here.
    crocheted Canadian flag by PlanetJune
  • A fanned-out pile of the books Everyday Crochet and The Essential Guide to Amigurumi, with text 'The answers to all your crochet questions at your fingertips - find out more'
  • Support PlanetJune!

    Want to say thanks? You can send me money in seconds at paypal.me/planetjune (over $20) or paypal.me/planetjune2 (under $20) or send me a donation through my shop.

    Or simply click through from my links before you shop at Amazon, Etsy, KnitPicks, LoveCrafts or Crochet.com, and I'll make a small commission on your purchase, at no cost to you! Start here:

    ♥ Support PlanetJune ♥

    Tip: This link is also in the footer of every page!

    Thank you so much for your support!