PlanetJune Craft Blog
Latest news and updates from June

PlanetJune Blog: Latest News, Patterns and Tutorials

fall seasonal patterns & crochetalong

Fall Crochet-Along at PlanetJune

Don’t miss the Fall Crochet-Along info and discount code at the end of this post!

Did you know that, as of right now, I have 75 crochet patterns in my shop?!

That’s a lot to look through! I thought some of you may be new to the wonderful world of PlanetJune (ha!) or might appreciate a reminder of some of the patterns I have in my store, so here’s a little seasonal roundup for you of my Autumn, Thanksgiving and Halloween-related designs:

1. My Fruit Bat pattern is all worked in single crochet (as usual). His wings are worked in rows instead of rounds. Pipe cleaners in his wings let you wrap the wings around his body, but you can easily omit these if making the bat as a toy for young children or pets.

crocheted fruit bat by planetjune
For Halloween, try making a fruit bat all in black with red eyes and dangle him from the ceiling with a string (yes, this is a fake Photoshopped one!)
scary amigurumi bat by planetjune

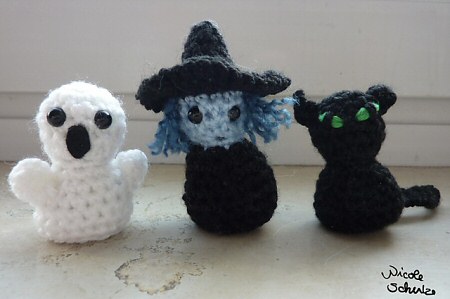
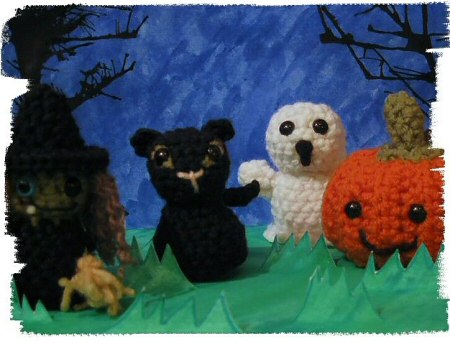
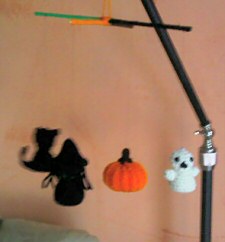
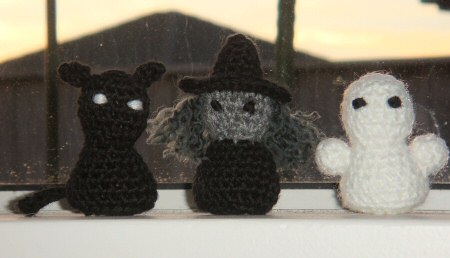
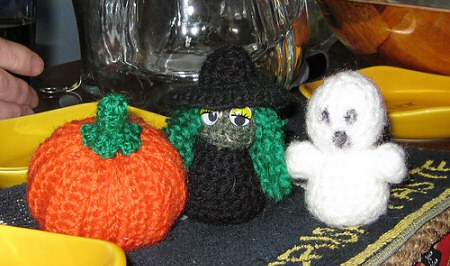
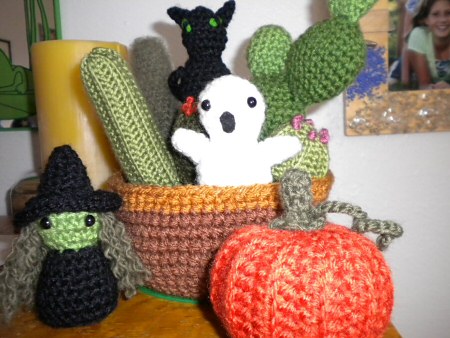
2. Running short on time? The Halloween PocketAmi pattern set (: Black Cat, Ghost and Witch) work up in no time and make cute little toys or perfect decorations! (And see below for a discount!)

amigurumi halloween ghost black cat witch crochet by planetjune

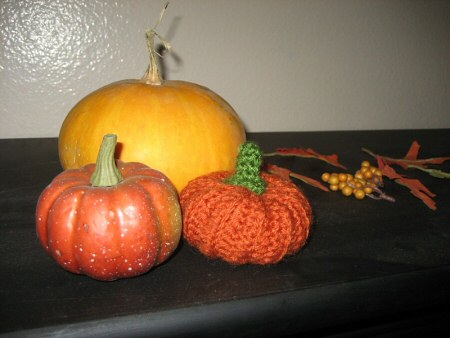
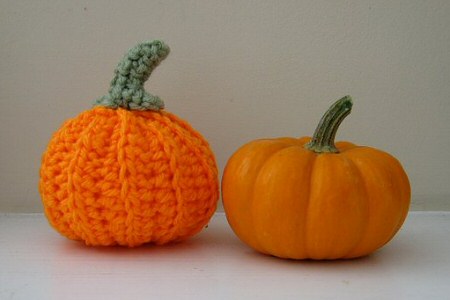
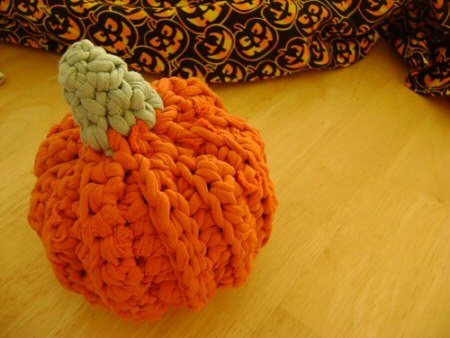
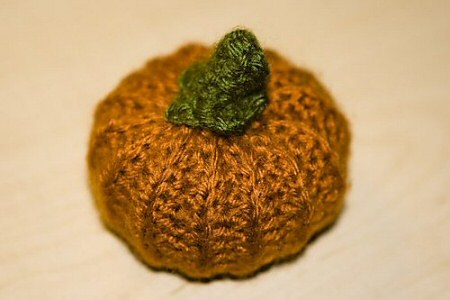
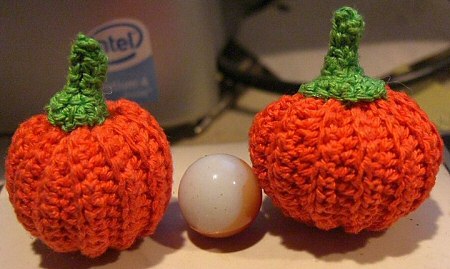
3. Or how about a perfect Pumpkin pattern? Mine comes in three flavours, so you can make a realistic pumpkin, a smiley kawaii version, or a scary Jack-o-Lantern. The Pumpkin pattern is free (but donations are much appreciated and will give you a nice printable PDF file in return!)

realistic crocheted pumpkin by planetjune

cute crocheted pumpkin by planetjunespooky crocheted pumpkin by planetjune

If you’re tempted by my seasonal designs, why not sign up for my Fall Crochet-Along (CAL) at my Ravelry group? My Pumpkin and PocketAmi Halloween patterns are all super-fast and easy to make, so “I don’t have time!” is no excuse 😉

You’ll get 20% off the PocketAmi Halloween pattern if you sign up for the CAL – just use code FALLCAL2010 at checkout to get your discount. And if you add a little donation for the Pumpkin pattern at the same time – $1 minimum – you’ll get a PDF version of the pattern as your reward for your generosity 🙂

Fall Crochet-Along at PlanetJune

Grab this button (above) for your blog, and spread the word about the Crochet-Along – it’s going to be fun!

Comments (4)

designing a kingfisher

Oooh, look what just arrived yesterday: the new issue of Inside Crochet. And, hello, what’s that on p92? Yay, it’s my new Kingfisher design!

inside crochet issue 10

When Inside Crochet commissioned me to make a colourful design, I knew I wanted to make something British (as it’s a UK magazine, and as a salute to the lovely wildlife I left behind when I moved to Canada) and a kingfisher was the first thing that sprang to mind.

Now, if you’re American (or Canadian), you may be wondering why I made my sample kingfisher in such crazy bright colours. The Belted Kingfisher that you’ll see in North America is much larger and less colourful than the Common Kingfisher of the UK, which really is a spectacular sight!

inside crochet issue 10 - kingfisher by june gilbank

It was quite a challenge to design with all those colours and the shaping, and I’ve developed a cunning new method to make the orange/blue stripe on the body match on both sides (as amigurumi-style stitches don’t stack on top of each other, if you crocheted both sides the same way, one side would slope up and the other would slope down). Yay for new techniques and methods!

Inside Crochet Issue 10 (October 2010) is out now, and you can buy it in stores in the UK, or online. It includes a nice variety of crocheted garment patterns as well as my kingfisher! As it’s a UK magazine, it’s written in UK crochet terminology (e.g. a single crochet stitch is called a double crochet). If that worries you, I’ll be releasing my Kingfisher pattern in my standard PDF format (and standard US terms), together with my usual step-by-step assembly pics, in 6 months’ time, so you can always pick it up from my shop next spring instead!

A couple of pattern notes if you do buy Inside Crochet and want to make my kingfisher:

  • I’ve listed a couple of minor introduced errata on the Ravelry pattern page, so check there before you start, to avoid confusion – there’s some inconsistent terminology.
  • Although the magazine photographers did a fabulous job of taking lots of beautiful photos on location, they didn’t take the close-up photos I asked for to accompany the assembly instructions. (I’d have provided mine if I’d known…) You can see most of the features in the photos, but the legs in particular aren’t clearly photographed from the side, and the wings aren’t positioned correctly along the body in their photos, so please take a look at my photos here, to supplement the pretty magazine photos, and if you do buy the magazine and have any questions about assembly, please email me!
crocheted kingfisher by planetjune crocheted kingfisher by planetjune

Comments (11)

Summer CAL roundup

First up: the August ‘Review and Win’ winner is… Cora S, with her review of my Dinosaurs Set 1 patterns:

I am very happy with this pattern. June has a way of explaining things very clearly. I love they simplicity of the design. I am almost finished the brachiosaurus and look forward to finishing the others. I also have her other dinosaurs. These are going to be sets for Christmas gifts. Thank you June for another great set of patterns.

Congratulations, Cora, I’ll email you to find out which pattern you’d like as your prize!

If you’d like to be entered into the September drawing to win a pattern of your choice, it’s easy! Just review any item(s) you’ve bought from me – each review in my shop gives you another entry into the contest.

*****

PlanetJune Summer Crochet-Along

The Summer CAL in the PlanetJune crochet designs group on Ravelry is now over.

The Summer Crochet-Along had a choice of two designs: my Alpacas and African Violets patterns. Both patterns were popular, but even though the CAL lasted for 2 months, I suppose summertime isn’t the best time for completing crochet projects, as many participants have yet to complete theirs. But that’s okay – we all know life gets in the way of things sometimes, and I’m sure everyone will find the time to complete their projects eventually!
Below I have a nice little roundup of all the cute finished projects. (If I’ve missed yours, please email me or leave a comment with the link, and I’ll add it to this post.)

PlanetJune Summer Crochet-Along PlanetJune Summer Crochet-Along
Alpacas by indigo22 and rainydaybaby.

PlanetJune Summer Crochet-Along PlanetJune Summer Crochet-Along
African Violets by bsktkls and devinise.

PlanetJune Summer Crochet-Along PlanetJune Summer Crochet-Along
An alpaca converted into a giraffe by NatureandNurture and a regular Alpaca by nuime.

PlanetJune Summer Crochet-Along PlanetJune Summer Crochet-Along
African Violets by jukatca and klopferli (who made both sizes!)

PlanetJune Summer Crochet-Along
And a gold star goes to Silverlotus for making not one, but four alpacas!

I love seeing everyone’s choice of yarns etc and how adorable all the finished projects are! Thanks so much to everyone who joined in; I hope you enjoyed it 🙂

If you’d like to help choose the pattern(s) for the Fall CAL, come join us at the PlanetJune ravelry group!

Comments (2)

triple vs treble crochet

or, Why I Love Twitter…

Yesterday I had a thought about the “tr” abbreviation in crochet. I know that some people call it a triple crochet stitch, and others call it a treble crochet stitch, but I haven’t seen any clear differentiation for why or when you should use one or the other.

This is one of those occasions when I really wish there were universal crochet standards! In this internet age, it seems so arbitrary and confusing that what I call a ‘single crochet’ stitch is known as a ‘double crochet’ stitch in the UK and Australia (and similarly for almost every other crochet stitch).

My initial guess was that ‘treble’ was the UK name, and ‘triple’ the US name, but my go-to site for these questions, YarnStandards.com (a US site) states that tr is the abbreviation for treble crochet, so that can’t be right…

Time to turn to Twitter to poll my network of crocheting friends! I tweeted:

treble vs triple crochet

and within seconds the replies started flooding in (here’s a sample):

treble vs triple crochet

Thank you to everyone who responded! With all the votes counted (37 total), my results were 22 votes for triple vs 15 for treble. From what I can tell, UK folks say treble, and everyone else seemed split between the two options. @ThingsBright said that vintage US patterns use treble, and the new US convention is triple – which sounds right to me (although YarnStandards.com hasn’t made the change to triple).

So, should you use triple crochet or treble crochet in your crochet patterns? Apparently, unless you’re writing in US/Aus crochet terminology, the choice is yours!

I’ve decided I’m going to cast my vote in the triple camp, but write triple (treble) crochet in my patterns, to avoid confusion.

Comments (1)

Cactus Collection crochet patterns

I’ve been planning a cactus collection for a few months now – I know I’m not exactly the first person to come up with the idea to make a crocheted cactus, but my idea was to make my designs more realistic than the cartoonish cacti I’ve seen before.

I always like to base my patterns on solid research so they look as realistic as possible, and when I started to investigate, I found a huge number of really interesting-looking cacti to crochetify: I started out sketching 8 different types, and then had so many great ideas for how to create them, I couldn’t decide which to cut!

crocheted cactus collections 1 and 2 by planetjune

I spent a lot of time developing different techniques and effects for each cactus, so I hope you can see that it’s not the same basic pattern with tweaks for size and shape here: each cactus is completely different from all the others.

8 plant designs plus 2 pots seemed a bit excessive for one pattern – that’s almost a book, not a pattern! – so my solution was to split the patterns over two cactus collections: you can buy your favourite collection without breaking the bank, or buy both (at a huge discount!) and mix-and-match cacti from each collection to create your perfect cactus garden.

crocheted cactus collection 1 by planetjune
Cactus Collection 1

crocheted cactus collection 1 by planetjune
Cactus Collection 1

Each collection comes with both the individual-sized pot pattern and the larger cactus garden pot pattern:

  • An individual cactus makes a quick and sweet gift – or you can anthropomorphize it with some eyes and a smiley mouth to make a super-cute version!
  • Two or three (or more) individual cactus pots look great arranged in a line along your windowsill.
  • The larger cactus garden makes a beautiful decoration – and you’ll never have that problem where one of the collection dies and you’re left with a big empty space in the pot!

crocheted cactus collection 2 by planetjune
Cactus Collection 2

crocheted cactus collection 2 by planetjune
Cactus Collection 2

If you’d like to buy either or both of the Cactus Collection patterns, you can find them all in my shop. Don’t forget that there’s huge savings to be had if you buy the set of both collections.

As a special bonus for my newsletter subscribers, Twitter followers and Facebook fans, I’ll be giving out a special discount code to use with these patterns this week – so look out for that too!

crocheted cactus collection 1 by planetjune
Collection 1 includes (clockwise, from top left): Notocactus, Moon Cactus, Mammillaria, Echinocereus.

crocheted cactus collection 2 by planetjune
Collection 2 includes (clockwise, from top left): Micranthocereus, Cephalocereus, Opuntia (Paddle Cactus), Ferocactus (Barrel Cactus).

Which is your favourite?

UPDATE: adding some clearer links to where you can find the patterns:
Buy Cactus Collection 1
Buy Cactus Collection 2
Buy Cactus Collections 1 & 2 (at a bargain price!)

Comments (17)

in limbo

The blog is a little quiet because I’m playing a waiting game at the moment, so I don’t have a lot I can blog about yet:

  • Waiting for my new book to be released (less than 6 weeks to go!)
  • Waiting to see an advance copy – they should be printed by now and I can’t describe just how nervously excited I am that I’ll soon be able to hold a copy in my hands… (And then I’ll be able to finally share some details with you!)
  • Waiting to announce my new secret project that I’m busying away at behind the scenes…
  • Waiting to finally complete my 2 new crochet patterns that I’ve been working on for weeks – they expanded in scope far beyond what I originally imagined, so it’s taking much longer than I’d anticipated to write and photograph the instructions.

yarns for my next pattern
These yarns have morphed into something special – I hope you’ll agree when I reveal my new designs early next week!

In the meantime, I’m working on so many projects at once, it feels like nothing is getting finished, and I miss that satisfied feeling of having completed a project. It’s made doubly scary as August is always a quiet month for sales (if you have a business, do you find that too, or is it just me?!), so I’m working hard with nothing to show for it yet and not that much money coming in either.

Ah, the perils of self-employment…

Normal service will resume shortly, I’m sure 🙂

Comments (11)

getting an ITIN (for non-US contract workers)

…You’re probably thinking “huh?” right about now, and I know this post won’t have much interest to most of my readers, so if you’re not a non-US resident or citizen who wants to do contract work for US companies (for example: writing articles or patterns for US magazines, or writing or contributing to a book for a US publisher), you can skip the rest of this post!

Since I’ve been through the process of getting an ITIN (Individual Taxpayer Identification Number) I keep getting people referred to me for information about how to go about getting one. It wasn’t easy for me to find out the answers, so I’m sharing them here so that fellow non-US freelancers and contract workers can find this post through Google and figure out how it’s done without having to go through all the hassles I did.

This is how I did it, as a Canadian resident, but this information should apply to all other non-US contract workers and freelancers too; just substitute your own country for Canada throughout the rest of this post.

Note: I’m not a qualified tax professional and this information is based solely on my experience in late 2009. Please check with irs.gov or a certified acceptance agent (see below) to see if anything has changed before you submit your application.

Why do I need an ITIN?

If you’re Canadian and have no tie to the US, you should be paying Canadian income tax on your earnings, not US tax. However, if you want to do contract work for a US company, the IRS (the US Internal Revenue Service) requires the company to withhold 30% of your earnings to submit towards your US taxes, so you’ll only receive 70% of your money. (You then have to pay your Canadian taxes on that income as well.)

Although you can claim the withheld US tax back at a later date, there’s an easier way: if you submit Form W-8BEN to the company you’re working for, they don’t need to withhold the 30% US tax, and you’ll receive 100% of your payment (which, of course, you’ll report as income on your Canadian tax return).

To complete Form W-8BEN, you need to have an Individual Taxpayer Identification Number (ITIN). Your ITIN proves that you have no US ties and therefore do not need to pay US taxes.

How do I get an ITIN?

To apply for an ITIN, fill in Form W-7 and submit it, together with proof of identity and foreign status, to the IRS. (Let me warn you: Form W-7 is a minefield and it’s very easy to make a mistake on it and have it rejected.) This also means you have to mail off your passport to the US as proof of being non-American. You’d probably prefer to avoid that, right?

Okay, so here’s the best way around that: there are IRS-authorized Acceptance Agents outside the US (in Canada, and internationally) that you can visit. These agents can certify that they’ve seen your passport (so you don’t need to send it anywhere) and will also help you complete and submit your Form W-7 without making any mistakes.

It cost me about $120 (plus tax) – it’s not cheap to visit an accountant! – but it was well worth the money. Mine found and fixed a mistake I’d made on my application and wrote the letter certifying my identity and proof of foreign status. My application was approved and I received my ITIN about 6 weeks later.

How do I use my ITIN?

Once you have your ITIN, it’s yours to keep – it’s like a Social Security Number, except it proves that you’re not required to pay US taxes. You can fill in your number on Line 6 of Form W-8BEN and submit that form to each US company you work for, and you’ll be paid 100% of your earnings, without any US tax withheld.

Recap

If you’re not a US resident or citizen, you can receive 100% of your US earnings without the 30% federal tax withheld by following these steps:

  1. To get an ITIN, find an acceptance agent to help you submit Form W-7 to the IRS and to certify that they’ve seen your non-US passport.
  2. When you receive your ITIN, fill it in on Line 6 of Form W-8BEN.
  3. Submit a completed W-8BEN to every US company you do contract/freelance work for.

Yes, getting an ITIN is a hassle, a long process, and an expense (unless you’re willing to mail your passport to the US), but it’s worth it in the long run if you plan to do contract or freelance work for US companies: once you have your ITIN, you’ll never again have to claim back US taxes. 🙂

Comments (9)

punchneedle globe WIP (part 2)

Punchneedle Globe menu:

So, as everyone guessed from my last post (yeah, I didn’t think it’d be much of a stumper!), my ongoing punchneedle project is going to be a 3D globe, embroidered onto two flat circles (with wedge-shaped gaps around the edges so I can stitch them into hemispheres later) and then stuffed and stitched into a full globe.

punchneedle project - work in progress

It’s pretty ambitious, and even more so than I first imagined when I decided on the size: as the fabric will be curved after punching it, the loopy stitches will end up splaying further apart than usual, so I’m punching my stitches very close together so you (hopefully) won’t be able to see the fabric between the stitches after the globe is assembled. It’s sloooow going, but also quite nice to have a ‘mindless’ project I can work on – designing projects all the time is tiring, and, now I’ve completed the design for the globe, this is a soothing project to work on when I’m watching TV, just filling in each area with the right colour.

As you can see from the picture below, I have completely finished 2 of the 12 sections of the southern hemisphere, and I’m partway through the rest. And – hey – is that Australia I spy?

Here’s something that’s made it more fun though: Jessica at How About Orange linked to these cute printable floss bobbins designed by Wild Olive, and I thought they’d inject a bit of cute into the process.

I printed a sheet of bobbins onto white cardstock and cut them out (yes, I did pick the 4 shades that were closest to my floss colours – silly things like that make me happy). In contrast to the globe, they were a very quick and satisfying project!

Here’s a little papercrafty tip for you: to cut a smooth curve like these bobbin edges, hold the scissors steady and rotate the cardboard as you cut.

punchneedle project (work in progress) + cardboard bobbins

As I punch with 3 of the 6 strands of floss at a time, I usually cut a 1.5m length of floss, split it into two, and then leave the other 3-strand length languishing in my project box until I need it. Now I can wind the spare length onto the bobbin, and it’ll be neatly stored until I need that colour again. And I’ve even pre-cut and split an entire skein of the blue floss and wound all the lengths onto my blue bobbin, so I won’t be interrupted with cutting new lengths during my next punchneedle session. (As I’m working on the southern hemisphere, there’s a lot of blue ocean to fill in!)

Printable cardboard floss bobbins: recommended! They may not last forever, but they make me smile and I can always print more when these wear out. Or – shock horror – use the other shades that I already printed… but I don’t know if my matchy-matchy self will allow me to do that: green thread on a red bobbin? That’s just crazy talk! 😀

Comments (8)

    navigation: arrow

    buy crochet patterns and accessories from my online store

    'Everyday Crochet' and 'The Essential Guide to Amigurumi' crochet books by June Gilbank

    Crochet video tutorials and step-by-step photo tutorials

    Free PlanetJune crochet patterns

    Frequently Asked Questions

    navigation: arrow

    Punchneedle Embroidery information, ebook & patterns

    Papercraft ebook & tutorials

    Free PlanetJune craft projects & tutorials

    Ravellenic Games: Team PlanetJune
    PlanetJune Reindeer Games
    PlanetJune Temperature Snake CAL

    June Gilbank

    Hi, I'm June. Welcome to my world of nature-inspired crochet and crafting. I hope you enjoy your visit!

    If you'd like to get in touch, you can contact me here.
    crocheted Canadian flag by PlanetJune
    Proudly made in Canada!
    A fanned-out pile of the books Everyday Crochet and The Essential Guide to Amigurumi, with text 'The answers to all your crochet questions at your fingertips - find out more'

    Want to say thanks? You can send me money in seconds at paypal.me/planetjune (over $20) or paypal.me/planetjune2 (under $20) or send me a donation through my shop.

    Or simply click through from my links before you shop at Amazon, Etsy, KnitPicks, LoveCrafts and more, and I'll make a small commission on your purchase, at no cost to you! Start here:

    ♥ Support PlanetJune ♥

    Tip: This link is also in the footer of every page!

    Thank you so much for your support!