PlanetJune Craft Blog
Latest news and updates from June

PlanetJune Blog: Latest News, Patterns and Tutorials

Amigurumi Discworld

Looking to buy a Discworld pattern or a finished Discworld?
See my Amigurumi Discworld info page.

In general, I’m not one for picking favourites, but ever since I was first introduced to Terry Pratchett’s books at age 11-ish, I have bought and loved every single one of his books. I even have two copies of some of them! In my student days, while I still lived in the UK, I queued for hours at book signings so I could spend a few seconds with the man himself, and he was unfailingly nice every time.

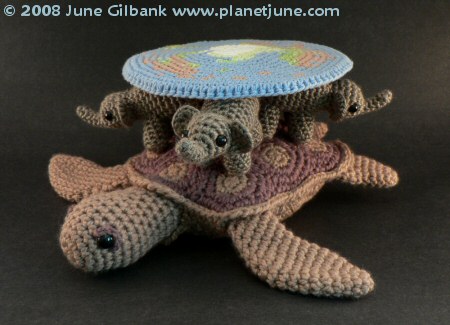
Since I made my sea turtle in March, I had a feeling it reminded me of something… Then it came to me: most of Terry’s books are set on the Discworld: a flat world carried through space on the backs of four elephants who themselves stand on the shell of the giant star turtle, Great A’tuin… (Google image search if you don’t know what I’m talking about 🙂 )

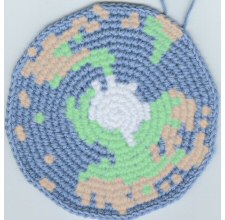
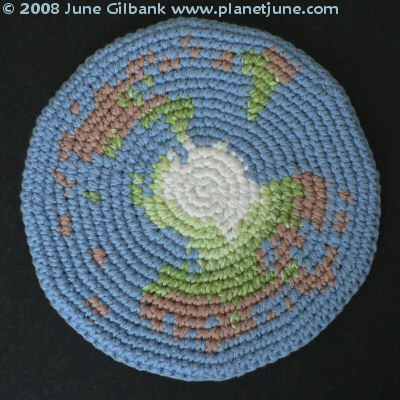
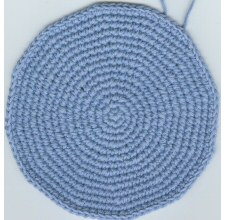
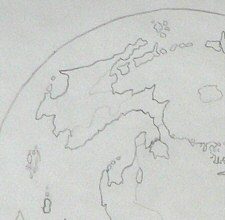
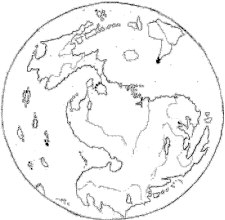
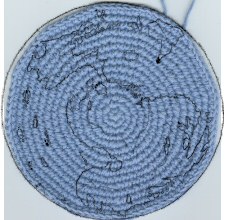
The idea to make a crocheted Discworld has been running around inside my head ever since. I thought it would make a wonderful art piece, so I’ve been slowly designing and assembling the pieces to create my Discworld model. I made sure the size for my small elephant design would fit on the turtle’s back… I spent hours studying, sketching, simplifying and photoshopping the Discworld Mapp so I could recreate it in cotton yarn (and my process for that would take up a whole post by itself)…

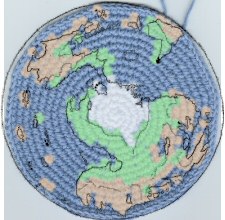
And, finally, today it has all come together with the finishing touches to the fourth elephant. Drumroll please… In honour of the genius of Terry Pratchett and his books (and totally unauthorized, so I hope he won’t take offence), allow me to present the Amigurumi Discworld:

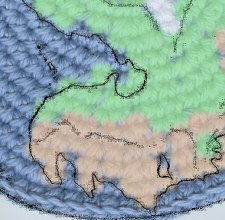
crocheted Discworld by planetjune

crocheted Discworld by planetjune

crocheted Discworld by planetjune

Small print: Discworld is © Terry Pratchett. I have made my homage only for fun, not profit. I don’t have the rights to create a crochet pattern based on the Discworld, so please don’t ask me to do so 🙂

Please leave me a comment if you like my work – your words mean a lot to me!

UPDATED 5 Sep 08: I have just posted a Discworld update. Terry himself has seen the pics and commented! And I have added some details on how I made the Disc.

Looking to buy a Discworld pattern or a finished Discworld?
See my Amigurumi Discworld info page.

Comments (78)

I’m a teacher!

…or at least, I’m going to be. The brochure for the Fall Creativ Festival in Toronto just arrived:

creativ festival brochure

And let’s have a look at page 42. See anything familiar?

creativ festival brochure

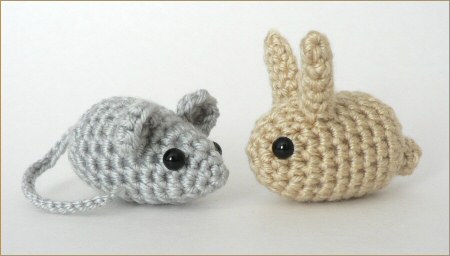
That’s right – I’ll be teaching a crochet class to make my PocketAmi Mouse and Bunny! Unfortunately for my marketing, the keyword PlanetJune is missing from my blurb (how did that happen?!), but luckily my name isn’t very common so I hope people reading the brochure will google me if they want to know more about me.

For anyone who might be in the area, the show runs October 17-19th 2008, so make a note in your diary to keep the weekend free – it’s going to be a great show! For more info on the show, see the Creativ Festival website.

My class is on Saturday 18th from 11am to 12.30pm, and I’ll be at the A Needle Pulling Thread booth all day on Saturday when I’m not teaching, so please remember to stop by and say hello to me. (I’ll be easy to spot: I’ll be the one surrounded by crocheted animals!)

Comments (5)

tunisian scarflet finished

Way back in February I posted some crochet WIPs. I finished the granny square throw shortly afterwards, but never quite got around to finishing this scarflet:

wip: tunisian scarflet

Once winter ended, it seemed a bit strange to be working on a scarf. Plus, it’s my first attempt at tunisian crochet, and the stitch pattern is a bit complicated, so every time I picked it up, I had to relearn the stitches. But I had some time this week, so I decided to finally finish it so it’ll be ready for the cold weather. And here it is, ready to wear:

tunisian scarflet

I used Bernat Bamboo yarn in Dill. It’s a wonderfully soft yarn, with none of the itch factor that I normally get from yarn against my neck. These photographs really don’t do it justice: the lovely subtle green shade just refuses to photograph properly.

I decided to carry on the ‘natural’ theme from the bamboo yarn (it really is made from 89% bamboo!) and I found these sweet little wooden buttons with a woodburned flower design to finish it off:

tunisian scarflet button detail

A scarflet is such a clever little design; here’s a little picture of me to give you an idea of how it works:

tunisian scarflet in use

I enjoyed the tunisian crochet, although I think I should have started with a simpler stitch for my first attempt. With hindsight, I see that the Bamboo yarn doesn’t have good stitch definition, so I could have made the scarflet with a basic tunisian stitch and got the same effect in much less time.

But overall, I love the scarflet. Almost enough to make me look forward to winter (okay, not quite that much)! I can’t wait to wear it; the yarn is dreamily soft, and the tunisian crochet makes it thick and warm whilst avoiding the bulk of having a scarf wrapped around and around my neck.

Comments (7)

how to crochet a miniature schnauzer pup

Since I posted pics of my crocheted miniature schnauzer puppy, I’ve received several requests for a pattern. There is no pattern as such, as it was a hybrid between my AmiDogs designs and Roman Sock’s brushed crochet idea. But you can recreate my hybrid to make a dog of your own, using this magic formula:

miniature schnauzer recipe

Not enough information? Read on for more detailed instructions…

Ingredients

Method

  1. Find an appropriate yarn (see the Brushed Crochet tutorial for yarn ideas) – I used Patons Spirit. You only need one colour of yarn.
  2. Crochet the pieces for the Boston Terrier, following the pattern as written, except for the following points:
    • Use a size G or H (4.5-5mm) crochet hook
    • Ignore the colour changes and work all stitches in the same yarn.
    • Use 12mm animal eyes as your puppy will be larger than the Boston Terrier (it’s approx 9 inches in length)
  3. Brush out all the pieces (see the Brushed Crochet tutorial for instructions).
  4. Sew the pieces together as per the Boston Terrier pattern. I made my schnauzer sit by positioning the back legs alongside the body instead of underneath, but either standing or sitting is fine. The tail should be sewn on at the very back of the body, pointing down, not sticking up as with the Boston.
  5. Fold the ears forward and secure in this position. (If you need more help with this step, you can find more detailed illustrated instructions in my AmiDogs Jack Russell Terrier pattern).
  6. Brush the finished dog some more to disguise the joins.
  7. Trim the long hair on the dog’s muzzle into a schnauzer-y shape 🙂

Enjoy your cute little schnauzer puppy!

miniature schnauzer by planetjune

FYI, if you would like to buy both Boston Terrier and Jack Russell Terrier patterns, they are also available as part of AmiDogs Set 2.

Comments (1)

tissue paper carnations

This week on Folding Trees, I am running a daily series on different types of paper flowers. To get things started, I followed a few online tutorials to make tissue paper flowers, but the end results looked really childish – not the elegant decorative look I like. So I had a think and came up with my own method to make these tissue paper carnations.

paper carnations by planetjune

I think they look lovely – the darker petal edges add a lot of realism and give the flowers a more professional finish. My inspiration was some beautiful carnations I was given last winter (thank you, library friends!):

carnations

And here is a close-up of my paper version – pretty similar, don’t you think?

paper carnations by planetjune

If you’d like to see how to make your own, check out my tutorial on Folding Trees!

Comments (3)

AfricAmi: Elephant, Hippo, Rhino

AfricAmi logo by PlanetJune

The first set of AfricAmi crochet patterns are now available to purchase from the brand new PlanetJune store! Buy yourself an elephant, hippopotamus or rhinoceros pattern, or treat yourself to all three and save 🙂

AfricAmi Elephant logo by PlanetJune

AfricAmi Hippo by PlanetJune

AfricAmi Rhino by PlanetJune

All three animals are about 6″ long when worked in bulky weight yarn with a G/4.5mm hook, or you can use worsted weight yarn and an E hook to end up with miniature versions like the baby elephants below:

AfricAmi Elephants by PlanetJune

Don’t forget there is still time to save 10% on your next PlanetJune order – which can include the new AfricAmi patterns. Just sign up for my new mailing list before the end of July end of day Monday 4th August and I will send you a discount code to use in the new shop (if you have already signed up you should receive the code in the next hour or so). Please remember to wait for the discount code to arrive by e-mail before you place your order, as your discount will be applied automatically when you enter the code.

And if you notice anything strange in the new shop, please let me know so I can fix it – thanks!

Comments (4)

10% discount and new mailing list

Exciting changes are afoot at PlanetJune…

New Shop
As of next week, there will be an all-new PlanetJune crochet pattern store. It will be fully automated, so as soon as your PayPal payment has been completed, you’ll be able to log into your PlanetJune account and download all your patterns. That means no more waiting for me to process your order and e-mail your patterns to you! This change has been in the works for a few months, and should free up more of my time to come up with new designs 🙂

New Mailing List
My old mailing list can’t cope any more with the number of subscribers I have, so I’ve just set up an all-new mailing list. I am starting the list over from scratch, as a significant number of e-mail addresses on my old list aren’t valid any more. Even if you were signed up for the old mailing list, you will have to sign up again for the new list to continue to receive the updates.

New Navigation
I’ve added a new navigation menu to the very top of the page, to help you get around the main sections of PlanetJune – craft blog, crochet pattern store and mailing list. Hopefully it will all make sense – if you do encounter anything strange or unexpected, please let me know immediately so I can fix it up as soon as possible.

10% off your next order!
To celebrate the launch of the new shop and new mailing list, anyone who subscribes to the new list by the end of July 2008 will receive a discount code, valid in the new store, worth 10% off your next order from the new PlanetJune store! The 10% code will be valid for one single order, but you may purchase as many patterns as you wish within that order, including the upcoming AfricAmi patterns (Elephant, Hippo and Rhino)!

AfricAmi by PlanetJune

Please remember to sign up for the new mailing list, and look out for your 10% discount coupon to use in the new PlanetJune crochet pattern store!

Comments

light tent for better product photography

One of the biggest frustrations with craft blogging can be to take decent photographs, as photography is so light-dependent. Using the camera flash is too harsh, and using your interior room lighting will give you dimly-lit, orange-tinted photos. The best solution is good natural light (out of direct sunlight, otherwise you will see dark shadows behind your object), but if you’re in the middle of one of those weeks where the sun never shows its face, what can you do?

The professional solution is to use a light tent (aka light box) for product photography. They are available to purchase commercially, but cost hundreds of dollars. If you google ‘light box’ or ‘light tent’ you will find people who have made their own light tents, including Bill Huber’s popular tutorial at PBase, made from PVC plumbing parts and a white bedsheet! In the comments following his tutorial, I noticed that someone had bought an IKEA Antonius laundry bag stand to save them from building their own frame for the light box, and woohoo, the frame is still available and only costs $7!

If you’d like to make your own light tent, the simplest form I have seen only requires a large cardboard box and some fabric, so don’t be put off by the idea of making a frame or finding a convenient IKEA!

Here is my prototype; I just draped the frame with a $1 white plastic tablecloth, and it works! I have attached a clamp lamp to each side of the frame so that the lights shine through the fabric and into the tent. I also used a desk lamp to add additional lighting through the top of the tent.

prototype light tent

I was a bit worried that the plastic might melt under the lights, and the draped tablecloth didn’t look very tidy, so I bought some cheap white fabric, sewed 4 panels (two sides, a back and the top), and then sewed them together to form a fitted cover. I purposely left the final seams on the outside to leave a snug fit around the corners of the frame. You can also probably see a little silver blob on the left of this photo – I had some rare earth magnets lying around, so I used a few to keep the front edge of the fabric stretched out nicely over the metal frame:

fabric cover for light tent

I used a white bristol board inside the light tent to give a seamless backdrop, but of course I can easily swap in another backdrop to add more colour. And here’s the finished tent:

finished light tent

Now for a photo comparison. Firstly, some piggies in nice natural lighting. This is about as good as it gets under normal conditions. Looks pretty good; there is a little shadow in the middle between the pigs, but the picture is fine, really:

piggies in daylight

And now for the light box photo:

piggies in light tent

Huh? There’s not really any difference, you say? That’s the whole point… because I could take the exact same picture in the middle of a thunderstorm, or in the middle of the night! No sunlight required. And that is the beauty of the light tent.

A few notes:

  • You can use any directional lamps for a light tent, but make sure you use the same light bulbs in each light source, otherwise your colour balance will change across the photo
  • Unless you have very special bulbs (mine are GE Reveal – they are supposed to be natural daylight coloured, but for the purpose of photography they are nowhere near!), you will have to set the white balance on your camera if you have that option, or adjust the colour balance of your photos in your image editing software. But it’s a 1-click fix in most software, so it’s really not a big deal.
  • You can easily adjust the amount of lighting coming from each direction by moving each lamp closer to, or further away from, the light tent. I find that using the side lights brightly and the top light a little further away works nicely.

UPDATED 18/11/09: I have since added a fourth light, pointing into the front of the box. It’s not filtered by the tent, so I keep it further away (behind the camera). As zabacorporation mentioned in the comments, my example pig picture would have been better with a light source illuminating them from the direction the camera sees (i.e. the front). The light tent then serves to reduce the shadows caused by that direct light. I’m still tweaking the exact configuration!

Comments (15)

    navigation: arrow

    buy crochet patterns and accessories from my online store

    'Everyday Crochet' and 'The Essential Guide to Amigurumi' crochet books by June Gilbank

    Crochet video tutorials and step-by-step photo tutorials

    Free PlanetJune crochet patterns

    Frequently Asked Questions

    navigation: arrow

    Punchneedle Embroidery information, ebook & patterns

    Papercraft ebook & tutorials

    Free PlanetJune craft projects & tutorials

    Ravellenic Games: Team PlanetJune
    PlanetJune Reindeer Games
    PlanetJune Temperature Snake CAL

    June Gilbank

    Hi, I'm June. Welcome to my world of nature-inspired crochet and crafting. I hope you enjoy your visit!

    If you'd like to get in touch, you can contact me here.
    crocheted Canadian flag by PlanetJune
    Proudly made in Canada!
    A fanned-out pile of the books Everyday Crochet and The Essential Guide to Amigurumi, with text 'The answers to all your crochet questions at your fingertips - find out more'

    Want to say thanks? You can send me money in seconds at paypal.me/planetjune (over $20) or paypal.me/planetjune2 (under $20) or send me a donation through my shop.

    Or simply click through from my links before you shop at Amazon, Etsy, KnitPicks, LoveCrafts and more, and I'll make a small commission on your purchase, at no cost to you! Start here:

    ♥ Support PlanetJune ♥

    Tip: This link is also in the footer of every page!

    Thank you so much for your support!