PlanetJune Craft Blog

Latest news and updates from June

Archive for June, 2011

Dinosaurs… Set 3!

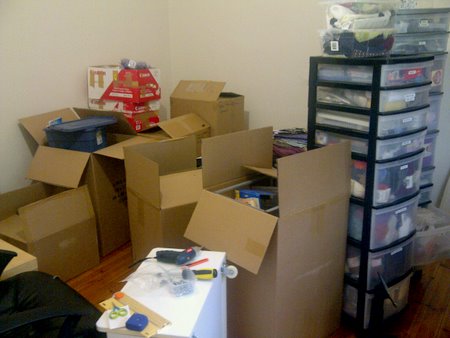
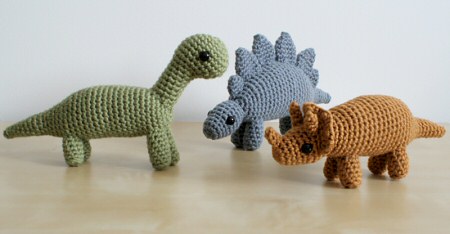
I’m very excited to finally be able to publish what will (probably) be my final set of Dinosaur crochet patterns! I crocheted them before I left Canada, but problems with editing on my netbook meant that I couldn’t do the patterns justice, so I made the frustrating decition to wait for my stuff to arrive so I could publish them to my usual standard with my desktop PC.

With each new set it gets harder to maintain the aesthetic of the previous patterns while coming up with totally new designs, but I think I’ve risen to that challenge – I’ve developed new shaping techniques for each of these dinos, that I haven’t used in any patterns before, to give them distinctive, unique shapes, but they still use the same yarn (Vanna’s Choice), eyes, and overall size as the previous dinos, so it’s pretty clear that they inhabit the same prehistoric amigurumi universe…

First we had Dinosaurs Set 1 (L-R: Brachiosaurus, Stegosaurus, Triceratops):
crocheted dinosaurs by planetjune

Then Dinosaurs Set 2 (L-R: Pteranodon, Plesiosaurus, Tyrannosaurus Rex):
crocheted dinosaurs by planetjune

And now, let me introduce you to Dinosaurs Set 3 (L-R: Dimetrodon, Parasaurolophus, Ankylosaurus):
crocheted dinosaurs by planetjune
Click to see them larger!

Meet The Dinosaurs

amigurumi parasaurolophus by planetjune

Parasaurolophus was a duck-billed dinosaur with a distinctive long crest on the back of his head. He was a 40 ft long herbivore and lived in the Cretaceous period. I think that Parasaurolophus may be my favourite dinosaur – I love that head shape!

amigurumi dimetrodon by planetjune

Dimetrodon was a small, sail-backed carnivore with legs that sprawled out to the sides. He was only about 13 ft long, but was a top predator in his time (the Permian period) – and that huge spiny sail must have helped with scaring away potential threats! For the sake of scientific accuracy, I should mention here that, just like Plesiosaurs and Pterosaurs, Dimetrodon also wasn’t technically a dinosaur. In Dimetrodon’s case, he actually lived before the time of the true dinosaurs, and he’s properly called a pelycosaur. And that’s the end of today’s prehistory lesson πŸ™‚

amigurumi ankylosaurus by planetjune

Ankylosaurus was probably the best-protected dinosaur ever to have lived: he had a heavily armoured back, a row of spikes along each side, and a club-like tail. Despite this fearsome appearance, he was a herbivore. He was about 30 ft long and lived in the Cretaceous period. Definitely a fun one to design with all those textural features!

My dinosaurs are consistent best-sellers in my shop, and I hope I’ll have continued the trend with this final set! As always, you can buy the three patterns individually in the shop, or enjoy the savings when you buy the complete Set 3.

Direct links to buy the patterns from my shop:

[Although I do intend this to be my final set of dino patterns, if I’ve missed your favourite and it doesn’t look too similar to one of my existing designs, let me know the name(s) of the dino(s) and I’ll keep a note of them. If this set is as popular as the other two and I receive requests for another 3 interesting-looking dinos, I’d consider creating a 4th set, but otherwise I’m content to leave it at this trio of trios.]

crocheted dinosaurs by planetjune
Dinos galore! RAWR!

Comments (15)

(belated) 5th blogiversary

Better late than never: my blogiversary was a over week ago and I’ve been so busy and unwell that I totally missed it! Still, I want to note this milestone: I can’t believe that I’ve been blogging for 5 years now. I owe so much to this blog; I wouldn’t have my crafty career without it…

Year 5 Review

This was a year of turmoil. Between finding out we’d be moving to South Africa, preparing to move, 2 months of bronchitis, selling the house, actually moving, living out of a suitcase in temporary accommodation for months, and a second bout of bronchitis, I’ve been forced to spend far less time on PlanetJune than I would have liked.

Despite all that, I have had some accomplishments in Year 5:

  • I designed and published 16 new amigurumi crochet patterns.
  • PlanetJune year 5 amigurumi patterns

  • I launched the PlanetJune Accessories pattern range with 6 published designs.
  • PlanetJune year 5 accessories patterns

  • My first crochet book, The Complete Idiot’s Guide to Amigurumi, was published and very well received (4.9 out of 5 stars on amazon!)
  • The Complete Idiot's Guide to Amigurumi by June Gilbank

  • My kingfisher was published in Inside Crochet magazine in the UK, and, in the US, Create and Decorate magazine ran a feature on PlanetJune.
  • PlanetJune year 5 magazines

  • I completed two major art projects: my punchneedle-embroidered 3D globe, and an amigurumi Reepicheep (from The Chronicles of Narnia), who won the Craftster Fantasy Crochet Challenge.
  • PlanetJune year 5 art projects

  • I started the PlanetJune YouTube channel to create high quality crochet tutorial videos, and it won the Flamie award for Best Crochet Video (Amateur)!
  • I also received Flamie nominations for Best Crochet Blog (for this blog) and Best Instructional/Technical Crochet Book (for The Complete Idiot’s Guide to Amigurumi).
  • Hmmm, it doesn’t seem so bad when I look at my work all together like this… Imagine what I could do without sickness and international moves occupying all my time!

    Goal Review

    Last year, I had grand plans for Year 5:

    My goal for the coming year is to build my business to the point where I no longer have that niggling feeling that I should really go and get myself a β€˜real’ job – a feeling that comes down to the grim reality of earning enough money to continue to support myself.

    …and I’d taken significant steps along that road before I hit the major roadblock of moving to another continent and having months and months (still in process) with very little time to devote to the business.

    Here’s a very clear illustration of that: of my 22 new patterns this year, 16 were released in the half-year before Christmas, and only 6 in the half-year since then! But, looking on the bright side, that was a pretty good record until my life took its detour, so I know I can get back to being prolific once things settle down here.

    What’s Next?

    For the upcoming year, I’m not going to set any real goals, as so much is still unknown at this point. I need to figure out the logistics of operating from here and how to get myself back on track under such different conditions. It’s certainly going to be a challenge! For starters, it may be another month or more before I can get internet hooked up at our new house, and that obviously makes a huge difference to how I operate.

    I need to prioritise getting settled into my new life and getting my health back. Only then can I really focus on making PlanetJune everything I know it could be if I only had the time… It will happen – I am determined to keep moving forward, no matter how hard this road is to travel. Losing the past few months (and maybe one more) isn’t going to ruin me. My ideas aren’t going anywhere – I just have to have the patience to keep them on the back burner until I have time to fulfill them to the standard I expect from myself.

    Thanks!

    I just wanted to add a thank you to you, my readers, for all your support and for following on my journey. This has been the hardest and loneliest time of my entire life, and knowing that you’re out there means a lot to me. I’d never have made it this far without you!

    Now, onto Year 6…

Comments (18)

home at last!

After a very long 10 weeks of being without any of our stuff, the delivery team arrived yesterday with our shipping container! We spent most of the day re-assembling pieces of our IKEA furniture and discovering long-lost treasures in some of the many boxes we now have stacked up all over the house. The day ended when we went back to our flat to collect Maui and bring him to his new home πŸ™‚

Here’s my craft room this morning:

new craft room - boxes galore
Yay – a whole room full of my craft supplies! It’s going to take some effort to turn this into a functional craft room though…

I also just realised that with all this moving craziness, I missed my 5th blogiversary last week. Let’s pretend that didn’t happen, and I’ll write my end of year roundup post later today – I’ll need to take a break from unpacking at some point and this will be a good reason πŸ˜‰

There’s a lot more work ahead of us to get everything sorted out, but I’m just so happy and relieved that we finally have a home again!

Comments (1)

my craft room: a photo guide

We’ll hopefully be moving into our new house this week, and I’ll have the challenge of figuring out how to set up my new craft room/office/photo studio. To make that task a bit easier, I thought I’d put together a visual guide to my old craft room, and I thought you might enjoy seeing it too – maybe it’ll give you some ideas for your own craft space!

I sadly didn’t have time to take photos before dismantling everything and depersonalizing the room to stage the house for sale, so I’ve compiled this guide from photos I took for previous posts. There are some strange angles, gaps, and different lighting etc as a result of that, but that just makes it more interesting, right? πŸ˜‰

In case you want to know more about the crafty projects you see in the photos, I’ll link back to my original posts where applicable.

Okay, now let’s take a tour anti-clockwise around the room, starting from the doorway…

craft room
To your right as you enter, my bookcase, made prettier with a little crafty decoration down the side.

craft room
To the left of the bookcase, amigurumi galore! My overcrowded toy shelves. (Beneath the shelves, I kept my business/shipping supplies and digital piano – I had to sell the piano before we moved, so at least I won’t need to fit that into the new room.)

At the left of the photo, you can see the edge of desk 1…

craft room
As you can see, it had good natural light from the window, so I used this desk mostly for polymer clay and papercrafting. I kept a row of cubbies and baskets along the back of the desk to store small supplies: paintbrushes, crochet hooks, glues and varnishes, etc.

Under the window, I had a low table with my toaster oven (for polymer clay, shrinkydinks, etc) and I kept storage boxes underneath the table. No photos of this, and of course I couldn’t bring the toaster oven to South Africa (it’s electric, so the voltage would be wrong).

craft room
I decorated the window with origami – this strand of lucky stars along the top, and 6 dangling vertical strands of silver thread, each strung with a few sparkly beads and origami lotus flowers, cranes, and diamond shapes, spaced across the window. (I did try to photograph the vertical strands but, with them being so small and backlit, I never managed a decent photo.)

craft room
My computer desk, with a magnetic dry-erase board mounted on the wall next to it, and my wall-climbing amigurumi gecko!

craft room
Above the desk, some shelves I made to keep various trinkets – mostly handmade ornaments and a few travel souvenirs.

craft room
I prettied up my stark black leather office chair with a custom-designed crocheted granny throw.

Now moving along to the other side wall…

craft room
Light tent for my pattern photography. I eventually replaced the tiny table you see here with a wider coffee table and then stored all my computer accessories, gadgets etc in decorative patterned cardboard boxes (from IKEA – sorry, I apparently never photographed them) underneath – you’d never guess their geeky contents from the outside!

craft room
Desk 2. I kept my sewing machine here, and borrowed the desk space when needed for the print-quality tutorial photography for my book (shown in-progress here – the letters refer to my blog post about this setup), and for filming tutorial videos.

craft room
I re-covered this boring grey office chair with pretty fabric. I shared the chair between desks 1 and 2, as I could only sit at one at a time anyway!

craft room
And finally, the built-in closet, aka craft supply heaven. The wire shelving on the right contained my fabric stash, and the plastic towers of drawers were filled with yarn, FIMO, and supplies for all my other crafts. For each plastic tower, I cannibalised 2 units and snapped them together so I could create these taller towers that fit my space better. The contents are organised and the drawers are all labelled so there’s a drawer for stamps and punches, one for papercrafts, one for embroidery supplies, one for art supplies, etc etc, and then yarn split by weight, type and brand.

Not the prettiest solution, but I could always close the closet doors to hide the mis-matched units if required. The only problem is that my yarn stash inevitably outgrew the closet, so I’ll need to rethink things a bit this time around.

On top of the units, I had a stock of clear plastic boxes with lids, in two sizes. Each in-progress project gets its own box, so I can easily see what I have on the go, and keep all the pieces of one project together. This idea works really well for keeping organised and keeping the clutter down on my desks.

So that’s what I left behind… My new room will be very different and quite a challenge – it’s currently an empty square apart from a very cool fireplace in one corner:

new craft room

The lighting is terrible (small window, bare bulb hanging from the ceiling near the door) and there’s only one power socket on one wall, but that’s what happens when you buy an old 1920s bungalow instead of a modern cookie-cutter characterless house. Our new place has a lot of personality!

What do you think of my craft storage solutions? Any suggestions for me to improve things this time around? If you have photos of your craft space, or links to photos of other people’s beautiful craft rooms that might inspire me when trying to set up my new room, please share them in the comments!

Comments (41)

June update

…June the month, that is! I suppose all my posts are ‘June updates’, in a sense πŸ™‚

I’m finding it hard to get my head around the fact that it’s autumn/winter here – switching hemispheres is quite disorienting! And the fact that flowers are still blooming, birds are mating, and most trees are still green makes it even more difficult to believe it’s not really spring. But – finally – I found a view that does make it look (slightly) like autumn:

cape town
Beautiful, isn’t it? This tree is on the Observatory grounds.

The May ‘Review and Win’ contest winner is Mary Z, with her review of my Gossamer Lace Wrap:

Gossamer Lace Wrap by planetjune

The Gossamer Lace wrap pattern is very clearly written with nice charts. I recently used the pattern to make a scarf, and had no trouble adjusting the pattern to a shorter starting chain. The scarf has gotten many compliments! Thanks PlanetJune!

Glad to hear that, Mary, and congratulations – I’ll email you to find out which pattern you’d like as your prize!

It’s always nice for me to see people enjoying my PlanetJune Accessories patterns, as they aren’t as well-known as my amigurumi designs. I’ll be designing some more accessories this year (I actually have a beautiful lacy scarf in the works already – it’s cold in this apartment and I needed it to keep warm!), so do let me know if you have any suggestions for future designs you’d like to see in my pattern line.

I feel a strange symmetry here: last time a review of the gossamer lace wrap won the contest was back in March, at which time I was suffering from bronchitis while getting ready to move. It feels like I’ve barely stopped wheezing from that (it lasted well over two months) but now I’ve been struck down with another outburst, just when we’re on the verge of moving out of our temporary accommodation and into our new house!

I’m sure all the stresses of trying to get set up and used to life in a very different country has played its part – I just hope I can get over the exhausting cough more quickly this time around. I have half a dozen designs in various stages of completion, but between getting sick and now having to move again (although thankfully only a few kms this time!), I’m not sure exactly when I’ll be able to complete any of them.

But it’s exciting times ahead: we just got the keys to our house, our possessions should be arriving any day now, and then once we get moved in I can set up my new craft room/photography studio/office and get back to work properly! Now there’s incentive to get back to full health in a hurry πŸ™‚

Comments (2)

free pattern: plumeria flowers

This Plumeria is the first design that I’ve completed since my arrival in South Africa. I first encountered these beautiful flowers on holiday in Hawaii, so I was delighted to discover that they grow here too! Picking up fallen blossoms on my travels, I started to look at the intriguing spiral petal formation, and wondered if I could reproduce it in crochet… Turns out, the answer was yes πŸ™‚

Here’s the resulting design:

plumeria flower crochet pattern by planetjune

I tried to take a photo of my inspiration for you, but by that time almost all the blossoms had fallen (it’s autumn here!) and all I could find were these two tiny specimens on a rainy day. But the lighting conditions gave my photos this lovely ethereal glow, so that’s okay:

plumeria flowers

And now you can use my pattern to make your own plumeria blooms, wherever in the world you happen to be. Crochet a touch of the tropics with these exotic plumeria blossoms. Use a plumeria flower to make a beautiful pin or hair accessory, or to embellish anything! My pattern includes three different petal designs – choose your own colours to make custom blooms.

plumeria flower crochet pattern by planetjune

The Plumeria crochet pattern is free for you to use. If you’d like to thank me with a donation, you’ll get a handy printable PDF version of the pattern as a thank you πŸ™‚

Enjoy!

Go to Plumeria pattern >>

Comments (14)

  • Quick Links: Crochet

    navigation: arrow

    buy crochet patterns and accessories from my online store

    'Everyday Crochet' and 'The Essential Guide to Amigurumi' crochet books by June Gilbank

    Crochet video tutorials and step-by-step photo tutorials

    Free PlanetJune crochet patterns

    Frequently Asked Questions

    Quick Links: Crafts

    navigation: arrow

    Punchneedle Embroidery information, ebook & patterns

    Papercraft ebook & tutorials

    Free PlanetJune craft projects & tutorials

  • Blog Post Categories

  • Blog Archives

  • Welcome to PlanetJune!

    June Gilbank

    Hi, I'm June. Welcome to my world of nature-inspired crochet and crafting. I hope you enjoy your visit!

    If you'd like to get in touch, you can contact me here.
    crocheted Canadian flag by PlanetJune
  • A fanned-out pile of the books Everyday Crochet and The Essential Guide to Amigurumi, with text 'The answers to all your crochet questions at your fingertips - find out more'
  • Support PlanetJune!

    Want to say thanks? You can send me money in seconds at paypal.me/planetjune (over $20) or paypal.me/planetjune2 (under $20) or send me a donation through my shop.

    Or simply click through from my links before you shop at Amazon, Etsy, KnitPicks, LoveCrafts or Crochet.com, and I'll make a small commission on your purchase, at no cost to you! Start here:

    ♥ Support PlanetJune ♥

    Tip: This link is also in the footer of every page!

    Thank you so much for your support!