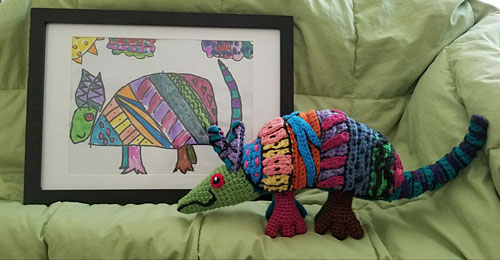
I’ve added 2 new pages of instructional techniques (what to do if your original amigurumi pattern has wired limbs, and how to add an optional lining to contain the stuffing), and an inspiration gallery page with all the giant ami I’ve made since I first published the book (7 new additions!) with any special tips I have for each one.
Newly added: my technique for replacing the wire in an amigurumi that’s intended to have wired legs, like my gecko!
Free Update!
If you’ve previously purchased The Complete Guide to Giant Amigurumi, your licence entitles you to a lifetime of free updates! Your download link in your original order has been updated, so please log back into your PlanetJune account and re-download the PDF file to get the latest version. 🙂
Tip: The copyright date in the footer of every page of the book has been updated from “2019” to “2019, 2022” so you can easily see which version you have!
Get Started with Giant Amigurumi
If you’re just beginning your Giant Amigurumi journey, this is the perfect time to grab your guidebook for this adventure!
You can upsize almost any amigurumi pattern with the techniques in The Complete Guide to Giant Amigurumi and get an irresistibly cuddly, adorable result. You’ll learn how to take a normal amigurumi pattern and enlarge it by 3 to 4 times to make a giant huggable amigurumi! All you need is your favourite pattern, a 15mm hook, and a super-bulky yarn, and you’ll be ready to start.
I’ll guide you through every step along the way, from choosing your materials and learning how to work giant stitches, to stuffing, assembly and embellishment, and more. Everything is explained in my usual detail, with clear, close-up photos and instructions.
Giant amis are so fun and satisfying to make (and you can also apply all the techniques to Mini Giant amigurumi if you don’t want to scale up as far as full giant size).
I doubt this is the end of my giant amigurumi explorations, so there may well be another updated version of my ebook in a few more years, if I develop any more new techniques and tips to share with you – I love that there’s always more to discover on my crochet journey!
In the meantime, I hope you’ll find this update useful, and I wish you happy giant amigurumi making. 🙂
Today’s PlanetJune Story comes from Maureen Carter, a crochet enthusiast from Grosse Pointe Woods, MI. Last year, Maureen tagged me on Facebook with this picture of an incredibly colourful armadillo she had crocheted using my pattern and based on a child’s drawing:
…and I just had to reach out to her to find out more about the story behind this incredible project!
Over to Maureen:
I learned how to crochet when I was 12 years old but have only been doing amigurumi in the last 4 years. I used to make mostly slippers, hats, mittens, blankets, scarves, sweaters, ponchos. Now I do a lot of amigurumi as well. It is a lot of fun seeing all the little parts come to life as a stuffed animal. My crochet teacher always said, “Make joy with your crochet.” Amigurumi always brings joy to those that receive the finished projects.
I have relatives in California who were involved with helping support and promote an online fundraiser by the Dominican Sisters Vision of Hope, a non-profit organization that raises funds to support several Catholic schools in the Los Angeles area and the San Francisco-Oakland California area. One of my sisters invited me to participate in the online auction.
One of the features of the auction was artwork made and donated by students in the schools supported by the auction. I was very taken with a colorful drawing called “Oaxacan Armadillo” by a first grade student, Isabella. I placed a bid for her drawing in the auction and was so happy to be the successful bidder.
“Oaxacan Armadillo” by Isabella
When the framed artwork arrived at my home I came up with the idea that this artwork could be transformed into an amigurumi replica that I could send as a surprise to Isabella. I looked for armadillo crochet patterns and decided that I could work with June’s pattern as the base, but incorporate the colors and designs from Isabella’s drawing.
I have followed June’s work and often watched her tutorials and lessons on how to do certain stitches and techniques. I was happy to find her pattern which was a great help to bring this drawing to life. June’s armadillo design was the perfect one to use as my base, especially since the armor shell is made as a separate piece that attaches after it’s all done.
I made each leg a different color with 3 toes, and made the ears and eyes and facial expression to match Isabella’s drawing as closely as possible. The color I added to the armor was achieved partly by crocheting in stripes, then I made small appliques and sewed them on and did some surface crochet to get the shapes and colors that were used in the drawing.
It took me 2-3 weeks working intermittently to recreate the armadillo. I also had a color copy of the drawing made up to send with the crocheted armadillo. I mailed it to Isabella in the care of her school principal. It was presented to her at school.
I sent a note thanking her for making the beautiful colorful drawing and sharing it with the fundraiser for her school. I encouraged her to continue to have fun making beautiful things using her imagination and talent. I told her that when I see it on my fireplace mantle every day, it brings me joy.
I recently received a note back from Isabella and her mother. Isabella’s handwritten note says:
Dear Ms. Maureen,
Thank you for my armadillo. I really like it. I like how it looks exactly like my drawing and it turned out very colorful. It is very special to me.
Love, Isabella
Her mom also sent a beautiful note thanking me for making the armadillo for Isabella, which she named “Alice.”
I loved Isabella’s artwork right away the first moment I saw it. I felt compelled to do something to express how much I admired her work and that I hope she continues to enjoy drawing and making things. I thought I could do it justice as a crocheted stuffed animal that she might like, so I gave it a try. It was a happy and moving experience for both of us.
(Back to me, June, again!)
I love everything about this story – it’s such a fun project, and isn’t the story behind it fantastic?! Both Maureen and Isabella are wonderfully creative, and I’m so happy my armadillo pattern contributed to their collaboration.
Part of the joy I find in having a clean and simple design style is seeing how people choose to adapt, embellish and modify my PlanetJune patterns – and I’m sure you’ll agree that Maureen’s armadillo is a prime example of that creativity.
Thank you so much, Maureen, for sharing your story with us today 🙂 Please leave Maureen a comment if you’ve enjoyed this post!
Do you have a PlanetJune Story you’d like to share? I’d love to hear it! Please email your story to june@planetjune.com, together with one or more high quality photos showing what you’ve made from PlanetJune patterns. If I choose your story to feature here on the blog, I’ll send you your choice of pattern from my shop to say thank you!
I’m so happy to present another new design that was many years in the making: the Barn Owl!
Barn Owls are my favourite owl, and adding a Barn Owl option to my Owl Collection was always part of my plan. Out of interest, I thought I’d look back at my digital notes to see how long it’s taken to bring it to life…
I first came up with the seeds of this idea in March 2014. It took until 2017 (and a whole year of prototyping) to figure out the unique shaping for the smooth lines and minimal sewing of the main Owl Collection design, but I couldn’t quite get the barn owl right… At that time, I said:
Fun Fact: Owls are divided into two families: Strigidae (typical owls) and Tytonidae (barn owls). With this pattern, you can choose appropriate colours to make any of the typical (true) owls.
Note: I’d love to design a barn owl too, but to make it look right it’d need lots of colour changes and special shaping to make the distinctive heart-shaped face, so that’s a challenge I’ll have to save for some future point in time!
I’m so glad I decided to publish the single-colour owls in June 2017 instead of waiting for the inspiration to finish the barn owl as well, because it took another 5 years to figure out how to add the barn owl’s distinctive facial features and get the colour changes that run all the way down the body just right!
Whoooo’s this then?! My owls are delighted that their beautiful cousin, the Barn Owl, has joined them to complete the owl family.
Barn Owl Fun Facts
There are species of barn owl living almost all over the world.
It’s easy to recognise a barn owl by its heart-shaped facial disc and dark eyes.
The facial disc isn’t just an attractive feature! It helps barn owls to locate their prey by funneling sounds to their ears when they are hunting.
Unlike typical owls, barn owls don’t hoot: they have a loud shrieking cry.
Barn owls hunt at night, and they are often mistaken for ghosts when people see a white face with staring black eyes floating above the ground!
About the Pattern
Barn Owl is an Expansion Pack for my Owl Collection pattern, and includes all the modifications required to crochet a Barn Owl with realistic face shape and markings.
Although it’s only an Expansion Pack, there’s a lot to this pattern – the special stitches that make the raised part of the face are all crocheted while you make the head, so I’ve included right- and left-handed appendices that walk you through exactly where and how to make those stitches so your barn owl will be perfect!
Aside from the colouring and facial features, the Barn Owl has all the same features as the Owl Collection – the smooth, seamless head, body, wings and legs, giving you the perfect elegant owl posture with minimal assembly.
(And btw, I’ve also updated the Owl Collection pattern in my new publishing software so both patterns will match, so you may as well re-download it too if you’ve already bought it! The new layout doesn’t look very different, but it’s higher quality, and all the round numbers are bolded to make for easier reading.)
What is an Expansion Pack?
An Expansion Pack is an add-on to an existing PlanetJune pattern.
The Expansion Pack lets you modify or add to the original pattern to create something else.
You cannot use the Expansion Pack alone – you must also purchase the original pattern in order to be able to complete the pictured items in the Expansion Pack pattern.
Not ready to make it yet? Add Barn Owl to your queue on Ravelry:
Although it’s ridiculous how long some of my designs take to be birthed, I’m so happy I waited until I could do justice to the gorgeous Barn Owl – this design is exactly what I pictured in my head, eight years ago…
I had a request earlier this week in the PlanetJune Discord group to modify my Love Hearts pattern to look like the Ukrainian flag, and that was a request I just couldn’t refuse.
I thought it would be simple, but I made prototypes to figure out the straightest line…
It’s *not* what you’d think – crochet stitches aren’t straight, so the straightest line is not formed from a symmetrical pattern…
And then more prototypes to figure out whether hook size affects the straightness of the colour change line (it does – smaller is better) and the best way to manage the yarns with all the colour changes…
Cut-and-tie gives the cleanest result on the front, but a messy back with lots of yarn ends to deal with. Tapestry crochet (working over the unused colour with every stitch) gives a neat front and back, with only two yarn ends from each colour to weave in, but the unworked yarn colour is slightly visible between the stitches (especially in the yellow half).
After several rounds of prototyping, the final pattern is ready for you, in flat and puffy versions, with colour change recommendations for how to get the best balance of appearance, speed, and simplicity.
Please use this pattern however you wish, and especially to make hearts in the colour of the Ukrainian flag to show your support during this crisis. You can also sell hearts to fundraise (look for an accredited humanitarian aid charity in your country).
Or simply click through from my links before you shop at Amazon, Etsy, KnitPicks, LoveCrafts or Crochet.com, and I'll make a small commission on your purchase, at no cost to you! Start here: