Writing my Year in Review post every year helps me to see what I’ve accomplished, think about what I’ve learnt, and decide what I’d like to do differently in the following year.
2023 has been a unique year for me. I usually start these reports with a summary of all the new crochet patterns, tutorials and craft projects I’ve completed over the year, but I had two major achievements this year, and these basically tell the entire story of my year, with little time remaining for anything else.
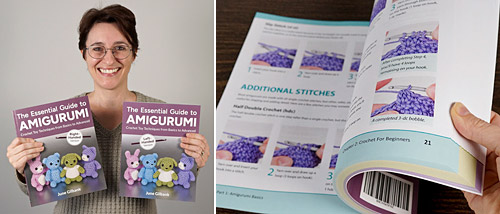
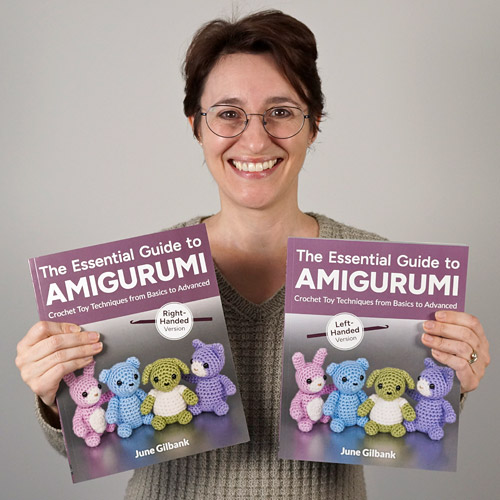
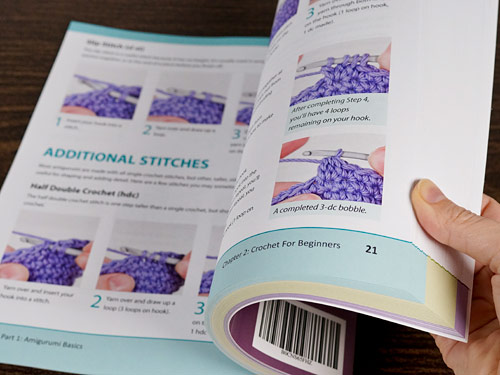
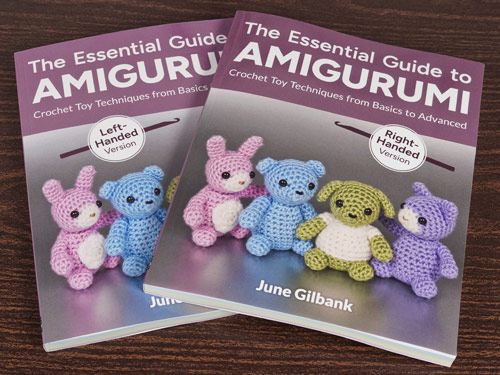
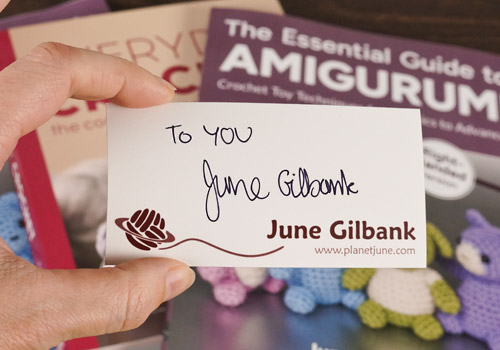
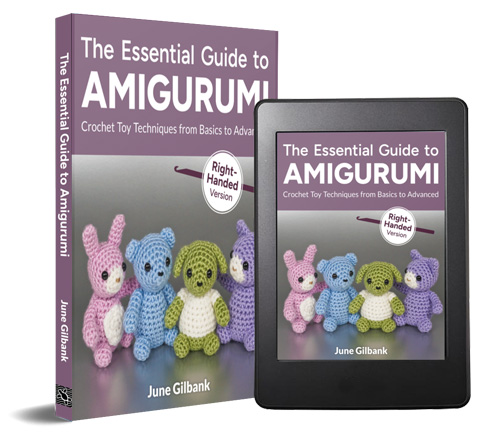
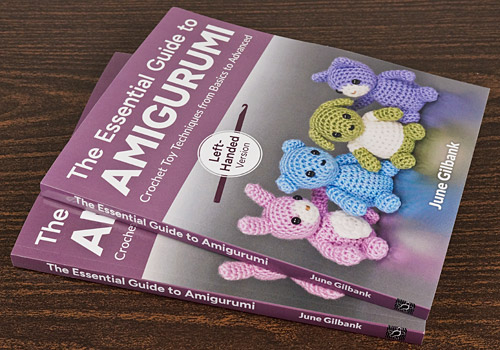
My biggest accomplishment was to write and publish my comprehensive amigurumi reference book, The Essential Guide to Amigurumi, without sacrificing any of the quality you’d expect from the best traditionally-published crochet books. (As a bonus achievement, the right-handed version became the top new release in the Stuffed Animal Crafts and Crafts and Hobbies Reference categories on Amazon – yay!)
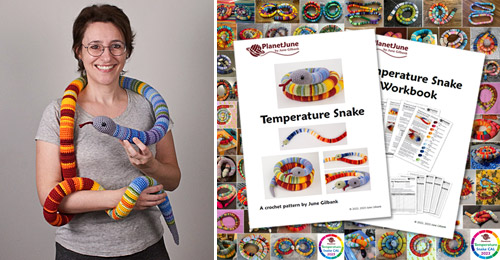
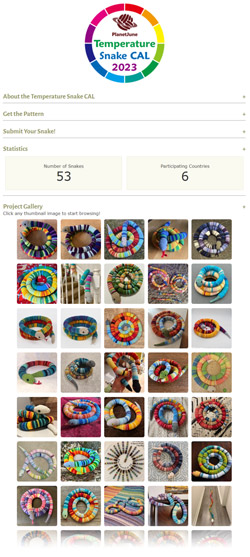
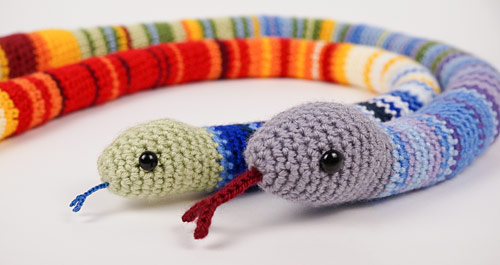
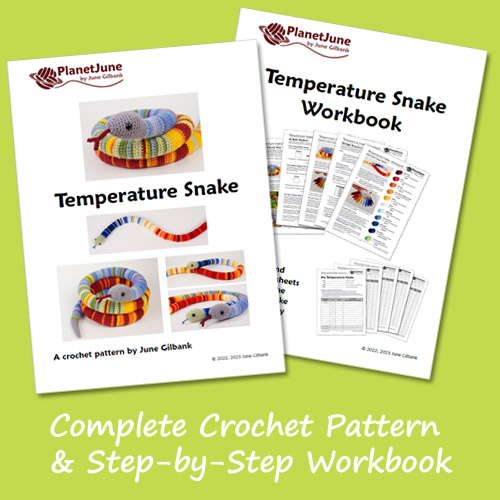
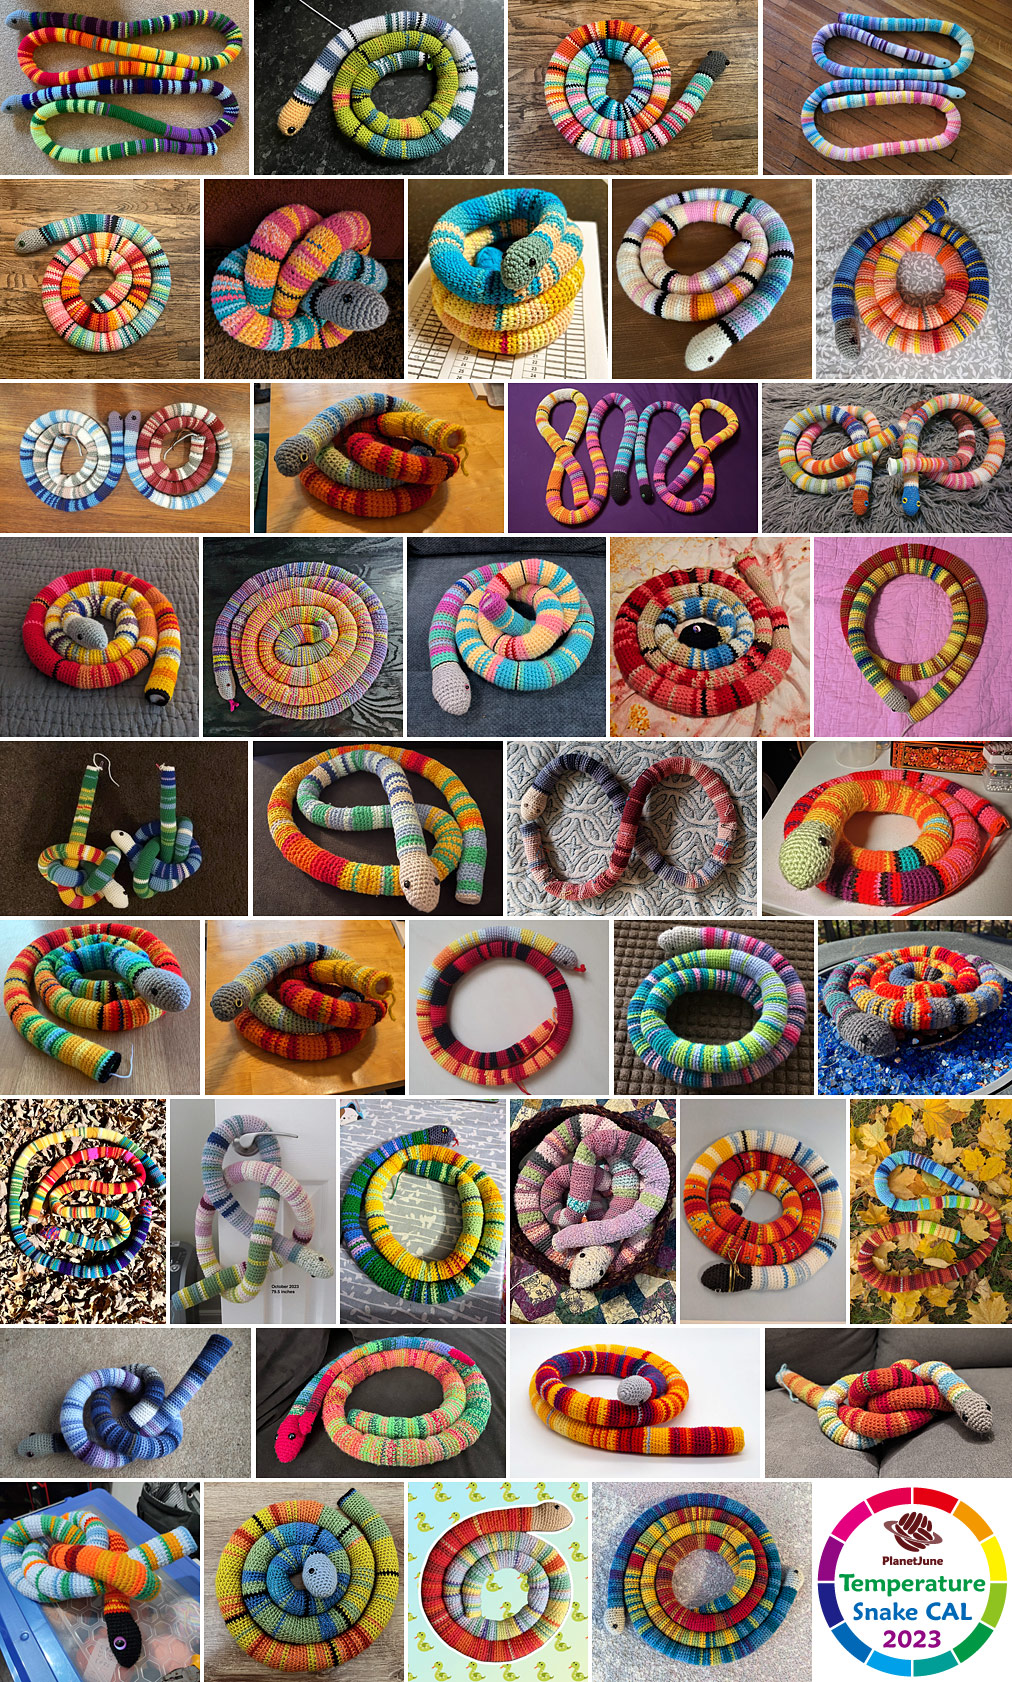
Secondly, I ran the hugely popular PlanetJune Temperature Snake crochet-along with over 800 participants, and collected all the CAL materials and tips together into a complete pattern and detailed accompanying workbook at the end of the year so everyone can make temperature snakes for 2024 and beyond.
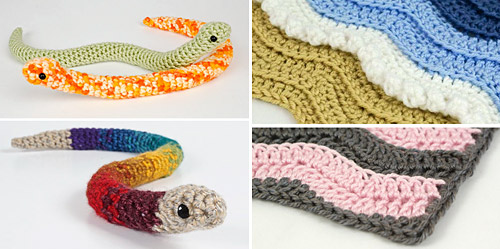
Aside from those major goals, I published the Seafoam & Edging Expansion Pack for my Turtle Beach blanket, I managed to find time for one tiny (literally) new pattern with my Baby Snake design which I then adapted to add a rainbow ombre colourway, and made a couple of snake-related tutorials to accompany the CAL.
Business Report
This year I’ve been working on making the PlanetJune community more platform-agnostic, so I can meet you wherever you are. The Temperature Snake CAL was a good example of this, with participants on Discord, Ravelry, Facebook, Instagram, and email.
I built and coded custom galleries for both the Temperature Snake CAL and the annual end-of-year Reindeer Games CAL, to streamline and automate the back-end processes and make the galleries available to everyone, no matter where they participate in the crochet-alongs.
I updated the My Patterns page in your PlanetJune account, so you can see all your past PJ pattern purchases at a glance, and review and re-download them directly without clicking back into the order.
And I made some progress on other behind-the-scenes tech updates to PlanetJune, but that’s always an ongoing process. One of the downsides of being my own web developer and tech support team is that there’s only so much time I can devote to the tech side of things, but I anticipate that will be easier in future now I have an AI assistant to speed up my coding. 😉
Personal Report
We’ve been dealing with an unexpected change in family circumstances this year. And my sweet pup Maggie had dental surgery and then a bigger surgery for removal of a tumour. She needed my constant supervision while she recuperated, to keep her from tearing her stitches – you can’t explain to a dog that all stairs are off-limits! – but it was worth it, as she’s bounced back and is now as happy and active as ever.
Good news for my own health too: I may have avoided another knee surgery! Ten months of physiotherapy has strengthened the muscles around my unstable knee to compensate for the damaged ligament, and my knee feels stronger than it has in many years.
Crafting
I didn’t have any energy or brainspace left for much other crafting this year – definitely not a situation I’d like to repeat in future – but I did get to use my crafting superpower for good. Maggie’s massive surgical incision (from neck to knee, poor pup!) needed to be loosely covered while she healed, but her leg couldn’t be bent enough to get it into a normal T-shirt, so I made her a ‘hospital gown’: a custom t-shirt with ribbon ties down the back.

And I surprised myself by discovering an unexpected creative outlet: vegetable gardening. I’ve never been successful with growing plants (there’s a reason all my houseplants are crocheted!) but I cultivated a new experimental attitude with low expectations and it paid off.
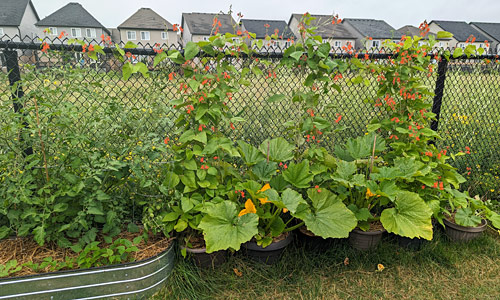
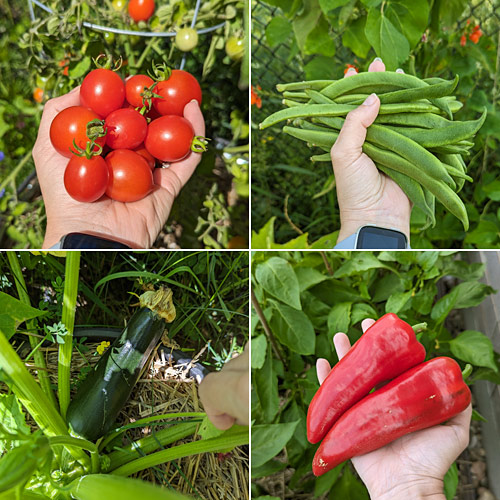
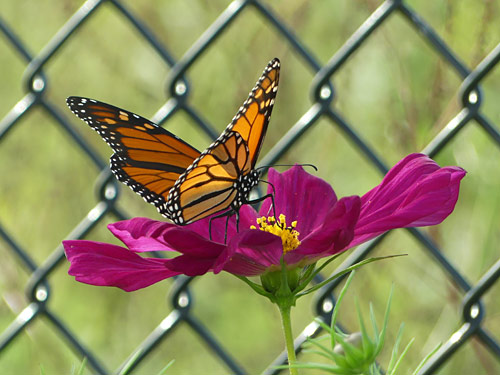
We ate delicious garden-fresh vegetables every day for over 3 months, and, while not everything I tried was a resounding success, it was a joy to spend time in the garden every day enjoying the fresh air, watching the birds and butterflies, and observing how my plants were growing.
And the vegetables led to another new ‘craft’: canning! Now I have enough pickles, chutneys, preserves and relishes to last me until the next growing season.
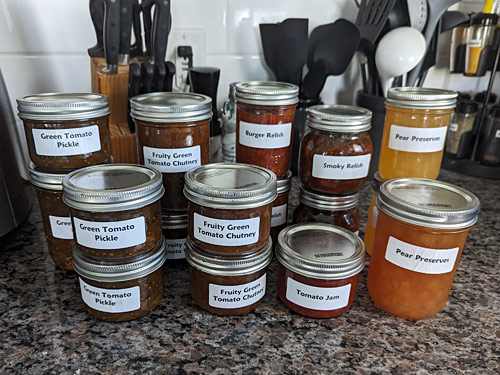
There’s nothing like eating a burger in a fresh-from-the-oven bun, topped with homemade relish and home-grown lettuce and tomato, with just-picked green beans on the side. It’s a different kind of crafting, but baking bread and growing food have now become part of the crafty life that I love.
Looking Back
When I made the decision to devote this year to writing and publishing my magnum opus on amigurumi, I knew it would be an epic challenge to produce a top-quality book from scratch with no assistance, but it proved to be an even larger task than I’d anticipated.
I’d originally planned so much more for the year – new seasonal PlanetJune patterns for fall and winter, and a crochet beginner’s video tutorial series and fun stop-motion video trailer to accompany the book release. But life had other ideas: between Maggie’s surgery and recovery, the physical limitations from my chronic fatigue condition, and personal challenges, by the end of summer I was three months behind the schedule I’d set myself for the book at the start of the year.
If I was going to bring my book into the world, I had to keep my eyes on the prize and drop all the non-essential side projects from this year, leaving me with just three projects:
- Keeping PlanetJune running (customer support takes the majority of my time there)
- Managing the unexpectedly large CAL for my Temperature Snake design (customer and community support, creating the monthly roundup collages, plus my own participation with two crocheted snakes to keep up to date)
- Creating the book of my dreams (no small task: writing, editing, designing, photographing, layout, publishing, and more, with no compromises on quality anywhere in the entire process)
And, although I may have pushed myself beyond my limits to do this, I ended up making up two of the three lost months and publishing the book only a month later than I’d originally hoped, and within my overall goal of publishing in time for Christmas. I’m trying not to shame myself for having to drop all my other plans for the year – I couldn’t possibly have worked any harder than I did, my priority was to put everything I had into making this book the best it could be, and that’s exactly what I did. That’s a real and long-lasting achievement, and I’d say it was a year well spent.
Looking Forward
For 2023, one of my more nebulous goals for PlanetJune was to imagine “what would it look like if it was easy?” I’ve spent a lot of my time over the years pushing through and struggling with my energy limitations, and I don’t want to live my life like that any more.
I’ve been attempting to move in this direction for several years, but there’s always been just one more thing I need to get through before I can slow down… And then there’s the next one more thing, and the next… I’ve been determined that bringing my legacy book into the world would be the last of these, and now it’s time to find an actual balance where I can enjoy my life, and have PlanetJune be a part of that.
Writing this book has shown me a) what not-easy can look like, and b) that my business is at such a mature stage that it can survive for essentially a whole year without me doing anything except customer support. And if that’s true, imagine how well things could go in future if I add to that baseline by concentrating on following my curiosity and bringing the things I want to make into the world, and giving myself permission to minimise the things that drain me…
For 2024, I’m looking forward to striking out in this new direction. After a year with very little pattern designing, I’m itching to get back into it – I’ve been keeping lists of ideas that I didn’t have time to work on, so I have no shortage of inspiration. I love bringing nature to life in amigurumi, and I’m so excited to get back into it!
But first, rest. 2023 was too much for too long, but I really needed to complete The Essential Guide to Amigurumi and not have it be one of those passion projects that goes on for years and is never quite ready to go out into the world. And now, it’s published! I’ve done what I set out to do. I can finally hit pause after a year-long push, so I’m going to take a month off to reset and try to find a healthy rhythm and remember how to relax (I seem to have forgotten how, after pushing through for so long…)
I’ve been thinking of this point in time as a semi-retirement, where I’m retiring from the mentality of hustle and business growth, but not from creating new designs and allowing PlanetJune to support me financially. I think this could be my answer to “what would it look like if it was easy?”
I don’t have the energy or desire to reach for capitalist goals or to craft persuasive social media marketing campaigns, and I don’t want to waste my energy on those things. I need to trust that the people who enjoy my work will continue to find, enjoy and share it, genuinely and authentically, and that will be enough. I can imagine the simpler life I want, filled with creative projects, rest, nature, family, friends and online community, and peace.
(If that sounds good to you too, I warmly invite you to join the PlanetJune community on Discord. It’s a cozy online space where we chat about topics like pets, food, gardening and books as well as crochet and crafting!)
2024 Wishes
Last year, as I worked towards my ambitious publishing goal, I wished to be grounded, steady, and focused: to move forwards, one step at a time, without getting overwhelmed, sidetracked or discouraged. I really needed all those things in 2023 to keep me going all year long, but now that era has ended and it’s time to begin a new one. I don’t know exactly what that will look like yet, but I’m looking forward to finding out!
For 2024, I wish for a simpler, more serene life: for making time for what really matters, and for leaving behind the things that don’t.
I wish the same for you, and for a happy, healthy and harmonious 2024. Happy New Year!


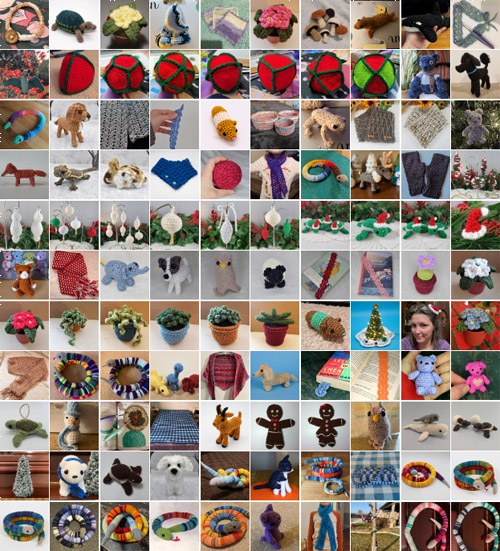
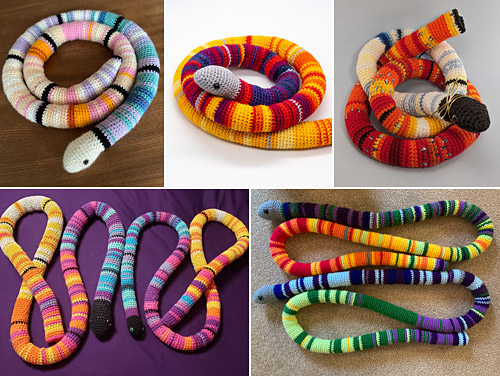 Credits, clockwise from top left: Dot, PsychoGryphon, CrochetChrisie, jukatca, Mouzly
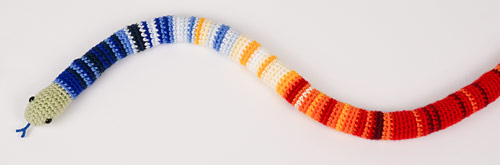
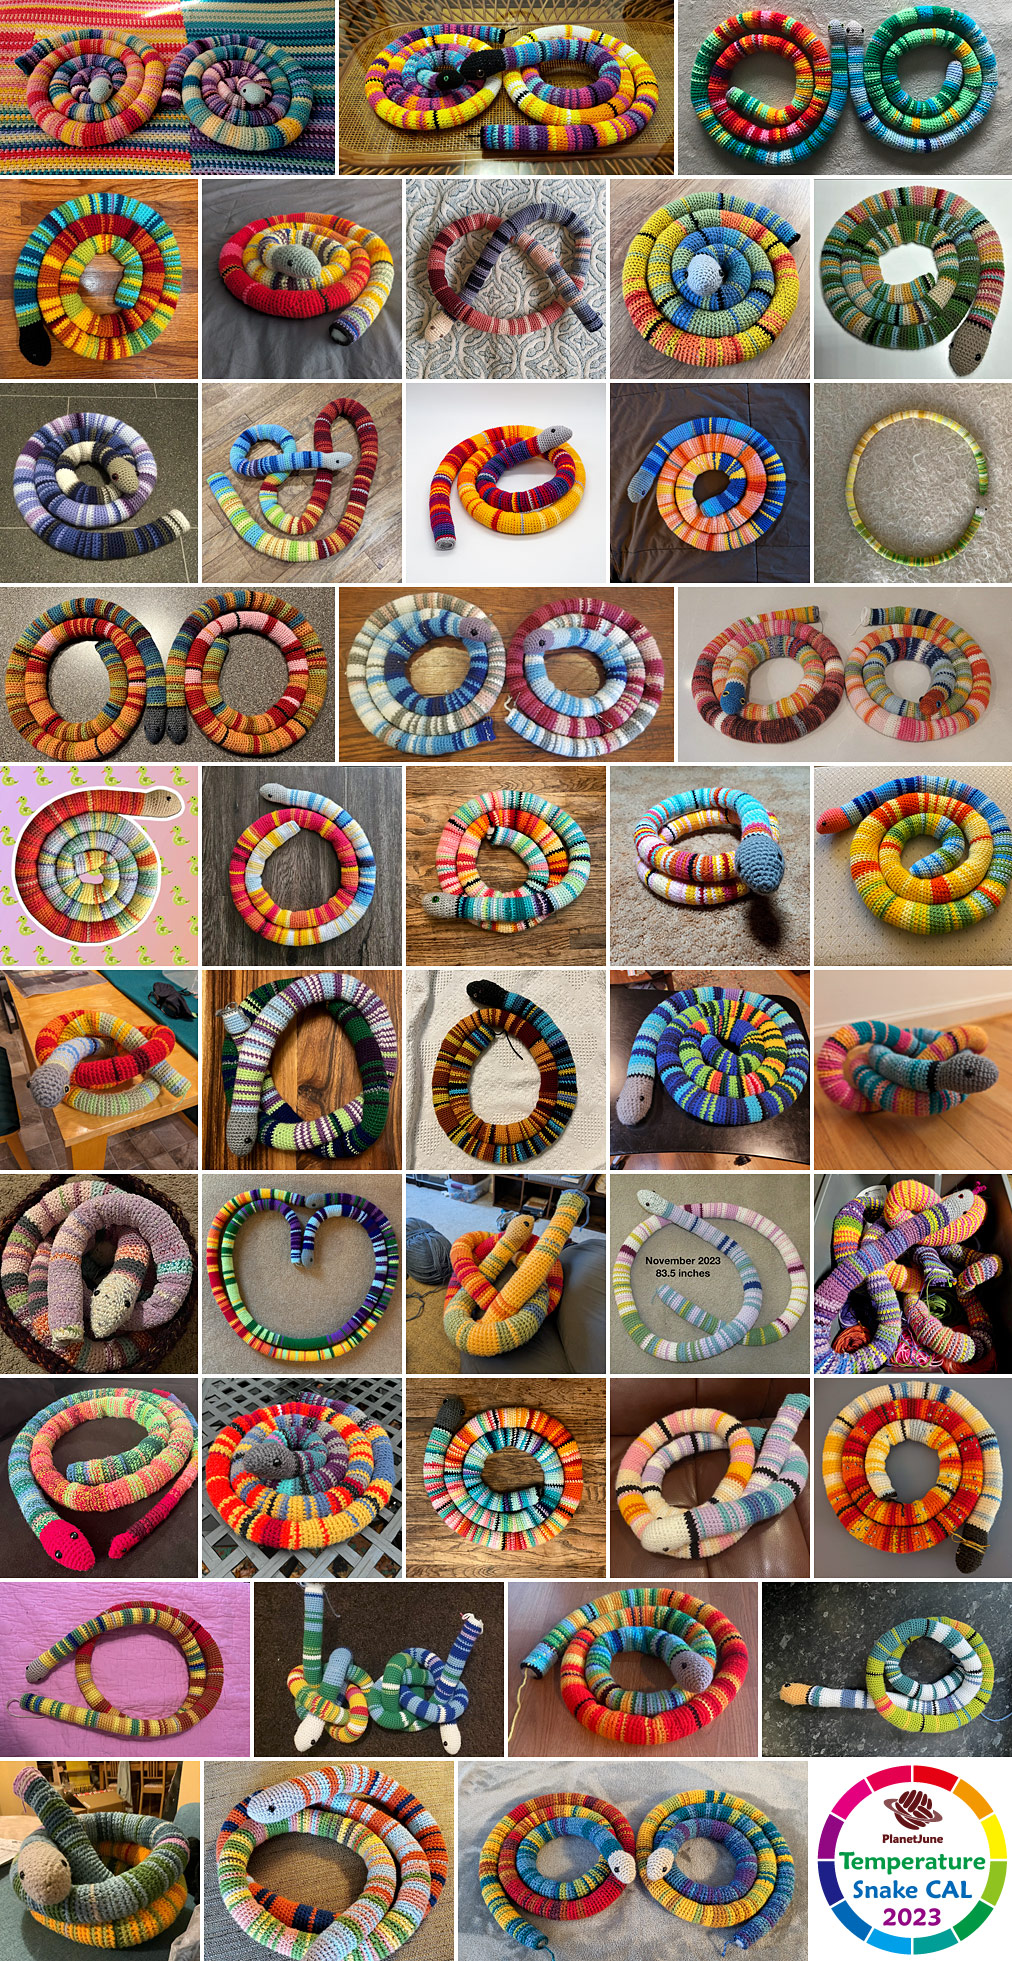 Click to see the full-size collage
 Click to see the full-size collage


