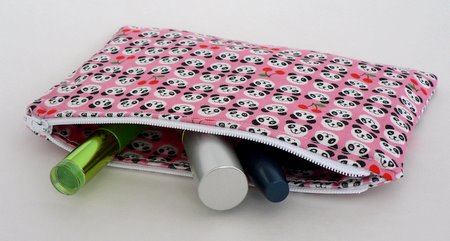
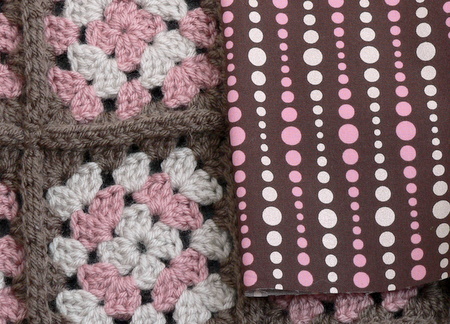
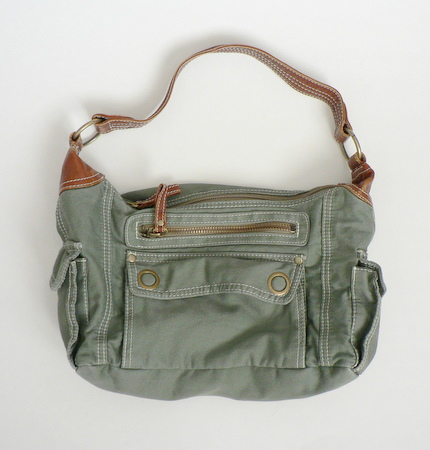
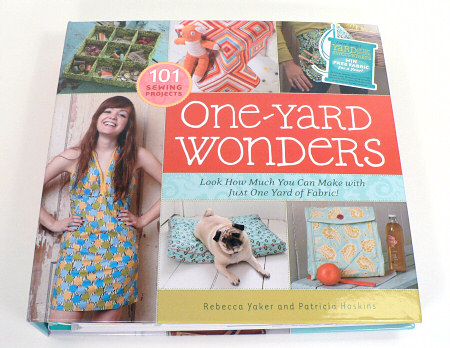
PlanetJune Craft Blog

Latest news and updates from June

Archive for Sewing

light tent for better product photography

One of the biggest frustrations with craft blogging can be to take decent photographs, as photography is so light-dependent. Using the camera flash is too harsh, and using your interior room lighting will give you dimly-lit, orange-tinted photos. The best solution is good natural light (out of direct sunlight, otherwise you will see dark shadows behind your object), but if you’re in the middle of one of those weeks where the sun never shows its face, what can you do?

The professional solution is to use a light tent (aka light box) for product photography. They are available to purchase commercially, but cost hundreds of dollars. If you google ‘light box’ or ‘light tent’ you will find people who have made their own light tents, including Bill Huber’s popular tutorial at PBase, made from PVC plumbing parts and a white bedsheet! In the comments following his tutorial, I noticed that someone had bought an IKEA Antonius laundry bag stand to save them from building their own frame for the light box, and woohoo, the frame is still available and only costs $7!

If you’d like to make your own light tent, the simplest form I have seen only requires a large cardboard box and some fabric, so don’t be put off by the idea of making a frame or finding a convenient IKEA!

Here is my prototype; I just draped the frame with a $1 white plastic tablecloth, and it works! I have attached a clamp lamp to each side of the frame so that the lights shine through the fabric and into the tent. I also used a desk lamp to add additional lighting through the top of the tent.

prototype light tent

I was a bit worried that the plastic might melt under the lights, and the draped tablecloth didn’t look very tidy, so I bought some cheap white fabric, sewed 4 panels (two sides, a back and the top), and then sewed them together to form a fitted cover. I purposely left the final seams on the outside to leave a snug fit around the corners of the frame. You can also probably see a little silver blob on the left of this photo – I had some rare earth magnets lying around, so I used a few to keep the front edge of the fabric stretched out nicely over the metal frame:

fabric cover for light tent

I used a white bristol board inside the light tent to give a seamless backdrop, but of course I can easily swap in another backdrop to add more colour. And here’s the finished tent:

finished light tent

Now for a photo comparison. Firstly, some piggies in nice natural lighting. This is about as good as it gets under normal conditions. Looks pretty good; there is a little shadow in the middle between the pigs, but the picture is fine, really:

piggies in daylight

And now for the light box photo:

piggies in light tent

Huh? There’s not really any difference, you say? That’s the whole point… because I could take the exact same picture in the middle of a thunderstorm, or in the middle of the night! No sunlight required. And that is the beauty of the light tent.

A few notes:

  • You can use any directional lamps for a light tent, but make sure you use the same light bulbs in each light source, otherwise your colour balance will change across the photo
  • Unless you have very special bulbs (mine are GE Reveal – they are supposed to be natural daylight coloured, but for the purpose of photography they are nowhere near!), you will have to set the white balance on your camera if you have that option, or adjust the colour balance of your photos in your image editing software. But it’s a 1-click fix in most software, so it’s really not a big deal.
  • You can easily adjust the amount of lighting coming from each direction by moving each lamp closer to, or further away from, the light tent. I find that using the side lights brightly and the top light a little further away works nicely.

UPDATED 18/11/09: I have since added a fourth light, pointing into the front of the box. It’s not filtered by the tent, so I keep it further away (behind the camera). As zabacorporation mentioned in the comments, my example pig picture would have been better with a light source illuminating them from the direction the camera sees (i.e. the front). The light tent then serves to reduce the shadows caused by that direct light. I’m still tweaking the exact configuration!

Comments (15)

displaying finished work

Do you ever have the problem of figuring out what to do with things after you make them? Unless a handmade item is a gift or something wearable, I usually don’t know what to do with it, and it ends up buried in a pile of ‘stuff’ or hidden in a box and very rarely gets seen – such a waste!

My craft room really needs some decorative interest; it is still completely unaccessorized apart from my glass toy shelves and some origami in the window. So, I’ve decided that I should try to display some more of the things I’ve made, without making the room look too busy and cluttered. This is going to be a long-term project, and I’ll show you my progress as I come up with ideas.

felt sea creatures on display
Click for larger image

My supercute felt sea creatures have been homeless for months, so my first task was to find a way to show them off. I sewed up a quick pennant yesterday using the leftover lining fabric from my laptop sleeve, reinforced with some fusible interfacing on the inside back so it won’t stretch under the weight of the animals. I hung each animal on a simple loop of embroidery floss through the topmost blanket stitch, brought the floss ends through to the back of the pennant, and knotted the ends together. The long tall design means it fits perfectly down the side of my bookcase, so it looks good AND fills a space I hadn’t previously considered as useable.

I think having more of my work visible like this will add a lot more personality to the room. Stay tuned for more craft room progress posts 🙂

Comments (4)

simple a-line skirt

I’ve been very busy crafting this week, but most of it isn’t quite ready to show off yet. But I’m feeling proud of myself, because I made a new skirt from scratch in an evening, and without a pattern:

A-line skirt with elasticated waist

It was really easy – I just traced around an existing skirt, added seam allowance, cut the fabric (I used 100% cotton) on the bias, sewed the sides together, and then sewed a loop of elastic in at the top and hemmed the bottom. The elastic waist gathers the fabric around the top, and you can just pull the skirt on and off.

I decided that I wanted the gathers around the waist to be perfectly even, so I stretched the elastic to the same width as the fabric and then sewed them together. Then I had to stretch it all out again so I could sew down the waistband to hide the elastic. With hindsight, I’ve thought of a much simpler method that will look just about the same and take a fraction of the time.

I’m going to make another skirt with my simpler method – it’s a really cute simple summery skirt and it would work with pretty much any kind of fabric. Would anyone be interested in a tutorial?

Comments (8)

vinyl-lined makeup bag

While I was in the UK, my sister handed me a piece of fabric (a gift from Jodi) and asked me to make it into something for her. We decided a makeup bag would be a good choice for the cute fabric, and I had the brainwave of adding a layer of clear vinyl over the lining, to protect the lining fabric from getting makeup smudges all over it.

I used splityarn’s zippered wristlet tutorial because it’s worked out for me before, but I skipped the wrist strap and layered a piece of thin clear vinyl over the right side of each lining piece before assembling the bag.

It was… not easy. The vinyl wanted to stick to the base plate of the sewing machine, and kept moving with respect to the lining fabric. It was really tricky to keep all the layers in position to sew the bag together. About halfway through, I realised that sewing the vinyl to each lining piece (around the edges within the seam allowance) before I started would have kept the pieces together – isn’t hindsight great?!

But I struggled on, and eventually finished the panda bag. And now I see that the vinyl lining, because it is clear, doesn’t show up at all on any of my photos! But trust me, it is there, and the panda faces on the inside will be protected 🙂

vinyl lined makeup bag

And then – the very same day – I saw Jessica’s post about iron-on vinyl. It would have been perfect for my project, had I only known it existed a day earlier… So, if you decide to make a clear vinyl-lined bag, I recommend you try the iron-on vinyl, if you can find it, and make your life easier!

Dawn: hope this is what you had in mind! I’ll send it to you soon xx

Comments (11)

chair makeover

Although I have my new leather desk chair in my craft room, I stored my old chair in the basement, just in case. I saw a great post (‘save your old chair with a new look’) on IKEA Hacker a few weeks ago, and recognised my boring old Svenning chair given a fantastic makeover. Well, I do have two desks in my craft room, so having two chairs wouldn’t be a bad idea…

I went to the fabric store and managed to find some fabric in the exact colour scheme I used to crochet the throw for my other chair!

matching fabric

Holly’s method involved removing the old fabric from the chair, and then stapling the new fabric over the chair padding. I don’t have a staple gun, and after reading about Holly’s stapling difficulties, I decided to try a different method to attach the new fabric. I removed the backing fabric from the seat, and the plastic backing from the back rest, but left the original fabric stapled to both parts.

seat with backing removed

I stretched the new fabric over each piece and pinned it roughly in place so the dots pattern would be straight. Using a curved upholstery needle and strong thread, I stitched around the underside of the seat, sewing the new fabric to the old fabric.

upholstery needle

I used a combination of running stitch for speed and backstitches for extra security every few stitches and around the corners. No need to be too neat – none of this is visible in the finished chair.

stitches

When I’d finished sewing, I trimmed the excess fabric, leaving about an inch beyond my stitches.

all sewed up

I reattached the plastic back to the back, and blanket stitched the original backing fabric to the seat, to hide the raw edges.

blanket-stitched underside

And the result? Better then new!

finished chair

I love it!

finished chair

Comments (13)

refashioned bag

This project has been in the works for a long time. I was halfway through it when my old sewing machine gave up on me! I’m happy to report that my new sewing machine tackled it without any difficulties – even when sewing through 8 layers of heavy cotton fabric.

I was given this little bag as a gift, and it’s a useful size, with plenty of pockets. One problem: I really didn’t like that nasty brown fake leather strap.

With no clear plan in mind, I decided to do something about it. I started by cutting off off all the plastic ‘leather’ pieces and deconstructing them:

I chose a blue heavyweight cotton with a large leaf print from my fabric stash, and then I recreated all the missing pieces in this fabric. I reused the metal rings from the original strap, and added some length to the new strap because the old one was too short for my liking. I sewed all the pieces together on the sewing machine, and added the finishing touches by hand.

bagmod4.jpg

And the end result:

I debated added an embellishment to the front pocket flap, but I think it’s okay like this – the matching zipper pulls add some continuity between the bag and the handle. At least it’s useable now, and thankfully there’s no pleather in sight 🙂

Comments (3)

rocking out… quietly

We’ve had friends visiting and they brought their PS3 and Rock Band game – so much fun! The game is played with a guitar, drums and a microphone – but the noise of the drumsticks hitting the drums is LOUD, so you have to play at high volume to hear the song over your drumming.

rock band

We needed a quick solution for this (didn’t want to use up valuable game time), so I wrapped the tips of the drumsticks with multiple layers of batting and used some stretch denim from my stash to sew a quick sleeve to cover each tip. Then we just tied the sleeves onto the sticks by wrapping household string around the bottom of the sleeves very tightly. They worked really well to muffle the sound of the sticks hitting the drums without impeding the gameplay. And they look kind of cool too.

modified quieter rock band drumsticks

For any other Rock Band owners, the other way to modify it (this takes longer and requires specific supplies) would be to add foam padding to the drum pads – I just did some googling and found a run-down of mods others have tried. Or just buy some rubber-tipped drumsticks 🙂

Comments

supercute sea creatures

I was lucky enough to receive a free copy of Futuregirl’s Supercute Sea Creatures pattern a few days ago (thanks Alice!) so that means it’s time for me to learn another new craft – how to sew felt softies!


Click for larger pic

The last time I attempted blanket stitch was well over 20 years ago (now doesn’t that make me sound old! I was a very small child at the time) so I had a little apprehension, but I needn’t have worried. The pattern is very clear and easy to follow, even for a novice like me, especially when supplemented with Alice’s tutorials on how to hand sew felt.

I decided to go with a colour theme – white with blue embellishments – but to try to find subtle variations within the theme for each creature. I also wanted it to be a stash-busting project (i.e. I wouldn’t buy anything new in order to complete it), so the whole thing cost an amazing 28 cents (for 1 sheet of white craft felt).

First up was the starfish. I stitched seed beads (clear with a blue core) onto the front, embroidered a pattern on the underside, and then blanket-stitched them together. I really love the embroidered back, although it does look a bit like a 5-sided snowflake… hey, there’s another craft idea! The starfish took me 2 hours to make.

Next up, the octopus. Wow, cutting out all those legs was a lot of work! For the suckers, I found some blue plastic beads that were once part of an ugly beaded belt that came free with a pair of trousers. I had unpicked the entire belt a few months ago, and now have little piles of red and black wooden beads, and the blue plastic beads, waiting for a use. I figured out a way to sew them on invisibly with transparent nylon thread, which I threaded inside the thickness of the felt between each bead so the thread doesn’t show on the back side either. The eyes were more difficult… I don’t have any sequins or suitable-sized buttons in my colour scheme. Finally, I decided to make a sead bead cluster for each eye and I think it has a nice effect!

Thirdly, the fish. I’m getting the hang of the felt cutting etc by now, and I’m racing through the blanket stitching. My white fins didn’t show up against the white body, so I blanket stitched around them. Again, I had the problem of what to use for the eye, and I didn’t want to do the same thing as I’d used for the octopus, so I came up with a ring of opaque seed beads with one larger blue glass bead in the centre.

And lastly, the jellyfish. I left it to last because I thought it would be the most difficult, but either I was super-experienced by this point (haha), or it was very easy. I made the entire jellyfish (except the trailing floss tentacles) during a 25-minute wait at the US border! I’d made a little kit of the pattern, some felt, embroidery floss and needle, my sewing scissors and a tiny bit of fiberfill stuffing in a zip-lock bag, and put it in my handbag in case I was stuck waiting at the border. While everyone else was complaining about the length of their wait, I was happily cutting and sewing. I was almost annoyed when they called my name. I felt a bit self-conscious of my public crafting at first, but I don’t think anyone even took any notice (although I didn’t look up to check, just in case anyone was laughing at me).

So there you go – the set is complete. I really enjoyed making it. Cutting out the fiddly shapes (why oh why do octopi have to have so many legs?!) and the beading took the longest time. But I was surprised at how much I enjoyed working with the felt and floss. Maybe it’s because I’m a perfectionist freak, but seeing all those little neat stitches take shape made me very happy. I can definitely see myself doing some more work with felt and floss in future.


Click for larger pic

Comments (11)

Next entries » · « Previous entries
  • Quick Links: Crochet

    navigation: arrow

    buy crochet patterns and accessories from my online store

    'Everyday Crochet' and 'The Essential Guide to Amigurumi' crochet books by June Gilbank

    Crochet video tutorials and step-by-step photo tutorials

    Free PlanetJune crochet patterns

    Frequently Asked Questions

    Quick Links: Crafts

    navigation: arrow

    Punchneedle Embroidery information, ebook & patterns

    Papercraft ebook & tutorials

    Free PlanetJune craft projects & tutorials

  • Blog Post Categories

  • Blog Archives

  • Welcome to PlanetJune!

    June Gilbank

    Hi, I'm June. Welcome to my world of nature-inspired crochet and crafting. I hope you enjoy your visit!

    If you'd like to get in touch, you can contact me here.
    crocheted Canadian flag by PlanetJune
  • A fanned-out pile of the books Everyday Crochet and The Essential Guide to Amigurumi, with text 'The answers to all your crochet questions at your fingertips - find out more'
  • Support PlanetJune!

    Want to say thanks? You can send me money in seconds at paypal.me/planetjune (over $20) or paypal.me/planetjune2 (under $20) or send me a donation through my shop.

    Or simply click through from my links before you shop at Amazon, Etsy, KnitPicks, LoveCrafts or Crochet.com, and I'll make a small commission on your purchase, at no cost to you! Start here:

    ♥ Support PlanetJune ♥

    Tip: This link is also in the footer of every page!

    Thank you so much for your support!