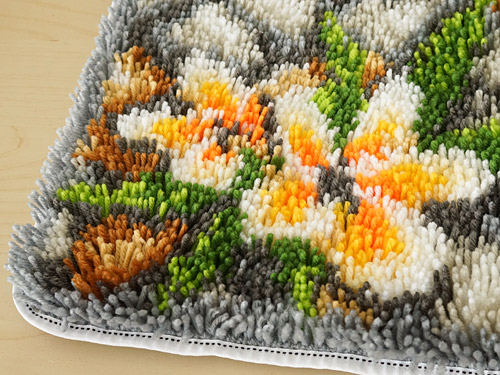
PlanetJune Craft Blog

Latest news and updates from June

Archive for Relaxing Crafts

review: ARTDOT diamond painting accessories

Before we begin: ARTDOT provided these products to me for review, and set up an affiliate account for me, but I’m not being compensated for this review, and, as always, my opinions are my own!

Do you take time off over the holidays to relax and decompress? I love to stay home and do jigsaw puzzles or relaxing crafts while the TV plays in the background.

One of the crafts I’m still enjoying is diamond painting (see my posts from last year), and when ARTDOT approached me about a collaboration, I saw that some of their products looked like they’d be really useful, so I’ve been testing them out in preparation for my holiday crafting sessions!

These are multi-purpose products, so do take a look even if you aren’t into diamond painting – the storage products would also work for beading or other small craft supplies, and the light pad is perfect for tracing designs onto paper or fabric. And I have a special discount code for you at the end of this post!

Storage Case

This is the Diamond Painting Storage Case. I got the medium size – it also comes in smaller and larger sizes, and in a colourful pink patterned version if you don’t love the smart black and purple option.

ARTDOT diamond painting accessories reviewIt’s a nice sturdy zippered case, and I love that purple!

To test it out, I picked up a small diamond painting kit from amazon to play with and decanted all the diamonds using the provided silicone funnel.

ARTDOT diamond painting accessories review

Tip: Although I found the funnel useful for this initial step, once you’re working with your diamonds you can tip them straight back into their jar from the tray.

I’m really impressed with this case – it has a convenient screw-topped jar to store each colour, and they’re all mounted in a custom foam base so they don’t get mixed up and out of order!

ARTDOT diamond painting accessories review

You can store your pen, tray, spare wax and other accessories in the mesh pocket inside the case lid, so it’s a convenient and portable solution to keep all your accessories together.

Tip: Although the colours and symbols will be different for each kit you buy, the key should always have numbers, so by labelling your containers with the numbers you can reuse them for future kits without having to change the labels!

ARTDOT diamond painting accessories review

The storage bag also came with stickers to label the jars, and the above set of bonus diamond painting accessories – I don’t need all the included items, but I really like the extra-large tray!

Tip: I bought myself a couple of fancy resin diamond painting pens from amazon as I find the larger handle much more comfortable to use, but despite trying several fancy expensive tips, the best tips I’ve found are the ones that come on these cheap pink pens! So don’t throw those pens away when you get one with a kit or accessory – pop out the tip and you’ll have spares for your fancy pen handle!

ARTDOT diamond painting accessories review

Light Pad

This is the Light Pad For Diamond Painting (although it’s actually a multi-purpose crafting item – I’m also going to use it for tracing punchneedle patterns onto fabric, and I’m sure it has multiple other crafting uses!)

ARTDOT diamond painting accessories review

I got the A3 size (that’s ~17×13″, it’s massive!) – it’s also available in both smaller and larger sizes, and the smaller A4 one (~14×10″) would be fine for most needs.

The light pad comes with a stand and binder clips, so you can clip your work directly to it and use it in a more vertical position like an artist’s easel, if that works for you. It also comes with the same accessories (pens, trays, wax etc) as my storage bag above, and a diamond storage box with little flip-top containers.

ARTDOT diamond painting accessories review

I can’t believe how thin this light pad is – it just looks like a sheet of acrylic, and is barely thicker than the USB socket! The website says it’s over an inch thick, but that measurement must include the stand – I measured the pad and it’s only 3mm (1/16″) thick. But it really works – it uniformly lights up the surface and has three levels of brightness.

Storage Drawers

And finally, these are the Stackable Diamond Painting Storage (Square Bottle). I got 4 drawers, but you can buy them in smaller or larger quantities too, and each drawer clips to the others horizontally or vertically so you can build a custom storage system of any size.

ARTDOT diamond painting accessories review

I’ve had a large diamond painting in progress for a long time, and this (below) was my diamond-storage solution up till now – all the colours were in ziplock bags and arranged by number in a box (apart from the large bags, which wouldn’t fit). But the bags are starting to break after repeated opening and closings, and I’ve had to double up bags in some of the compartments because my box only has 30 spaces and I have 45 colours:

ARTDOT diamond painting accessories reviewBefore: not ideal! All these diamonds are now neatly organised in the storage drawers above.

These storage drawers make wrangling all those colours so much easier! You can choose to buy the drawers with either the round bottles I showed you in the storage case above, or these small rectangular tic-tac-style bottles:

ARTDOT diamond painting accessories review

I chose the rectangular bottles as they’re perfect for large kits with small quantities of many colours. Just be aware that the opening in the lid of the tic-tac box is so small that you have to pull off the entire lid of the box each time you fill it, so the flip-top lid is only useful for tipping out the diamonds into the tray, not replacing them after you use them.

UPDATE: The tic-tac boxes work perfectly without removing the lid if you use a standard-sized diamond tray! It’s just the extra large tray pictured above that they aren’t great with. Now I keep the extra large tray for the black diamonds (there are soooo many in my project!) and I’m completely satisfied with using the tic-tac boxes with a regular tray for all the other colours – this setup makes swapping between colours easy and fast.

If you don’t need that many bottles, I’d suggest getting the version with the round screw top bottles – you only get 32 bottles instead of 35 in each drawer, but I think I prefer the round ones.

Tip: Although this product also comes with a silicone funnel, I found it easier to fill the containers directly and skip the funnel.

My Experience

Part 1: Sofa Crafting

I clipped my small diamond painting directly to the light pad. The pad is thin and light, but perfectly sturdy, so I can easily work on my lap on the sofa without any additional support. It’s easy to see the canvas, even in low light when I’m watching TV at night.

I’m using the lowest of the 3 brightness settings, and I love how this is bright enough to clearly see what I’m doing without lighting up the whole room. There’s plenty more power available if you need brighter backlighting for your project.

Look how easy it is to see my project without straining, even at night:

ARTDOT diamond painting accessories reviewThis painting is just a cheap kit I picked up from Amazon – the picture reminded me of the best parts of my time in Africa…

And I unreservedly love this storage case! It’s so convenient to have all my tools to hand and be able to put everything away neatly in seconds when I’ve finished crafting.

I don’t really trust flip-top containers when I’m crafting on the sofa – if I got distracted and a lid popped open, I’d have diamonds everywhere. This is my perfect sofa-crafting solution: the screw-top jars feel very secure, and each jar is held securely by the foam base so they don’t roll around inside the case.

ARTDOT diamond painting accessories reviewI think Maggie approves too!

That’s my cozy holiday evening crafting sorted – thumbs up all around.

Part 2: Desk Crafting

And now to my big diamond painting! For my birthday last year (well over a year ago now) I received a huge 2x3ft (60x90cm) diamond painting canvas. But I’d only finished a small fraction before it became impossible to work on while sitting on the sofa – you can’t roll up the parts you’ve already completed, so it was getting larger and more unwieldy as I unrolled more of the canvas.

I cleared a desk in my studio as a dedicated crafting space and laid out my canvas there, but I’ve struggled to tell some of the symbols apart when there wasn’t full daylight streaming into the room, so I have to admit that my beautiful painting has languished, mostly untouched, for months.

But now, all that is solved! Slipping the slim LED light pad underneath my canvas makes it so much easier to see the symbols I’m working with.

ARTDOT diamond painting accessories reviewLight off. The symbols are the squares where I have yet to place a diamond.

ARTDOT diamond painting accessories reviewLight on! And – bonus – look how easy it is to spot if you’ve missed a diamond (compare the individual symbols near the bottom right with the same area in the previous pic)!

The storage drawers are very handy if you want to keep lots of small materials you need regularly to hand, in a dedicated workspace. In general, I think the portable case is a more versatile choice, but these drawers let me store a lot of colours in a very small space on my diamond painting desk, so they’re perfect for a long-term project like this.

ARTDOT diamond painting accessories review

Tip: I’ve taped a printout of the key to my diamond painting just in front of the drawers, so it’s easy to grab the right diamond colour without needing to consult the key printed at one edge of the canvas.

As the tic-tac style bottles are so small, I’ve had to use multiple bottles for a few of the most numerous colours. But I have more bottles than I need, so that’s fine. It’ll be nice to just grab a spare bottle of #3 (black – there’s always so much black!) when I run out instead of having to decant more diamonds from the larger bag!

And oooh, look, my painting is starting to look like something (it’s only about 1/4 done!)…

ARTDOT diamond painting accessories review

In case you’re wondering, this is an officially licenced version of a painting I love, Farewell to Anger by Leonid Afremov.

I wanted it large so I could hang it on the wall when it was finished, and so the detail wouldn’t get lost, but I lost momentum when I couldn’t easily work on the project. Now I’m excited to get back to it and make some progress – I love seeing all the colours developing, and it’s so much easier to work now I have all my diamonds conveniently at hand and can see the symbols clearly without straining!

Buying Info – and a Special Discount!

I hope you found this review useful. I definitely recommend getting a light pad and a proper storage solution for your diamond paintings – it makes the world of difference. And I can recommend any of these ARTDOT products – the quality is good and they’re very reasonably priced (and are all currently on sale too!)

All the ARTDOT products I reviewed here are available (and highly-rated) on amazon, but for the best prices you can buy them directly from ARTDOT with free shipping & fast delivery within 2-5 business days to the United States, Canada, United Kingdom, France, Germany, Italy, Netherland, Spain, Belgium, and Australia.

You get reward points with every purchase, and ARTDOT are offering PlanetJune readers an additional 10% off your order – just go to ARTDOT and enter code JUNE at checkout. Enjoy! 🙂

Comments (7)

Relaxing Crafts: Finger Knitting with Loop Yarn

Have you seen this novelty loop yarn in stores? It’s designed to be finger-knit with no tools – you just pull one loop through the next.

finger knitting with loop yarn

Working straight gives you a standard knitted fabric, and crossing pairs of loops before you ‘knit’ them lets you make pretty stitch patterns.

finger knitting with loop yarn

I picked up a bargain bundle of this Bernat Blanket Alize Blanket EZ from the yarn factory outlet store as part of my quest to find relaxing crafts to try. (And yes, this is the wrong time of year to be making a cozy blanket, but I have air conditioning, so it’s not that bizarre…)

Choosing a Pattern

Once you know what you’re doing, you can probably adapt many knitting patterns for this type of yarn, but I’d recommend starting out by choosing a pattern that’s designed especially for loop yarn.

I chose my favourite pattern, Yarnspirations’ Diamond Lattice Blanket, and looked up other projects on Ravelry to see what other people thought of it. Based on the feedback of a few other ravelers, I started by forming a starting chain so the bottom of the blanket would match the cast-off edge, and pulled up a row of plain knit stitches in the back bumps of the chain before beginning the lattice pattern, to give a straighter bottom edge.

This pattern says it’s rated as ‘experienced’ skill level, and I agree with that assessment. I wouldn’t jump into this as your first loop knitting project like I did unless you really like a challenge. (Luckily, I do!)

finger knitting with loop yarn

As others had noted in their project notes, the pattern is extremely wordy and not clear to follow. I decided to just ignore the pattern directions after the first row, and figure it out myself based on watching where the slanted crossed stitches should go next. I got a bit confused at the edges at first, but apart from that it was fairly straightforward, thanks to my experience with crossed stitches in knitting. Again, I wouldn’t recommend this specific pattern unless you’re familiar with loop knitting and/or regular knitting with crossed stitches.

Loop Knitting: The Process

Loop knitting is actually a little more difficult than I’d imagined it would be:

  • As you never turn the work, you work left to right for one row and right to left for the next, so each hand has to do different things on odd and even rows.
  • It’s definitely a two-handed craft – crossing loops with one hand while finding the next loop of the working yarn with the other keeps you on your toes!

finger knitting with loop yarnCrossing a pair of stitches

Upsides

Although the in-progress project looks like a knitter’s nightmare – just like you’ve dropped all your stitches off the needles! – the textured yarn holds the loops in place well, so the stitches are fairly secure. It even takes a bit of effort to frog these stitches if you make a mistake, so stitches unravelling by mistake doesn’t seem to be a problem.

finger knitting with loop yarn

The yarn is very soft and feels nice to work with (if you’re familiar with plush chenille super bulky blanket yarns, it’s like a looped version of an extra thick one). As each stitch is large, it works up quickly and the resulting fabric is extremely thick and plush – I’d never use this yarn and technique to make anything other than a cozy blanket.

Downsides

I discovered a major problem with using this kind of yarn: as you never turn the work, you don’t see the back until you’ve finished (or stop and flip it over). That wouldn’t be a problem, except that it’s very easy to skip a loop in your working yarn without noticing, so you keep going blissfully along with no problem until the end of your session when you fold up your work and see this:

finger knitting with loop yarnNoooo!

A big loop on the back of the work! The only solutions at this point are:

  • Cut the loop off (which should be just as safe as starting a new ball of looped yarn – there’s just a tiny nub of plain yarn at the end of each ball – but that would leave two extra tiny nubs in your work).
  • Cut the loop in half and weave in each of the resulting ends (again, it’s safe to do this, but I’m not sure how well the ends would stay hidden over time).
  • Undo alllll the way back to the loop and redo it properly.

Can you guess which one I did?! That’s right, I frogged back to fix the mistake whenever I realised that I’d done it again, sometimes unravelling 5 or 6 entire rows, so I could fix the problem – ugh.

And here’s the other problem with this yarn: the fluffy chenille is very ‘grabby’ – when you’ve pulled a loop through another loop, they tend to hold in place. This is obviously a good thing when you have a whole row of loose loops to work with, but it does mean that unravelling takes almost as long as knitting the loops in the first place!

Adding a New Ball of Yarn

I couldn’t find any info on how to add the next ball of yarn, so my solution was to hold the last loop of the old ball and the first loop of the new ball together. Then, on the next row, all I had to do was to remember to pass the new loop through both the loops below.

Tip: As there are free loops all over the place, it’s easy to miss the doubled loop, so I clipped a locking stitch marker around both loops so I could easily spot them again as I worked the next row.

The Result

My finished blanket is 43×57″, which is a nice size for a sofa throw. (It did confuse me though, as the pattern claims the blanket is 56″ wide, not 43″ – I think that must be a mistake in the pattern instructions, as that’s a huge discrepancy.)

loop knitted lattice blanketIsn’t it pretty?

Although it’s far too hot to even contemplate needing a thick cozy blanket at the moment, I know I’ll enjoy using mine when the cooler weather arrives. It’s very soft, has a good weight to it, and I love that lattice stitch pattern.

loop knitted lattice blanket

A couple more angles…

loop knitted lattice blanketHere’s the texture of the back of the blanket.

loop knitted lattice blanketAnd here are the top and bottom edges – they did end up matching nicely.

And, most importantly: it’s passed the Maggie test! She curled straight up on it on my lap and went to sleep – that’s high praise from my discerning girl. 😉

loop knitted lattice blanket

Relaxing Verdict

Loop knitting is definitely a relaxing craft if you’re following a simple repetitive pattern. Once you’ve completed the first row, it’s very easy to form knit stitches by pulling the next loop from the working yarn through the next loop of the row below. I found it to be mostly relaxing once I got used to my more challenging stitch pattern, and if you chose a more straightforward stitch pattern, it would be very relaxing!

Finger knitting with pre-looped yarn means you don’t need to worry about tension – the size of each loop is fixed, so you know you’ll get a nice even result without any effort to control it. But it does give rise to the problem of accidentally leaving a loop on the back of your work – that’s one thing that would never happen with knitting or crochet, or even finger knitting, where you always control the flow of yarn.

Immersing your fingers directly in the soft cozy yarn to create a blanket makes a nice change from holding a hook or needles, but my overall verdict is that looped yarn is a bit of a novelty with limited applications. It’s fun to try, and the results can be lovely – I’m very happy with my chunky blanket! – but I don’t see loop knitting becoming the ‘next big thing’ in fibre arts. What do you think?

Comments (6)

Relaxing Crafts: Diamond Painting

For my new Relaxing Crafts series, I decided to pick up a pile of random craft kits that one of my neighbours was selling on Facebook and see if there was anything interesting for me to try…

a selection of craft kits

It was quite a haul for a few dollars! There are quite a few things I’d like to experiment with in here, and I’ll pass the rest onto someone else who has kids who can use them – nothing will go to waste.

Hiding out in the bottom right corner of the above pic, I found a kit I was intrigued to start first: a small diamond painting kit.


Diamond Painting

The craft of ‘diamond painting’ – sticking flat-backed plastic ‘gems’ onto an adhesive colour-coded surface to form a pattern – seems to have sprung up from nowhere over the past few years. Have you heard of it before?

puppy diamond painting kit

A diamond painting kit comes with an adhesive backing (this one is cardboard, but most are canvas), preprinted with the design. You fill in each space with a plastic ‘diamond’. Depending on the kit, the diamonds can be square or round – in this kit, mine were round.

There’s an individual bag for each colour of diamond. With only a few colours in this design, I found it most fun to pour a few colours into the tray at once, and then I got to play a minigame every time: to look for a piece that was a) the right colour and b) the right way up.

puppy diamond painting kit

Each diamond has a domed front and a flat back. You pick up a diamond by loading the nib of the special pen with a little pink wax, then pressing it gently to the domed side of the diamond, so the diamond sticks to the wax:

puppy diamond painting kit

Then you press the flat side of the diamond down to the picture. The adhesive grabs the diamond and keeps it in place. (The wax stays inside the nib of the pen, ready to grab the next diamond.)

puppy diamond painting kit

It’s very satisfying to place all the tiny diamonds into neat rows and watch the picture emerge. It’s faster than cross stitch, much easier than paint-by-numbers(!), and once each piece is placed it stays there, so you don’t have to worry about knocking them out of place before you complete the design.

puppy diamond painting kit

As you work, you peel back the protective plastic film from the painting a bit at a time, so the rest of the picture stays sticky and doesn’t attract dust or lint before you’re ready to apply the diamonds to it.

And, after a little time, the canvas is filled and the finished picture emerges!

puppy diamond painting kit

Relaxing Craft Verdict

This kit was just a dollar store special and I don’t love the design, but as a test of the craft it served its purpose admirably: I call diamond painting a win on the relaxing front! Big thumbs up from me.

I’m looking at diamond painting kits now – there are lots with really nice looking designs, and I think I’ll be picking one up. Here are my top choices at the moment:

Diamond Dotz diamond painting kits
Clockwise from top left: Miniature Magic, Forest Babe, and Graceful Swimmer kits from Diamond Dotz.

I’m leaning towards the turtle – I think the diamonds may make it look like it’s swimming in a sparkling sea. What do you think?


Have you ever tried diamond painting? Are you tempted to try now? Let me know in the comments below!

Comments (11)

Relaxing Crafts: Paint by Numbers

Some craft projects require concentration (like following an amigurumi pattern), while other projects are relaxing in their repetitive nature (like crocheting row after row of a simple afghan pattern). I find these more relaxing crafts and projects wonderful for the times when my brain is too tired to concentrate on something complicated, but my hands still want to stay busy.

I’ve started picking up craft kits so I can try different crafts and see what appeals to me. I thought it might be fun to do a series of posts on the crafts I’m dabbling in – maybe you’ll find something you’d like to try too! (And many of these simple crafts are kid-friendly, so these could also be family craft projects, or ideas for gifts for the crafty children in your life.)

So here’s the first post in my new Relaxing Crafts series…


Paint by Numbers

I haven’t painted anything for years, and I thought that a paint by numbers kit might be a good way to practice brush technique and ease me back into the feel of painting so I could try painting something from scratch in future.

I tried the Royal & Langnickel Dolphins Painting By Numbers kit. It looked like a cute picture, and at about the size of a sheet of printer paper, I thought it’d be a manageable size.

dolphins paint by numbers kit

The design and the colour-coded numbers are pre-printed onto the canvas in pale blue, so all you need to do is grab a colour of paint and fill in all the indicated areas with that colour, then repeat for all the other colours, and you have a beautiful painting! Or do you…?

I found it more difficult than I’d expected, considering these kits are designed for kids 8 and older – surely, I should have more skill than an inexperienced 8-year old? For me, it was frustrating to have to follow the arbitrary lines separating the shading colours – for example, I think I’d have preferred to try shading the dolphins in my picture myself vs trying to follow all the jagged bands of shadow and light on the dolphins’ bodies.

dolphins paint by numbers kit
There are lots of fiddly jagged lines to follow to form this shading.

I also assumed I’d be provided with all the paint colours I needed, but there were lots of mixed colours required:

dolphins paint by numbers kit
All the areas with two numbers are colours you have to mix yourself, e.g. “10/20” means a mix of colour 10 and colour 20. It seemed like most of the colours were mixes!

dolphins paint by numbers kit
The results of some of that fiddly colour mixing are disappointingly muddy…

Some of the provided paint colours were used a lot – in mixes as well as solo – and I was always scared I’d run out, especially if I mixed too much of a certain shade and had to waste some of it. This was not a very relaxing process! But I did complete the painting…

dolphins paint by numbers kit
Finished!

The end result is okay, but I feel a bit misled by the box art, which shows a coloured picture of the design, not a completed painting (and now I know to look for that, it seems that’s a common trend in these kits). The provided paint colours aren’t the same as shown in the cover picture, and the result is much less subtle, so it’s a bit disappointing.

dolphins paint by numbers kit
Where are my blue dolphins from the cover pic?!

Given all that, paint by numbers is not something I’d want to try again. If I do ever brave painting again, I’ll just sketch an outline and then attempt to paint it properly – I think I could do at least as well as following the kit!

dolphins paint by numbers kit
The painting is still kind of cute though – especially once I added a glint to each dolphin’s eye (that’s not part of the design).

I did pick up a few painting tips from this experience:

  • Low quality paint has terrible coverage – once I’d painted over each section, I could still see the numbers printed beneath the paler paint shades and had to give them a second coat (and the white paint took three coats to cover the numbers!)
  • Acrylic paint dries much darker than the colour appears when the paint is wet.
  • Painting accurate fine lines is difficult, especially at certain angles. I’m much more comfortable with a pencil than a brush.

dolphins paint by numbers kit
Look carefully and you can still see the blue lines around the edges of the paler colours, despite my best efforts to hide them 🙁

Relaxing Craft Verdict

As a relaxing craft, I’m calling Paint by Numbers a fail – for me, anyway.

  • If you’re inexperienced in painting, taking care not to stick your hand in the wet paint or paint over the lines requires a fair amount of concentration.
  • If you’re already a painter, you really don’t need a paint by numbers kit – you’d do better without one!

Maybe I was just unlucky with my choice of kits and there are better ones out there. Have you (or your kids) had any success with paint by numbers kits, or do you agree with my assessment? Let me know in the comments!


And now, my search for relaxing crafts continues. I have quite a few lined up already, but I’d love to hear your suggestions for crafts I can try – and review here for you – too. Please leave your ideas below… 🙂

Comments (12)

  • Quick Links: Crochet

    navigation: arrow

    buy crochet patterns and accessories from my online store

    'Everyday Crochet' and 'The Essential Guide to Amigurumi' crochet books by June Gilbank

    Crochet video tutorials and step-by-step photo tutorials

    Free PlanetJune crochet patterns

    Frequently Asked Questions

    Quick Links: Crafts

    navigation: arrow

    Punchneedle Embroidery information, ebook & patterns

    Papercraft ebook & tutorials

    Free PlanetJune craft projects & tutorials

  • Blog Post Categories

  • Blog Archives

  • Welcome to PlanetJune!

    June Gilbank

    Hi, I'm June. Welcome to my world of nature-inspired crochet and crafting. I hope you enjoy your visit!

    If you'd like to get in touch, you can contact me here.
    crocheted Canadian flag by PlanetJune
  • A fanned-out pile of the books Everyday Crochet and The Essential Guide to Amigurumi, with text 'The answers to all your crochet questions at your fingertips - find out more'
  • Support PlanetJune!

    Want to say thanks? You can send me money in seconds at paypal.me/planetjune (over $20) or paypal.me/planetjune2 (under $20) or send me a donation through my shop.

    Or simply click through from my links before you shop at Amazon, Etsy, KnitPicks, LoveCrafts or Crochet.com, and I'll make a small commission on your purchase, at no cost to you! Start here:

    ♥ Support PlanetJune ♥

    Tip: This link is also in the footer of every page!

    Thank you so much for your support!