PlanetJune Craft Blog

Latest news and updates from June

Archive for Craft Room

trinket shelves

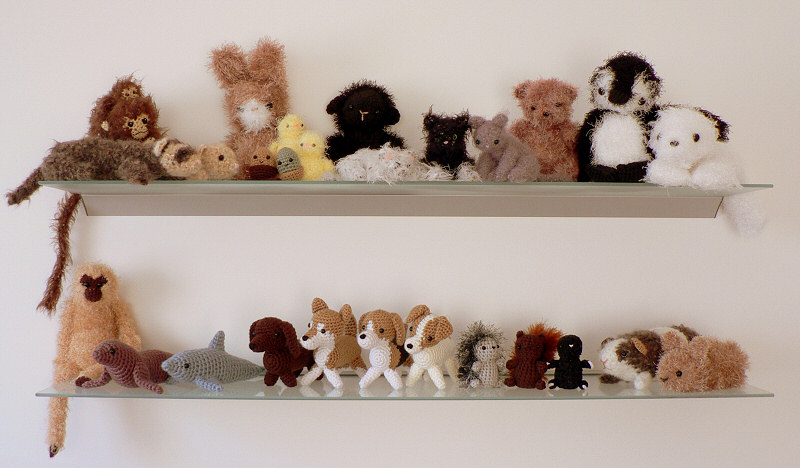
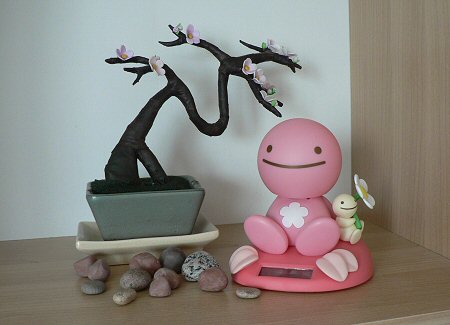
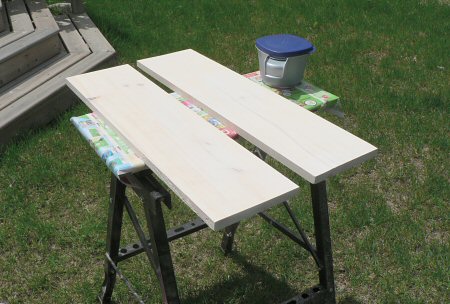
I have lots of little ornaments etc and nowhere to put them, so I made some basic shelves to display them. I had some wood cut at the hardware store to fit the space above my computer desk. I sanded and primed the wood:

shelves in progress

Then I spray-painted the shelves this gorgeous greyish purple colour and mounted them on the wall with brackets:

craft room shelves

I just threw some of my trinkets up quickly so I can see how the shelves look. In case you’re wondering, most of the little ornaments are made by me from crochet, origami, needlefelting, polymer clay, sewing, or beading. The rest are artwork, travel souvenirs, and a few other bits and pieces.

I’m really happy with how the shelves turned out – my favourite part was discovering that the wooden chickadee and flying piglet can hang from the brackets. Now I get all the fun of unearthing all my other favourite treasures and rearranging everything!

Comments (7)

displaying finished work

Do you ever have the problem of figuring out what to do with things after you make them? Unless a handmade item is a gift or something wearable, I usually don’t know what to do with it, and it ends up buried in a pile of ‘stuff’ or hidden in a box and very rarely gets seen – such a waste!

My craft room really needs some decorative interest; it is still completely unaccessorized apart from my glass toy shelves and some origami in the window. So, I’ve decided that I should try to display some more of the things I’ve made, without making the room look too busy and cluttered. This is going to be a long-term project, and I’ll show you my progress as I come up with ideas.

felt sea creatures on display
Click for larger image

My supercute felt sea creatures have been homeless for months, so my first task was to find a way to show them off. I sewed up a quick pennant yesterday using the leftover lining fabric from my laptop sleeve, reinforced with some fusible interfacing on the inside back so it won’t stretch under the weight of the animals. I hung each animal on a simple loop of embroidery floss through the topmost blanket stitch, brought the floss ends through to the back of the pennant, and knotted the ends together. The long tall design means it fits perfectly down the side of my bookcase, so it looks good AND fills a space I hadn’t previously considered as useable.

I think having more of my work visible like this will add a lot more personality to the room. Stay tuned for more craft room progress posts 🙂

Comments (4)

chair makeover

Although I have my new leather desk chair in my craft room, I stored my old chair in the basement, just in case. I saw a great post (‘save your old chair with a new look’) on IKEA Hacker a few weeks ago, and recognised my boring old Svenning chair given a fantastic makeover. Well, I do have two desks in my craft room, so having two chairs wouldn’t be a bad idea…

I went to the fabric store and managed to find some fabric in the exact colour scheme I used to crochet the throw for my other chair!

matching fabric

Holly’s method involved removing the old fabric from the chair, and then stapling the new fabric over the chair padding. I don’t have a staple gun, and after reading about Holly’s stapling difficulties, I decided to try a different method to attach the new fabric. I removed the backing fabric from the seat, and the plastic backing from the back rest, but left the original fabric stapled to both parts.

seat with backing removed

I stretched the new fabric over each piece and pinned it roughly in place so the dots pattern would be straight. Using a curved upholstery needle and strong thread, I stitched around the underside of the seat, sewing the new fabric to the old fabric.

upholstery needle

I used a combination of running stitch for speed and backstitches for extra security every few stitches and around the corners. No need to be too neat – none of this is visible in the finished chair.

stitches

When I’d finished sewing, I trimmed the excess fabric, leaving about an inch beyond my stitches.

all sewed up

I reattached the plastic back to the back, and blanket stitched the original backing fabric to the seat, to hide the raw edges.

blanket-stitched underside

And the result? Better then new!

finished chair

I love it!

finished chair

Comments (13)

completed granny throw

For the Granny Squares theme on Crochet Along, I decided to make a throw to decorate the office chair in my craft room. I figured out I would need a long strip, 13 squares long and 3 squares wide. When I’d finished all the squares, I measured the finished squares against the chair and decided it needed a 4th column of squares to look better. I didn’t quite have enough yarn for the additional 13 squares, so I had a mad dash to Michaels to hope they still had the same dye lots in stock (they did with the linen colour, but not the brown, but I can’t see the difference so that’s okay).

The upshot of all this is that I didn’t finish the project during the theme time, but I’m only a week overdue. And here is the completed throw:

crocheted granny throw

The throw also comes to the same length behind the chair, so it breaks up the expanse of black leather nicely. I’m especially pleased with the way one square is exactly the same as the width of the top of the chair, so the throw sits squarely on top of the chair and isn’t likely to slide about:

crocheted granny throw detail

I found the Vanna’s Choice yarn pleasant and even to work with, although not as soft as the yarns I usually favour. But I think it will stand up well to use, and may soften with washing.

The rest of my craft room is still plain and undecorated (apart from the toy shelves), but I have grand plans! More on that soon…

Comments (13)

toy shelves

A while ago, I bought some glass shelves from IKEA so I can display all my toys in my craft room. We finally got around to putting them up this week:

toy shelves
Please click for the full-size image so you can see them properly!

Don’t they look great all together like this? I just threw them up quickly, so I’m sure I’ll be doing some rearranging (and shuffling them to make more space for the new yet-to-be-born animals 😉 ).

Of course, these aren’t all the animals I’ve made. Some of them have new homes:

  • Pink bear lives with Dawn in Surrey UK
  • White lamb aka Lilly Woolington lives with Nia in Berkshire UK
  • Labrador lives with my Dad in Surrey UK
  • Both long-haired guinea pigs live with Jen in Michigan
  • My original shiba inu Ginger Jr and boston terrier AmiBob live with Kari in Chicago
  • One more mystery animal is currently on a photoshoot adventure (more on this later…)

I’m still working on the rest of the craft room – I’ll show you more photos as I complete each area.

PS – If you haven’t entered my contest yet, it’s running for the rest of the weekend!

Comments (13)

calm corner

We have moved into our new house! Thanks to everyone who sent cards or good wishes by e-mail – it means a lot 🙂

I finally have my new craft room, although it’s currently full of boxes and needs a lot of organising. I have so many ideas for it, but the whole house needs to be set up so I can’t devote too much time to it… yet…

But I have managed to keep one little corner neat and calm and it makes me happy to look at it:

calm corner

My wire and FIMO bonsai sakura tree, some polymer clay stones I made and some real stones, and my kawaii Hidamari no Tami who waves his head from side to side in sunlight. How cute is that?

Comments (2)

Next entries »
  • Quick Links: Crochet

    navigation: arrow

    buy crochet patterns and accessories from my online store

    'Everyday Crochet' and 'The Essential Guide to Amigurumi' crochet books by June Gilbank

    Crochet video tutorials and step-by-step photo tutorials

    Free PlanetJune crochet patterns

    Frequently Asked Questions

    Quick Links: Crafts

    navigation: arrow

    Punchneedle Embroidery information, ebook & patterns

    Papercraft ebook & tutorials

    Free PlanetJune craft projects & tutorials

  • Blog Post Categories

  • Blog Archives

  • Welcome to PlanetJune!

    June Gilbank

    Hi, I'm June. Welcome to my world of nature-inspired crochet and crafting. I hope you enjoy your visit!

    If you'd like to get in touch, you can contact me here.
    crocheted Canadian flag by PlanetJune
  • A fanned-out pile of the books Everyday Crochet and The Essential Guide to Amigurumi, with text 'The answers to all your crochet questions at your fingertips - find out more'
  • Support PlanetJune!

    Want to say thanks? You can send me money in seconds at paypal.me/planetjune (over $20) or paypal.me/planetjune2 (under $20) or send me a donation through my shop.

    Or simply click through from my links before you shop at Amazon, Etsy, KnitPicks, LoveCrafts or Crochet.com, and I'll make a small commission on your purchase, at no cost to you! Start here:

    ♥ Support PlanetJune ♥

    Tip: This link is also in the footer of every page!

    Thank you so much for your support!