When you unravel something you’ve crocheted, the yarn looks kinked up and squashed. Re-using this yarn can leave your crocheting looking noticeably different from starting over with fresh yarn. Wouldn’t it be nice if there was a way to refresh the yarn and return it to its unused state so you don’t have to waste it or put up with the re-used appearance? Guess what: there is!
Can you turn ‘stressed’ yarn back into ‘relaxed’ yarn? Yes!
I first read about this technique at TECHknitting but I wasn’t really convinced it’d work on acrylic (although I really hoped it would), so I decided to put it to the test with the yarn recovered from one of my prototype pandas.
(You may be wondering ‘why bother?’ The nicer acrylic yarns are actually quite expensive, and, if you’re a crochet addict, the cost of yarn soon mounts up; if there’s an easy way to save money, why not take it? But, for me, the real reason is availability – now I have to import all my amigurumi acrylics from the US, they’re like gold dust to me, and I hoard every metre! Making 3 prototype pandas took a whole skein of white Red Heart Soft, and that’s not something I can easily replace. Reclaiming the yarn so I can use it to design another amigurumi would be ideal, but not if it’s going to look messy and obviously re-used.)
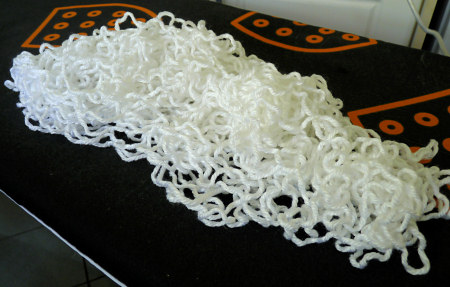
A 65m length of kinked up acrylic yarn reclaimed from a prototype panda.
Steam-relaxing
You can steam yarn with a clothes steamer or ordinary steam iron, and it will magically relax, de-kinking and fluffing itself back up! And yes, as I discovered, you can even do this with acrylic yarn – you can see my results in the photos below.
Note: to reclaim an entire skein of yarn, it’s probably easier if you wind it into a hank (a large loop), soak it, and let it dry (for more details on this method, see Webs’ article: How to Recycle Yarn). But for the yarn length recovered from frogging amigurumi or other small projects, steaming is simpler and faster.
Steam-relaxing yarn really is like magic: the yarn wriggles about as it relaxes and it looks quite eerie, like a pile of snakes – watch TECHknitter’s video to see exactly what I mean – but soon the yarn will turn from a kinked tangle into strands of fluffy yarn spaghetti.
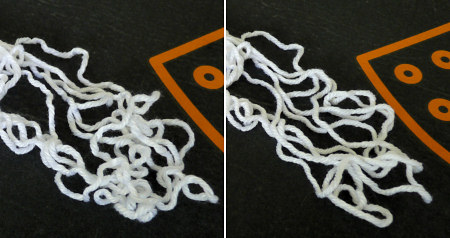
My iron doesn’t have a ‘shot of steam’ feature, so it took a fair while to steam the entire 65m pile you see above, but the method really does work. I didn’t touch the yarn at all between these two photos – this is how it moved, by itself, in reaction to the steam:
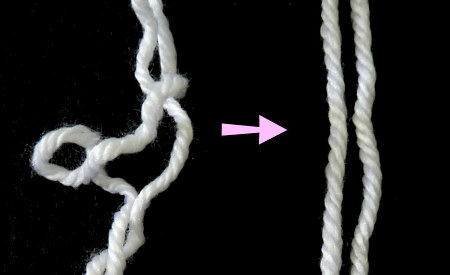
Before (left) and after (right) comparison of a small section – you can see that the yarn has de-kinked and untwisted itself.
Pre-steamed (left) and post-steamed sections of my big pile of yarn.
Top Tips
Learn from my experience!
- It’s much more effective if you spread the yarn out so you’re only steaming one layer at once, and work over a small area.
- Watch to see when the yarn stops wriggling about when the steam touches it – that’s when it’s fully relaxed and time to move on.
- For acrylics in particular, it’s critical that you don’t ever let the iron touch the yarn. Sit so you’re at eye level with your ironing board, then you won’t have to bend to see what’s going on, and you’ll be able to keep an inch between your yarn and the iron (you do need to keep it close though, so the steam is most effective).
- If you have the option to avoid it, don’t start with a big tangle of yarn (as shown in my photos) – once it’s de-kinked, you’ll still have to untangle it and wind it. I’d recommend you wind the yarn into a ball as you unravel your work, then unwind a couple of metres at a time and lay it in rows along the ironing board. Steam-relax that length of yarn, then wind it immediately into a new ball before pulling out the next kinked length. (Once it’s all relaxed, you can re-wind the yarn into a neater ball if you like.)

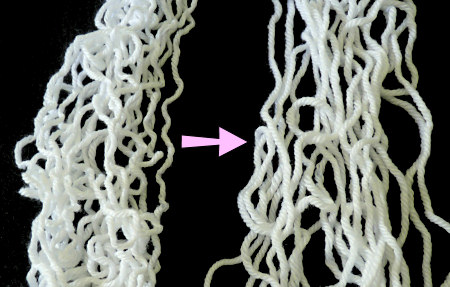
The 65m pile of yarn, post-relaxation. (Don’t leave it in a pile like I did here!)
I’m almost tempted to buy a handheld clothes steamer now, after seeing how effective this method is. And, as an added bonus, the yarn goes from feeling quite hard when it’s kinked up and squashed, to lovely and soft and bouncy again – it really does seem as good as new!
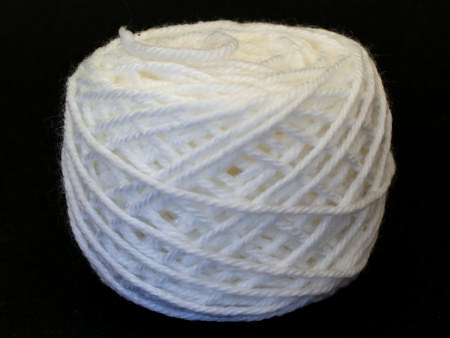
After winding it into a centre-pull ball it’s practically indistinguishable from new yarn and ready to use for another amigurumi design!
Steam-relaxing is a bit of a niche technique, but if you frog a project and want to reclaim the yarn, I highly recommend it. You’ll save money, you can re-use the yarn so it’s not wasted, and I promise you’ll have fun watching the yarn wriggle about – what’s not to like?


Alexi Davenport said
Whoa! That is an amazing trick. I had no idea you could steam yarn and it would go back to a relaxed state. I will definitely use that tip from now on when I am knitting for my grandbabies. Thank you so much!
Diana Mullins-Atkinson said
I’ve been using steam with my acrylics for a few years now and it works wonderfully. Not sure where I read about this, but I think it was from a stitching friend in Canada. I have a clothing steamer and it is one of my favorite tools- yes, I use it for clothes, but I probably use it more for my fibers.
pam said
Thank you. Thank you. Thank you!
futuregirl said
Thanks for taking it out on acrylic!
Chrisie said
For steaming pinned out shawls, I know people have used a wire cooling rack to set the iron on so it’s hovering over the working area and you don’t have to hold it the whole time.
That might work here if the yarn is laid flat. 🙂
(I have some yarn that I reclaimed yesterday that I might have to try this on. Thanks for the timely post!)
Karen said
Awesome idea. That may come in handy for a few of my projects.
Some of the higher-end irons; particularly those marketed to quilters; have little feet that pop out of the base so that you can put it down without constantly resetting it on its end to avoid scorching the board. These are also useful for steaming things that shouldn’t be touched by the hot iron.
For yarn, you’d have to be careful to lay it out very flat though, and just one layer deep for either the cooling rack or the footed iron since, unlike fabric, yarn is springy and fine and can easily fit through the rack or the feet to touch the iron.
SnowBunny said
I usually roll the yarn around a piece of rolled hard paper and after a while the yarn comes back to its natural shape.It works with acrylic too.
Dianna J. said
I saw someone using a stovetop tea pot as a yarn steamer on pinterest. Here’s the repin… pinterest.com/pin/110971578290802150/
June said
Ooh, I like it!
Thinking about it though, I’m not sure if any of these stovetop methods would be suitable for acrylic yarn. I’m not sure how hot a surface has to be to damage the yarn through contact – I know an iron is too hot, but would a saucepan/kettle on the stove also be too hot? I don’t know…
Little Knits said
I wonder if you could achieve this with a stove top steamer? (Thingy for cooking vegetables) I’ll give it a whirl at some point and let you know! 🙂
June said
Hmm, interesting idea! I expect it’d work, provided you don’t pack the yarn in so it has room to wriggle and straighten, but I’d imagine the yarn would get hopelessly tangled in the process…