Would you like to see something amazing? Loooook what I made!!
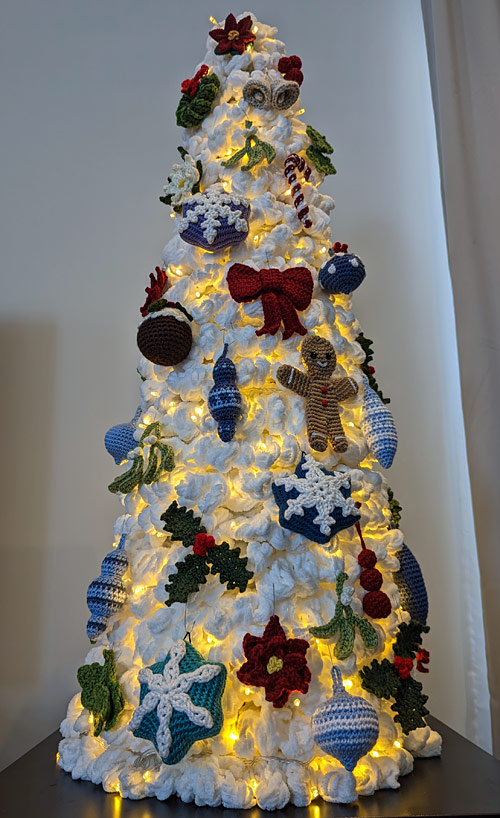 My giant crocheted Christmas Tree is 108cm (42.5″) tall!
Everything you see here is made from a PlanetJune Christmas-themed crochet pattern – including the tree! – so this truly is a PlanetJune Christmas Tree.
There’s quite a story to how I brought this project to life – I really didn’t know if it was going to work, and had some setbacks along the way – so please settle in and I’ll share the whole adventure with you now…
For my giant tree, I decided to use the Narrow Tree from my Christmas Trees 2 pattern, so it could be impressively tall without getting too wide.
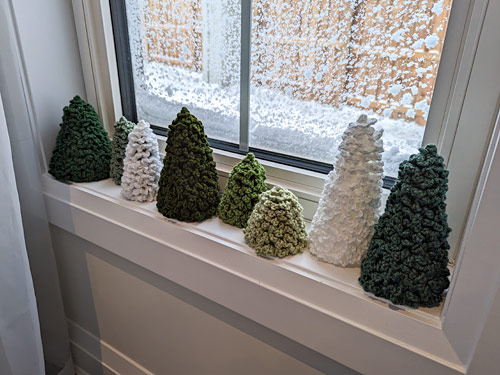 The standard Narrow Trees are on the right here, but this project would be a little larger than all these other Christmas Trees!
I started with the Secure Magic Ring from my Complete Guide to Giant Amigurumi. Together with my trusty 15mm hook and 2 strands of Bernat Blanket yarn, I was ready to begin, but I really wasn’t sure how well this would work: my tree design supports itself without any stuffing, and is completely hollow inside. This is an advantage (I’d like to be able to fold up my Giant Tree for storage when it’s not on display), but giant amigurumi aren’t as sturdy as regular amigurumi – the squish factor is part of their appeal! – and that, plus the weight of the yarn, might lead to some structural problems in the tree, with no stuffing to support it.
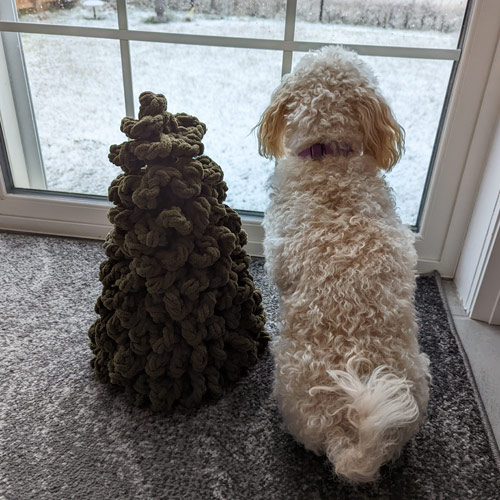
So, I started by making a ‘small’ giant tree as proof of concept – just a test project using blanket yarn I had on hand. This tree uses just one ball of blanket yarn, and it worked beautifully! The olive green colour was a little drabber than I’d like for a tree, but it served its purpose: it showed that a giant tree is still sturdy enough to support itself.
With one ball of blanket yarn the tree ended up being 15″ tall (or almost as tall as a small dog):
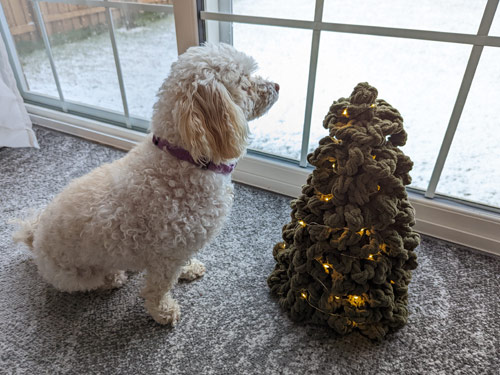
And I also tried quickly stringing some LED lights on the tree – I could see that, with a little more care in arrangement, that could look nice, but the foliage is pretty chunky on a giant tree, and many of the tiny LEDs in my string were completely hidden, so larger lights seem like the way to go here.
Now that I knew this idea could work, I bought a garbage bag full of yarn (yeah, that’s a standard quantity now!) to bring my vision of a giant crocheted tree to life:
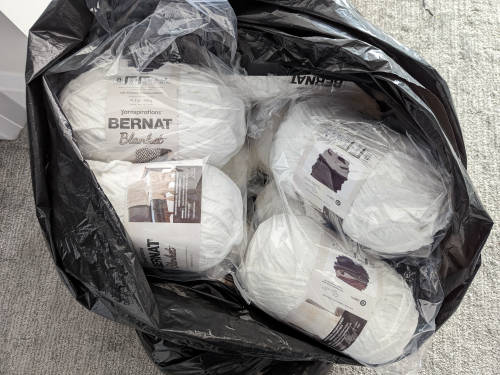 Each of those balls is 300g (10.5oz) of yarn!
My original plan was to make a 4ft tree (120cm), but once I started crocheting my white tree, I quickly noticed how floppy the tree was becoming. I couldn’t remember if my olive-coloured tree had been the same before I added the foliage, or if it was the additional height and weight that was making this one flop, so I started to worry that this supersized version wasn’t going to work at all….
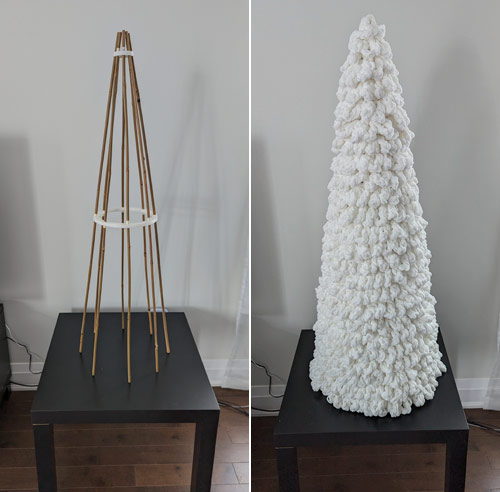
After using 1.25 big balls of blanket yarn, the tree base was 30″ tall, and I decided to pause and add the foliage to the part I’d already crocheted, to see if it would hold itself up with the foliage added, or if I’d need to come up with a way to stabilise it without stuffing – I really don’t have the space to store a huge stuffed tree!
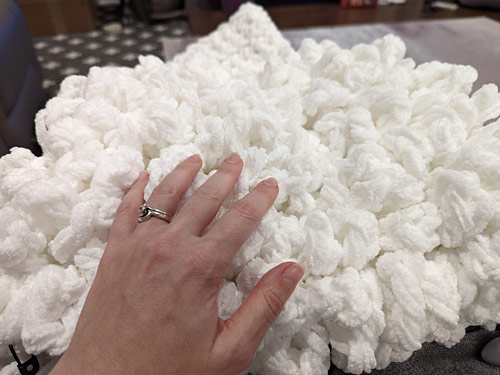 Mmm, this texture looks like giant popcorn kernels to me…
Once I’d finished adding the foliage, the 30″ tree could almost stand up by itself. It was a bit like a wibbly wobbly jelly – it stayed upright, but it was too heavy to hold its shape properly at this size, so I came up with a great (and easy) idea for support: a cone made from poster board inside, exactly like I did for my Pom-Pom Tree but much bigger.
The cone worked perfectly to support the tree, so I decided to keep going. I used the Taller Trees instructions in the pattern to continue as far as Rnd 50, which I calculated would use 6 balls of yarn and make the tree about a metre tall.
In the end I actually used 5.9 balls, and the final height of the tree is 108cm (42.5″ tall) – not quite as tall as the 120cm (48″) I’d originally planned, but still pretty impressive, and plenty tall enough!
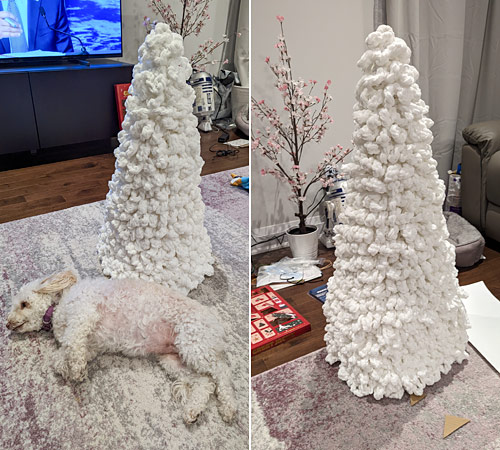 The extra height between the 30″ version and the final 42.5″ version made a big difference!
The next problem was that I didn’t have any poster board large enough to make a cone for the taller tree! In the above photo there’s a cardboard box sitting inside the base of the extended tree, with the poster board cone on top, but that made the tree look square at the bottom. I played around with cardboard cones and disks to support the tree, and eventually hit on the idea of using bamboo plant stakes to make a hidden tent that the crocheted tree could slip over.
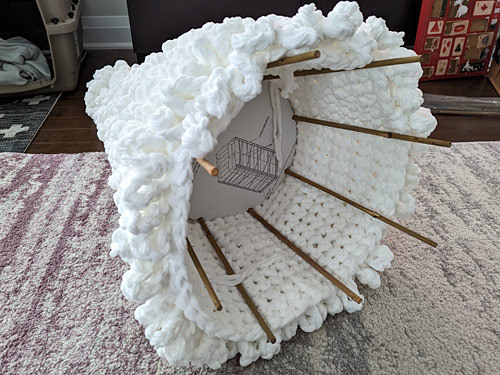 One of several prototype support systems that didn’t work very well…
My original bamboo + cardboard disks plan wouldn’t hold together securely without taping it all together. I wanted the structure to be completely collapsible so I can dismantle it at the end of the season and reassemble it next year, so I enlisted Dave’s help to design and 3D-print some rings to hold the poles in place and at the correct angle based on my measurements.
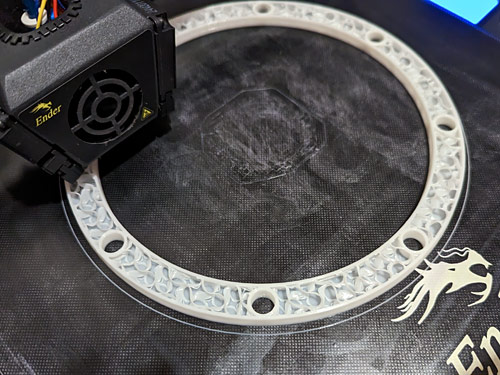 Printing in progress
The bamboo doesn’t have an even thickness, so we had to make the holes large enough to fit the thickest parts of the bamboo through. To stop the poles from sliding straight through the rings, I thickened them up with masking tape at the points where they meet the rings. It may not be pretty, but it does the job, and it doesn’t need to look nice as it’s all going to be covered up.

But my concept plus Dave’s experience in designing and printing in 3D made for a winning combination – I’m thrilled with our joint project! The bamboo tent works perfectly; it’s lightweight and sturdy and the crocheted tree slips over the top:
At the end of the season, I’ll be able to remove the crocheted tree and fold it up, then remove the poles from the rings to store everything away neatly for next year!
I’ve just realised that now I have these rings, I could buy longer bamboo poles and make my tree even taller for next year! I still have 4 more balls of yarn, and the tent concept means there’s no problem of the tree becoming too heavy as I add more yarn… But then I’d need more lights, and more decorations, and… maybe I should just leave it as-is… 🙂
I bought a string of 500 LED lights, and after a false start figured out how to wrap them so I didn’t run out. The nice thing about a white tree is you can totally change the look of the tree with different coloured lights. My string can toggle between warm white and various multicoloured options, so I can make the tree look classy or fun at the touch of a button!
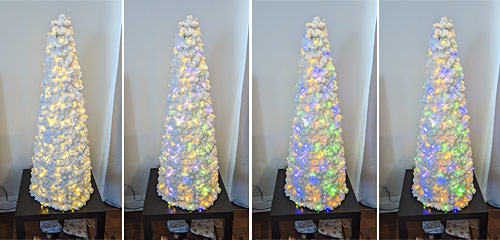 The colours don’t photograph very well, but at least you can see that they do change!
And then it was just a case of decorating the tree, and I just happen to have dozens of PlanetJune crocheted decorations just waiting for a home. I’ve never seen them all together before, and I’m delighted by the result!
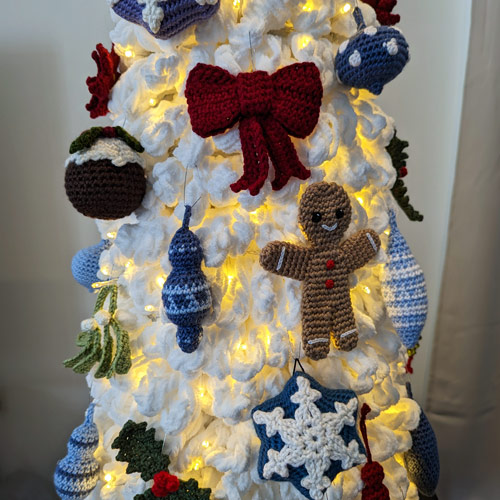
This tree represents 15 years of PlanetJune Christmases, and I think you can see that my design style ties everything together even though they don’t all match – that’s pretty amazing.
I stepped back to admire my work and I realised there was still one thing missing: a tree topper. Oops…
I thought that would have to wait for next year, but I couldn’t leave the top of the tree empty, so I spent the last couple of days playing with prototypes for a star topper and I hit on a style I really like:

I just finished designing the star today, and this is just a prototype, but it could be the start of next year’s PJ Christmas design..?
So, here it is, my finished giant tree, with and without decorations:
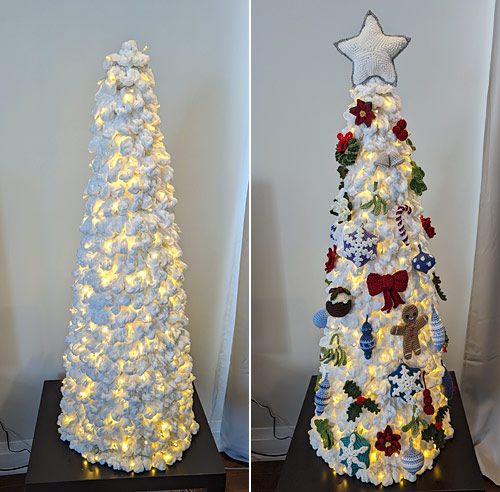
I’m so happy with it!
Apart from the star topper, if you’re looking for any of the patterns for my Christmas Trees or decorations, you can find them all at www.planetjune.com/xmas
And if you’d like to make a giant tree too (maybe not as large as this one!) – or upscale any other amigurumi pattern – my Complete Guide to Giant Amigurumi ebook includes everything you need to know to upscale an amigurumi-type pattern to giant size!
(By the way, the only reason I had to make a scaffolding for this tree project is because it’s not really an amigurumi, as it’s not stuffed – a stuffed giant ami wouldn’t need this level of support!)
I hope you’ve enjoyed seeing how my Epic Christmas Tree project came together! I’m still amazed that I pulled it off – there were a couple of moments there where I really thought it wouldn’t come together – but now I have a beautiful handmade tree that can light up our living room with a warm and cozy glow for years to come.
Wishing a very Happy Christmas to you and your family! ♥


Dawn pie. said
I’m listening to all of the great comments for the Christmas 🎄 tree, so did we finally get a pattern for it. We have a new Rottweiler puppy in the household and a real tree is out of the question for this year. I am trying to find another way to have a tree 🌲.?
June said
Yes, you can make your own tree – the instructions are in the post above, but, to summarize, you’ll need:
Keep making the tree until it’s as tall as you’d like, or you run out of yarn – my pattern lets you continue for any height of tree, and includes instructions for calculating how much yarn you’ll need to leave for the foliage to make sure you won’t run out!
Irma Benton said
Just ecstatic of how talented you are and what
beautiful work you did. The tree is magnificent and
ornaments are very nice. I would of loved to see a
tutorial on video on how you accomplished this. So others like myself can make one even a smaller
version. You are truly gifted. I love crochet. 😍
June Curtis said
I agree with all she said, you are very talented!
Reny said
June,
I absolutely love this! I think I will have to make one for next Christmas. Thank you so much for continuing to crank out spectacular patterns!
Gail Wiese said
what an amazing tree…… glad you shared it on facebook as i didn’t know about your site before. thank you for sharing and i might be doing more crocheting this winter.
Denise said
June! I love this! I was thinking we all don’t have 3d machine.maybe those plant protectors like you put over tomatoes vines? They are metal but still pliable? I don’t know I’ve been brainstorming because I really wanna try this but Trying to come up with another idea the stability. Thanks for sharing!
Denise said
No need to reply I was so excited by this tree I answered and posted a comment before I read the rest of the comments have a good day
Dee White said
Oh my goodness!!! Your tree is gorgeous!! I love how the lights shine/glow on the white tree. Great job. You are very talented
Jennifer said
The tree and ornaments are beautiful, and I love the star topper! What a lovely idea to make a giant tree! Merry Christmas and Happy New Year! P.S., My friend’s 13 yr old son has really been into crochet since I taught him the basics while visiting them on 2 different trips, and he recently designed and crocheted a fitted covering for his bedside table. Because of his continued interest, I bought him your new crochet book for Christmas, and I think it’s going to be a lovely, solid technique reference for him. He originally got interested and wanted to learn because of the many crocheted items I have gifted to that family, including numerous amigurumis made from your patterns! = )
June said
Awww, I’m so happy to hear that, Jennifer – I love that we can inspire a new generation of crocheters!
Lori said
For those of us without a 3D printer, do you think an upside down tomato cage would work as its skeleton?
June said
Someone suggested that to me while I was making this tree, but the tomato cages I have are far too small for this tree. You’d also have to do something at the top to stop the pointed tips of the cage from poking through the tree at the top. But it could definitely work if you get the tomato cage first and then crochet the base cone of your tree to match the height that your cage can support – you could test it as you go 🙂
Susan said
Hi June!
Wow! Your crochet Christmas tree turned out Amazing! The explanation of your process of designing and creating a pleasure to read. It is wonderful You and Dave teamed up to create the inner frame using a 3 D printer and wooden dowels!
Your tree is an inspiration!
Many thanks for All the time you put into your newsletters and tutorials!
Kind Regards, Susan
Have a Blessed Merry Christmas!
David Grindel said
Awsome !! Another piece of art by June.
Really it looks GREAT, perfect for the season and
what we have in NY, 0 deg (-18 C), windy and snowy.
Have a great holiday.
Dave
Katy said
That is beautiful! I love how you engineered the internal structure, as well. I really enjoy reading your scientific approach to crochet and your thorough explanations. Merry Christmas!