Sometimes a project is so simple that it seems like cheating! I’d planned to sew a cover for this new body pillow once I had time to buy fabric and set up my sewing machine, but then I spotted a fleece blanket in the dollar store with a convenient blanket-stitched border…
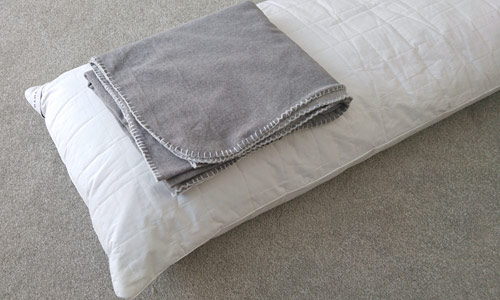
I draped it around my pillow, and it was almost exactly the right size to make a soft and snuggly cover (surely a sign that this project was meant to be).
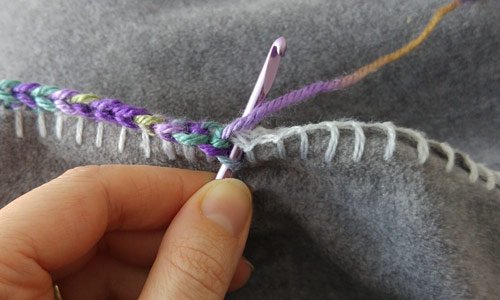
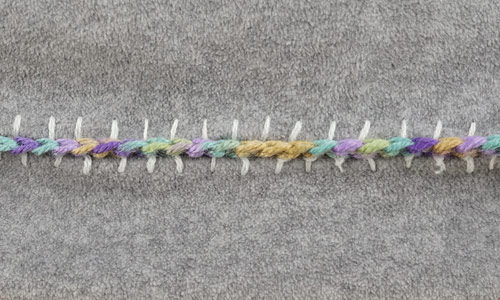
In case you don’t know, adding a border of blanket stitches around the edge of any fabric project makes the perfect set-up row for a crocheted trim – you can just insert your hook under the edge of each blanket stitch to begin each stitch of the first row:
(And if you need some ideas for border stitch patterns, I can recommend Edie Eckman’s two books on just that topic!)
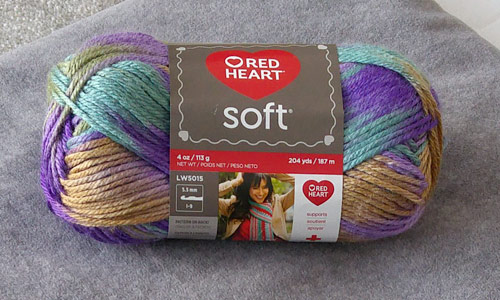
I’d loved this Red Heart Soft yarn in shade Watercolors in the ball, but soon realised when I tried to crochet with it that every stitch turned out as a different colour, which made the result way too busy for anything I’d wear. But this project has just a single row of crochet, so the different colours can shine without being buried by the next row. I did try out a few more interesting stitch patterns for my edging, but the constantly-changing colour is interesting enough – why over-complicate things?!
I tested a variety of hooks with my yarn and the blanket stitches, and determined that anything larger than a G (4mm) was too big to fit easily under the blanket stitches, so I went with the G. I folded the blanket in half and, starting at one end of the fold, began to single crochet around, inserting my hook under the blanket stitch at the edge of both layers of fabric to begin each stitch.
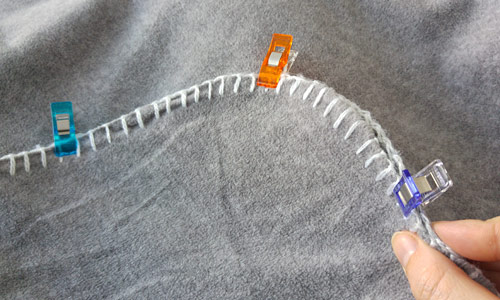
As I crocheted around the edge, I added a few extra stitches around the curved corners, and anywhere the blanket stitches seemed spaced a little too far apart for one single crochet stitch to be large enough to get to the next stitch without being stretched too far.
Once I got to the second open corner, I inserted the pillow, and then crocheted along the last open short edge to close the remaining gap. I fastened off, leaving an extra-long yarn end which I ran underneath all the stitches on the short edge, so I can easily retrieve the end and unravel some stitches if I need to remove the pillow to wash the cover, and then crochet it back up afterwards.
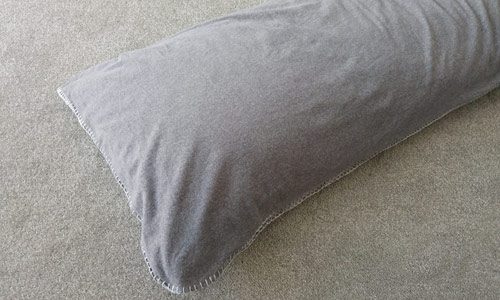
And here’s the end result – simple, but effective:
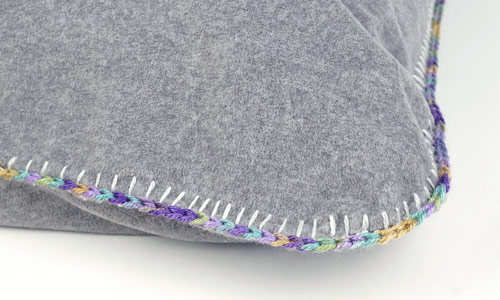
I think this project was a perfect use for my yarn and adds a touch of colour to a basic cushion cover (especially in a variegated yarn which does all the work for you).
If I’d started making the cover from scratch instead of using a pre-made blanket, I’d have done 2 things differently:
- Cut 2 rectangles of fleece instead of one large piece, so I’d have a crocheted border around all 4 sides of the cushion
- Made the blanket stitches in a different colour, to either blend in with the fleece, or co-ordinate with the yarn
But, overall, I’m very happy with this project – definitely half an hour well spent!
How about you? Have you ever considered adding a crocheted border to a fabric project?
I’ve always liked the idea of crocheting a trim around the bottom edge of a skirt – maybe this will inspire me to make it happen next summer 🙂


Jana said
This is pretty! I bought a special hook a couple of years ago (of course I STILL haven’t used it!) that has a pointed end so that you can puncture and crochet around things. It’s small and I think made for small projects, like maybe around a pillow case or such. I finally got out my packaged Tunisian Hook this past weekend and actually learned a few Tunisian stitches! Just goes to show that we shouldn’t be afraid of trying new things in crochet!
Else said
June, this is a fab idea! Thank you for sharing. Can you recommend some crochet stitches that would make a fancier trim around the edge? I’d love to try that, too. 🙂
June said
I have a few simple edging patterns at the end of my Idiot’s Guides: Crochet book, but if you’re looking for something fancier than that, I’d suggest you look in a book of dedicated edging patterns – Edie Eckman has two good ones and I’m sure there are more out there! – to find something that appeals to you. Check your local library if you don’t want to invest in buying a book of edging patterns 🙂
Shai said
What a great idea! Thanks for sharing. 🙂
Miriam P said
I love it! And adding a crocheted edge to a skirt. Hmmm….the brain is spinning away on that idea.
Darlene said
What a great easy project,love the crocheting around the edge. Looks good! I have Edie Eckman’s books,they’re awesome for ideas.