I saw on Twitter that there was a UK magazine with a super-cute knit Bagpuss kit on the cover (Your Crochet & Knitting, Issue 17)… and then my Mum bought it and sent it to me!
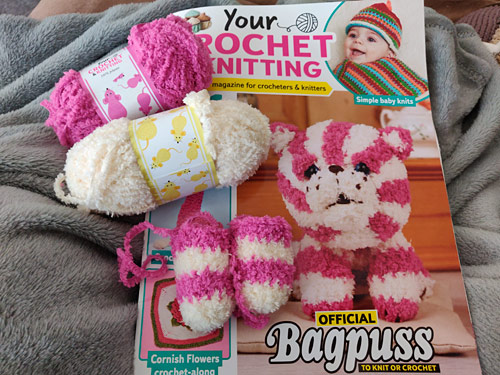
For the uninitiated, Bagpuss was a charming UK kid’s TV show from the 70s that, despite only having 13 episodes, was repeated endlessly on the BBC throughout my early-80s childhood, and was one of my all-time favourite TV shows.
I was prepared to tackle a new adventure in my knitting journey – I’ve never followed a knitting pattern before, or worked with multiple colours, but I do like a challenge! In fact, though, the magazine included both knit and crochet patterns for Bagpuss. After looking at the photos, I could see that they all showed the crocheted version – how strange! Without even a single photo for reference, I didn’t want to take a chance that the knit version wouldn’t be as cute, so I decided to go with the crochet pattern.
I don’t actually remember the last time I crocheted something I hadn’t designed myself (maybe this panda, over a decade ago?), so this would be a novel experience too!
Crocheting
There were two things I really didn’t enjoy about the crocheting :
- The yarn. Ugh, now I remember why all my fuzzy patterns are worked inside out in back loops only – it’s impossible to see your stitches when you work normally with a fuzzy yarn. I was just guessing where to insert my hook the entire time, counting carefully, and ripping out the round (slowly – frogging fuzzy yarn isn’t easy!) every time I was off by more than one stitch in my count for the round.
- The kit yarn quantity. I was so happy to have the perfect Bagpuss yarns included in this kit, but with only 16g of each colour, I knew from the beginning that the quantities would be tight. I made the back legs, then weighed them and the remaining yarn and calculated how much more yarn I’d need to complete the project. The answer: exactly as much yarn as provided, with no wiggle room at all! I kept all my yarn ends as short as possible and replaced all the decreases with invdecs to try to save yarn anywhere I could.
Both those factors meant this was far from the relaxing project I anticipated when following a pattern! I had to count constantly as I crocheted – checking the stitch count at the end of the round is impossible when you can’t see the stitches to count them – and always kept a worried eye on the rapidly dwindling balls of yarn…
It all worked out though, and I breathed a sigh of relief when I finished crocheting the final piece and still had about a yard of each yarn colour remaining – it couldn’t have been much closer!
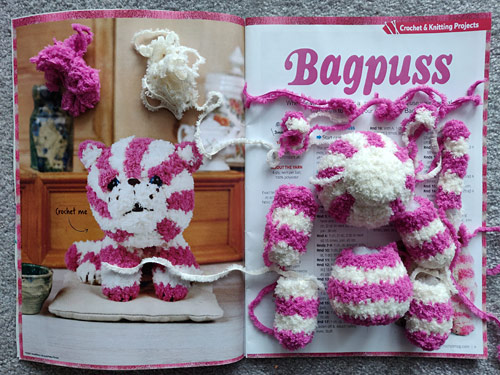
All pieces crocheted, with the tiny bits of remaining yarn at the top left.
Assembly (part 1)
Now to the assembly… I found the single paragraph of assembly instructions (“sew legs to body”, “embroider nose and mouth” etc) to be a little brief, especially when the magazine only included 2 photos of the finished Bagpuss – one from the front and one from a slight angle – so there’s no reference for the back legs or tail, or to see where the body should meet the head at the back.
I guess this is a downside of magazine patterns, where space is at a premium so instructions are brief. I’m used to my PDF patterns where I can include pages of detailed assembly instructions with step-by-step photos – quite a difference! I think the magazine format is far better suited for patterns that don’t need much (or any) assembly.
I didn’t really know how to tackle this stage – the pieces didn’t really look like they’d go together with such large openings at the top of each limb and such a tiny body, so I tried getting in touch with first the designer and then customer support at the magazine, to see if they could provide any additional photos to aid in the assembly. I moved onto the eyes while I waited for a response…
Eyes
The pattern called for 10mm blue eyes. I don’t have any coloured eyes but I do keep some clear eyes on hand, just in case – that way I can paint them to whatever colour I need!
I tried some 10mm eyes on my Bagpuss’ head but they looked too small, so I decided to go with 12mm instead.
I painted the back of the eyes with a blue acrylic paint, let them dry overnight, then added a second coat of silver. As a Bagpuss fan, I know the original Bagpuss’ eyes were painted with blue backed by silver to make them sparkle, so I thought it’d be a fun detail to replicate that! Also, I didn’t want any of the pink yarn colour to show through the translucent blue paint and dull the colour, so silver seemed like a good idea.
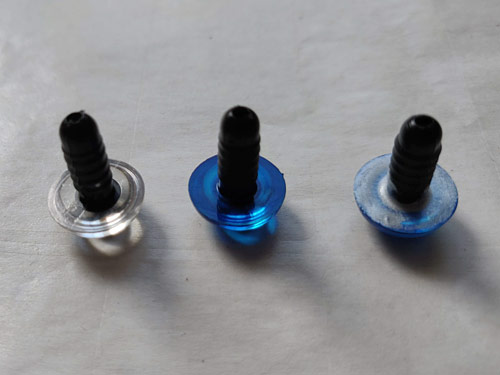
L-R: 3 stages: clear eye, painted with blue acrylic, overpainted with silver
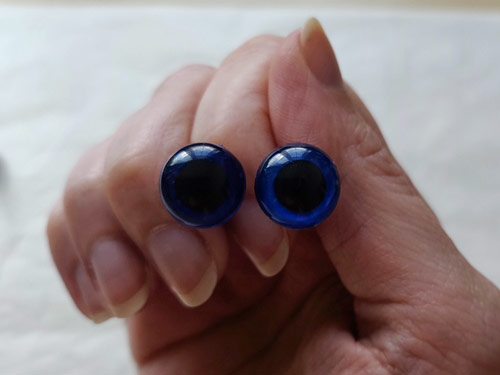
Look how effective the silver backing is to bring out the blue! Left: the eye painted blue. Right: the eye with the silver backing.
Assembly (part 2)
I stitched the muzzle down before placing the eyes and closing the head, to make sure I got the eyes in the right place.
No customer support yet, so I thought I’d finish the head while I continued to wait. This was tricky – there was no guidance on how to turn a flat white circle into the pictured shaped muzzle. I couldn’t pull the yarn of my brown embroidered stitches tightly enough to indent the muzzle without making the stitches look terrible, so I kept pulling them all out and trying again.
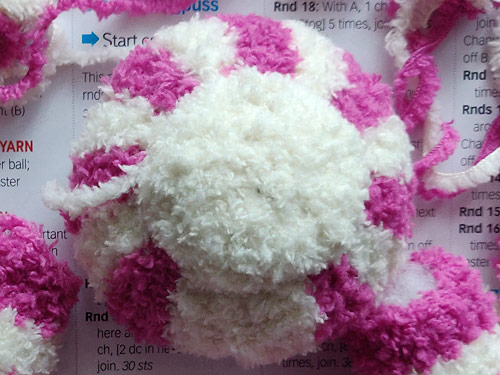
This white circle doesn’t look anything like the pattern photo…
After several failed attempts, I decided to cheat by needlesculpting the muzzle with a sharp needle and white sewing thread before adding the embroidery (see my article on needlesculpting if you’re not familiar with this technique!) to define the cheeks and chin.
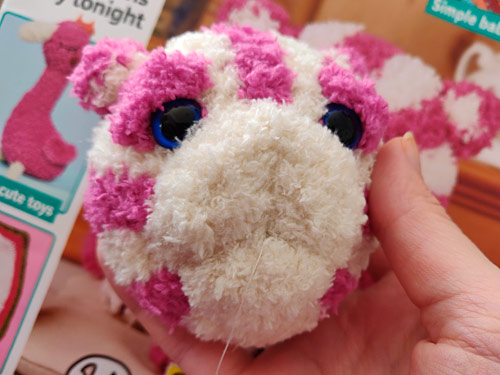
After needlesculpting, the face looked much better.
Assembly (part 3)
After a few weeks, I realised I shouldn’t expect to ever hear back from the designer or the magazine, so I just squished all the parts together and stitched them down wherever they met. First I attached each piece by just one stitch to keep them together:
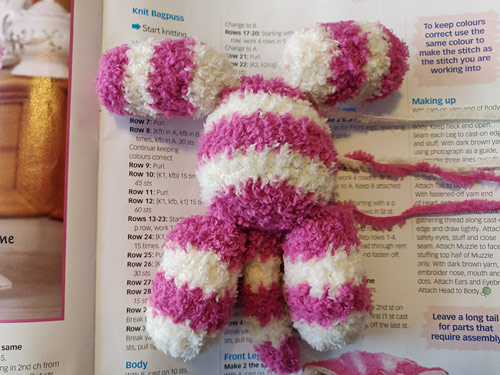
Then I posed the body, squished each limb in towards the body and then stitched them together wherever they touched, to hold them in position at the right angles.
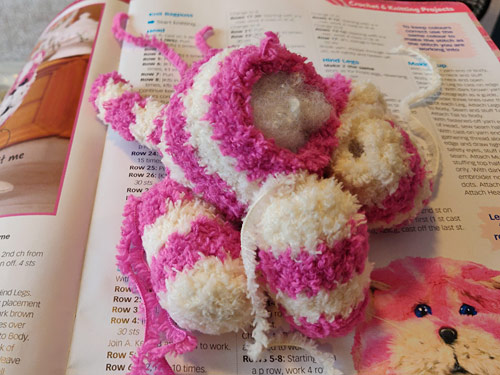
I’m still not sure if I’ve positioned everything the way it’s suppose to be, but I think it looks okay.
Embellishment
Then it was onto to the final stage – embroidering the nose, mouth, whisker points and claws! I abandoned the recommend yarn for the embroidery in favour of dark brown embroidery floss. Just this part took about two hours to get right – I’m not that experienced with embroidery, and I am very particular about the faces of my toys! I pulled everything out at least twice before I was somewhat satisfied.
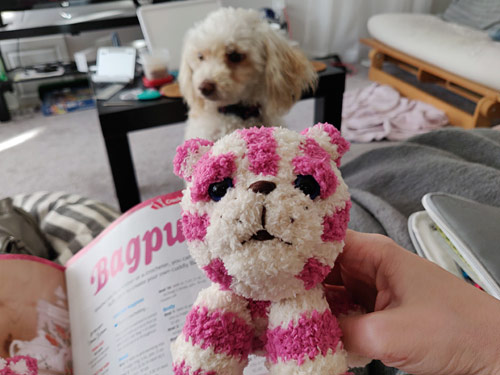
Maggie supervised this stage…
All done? I was fairly happy with him, but the big white misshapen circle at the back of his head looked ugly to me:
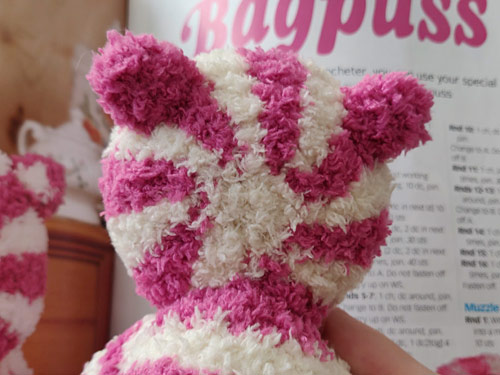
I used (literally) the final yard of the pink yarn to stitch over the lower part of the white area, where the head met the body, to tidy up the colouring there.
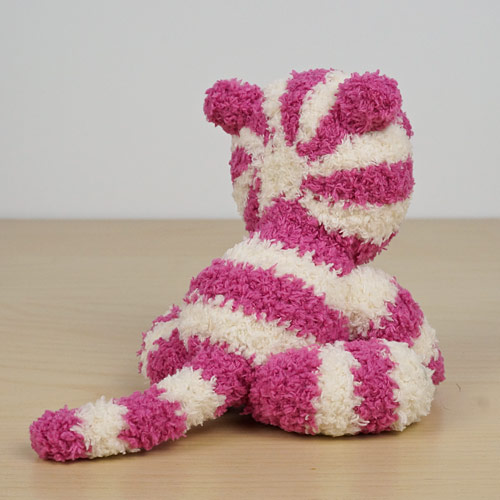
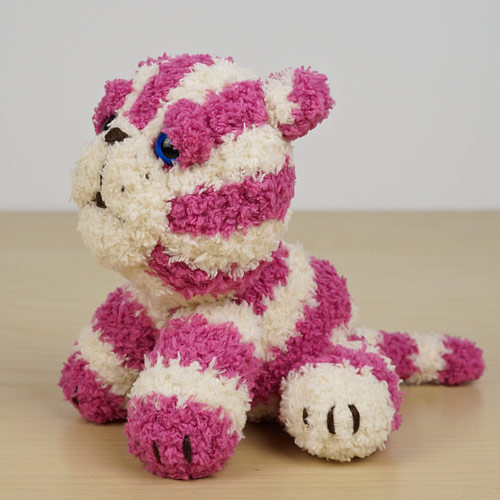
And now here we are – the finished Bagpuss!
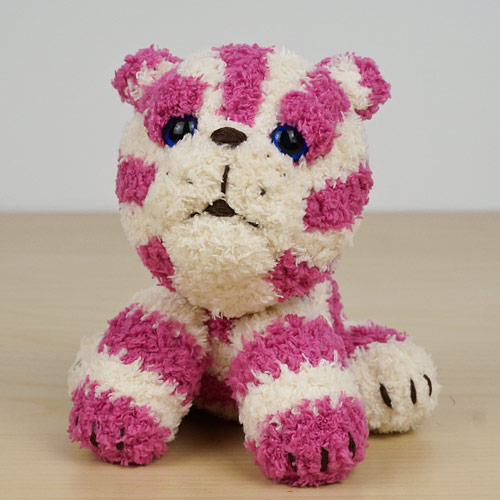
I feel like – with all my years of design experience – I probably could have done a better job of crocheting a Bagpuss from scratch, instead of trying to follow such a frustratingly brief pattern. I tried so hard to match everything to the photos, but I feel like every single part turned out looking different from the photo, and I couldn’t match the placements of the parts to the photo, no matter how many times I tried.
(And to anyone who doesn’t think amigurumi patterns are worth paying for, I can promise you there’s a world of difference between the vague single-paragraph assembly instructions in a magazine pattern and the pages of detailed step by step instructions, photos and diagrams you’ll find in my patterns where needed! Plus customer support by email comes as standard with every PlanetJune pattern licence…)
Still, the yarn was a perfect match for Bagpuss, so I’m glad to have got the magazine and kit just for that (thanks Mum)! And it all worked out in the end for this project – I do love my cute little baby Bagpuss 🙂


Susannah said
Hi, what yarn was used please?
June said
The yarn was included with the kit and the ball band just said the name of the magazine so I have no idea what the yarn really is, I’m afraid…
Terri said
Did this magazine also include a sugar mice pattern? can you share it as well?
June said
Yes, there is a knitted sugar mice pattern in that issue, but sharing a pattern from a magazine is a violation of copyright so you’d have to order a back issue yourself if you wanted a copy of the pattern. It’s ‘Your Crochet & Knitting’ magazine, Issue 17 🙂
Christine Galindo said
Thank you for this article, I too find patterns in magazines frustrating at times but I also have purchased single patterns with little or no “real” instructions aside for the pattern itself. And It is very frustrating when you try to contact the designer and get NO response whatsoever. Your patterns are very well written and your response is great, thank you for all you do for us.
Darlene said
I agree most patterns in magazines are very poorly written and it is difficult to follow along. Not unusal to find missing or wrong instructions. Pattern books are not any better. In fact most patterns I download from the internet paid for or free can leave a lot to be desired. I am always amazed at the designers ability to come up with their patterns but thir inability to write a pattern. For instance I am making an afghan from a yarn lable pattern titled ‘Larks Foot stitch’ but when you get to the body of the instuctions they describe a stitch that is an extended double crochet not a Larks Foot stitch. The picture on the lable is of the Larks Foot stitch. Way to sell yarn with incorrect instuctions. An inexperienced crocheter would not know the instructions were wrong and wonder why it looks strange. I could go on but you get the idea.
June said
Good point! The ability to design and the ability to write a good pattern are two completely different skills – it’s creative vs technical.
I’m not at all surprised that some artistic people who can create beautiful designs don’t have the technical skills to explain them clearly and accurately. (I have a scientific and technical writing background, so it’s the creative part that’s more difficult for me – my art can be a challenge to me, but I know I’ll always be able to explain clearly how to reproduce what I create…)
CraftAtticResources said
Actually you did pay for the pattern as the magazine wasn’t free. I always feel when I go to a blog or website and the pattern is actually free that I can’t complain. The person gave me the pattern to use and it didn’t cost me anything. I will make notes if I post a blog about it to remind myself if I make it again or to help anyone else who seeing the blog thinks they’d like to make the item, too.
However, even in a magazine I do have basic expectations that the pattern has certain correct design elements so the project can be completed. WHy else buy a crochet magazine?
June said
Well, yes, I’d assumed so too, and the magazine wasn’t cheap either, at £10 plus international shipping! If it hadn’t included the perfect yarn (which I don’t think I’d have found anywhere else), I wouldn’t have thought it was worth the money to get such brief instructions.