Over the holidays, I decided to give myself a fun organisation project: creating a box of yarn swatches for all my amigurumi yarns, so it’ll be easy to see all my options and make choices.
Being able to see at a glance all the yarns I have available for my designs is so handy – this could be a really useful project for you too, if you make a lot of amigurumi and have a large yarn stash!
Here is the glorious result:
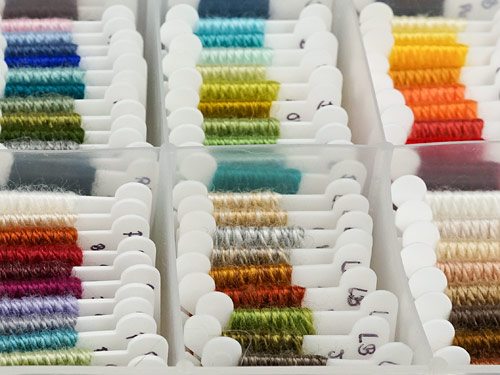
Isn’t it wonderful?! It’s like looking at a selection box of chocolates, but calorie-free and without the one that nobody likes.
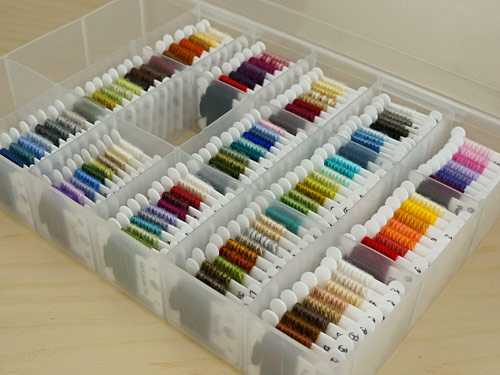
There’s so much pretty colour here, and so much potential for what those colours could become… I feel like I’m an artist and this is my paint box.
Why Make a Swatch Box?
As a professional amigurumi designer, I have a lot of yarn in my stash. More specifically, a lot of worsted weight acrylic from several brands. Some are close enough in weight and appearance to be mixed within a project, and others aren’t (just look at my worsted weight yarn comparison to see how broad a category ‘worsted weight acrylic yarn’ really is!)
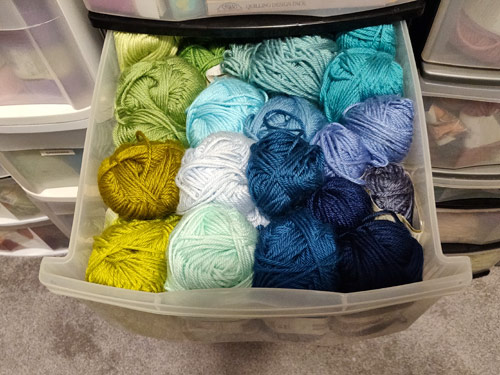
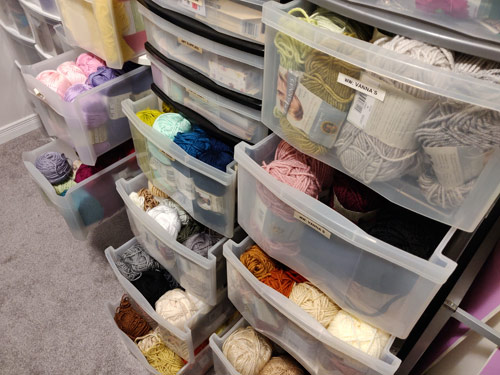
All my ami yarns are filed in plastic drawers, and every time I need to pull yarn options for a new project, I have to open several drawers, grab multiple balls of yarn, and then select the best combination of shades that could work for what I have in mind and also match in weight, sheen and texture.
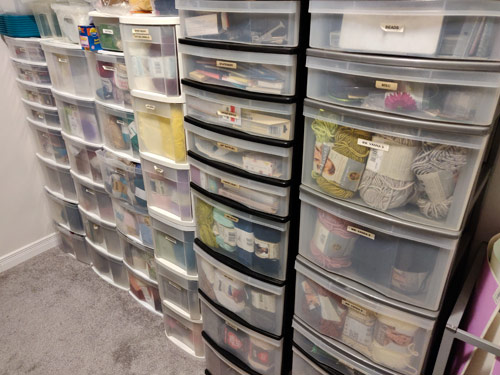
This often leaves me with 10 or more balls of yarn scattered around and the hassle of cramming all the rejected yarns back into their appropriate (and usually overstuffed) drawers. Not ideal.
Making the Swatch Box
I bought lots of the plastic bobbins that are usually used for storing embroidery floss, and wrapped each one with a single layer of yarn, leaving a small space at the top to write the colour name. I used the slits at the bottom of the bobbin to hold the yarn ends in place. To finish each bobbin, I used a yarn needle to pass the yarn ends beneath the wrapped yarn on the back of each bobbin, then trimmed the excess.
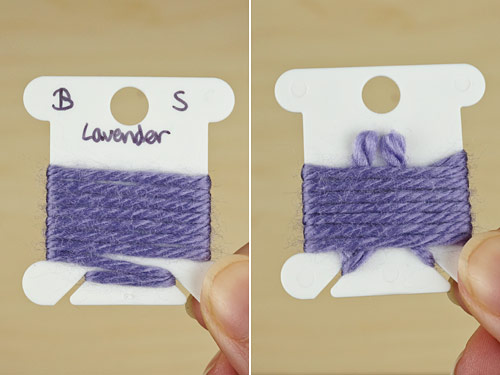
I labelled each bobbin with a simple code (due to lack of space):
- top left corner : brand (e.g. B = Bernat)
- top right corner: yarn line (e.g. S = Satin)
And then wrote out the full colour name below that.
I found a plastic divided box that had sections large enough to hold several bobbins, and organised the swatches first by brand and yarn line, then by colour family.
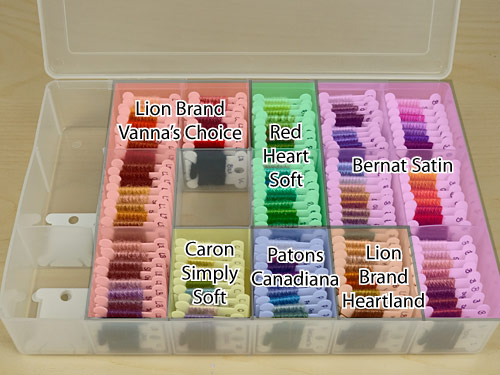
Do you think I have enough yarn options? (Trick question: of course I don’t! That’s what the extra space and spare bobbins are for…)
After the Swatch Box
This box has changed everything for me. Today I pulled shades for a potential upcoming design, and I just opened the box and could see all my options at once. Within a couple of minutes, I had a selection ready to go, and now I can just go to the appropriate yarn drawer (as indicated from the bobbin) and grab only the shades I need to use.
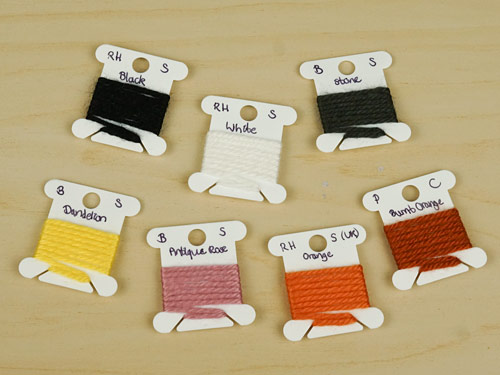
I can use the holes at the top of each bobbin to clip the collection together while I use them so none go astray.
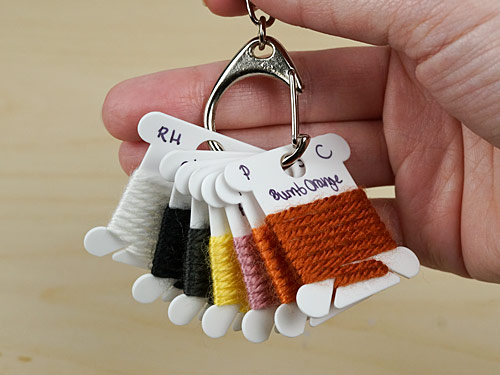
And, when I’m finished, I can easily refile the swatch bobbins in the box.
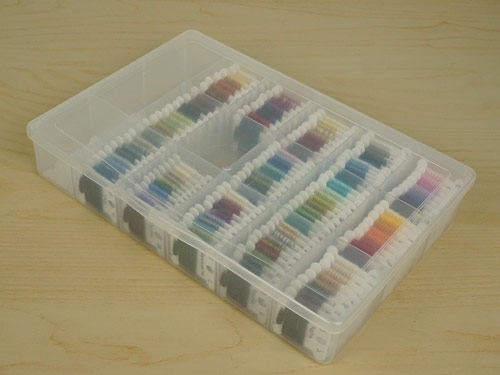
Yes, I ‘wasted’ about 2ft of each yarn in making these bobbins, but it was definitely worth it to me – just opening the box and looking at my yarn palette is so inspiring!

Now I can’t wait to grab my hook and get ‘painting’ (well, ‘sculpting’ would be more accurate) with some of these pretties…


Barbra Knight said
June,
I was thrilled to see your idea for yarns!!! I have a system similar to this for my cross-stitch threads. I didn’t even thing about doing it to yarn. I have my yarns in drawers by colors, but as you, I have to dig through every one to find the right combination.
Thank you so much!!!
Barbra
Jana said
Oh, WOW! I JUST finished doing some organizing of all my jewelry making supplies! I bought a couple of dozen boxes that hold 7 strips of 4 mini boxes) I finally got all my beads organized according to size and shape. I numbered and labeled the boxes (and other regular plastic ones). To cut to the chase, I took a photo of the inside of each of the boxes (51 of them!) then printed each photo, put them into a binder in order with the box number on top. I also put the number of the box on each mini one. I just made earrings for my daughter and was able to pull out AND put back exactly what I needed!
My next organizing project is MY yarn stash which is also MASSIVE! I’ve been trying to figure out how I could do it and YOU just gave me the answer!! Yay! THANKS, JUNE! 🙂
Nicole said
Oh, I started something similar a while ago. With crochet granny swatches (I think, I have a project on Ravelry for it). But I didn’t finish it (yet), because I have to find a new acrylic yarn for me that works. :rolling_eyes:
Jackie Morgan said
Wow, what an excellent idea! Despite regular destashing, I have a MASSIVE hoard of yarn, so doing something like this would really benefit me. I love those plastic organizer boxes – I have 5 of them for my safety eyes/noses (4 of them are completely full!).
Ruth Lister said
Wow! I’m impressed June. :raised_hands: I definitely need to do this! Whilst I don’t have anywhere near the amount of yarn as you, mine is spread between the ‘new bigger’ craft box in one room and bags in a cupboard in another room. Such a wonderful idea! Thank you June. 🙂 This would also save me from buying more yarn that I already have. Brilliant! ✔
I’m thinking I might also add how much I have of each colour/type to the card. My dear Mother passed in August and my brother has just reminded me that he has 2 large plastic crates of various yarns at his home that he wants to move to mine. Oh darn! 😉 lol
Rosemary said
wow! you would have also made a great librarian! This system has applications for craft papers and other supplies. Thanks for passing it along!
Rosemary
June said
Funny you should say that: I used to work in a library! I didn’t realise I was making the equivalent of a card catalogue for my yarn 😉
Melody Gillum said
Thank you for sharing such a wonderful idea!!