PlanetJune Craft Blog

Latest news and updates from June

Archive for March, 2023

How to Fix Uneven Stuffing: The Pinch-and-Push Method

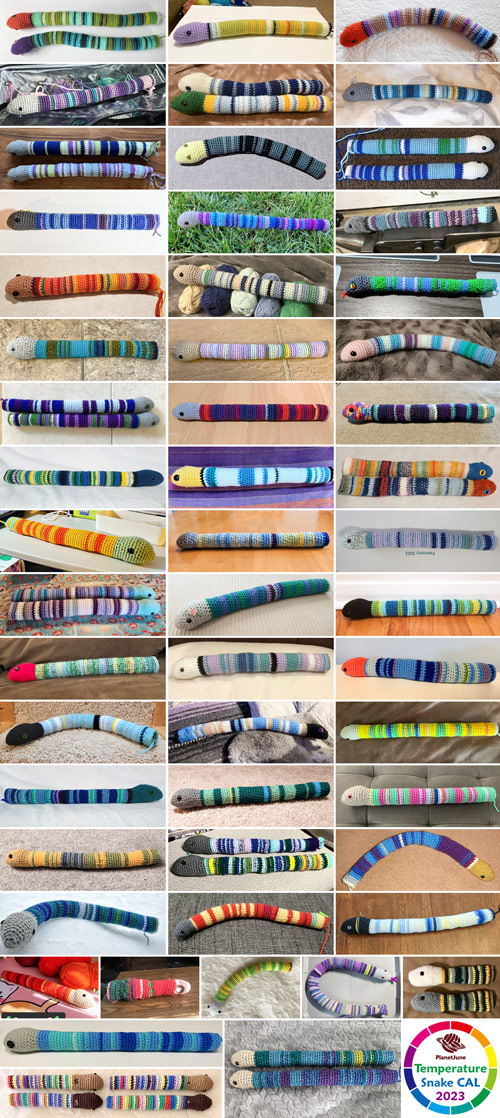
I have a new tutorial for you today that you’ll probably find especially useful if you’re working on a Temperature Snake (although it isn’t just for snakes!)

Is your stuffing less smooth and even than you’d like? I can help with that!

tutorial: fix lumpy stuffing in amigurumi; the pinch and push method

With my ‘pinch-and-push’ technique, you can manipulate the stuffing of an amigurumi from the outside of the piece, by using both hands to encourage the stuffing to shift into the desired area. This method will save you from having to pull out all the stuffing and start again (which may not even be possible if you have a snake that’s already several feet long!)

I’m demonstrating on a snake because it’s easiest to see what’s happening with a long thin tube, but you can also use this method to pinch-and-push stuffing into a different area of any long or large amigurumi, as long as you still have an opening so you can add extra stuffing to replace the quantity you move.

Note: This technique will help to redistribute stuffing that’s uneven, but it can’t help much with actual lumpy stuffing. Always fluff your stuffing by teasing it apart into light fluffy layers before you use it; if you add stuffing in clumps, it will form lumps inside the amigurumi.

The Problem

For the purposes of this demonstration, I’ve intentionally under-stuffed my in-progress Temperature Snake in a couple of places.

Below, you can see both dark blue sections aren’t stuffed as much as the rest of the body, giving my poor snake a bit of a lumpy, uneven appearance when straight:

tutorial: fix lumpy stuffing in amigurumi; the pinch and push method

It’s especially important to try to even out the stuffing in something long and thin like an amigurumi snake. You need enough stuffing inside to fully support the crocheted fabric in any position you’ll use it, as these areas will tend to crease or buckle when you try to curve the snake’s body, and that’s definitely not the look you want!

Method

The idea of the pinch-and-push process is to move stuffing forward (away from the open end – i.e. toward the head in this case) to fill any under-stuffed areas.

Note: In all the photos below, the snake’s head is on the right, and the open end of the snake on the left, so we’ll be shifting the stuffing from the left to the right.

Here’s the first under-stuffed area:

tutorial: fix lumpy stuffing in amigurumi; the pinch and push method

We’re going to move some of the stuffing forward from the well-stuffed purple area to the under-stuffed dark blue area.

Pinch-and-Push Instructions:

  1. Grasp the work loosely in front of the under-stuffed part, leaving your thumb and forefinger free, and pinch the piece firmly behind the under-stuffed part.
  2. Push the pinched part forward. (The rounds of your crochet will be forced closer together, and all the stuffing in that part will be squashed together more firmly.)
  3. Pinch the squashed part with your other hand to hold the squashed stuffing in place.
  4. Release your push.

tutorial: fix lumpy stuffing in amigurumi; the pinch and push method

As you can see below, after just one pinch-and-push, some of the stuffing has been moved a little further forward (to the right in this photo), leaving most of the dark blue section nicely stuffed and a new under-stuffed section (marked by arrow) a little closer to the open end.

tutorial: fix lumpy stuffing in amigurumi; the pinch and push method

But you won’t be doing this just once! Repeat the pinch-and-push process over and over, as many times as necessary, inching your way back toward the open end as you persuade the stuffing to move forward with each push:

"tutorial:

Note: You can’t shift stuffing forward from an area that’s already under-stuffed – if you end up with an empty section, move further back and pinch-and-push more stuffing forward to fill the gap.

Once you get close enough to the open end, you can add more stuffing through the opening to replace the quantity you’ve shifted forward.

Below, you can see that I’ve shifted the under-stuffed section to be much further back. Now it’s close enough to the open end of my snake that I can add additional stuffing to fill that area properly, instead of continuing with more pinch-and-push movements.

tutorial: fix lumpy stuffing in amigurumi; the pinch and push method

Confused?

Don’t worry, this method is easier to do than to explain! Once you’ve tried it a couple of times, you should understand how it works and be able to do it instinctively.

If you’re still having trouble grasping the concept, imagine dropping an orange into a sack. You can grip the orange through the sack fabric, and then use both hands to move the sack fabric around the orange from the outside, allowing you to shift the position of the orange inside the sack.

This is basically what we’re doing here – moving the stuffing (the orange) around through the crocheted fabric (the sack).

Finishing Touches

When you’ve finished shifting the stuffing, squeeze and squash the amigurumi to further even out the stuffing. For something long like a snake, you can also combine that with bending it back and forwards in several directions a few times, to encourage the stuffing to compress and settle into its final state. Repeat until you’re happy with how your amigurumi looks and feels.

Here’s the result – fairly smooth, with no lumps or under-stuffed areas!

tutorial: fix lumpy stuffing in amigurumi; the pinch and push method

I hope you’ll find this technique useful, whether you’re participating in the Temperature Snake CAL, or making a different long/large amigurumi where you realize that you haven’t stuffed the front end of your amigurumi enough.

Give my pinch-and-push technique a go before you resort to removing all the stuffing to start again, or decide to put up with an unevenly-stuffed amigurumi – with a bit of patience, you can probably fix it!

Comments (4)

PlanetJune Stories: Diane’s Succulent Arrangements

Today’s PlanetJune Story comes from Diane Theriault from Boston, MA. Diane had the innovative idea to make needlepointed plastic canvas bases for my Succulent Collection crochet patterns, to make them into modular desk displays that can be arranged in multiple configurations, and combined into a giant window display.

This is such a clever concept, and I knew you’d love to see it too. Maybe you’ll be inspired to try it for yourself!

Over to Diane:


I first made an instance of the original succulent pattern (the 4 plants in the pot) for my advisor in 2013 and then I made a set of singles in little pots for my labmates in 2015. My main innovation is mounting the succulents on top of little rectangles of needlepointed plastic canvas, which has been working well for me for making modular rearrangeable desk displays.

PlanetJune Stories: Diane's Modular Crocheted Succulent Arrangements

PlanetJune Stories: Diane's Modular Crocheted Succulent Arrangements

I had an overuse injury in 2017 so I couldn’t crochet for a few years, and I started nine months of hand OT in mid-2021 because I wanted to be able to do it again! After a lot of physical therapy, the succulent pieces were a good reentry project because they had lots of natural stopping places, while something larger would be tempting to keep going even when I should stop.

PlanetJune Stories: Diane's Modular Crocheted Succulent Arrangements

I looked at a lot of pictures from companies selling succulents to decide what colors to use. I mostly used a variety of colors from the Vanna’s Choice line of Lion Brand yarn, with a couple of Red Heart colors. Sticking with mostly colors from the same line of yarn was useful because all the colors went together nicely.

PlanetJune Stories: Diane's Modular Crocheted Succulent Arrangements

Since the display I imagined was a lot larger than the little pots, I wanted some of the plants to be a little bigger. I improvised a couple of larger leaf sizes for some of the plants, and lots of strands – and longer strands – for the trailing plants.

PlanetJune Stories: Diane's Modular Crocheted Succulent Arrangements

I had done the plants in the crocheted pots before and it was more crochet than I thought my wrist would tolerate, so I decided to try plastic canvas. I was concerned about the plastic tearing, so I needlepointed it for structural support (and to make it a nicer color).

PlanetJune Stories: Diane's Modular Crocheted Succulent Arrangements

I chose the sizes for the bases by tacking the plants down and seeing if they fell over or not. They are in a variety of sizes between 2×2″ and 3×3″.

PlanetJune Stories: Diane's Modular Crocheted Succulent Arrangements

The trailing plants are mostly on 2″x3″ bases. If the stems are hanging down without support, the bases need to be oriented long-ways towards the edge of the surface, because otherwise, the weight of the stems will pull them over, even if they are sitting flat.

PlanetJune Stories: Diane's Modular Crocheted Succulent Arrangements

Each little base takes 30 – 60 minutes to needlepoint, depending on size.

PlanetJune Stories: Diane's Modular Crocheted Succulent Arrangements

I started this project in Feb 2022 and finished most of the plants and bases by May. When I tried to arrange the plants in the window, I found that the taller plants fell over because the ledge was too steep, so I decided that I needed to make a planter to get them up higher and reduce the angle.

PlanetJune Stories: Diane's Modular Crocheted Succulent Arrangements

Meanwhile, I started taking little selections of plants to work for displays on my desk.

PlanetJune Stories: Diane's Modular Crocheted Succulent Arrangements

Needlepointing the big pieces for the planter took quite a while, and was less fun than making the plants so it didn’t go as fast, but I think the final effect is pretty good. I used a piece of oak deck trim to provide structural stability – cheaper than a dowel and more sturdy. I declared victory on the planter in October.

PlanetJune Stories: Diane's Modular Crocheted Succulent Arrangements

It took a lot of volume to fill the planter so the plants would sit on top and be visible. I basically made a lot of pom poms from yarns I had laying around that I didn’t like, with a top layer of pom poms in the matching brown color.

PlanetJune Stories: Diane's Modular Crocheted Succulent Arrangements

Thank you June for all your beautiful patterns and meticulously executed instructions!

PlanetJune Stories: Diane's Modular Crocheted Succulent Arrangements


(Back to me, June, again!)

Aren’t these projects wonderful? The needlepointed bases are a clever and unique touch, the modular desk display looks like it’d be fun to play with and rearrange, and I’m sure you’ll agree that the finished succulent window planter is spectacular!

Thank you so much, Diane, for sharing your story and inspirational photos with us today 🙂
Please leave Diane a comment if you’ve enjoyed this post!

PS – As you can see, my crocheted succulent patterns are very versatile! You can use them individually or in a potted succulent garden as I show in the patterns, or you can keep making more and more of your favourites, to fill any space. You can find all the mix-and-match PlanetJune Cactus and Succulent Collection crochet patterns in my shop 🙂


Do you have a PlanetJune Story you’d like to share? I’d love to hear it! Please email your story to june@planetjune.com, together with one or more high quality photos showing what you’ve made from PlanetJune patterns. If I choose your story to feature here on the blog, I’ll send you your choice of pattern from my shop to say thank you!

Comments (6)

Temperature Snake CAL: month 2 roundup

The complete Temperature Snake pattern and workbook are now available! Click here for details >>

Each month in 2023 I’m sharing a Temperature Snake CAL roundup with a collage of some of our snakes’ progress – even if you aren’t joining in, I think you’ll enjoy seeing all the snakes growing throughout the year!

We’ve completed two months of the Temperature Snake CAL, and our snakes are starting to grow! It’s lovely to see so many variations, and I’m also enjoying spotting ‘family resemblances’ cropping up in snakes from similar areas, e.g. I see a lot of snakes with a bright stripe around mid-February from that unseasonably warm blip we had here in Ontario (and also in many other states and provinces by the look of it!)

Here’s the February collage from some of the latest photos that have been posted. These are taken from the CAL threads on Discord and Ravelry, plus some from people who’ve tagged me (@PlanetJune) on FB and IG:

PlanetJune Temperature Snake 2023 CAL - month 2 roundupClick to see the full-size collage

Wow! Aren’t they all amazing? The collage is getting huge already as the snakes grow longer – and these photos only represent 7% of all the Temperature Snakes being made all over the world! This CAL is truly amazing – it’s wonderful to have so many of us together, all enjoying the slow process of seeing our snakes forming as the year continues.

If you haven’t joined in with the community groups yet, please do come over, share your progress with us all, and join in the conversations!

And, if you’d like your snake to be included in the next monthly roundup, please post an up-to-date pic (or email it directly to me: june@planetjune.com) in the last couple of days of March, or by end of day April 1st. I’ll try to include as many as possible in each collage.

Feeling like you’re missing out on the fun? Don’t worry: you can still join us for this CAL! Grab the pattern and get caught up – we’d love for you to join us for the rest of 2023 🙂

Now, I wonder if our snakes are going to see some new colours developing in March, as the seasons begin to shift… Let’s keep crocheting and find out!

Comments

  • Quick Links: Crochet

    navigation: arrow

    buy crochet patterns and accessories from my online store

    'Everyday Crochet' and 'The Essential Guide to Amigurumi' crochet books by June Gilbank

    Crochet video tutorials and step-by-step photo tutorials

    Free PlanetJune crochet patterns

    Frequently Asked Questions

    Quick Links: Crafts

    navigation: arrow

    Punchneedle Embroidery information, ebook & patterns

    Papercraft ebook & tutorials

    Free PlanetJune craft projects & tutorials

  • Blog Post Categories

  • Blog Archives

  • Welcome to PlanetJune!

    June Gilbank

    Hi, I'm June. Welcome to my world of nature-inspired crochet and crafting. I hope you enjoy your visit!

    If you'd like to get in touch, you can contact me here.
    crocheted Canadian flag by PlanetJune
  • A fanned-out pile of the books Everyday Crochet and The Essential Guide to Amigurumi, with text 'The answers to all your crochet questions at your fingertips - find out more'
  • Support PlanetJune!

    Want to say thanks? You can send me money in seconds at paypal.me/planetjune (over $20) or paypal.me/planetjune2 (under $20) or send me a donation through my shop.

    Or simply click through from my links before you shop at Amazon, Etsy, KnitPicks, LoveCrafts or Crochet.com, and I'll make a small commission on your purchase, at no cost to you! Start here:

    ♥ Support PlanetJune ♥

    Tip: This link is also in the footer of every page!

    Thank you so much for your support!