PlanetJune Craft Blog

Latest news and updates from June

Archive for April, 2010

adventures in knooking

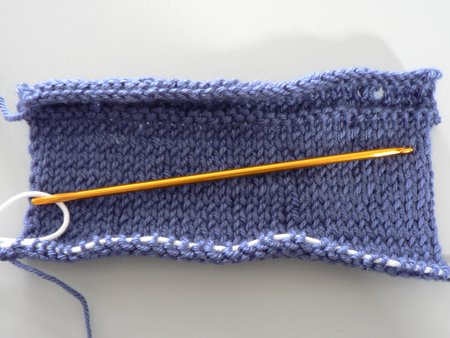
I bet many of you (unless you saw my tweets last weekend) are thinking ‘huh?’ right about now… But if you’re like me (a crocheter who doesn’t knit) you’re going to love this craft: knooking is knitting with a crochet hook. No, it’s not tunisian crochet, or any other type of crochet; when you knook you form genuine knitted stitches. The finished product is indistinguishable from a knit piece. Isn’t that cool?

I just don’t get along with the pointy sticks and I’ve often wished I could just put a hook on the end of a knitting needle so I could snag those stitches more easily, so the idea of knooking was very appealing. You do need to use a special hook to knook with – it has to be straight all the way down the length (i.e. no wider thumb grip) and have some way to attach a cord to the non-hooked end. You can modify a regular crochet hook, or a locker hook makes the perfect starter tool – you can find it in most craft stores, and it’s approximately equivalent in size to a G hook.

This weekend I had some time on my hands and thought I’d finally give knooking a try. I must be a bit of a masochist – I didn’t want to start with a boring swatch or dishcloth pattern; I wanted something that I could actually use once I’d finished it. I’d seen a free knitting pattern a few weeks ago for a Shaun the Sheep DS case and it seemed like it may be a feasible (and cute!) first project. Luckily it starts with the back, which is plain, before moving to the colourwork on the front, so I figured I’d have time to get used to the knit and purl stitches before introducing another element of difficulty.

knooked shaun the sheep bag, pre-blocking
First knooking attempt in progress

Here it is after getting 2/3 through the back. (The hole at the top right is a buttonhole, not a mistake.) You can see my white cord running through the active stitches at the bottom of the picture. Each time you complete a row, you slide the stitches down off the bottom of the hook onto the cord, and then work into them again for the next row.

I think I may have wrapped the yarn wrongly a couple of times, because there are a couple of flubs in my beautiful knitted fabric. Also, my yarn was a bit splitty, which didn’t help when trying to form those awkward purl stitches. I was surprised that my stitches looked so even, considering this was my first ever attempt at knooking.

The colourwork was easier than I’d anticipated. I worked the design backwards (mirror image) because I’m left-handed and wasn’t 100% sure if knit stitches are symmetrical (although I think they are) so I thought I’d play it safe. I left yarn ends dangling on the inside while I knooked, and wove them all in later. My only difficulty was my choice of a bouclé yarn for the ‘wool’: it turns out that bouclé is just as challenging to knook with as it is to crochet with!

knooked shaun the sheep bag, pre-blocking
Before blocking

My finished piece was curling up a lot at the edges, so I used makeshift blocking wires (actually floral wire – I don’t have much need for real blocking wires in my daily life) and some steam blocking to straighten it out (yes, you can steam block acrylic!).

knooked shaun the sheep bag, wires attached for blocking
Blocking wires in place

When it was dry, I seamed the sides and attached some buttons to the top. I wasn’t sure how to make the eyes, but in the end I made some from black and white felt strengthened with embroidered buttonhole stitches around the edges. The whole project cost me nothing: all the materials came from my stash (yay!) – even the buttons!

knooked shaun the sheep bag, front
Front

I could see by the end (the top border) that I’d really got the hang of it: my stitches were much more consistent than they had been on the back of the piece, although they really hadn’t been bad to start with. I think I can say that I’ve conquered the basics of knooking, and I’m looking forward to trying out another knitting pattern with my hook!

knooked shaun the sheep bag, back
Back

Have I captured your interest? If you’d like to try knooking, I recommend you check out the Knooking blog (I learnt how to knook from Jen’s excellent how-to videos) and Knooking Ravelry group 🙂

cat in light box
Maui insisted on ‘helping’ with the photoshoot!

Comments (42)

the ultimate finish for amigurumi

Would you prefer to see the video tutorial demonstrating this method? If not, read on:

I’ve written before about how there are several ways you can finish off a closed piece in amigurumi, and there’s no one ‘best’ method for closing that remaining hole to give the neatest finish. I’d like to officially change my opinion on that point! Here are my previous results:

Since I wrote that post, I’ve been doing more experimenting, and I think I’ve finally found the definitive method to give the best possible finish to a closed piece in amigurumi. It works almost like a Magic Ring (and we all know how good that is!) so that’s why I’ve named this technique the Ultimate Finish for amigurumi:

ultimate finish for amigurumi by planetjune
Where’s the hole? This is the beauty of the Ultimate Finish

(Of course, to get the best finish, you’ll also want to use the Invisible Decrease instead of sc2tog for all your decreases – but that goes without saying, right?)

Ultimate Finish for Amigurumi

The almost-finished stuffed piece, with 6 sc remaining:

ultimate finish for amigurumi by planetjune

Cut the yarn, leaving a long yarn end. Draw the end through the final loop on the hook and thread it onto a yarn needle.

You’ll be using the front loops only for the next stage; those are the loops that are furthest from the hole:

ultimate finish for amigurumi by planetjune

Working in the same direction as you crochet (clockwise for right-handers; anticlockwise for left-handers), insert your needle under the front loop of the next stitch, so the needle goes from the centre of the hole to the outside (below, left). Draw the yarn taut.

Move to the next stitch and repeat: insert the hook under the front loop of the stitch, again going from the middle of the hole to the outside (below, right). Draw the yarn taut, but don’t tighten it fully yet.

ultimate finish for amigurumi by planetjune ultimate finish for amigurumi by planetjune

Repeat for the remaining stitches until you have woven the needle through all 6 stitches, going from the middle to the outside each time (below, left). Now pull the yarn tight (below, right). The hole will close up just like a magic ring! It does leave a small bump on the outside though…

ultimate finish for amigurumi by planetjune ultimate finish for amigurumi by planetjune

To get rid of the bump, insert the needle through the middle of the ring you’ve created, going into the piece, and bring it out an inch or two away. Pull the yarn tight and the bump at the closed end will disappear, leaving a nice smooth finish.

ultimate finish for amigurumi by planetjune ultimate finish for amigurumi by planetjune

Finally, snip the end close to the surface, and the cut end will retract back inside the piece.

ultimate finish for amigurumi by planetjune

It’s nothing revolutionary, but weaving through the loops in this way (always going from middle to outside) and then pulling it closed like a magic ring really does give the best finish I’ve found. Give it a go and let me know what you think of my Ultimate Finish!


Do you find my tutorials helpful? If so, please consider making a contribution towards my time so I can continue to create clear and concise tutorials for you:

Thank you so much for your support! Now click below for loads more crochet video and photo tutorials (and do let me know what else you’d like me to cover in future tutorials…)

See more helpful PlanetJune crochet tips and technique tutorials

Comments (70)

all new!

Welcome to the new PlanetJune webserver! You should notice a huge speed difference from the old site – no more sluggish pageloads and pageload errors (I hope!). This was a desperate emergency move on my part to try to fix the problems, but I’ve now got a reliable new webhost, a virtual server of my own, and plenty of room to grow without causing any more problems, so it was all worthwhile!

PlanetJune crochet designs group on Ravelry

I have also finally set up a PlanetJune group on Ravelry. If you have a Ravelry account, please feel free to join!

And now onto some new products available in the PlanetJune store:

I’ve been listening to your requests for amigurumi noses and smaller clear eyes, so I’ve just added 6mm and 8mm clear eyes to the shop, and also two shapes of safety noses (oval and triangle).

clear safety eyes from planetjune

In case you don’t know about clear eyes, they are very versatile – they have a black pupil and clear iris, and by painting the backs (the flat side) or putting felt behind them, you can colour the irises any shade you wish! I now carry all sizes from 6mm to 15mm, so that should cover any project you need eyes for. (Of course, I still have all sizes 4.5mm-15mm in solid black too.)

oval safety nose from planetjune

triangular safety nose from planetjune

Safety noses work exactly like safety eyes – they come in 2 parts: a front, and a locking washer. If you need a nice black shiny nose for your amigurumi, check these out! I have oval and triangular noses in stock, in two different sizes for each shape.

aquaami polar bear crochet pattern by planetjune
Here’s a triangular nose in action!

You can find all my eyes and noses in the Eyes, Tools & Accessories category of my shop 🙂

Comments (3)

Next entries »
  • Quick Links: Crochet

    navigation: arrow

    buy crochet patterns and accessories from my online store

    'Everyday Crochet' and 'The Essential Guide to Amigurumi' crochet books by June Gilbank

    Crochet video tutorials and step-by-step photo tutorials

    Free PlanetJune crochet patterns

    Frequently Asked Questions

    Quick Links: Crafts

    navigation: arrow

    Punchneedle Embroidery information, ebook & patterns

    Papercraft ebook & tutorials

    Free PlanetJune craft projects & tutorials

  • Blog Post Categories

  • Blog Archives

  • Welcome to PlanetJune!

    June Gilbank

    Hi, I'm June. Welcome to my world of nature-inspired crochet and crafting. I hope you enjoy your visit!

    If you'd like to get in touch, you can contact me here.
    crocheted Canadian flag by PlanetJune
  • A fanned-out pile of the books Everyday Crochet and The Essential Guide to Amigurumi, with text 'The answers to all your crochet questions at your fingertips - find out more'
  • Support PlanetJune!

    Want to say thanks? You can send me money in seconds at paypal.me/planetjune (over $20) or paypal.me/planetjune2 (under $20) or send me a donation through my shop.

    Or simply click through from my links before you shop at Amazon, Etsy, KnitPicks, LoveCrafts or Crochet.com, and I'll make a small commission on your purchase, at no cost to you! Start here:

    ♥ Support PlanetJune ♥

    Tip: This link is also in the footer of every page!

    Thank you so much for your support!