This is going to be a bit of an epic post, because I’ve had a lot of questions about Mega Bun and I want to answer them all and explain exactly how I made her. I encountered several unexpected problems along the way, and I’ll show you my solutions in case you want to try making an extreme amigurumi of your own!
Although I’m explaining my process here and you could replicate it to make your own Mega Bun, I intend it as more of a general guide for the types of problems you may have to solve to convert an amigurumi pattern into something many times larger than intended. I’d advise that you should be prepared to a bit inventive and be ready to make some trial and error attempts if you’re going to attempt an extreme amigurumi of your own!
Okay, now onto the Mega Bun details!
Making an Extreme Amigurumi
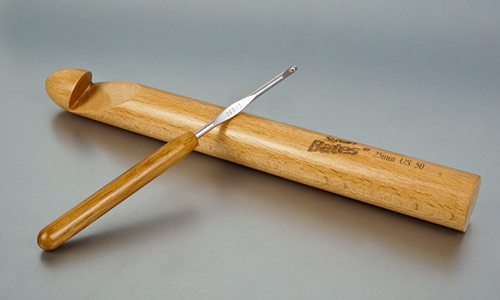
I had a few false starts – this Susan Bates Xtreme wood crochet hook is a massive 25mm (1 inch) in diameter, and every yarn I tried was far too thin, even doubled or tripled. I ruled out three strands of bulky yarn because the holes between the stitches were still so large that I was crocheting a mesh of holes instead of a sturdy fabric!
I eventually discovered that the thickest fuzzy yarns in my stash, tripled, would just about work, thanks to the fuzz obscuring the holes between the stitches. I found that I had 6 pre-wound balls of this unlabelled yarn in my eyelash stash:

I have no idea what it is (I picked up a lot of second-hand fuzzy yarn when the eyelash craze of 2009 was dying down!) but it looks and feels similar to Patons Allure (except it has 80g per ball instead of 50g):
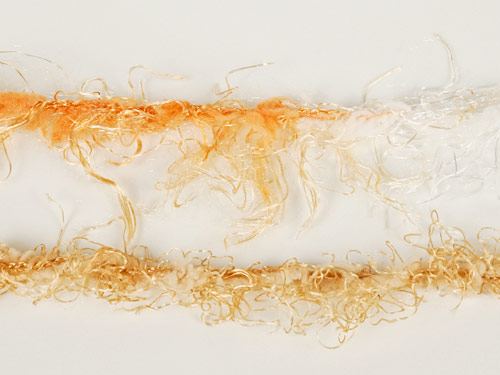
Top: unknown fuzzy yarn; Bottom: Patons Allure (discontinued)
I held three strands of yarn together as I crocheted. Working with such a large hook is very different – you have to move your whole arm to make each stitch, not just your wrist, so it’s quite a workout – but the hook isn’t heavy and it wasn’t difficult or painful to use.
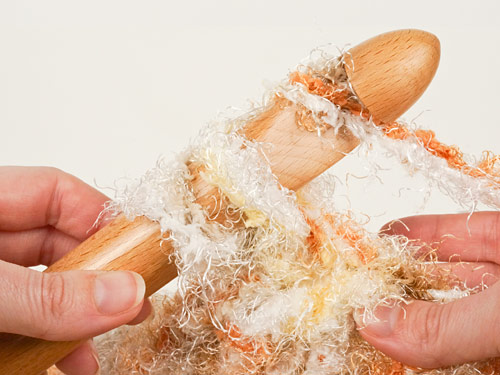
Making a single crochet stitch with an extreme hook and three strands of fuzzy yarn
Overcoming Challenges
Adapting the Pattern
I used the Lop pattern from my Baby Bunnies, but Mega Bun is many times larger than my original Lop:
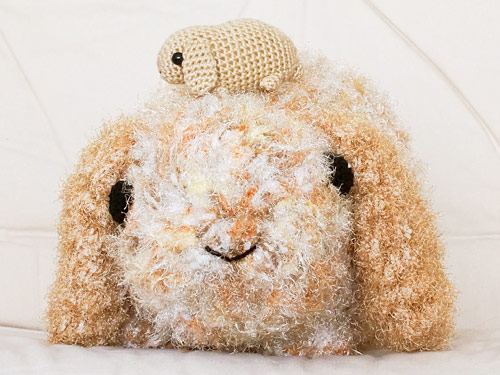
I intended to follow my pattern exactly, but I discovered that her back feet completely disappeared into the mass of her body, so I added one extra round to the back feet. Changing the scale by this much may start to affect the proportions slightly, so you may need to tweak a pattern if you’re upscaling it to extreme size.
Running Out of Yarn
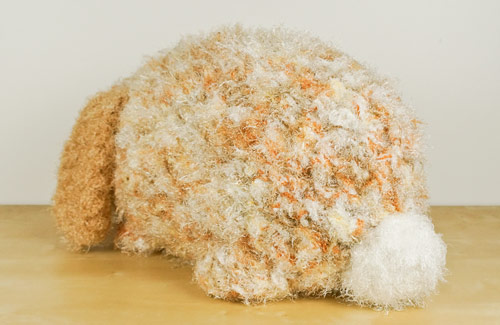
I had no idea how quickly I’d get through my yarn, so I just got started and hoped for the best! After making most of the body, I could see that I wouldn’t have anywhere near enough to make all the other pieces – argh! I briefly debated turning my amigurumi into a different animal with smaller ears, but in the end I decided to make the tail in white (a good bunny colour) and the ears in light brown Patons Allure (which matches the variegated body colour nicely). Problem solved!
…Or not. I got most of the way through one ear and ran out of yarn again. Luckily, my friend Monica came to my rescue and sold me some of her precious Allure from her stash so I could complete my bunny. Working with discontinued yarns can be pretty stressful!
Yarn Thickness
Although the yarn I chose for the tail (Bernat Baby Lash, also discontinued), looked nice and bulky and fairly similar to my other yarns, when I started to crochet with 3 strands, it left huge gaping holes between each stitch – not a good look for a bunny tail! So I decided to double it yet again and crocheted with 6 strands at once to give me a nice full bunny tail. Finding sufficiently bulky yarn is definitely a major problem for a hook of this size!
Holey Fabric
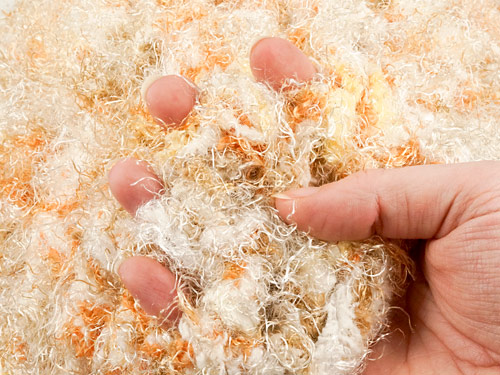
As I hadn’t used the correct yarn thickness for amigurumi making, I had a problem. Although the crocheted fabric doesn’t look holey (thanks to all the lovely soft fluff in my yarn), that’s not really the case: I can stick a fingertip through any of the gaps between stitches! This would be a problem when it comes to stuffing…
To get around this, I bought some tulle fabric (the fine netting used for wedding veils and ballet tutus) to contain the stuffing. For the head and body, I flattened the crochet and laid it on 2 layers of tulle to act as a template for cutting the tulle. I cut the tulle around the edge of my ‘template’ with fabric scissors, leaving a few inches of extra length at the back to make stuffing easier.
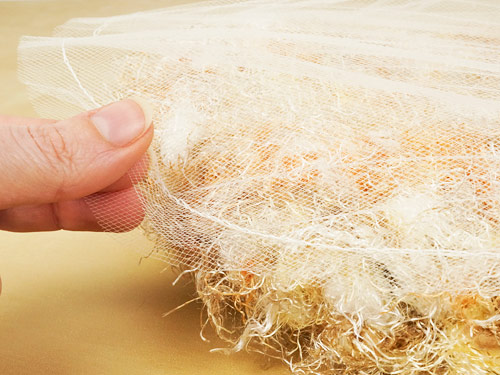
I wasn’t sure if I could sew tulle with a sewing machine, but my mum advised that it should be fine with a long stitch length, and it was (thanks Mum!), so I sewed my 2 layers of tulle together, leaving the tail area with the excess fabric open for stuffing.
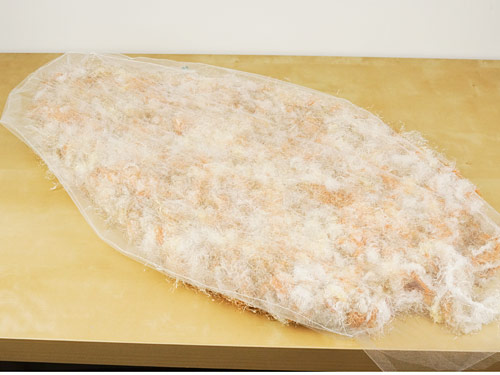
The completed tulle net on top of the flattened body, with excess tulle at the back.
I turned my tulle net inside out and inserted it into the body, turning the excess back outside the opening, and then I stuffed the body by pushing the stuffing into the net.

Once I’d finished stuffing, I overlapped the excess tulle and secured the two sides together with a few stitches by hand with a needle and thread, then crocheted the remaining body stitches and closed the remaining hole in the body as usual (with my Ultimate Finish technique).
Adapting the Stuffing Instructions
With this size of amigurumi, even the tiniest pieces that wouldn’t usually be stuffed are huge and need stuffing to support them. To stuff all the smaller pieces (paws, tail and even the eyes), I tied a blob of stuffing into the middle of a square of tulle, to make a stuffing parcel, and popped it inside the piece as I was stitching it to the body.
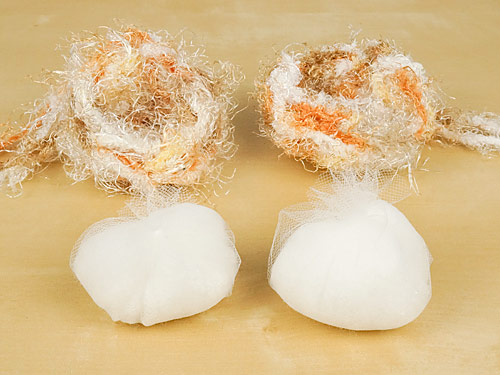
Front paws with their parcels of stuffing ready to be inserted
Stuffing Quantity
It took an entire 1lb bag of stuffing to stuff Mega Bun to a soft squishy level – perfect for cuddling – although if I’d been making a proper amigurumi (with nice firm stitches) I’d probably have needed two bags of stuffing to support the bunny shape further. Extreme amigurumi need a lot of stuffing!
Extra-Large Eyes
After measuring Mega Bun against an original Baby Bunny, I realised she’d need about 2 inch diameter eyes! I’m not sure if safety eyes even come that large (well, I’m sure they do, but they probably aren’t easy to find) and I didn’t want big hard lumps of plastic on my cuddly bunny, so I decided to crochet the eyes.
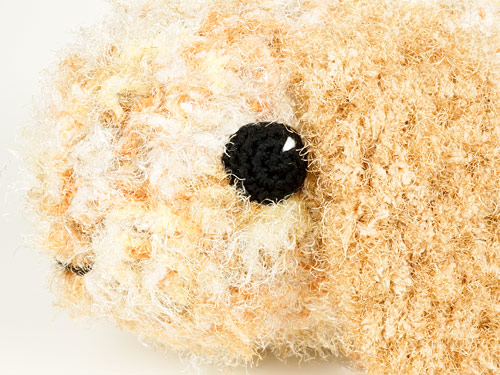
I used bulky yarn and an H hook to get to the right size more quickly, and added a half-stitch colour change to make the all-important glint in her eyes. (Don’t know about the glint? It’s so important to add a lifelike sparkle to non-plastic eyes – see my Glinting Eyes for Amigurumi tutorial for details!)
Adapting the Finishing Instructions
As each stitch is so huge, one sewn stitch per single crochet stitch didn’t feel like enough, so I stitched twice around each open edge to stitch it to the body, and tried to insert my yarn needle into a different part of a stitch on the body on my second time around, to reduce the gaps between my sewn stitches. (Oh, and, just out of interest, I tried using one, two or all three strands of the yarn to stitch with and didn’t see much difference in the result.)
I also used bulky yarn instead of embroidery floss to embroider the nose. Everything needs to be scaled up when you’re making an Extreme Amigurumi!
Loss of Shaping
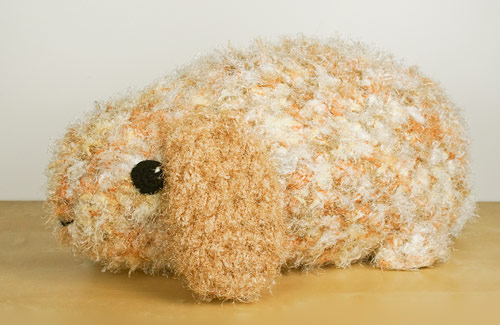
After stitching everything in place, I realised my last problem: as my crocheted stitches are so floppy and soft, and I couldn’t stuff the body firmly, the clever Baby Bunnies shaping isn’t very apparent: the head and body looked a little too much like one giant blob. But I have a trick to fix exactly this type of disappointment!
I used my Amigurumi Needlesculpting technique to draw the body in, all the way around the neck, to define and shape her neck area. It’s hard to capture in photos because she’s so fluffy, but her shaping looks much better now.
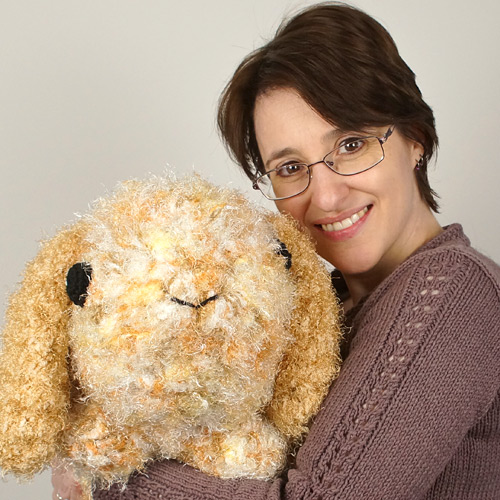
And finally, Mega Bun was complete and ready for big cuddles!
I hope you can see that this was quite an involved project… I have lots more I could say about Extreme Amigurumi in general, but this post has got longer than I expected, so I’ll save my tips and opinions for the next post!
If you have any more general questions about Extreme Amigurumi, please ask them below and I’ll see if I can offer some advice in my final Extreme Amigurumi post. 🙂


Daneille Haynes said
Just a suggestion, but had you considered that huge yarn that you use your arms to crochet with for making throws, for your mega bun?
June said
That was my next extreme amigurumi experiment after Mega Bun! You can see the result here 🙂
Kendra said
What a clever idea to use tulle for a stuffing net! i’d heard of using pantyhose for small projects but always hated the idea of using perfectly good pantyhose to be cut up or to use used ones (yech!). I’m not sure why I never thought of tulle! It seems to have worked out wonderfully. Maybe I should try an extreme crochet project…
June said
The big advantage of hose over tulle is that it’s so stretchy. I tried to make my tulle net a bit larger than I thought I’d need to account for the lack of stretch, which worked okay for such huge amigurumi, but I don’t think I’d recommend using tulle for a regular ami – something that’s both thin and stretchy is definitely a better choice.
I’m not sure if sheer stretchy fabric (like hose) is available by the metre though; maybe I should have a better look around next time I’m at the fabric store…
Karin said
The rabbit is great. You want to cuddle and play with him. Thanks for the great tips!
Erica said
Great bunny, June! I’ve been crocheting up a storm this past week! I’ve mostly been using super-bulky yarn to make cat beds and cat mats. I also made some other things like a large rainbow and a large heart.
Judy Carlson said
Outstanding work!
Pamela said
Anyone who can actually work with that kind of yarn no matter the dimensions is a hero in my book.
June said
I must confess, Pamela, it actually becomes much easier to work with fuzzy yarns when you use a giant hook! The fluff is irrelevant when the stitches are so massive – it doesn’t obscure anything, unlike with a standard hook, where you can’t see where to insert your hook 😉
Kate said
Beautiful job! I love the extreme bun! I like that you take such a scientific approach. I don’t think I’m going to make anything this big, but it does inspire me to try a bulky yarn and larger hook on my next amigurumi! 🙂
June said
Thanks Kate! See my Resizing Amigurumi article for my general advice on scaling up (to a lesser extent!) with larger hook and yarn.