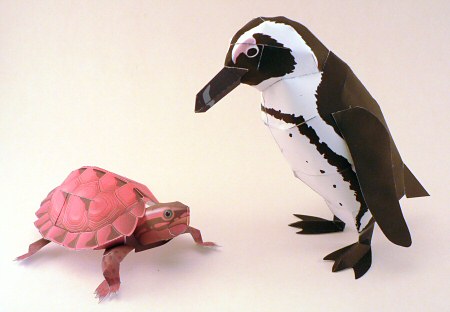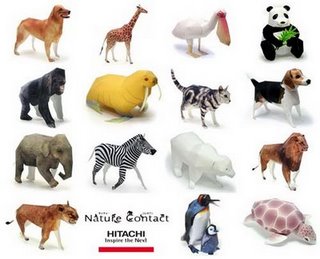
This post was originally published on my old papercraft site, Folding Trees. Hitachi Japan have created some endangered species animal paper models. I thought I’d try their sea turtle model so I could give you a quick review. The colours printed less vibrantly than shown on the website, although I accidentally printed it onto cheap paper using my printer’s […]