Amigurumi Wall Hanging Tutorial
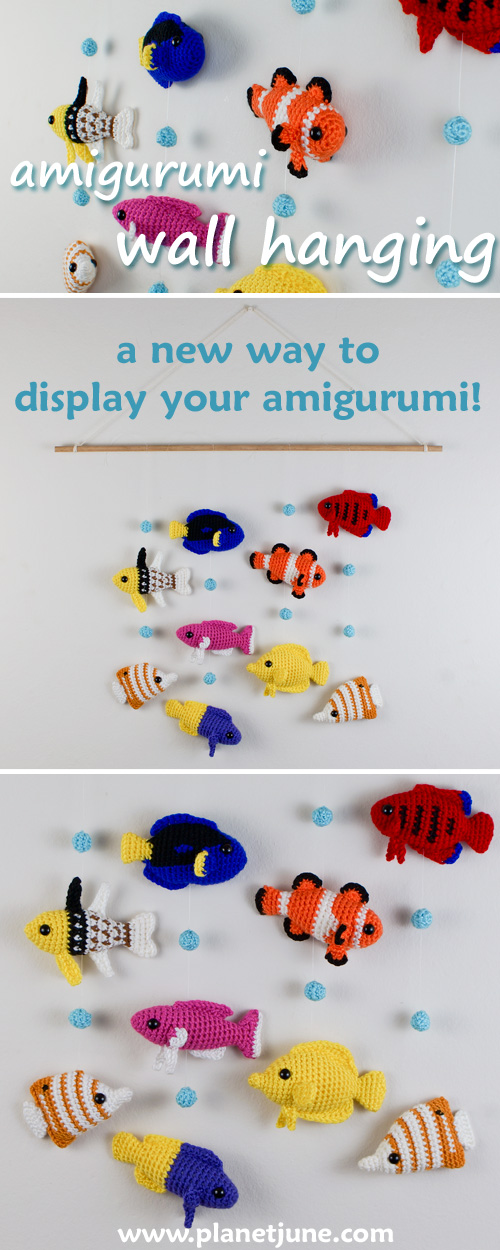
Any small amigurumi and crocheted pieces can be combined into a decorative wall hanging. Choose a theme (e.g. undersea, flower garden, or anything else you want) and a size and get creative!
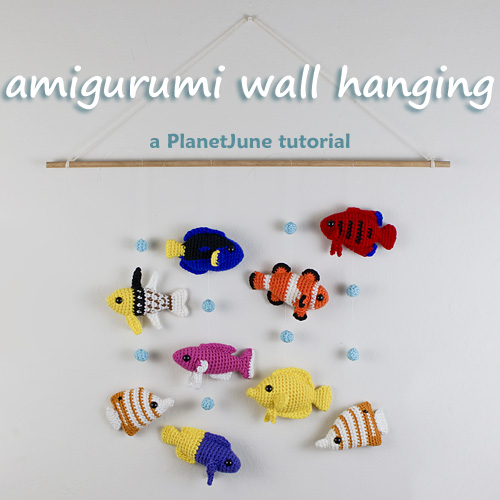
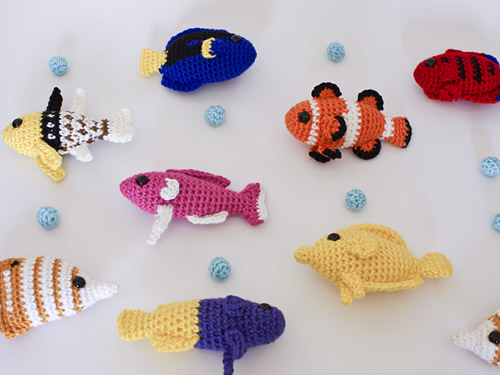
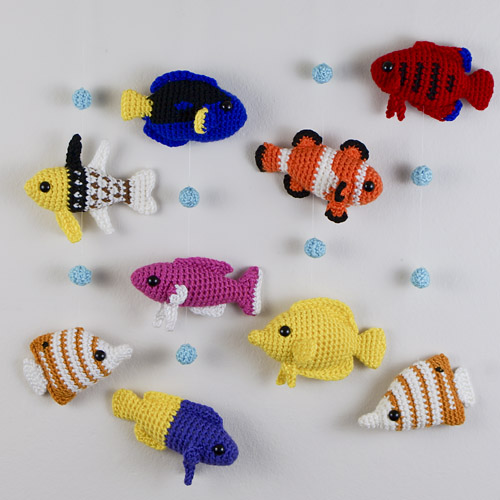
For my example wall hanging, I’ve used my Tropical Fish Sets 1-4 crochet patterns and Tiny Ball crochet pattern (available in the PDF version of this tutorial – see below for details).
You can also hang the finished strings of amigurumi elements from a round embroidery hoop or a wooden cross frame to make a lovely mobile.
This tutorial is Donationware – the instructions are available for free, but if you like it please consider sending me a donation to show your appreciation:

Send me a donation and receive the easy-to-print PDF version of the tutorial as a thank you! It includes some additional info that you’ll only find in the PDF version:
– My exclusive Tiny Ball crochet pattern
– Step-by-step tutorials for my preferred knots (particularly useful with slippery fishing line!)
– Bonus tips and advice
Donations of any size are much appreciated. Just add the amount you wish to donate, and, once you have checked out and paid, your PDF will instantly be available to download from your PlanetJune account.
The complete basic instructions are available below, regardless of whether or not you choose to pay for them 🙂 But please consider donating, so you’ll also receive the Tiny Ball crochet pattern, the photo tutorials for the knots, and the other bonus tips!
This is a PlanetJune original tutorial. Please do not share or reproduce this tutorial; instead post a link to www.planetjune.com/wallhanging
You will need:
- Amigurumi pieces and/or other crocheted elements
Sample uses Tropical Fish Sets 1-4 crochet patterns (available to purchase separately) and Tiny Ball crochet pattern (included in the PDF version of this tutorial) - Yarn or fishing line as hanging strings
Sample uses approx. 8ft (2.4m) nylon fishing line - Rod to support the strings
Sample uses a 24″ (60cm) length of 3/8″ (10mm) diameter dowel rod - Length of string to hang the rod
Sample uses a 36″ (90cm) length of string - Yarn needle
- Scissors
Making a Hanging Rod
Choose a rod: You can choose anything that’s sturdy enough to support the weight of the amigurumi, for example:
- a piece of dowel rod
- a length of bamboo cane
- a piece of driftwood from the beach
- a stick from the woods
The rod should be slightly wider than your desired wall hanging arrangement.
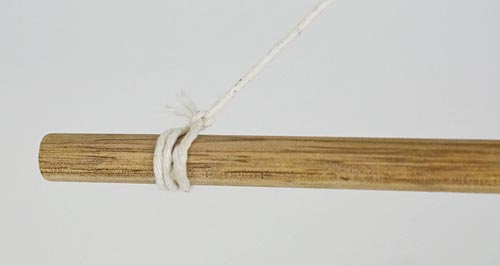
Attach the hanging string to the rod:
- Cut a length of string about 1.5 times the length of your rod.
- Tie one end of the string to each end of the rod.
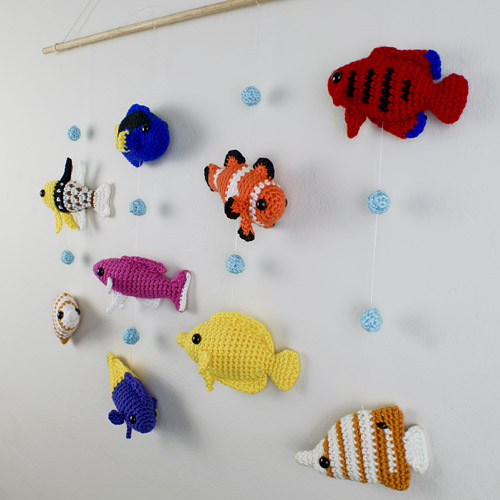
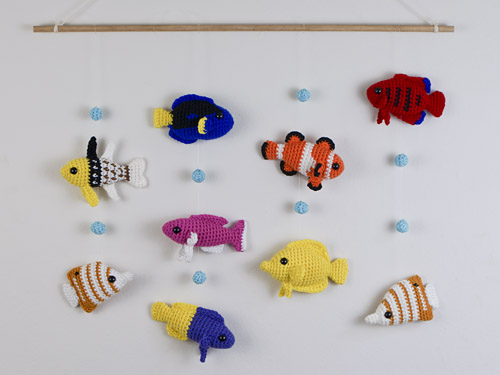
Arranging the Amigurumi
If you care about the order of the amigurumi, e.g. you don’t want similar colours or shapes to be clustered too closely together, lay them out flat on a table first, and lay each finished string back in place after you finish assembling it, to make the final assembly easier.
Arrange your amigurumi in vertical lines. All the pieces in one column will be tied onto one string.
Tip: If your amis are different sizes, put the largest ones on the longest strings so they won’t have any other strings to bump into!
For the length of the strings, the only rule is to make sure that each ami is far enough above or below each of its neighbours so they have some space between them and don’t bump together.
This is the artistic part – arrange the elements in a way that pleases you and looks balanced.
To prevent too much empty space in your arrangement, you can add small additional crocheted elements partway up the strings, or add extra strings of embellishments. For example, you could crochet balls, stars, hearts, or other embellishments that suit the theme and colour scheme of your wall hanging – they can be flat or 3D shapes.
Balancing an Amigurumi
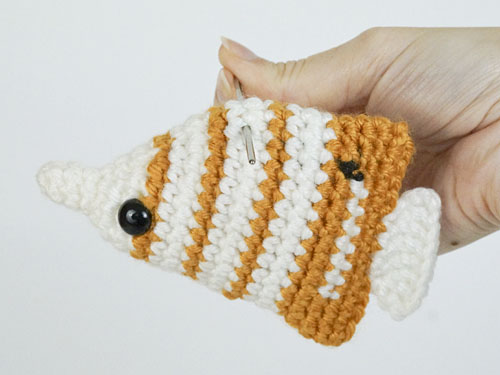
It’s important to attach the string in the right place on your amigurumi, or the ami may tip to a strange angle once it’s hanging. So, the first step is to figure out the centre of gravity of your ami, to make sure it’ll hang straight.
Tip: Add a sense of life and movement by intentionally making some elements point up or down a little – you don’t have to make them all perfectly straight!
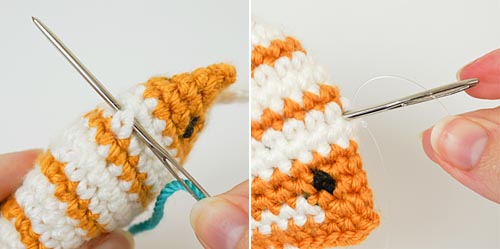
Step 1: Insert the needle from side to side across the top of the amigurumi (as shown below), so it passes under the stitches to either side of the centre.
Holding the end of the needle, try tapping your ami so it swings around the needle, and see where it settles:
- If the front tips down, move the needle 1 round closer to the front.
- If the front tips up, move the needle 1 round closer to the back.
- If the amigurumi tips down to one side, adjust the needle position towards that side.
Step 2: Repeat until the ami settles at an angle you’re happy with. Leave the needle in the ami at this position (for attaching the string).
Step 3: Repeat for each amigurumi when you’re ready to attach it to the string.
Attaching Amigurumi to a String
Now, to attach the pieces to the strings.
As ‘string’, you can use a length of yarn or crochet thread to attach the amigurumi, or, to give a ‘floating’ effect as shown in my sample, use nylon monofilament (commonly sold as fishing line, or nylon beading thread).
It’s hard to predict exactly how much string you’ll use for the knots, so I recommend you cut the string longer than you think you’ll need, and trim it later.
We’ll attach the elements to each string by working upwards from the bottom of the string.
Adding the Lowest Element
As it’s at the end of the string, the bottom ami is attached differently from pieces further up the string.
To figure out where to attach the string, balance the amigurumi first using a needle (see Balancing an Amigurumi, above). Thread the end of the string onto the needle, and pull a couple of inches of string through the amigurumi at this position (below, left). Tie the ends of the string securely together so they are knotted around the top of the amigurumi.
Tip: Yarn is easier to work with than nylon; tying a simple square knot will secure the amigurumi at the end of a yarn string. If you’re using fishing line, however, a normal knot won’t stay tight, so you can either attach the lowest ami with a non-slip knot (instructions included in the PDF version of this tutorial), or add a drop of crazy glue (superglue) to secure the knot while holding it tightly closed. Don’t let the glue touch the yarn of the amigurumi.
To give a neat finish, thread the short end of the string back onto the needle and lose the end inside the amigurumi (below, right).
Adding Additional Elements
Step 1: If the amigurumi isn’t symmetrical, balance it first using the needle (see Balancing an Amigurumi, above). Mark the position for the top of the ami with a stitch marker or scrap of yarn.
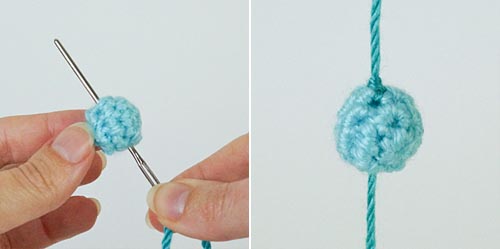
Step 2: Thread the top end of the string onto a yarn needle, and pass it through the embellishment, going from bottom to top, and exiting the top of the ami at the marked position (below, left).
Tip: For a 3D embellishment like a ball, turn the ball sideways so you don’t have to force the needle through the magic ring or closed up end, and can just pass it through the gaps between your stitches.
Step 3: When the embellishment is in the desired position along the length of the string, knot the string around a stitch at the top of the embellishment (below, right). This will keep the embellishment in place so it doesn’t slide down the string.
Attaching Strings to the Hanging Rod
If you don’t already have the strings laid out flat on a table, in order, lay them out so they’re spaced out along the length of the rod and you like the positions of the amigurumi and the length of each string.
Step 1: Holding the first string in place against the rod, cut the string leaving a 6″ (15cm) end.
Step 2: Wrap the end of the string two or three times around the rod, to keep it in place, then tie the loose end around the top of the hanging string to hold it in place. If you’ve used fishing line, add a drop of crazy glue (superglue) to secure the knot while holding it tightly closed.
Tip: Or, use a non-slip knot to tie the fishing line to the rod without using any glue (instructions included in the PDF version of this tutorial).
Repeat until all the strings are attached.
Hanging the Wall Hanging
Now all that’s left is to hang the wall hanging by its hanging string on a wall!
- If your amigurumi elements are small and/or flattish, you can hang the hanger from a small nail in the wall.
- If your amigurumi elements are larger and/or fatter, if you hang the hanger from a nail, the amigurumi may be pressed against the wall and hang at awkward angles. If you find this happening, mount a hook in the wall to hold the hanger slightly away from the wall, so the amigurumi can dangle freely.
I hope you enjoyed this tutorial! What theme will you choose for your first wall hanging?
Please leave me a comment, and consider leaving me a donation to receive the handy PDF and all the bonus content. Thanks!


Leave a Reply