I won this book through its blog tour, so I decided to review it for you. The following, as always, is based on my honest opinions!
Overview
Mend It Better: Creative Patching, Darning, and Stitching by Kristin M Roach, who you may know from her blog Craft Leftovers, is a combination book consisting of basic mending advice and project tutorials for creative mending.
The tutorials, mostly contributed by other crafters, show a variety of mending options to cover tears, holes and stains by crafting embellishments or making a feature of the damaged area, and upcycling projects to improve badly-fitting clothing or thrift store finds. Kristen also provides a tutorial for making a cute zippered mending kit.
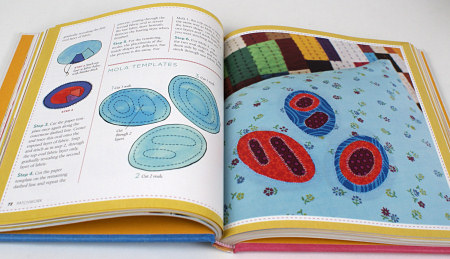
Colourful creative mending projects (e.g. this page is from the Mola Applique Patch tutorial by Carina Envoldsen-Harris)
The bulk of the book is reference material: it includes a lot of excellent mending information: repairing various fabrics; fixing damaged seams and buttonholes; repairing or replacing damaged zips and pockets, and much more. But calling it just a ‘mending book’ doesn’t really do it justice (and I haven’t seen this mentioned in any other reviews) – it also includes instructions for alterations you can make to your clothing: taking in a seam, adding hidden pockets, taking up a hem, adding bead or stitched embellishments, etc.
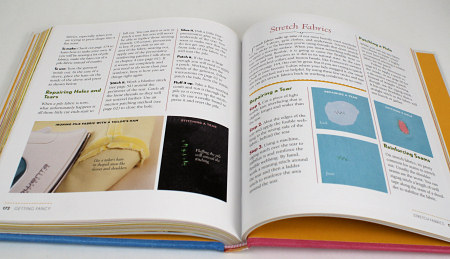
Detailed information, e.g. how to mend pile (left) and stretch (right) fabrics
The information starts from absolute basics – no prior knowledge of sewing equipment or techniques is assumed. The written instructions and accompanying photos are clear and comprehensive. Although I’m not in love with the narrow 3-column page layout, it’s efficient – there’s lots of information on each page but it doesn’t feel cramped. All project steps are clearly numbered, so it’s easy to follow the instructions.
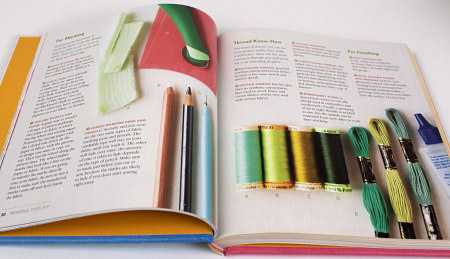
Mending information starting from the basics
My Experience
I skimmed through the whole book to give me a basic idea of techniques I could use at the moment and then decided to fix a backpack where the fabric had frayed along the seam allowance and left a big hole along the seam. I used my sewing machine and sewed a patch onto the back of the frayed fabric, then unpicked the original seam and re-sewed it to include the patch. I didn’t think to take a ‘before’ picture, but, as you can see, the result is pretty much invisible:
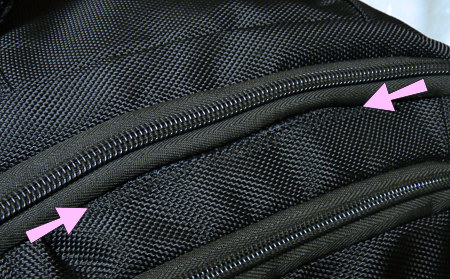
The fabric had frayed along the seam, leaving a big hole between the arrows.
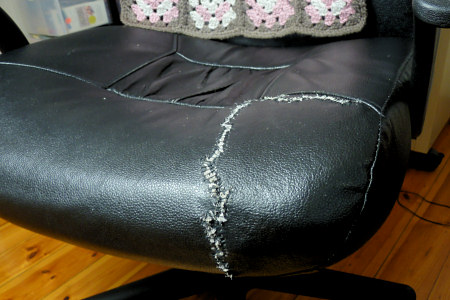
Next I consulted the section on fixing leather. I had assumed my office chair was real leather until it started to wear through and rip, and I could see the sad pleathery truth. Months ago, I tried to mend it with Speed Sew fabric repair glue, but it didn’t hold, and the rip worsened every time I sat down until it reached this sorry situation:
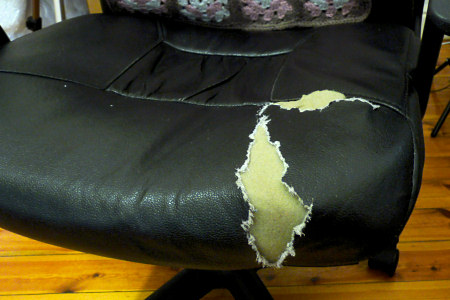
The rest of the chair is fine, though, so I really needed to fix it somehow before the exposed foam started to disintegrate and made the chair unusable.
As my ‘fabric’ is cheap faux leather, I wasn’t sure if the leather-mending instructions would work, so I started with this tiny hole on the other side of the chair front, to test the method. I tried the ‘mending a tear in leather’ instructions but, although the instructions were fine, it quickly became apparent that it wouldn’t work in my case – the pleather tore with any stress on it, so I ended up having to make large whipstitches over the top of the hole to keep it together. Result: a mended hole, but not a pretty one.
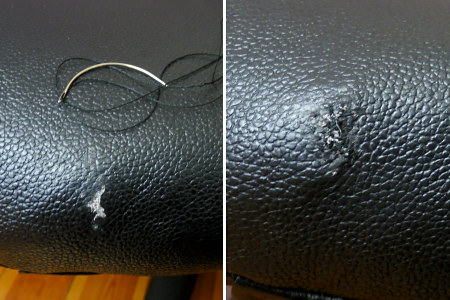
Tiny hole, before and after stitching
By this point, I could tell that fixing the giant rip neatly was not an option, so I decided to go for a functionally creative mend, using patching and gluing techniques from the book in addition to trying to sew the hole so it would stay closed.
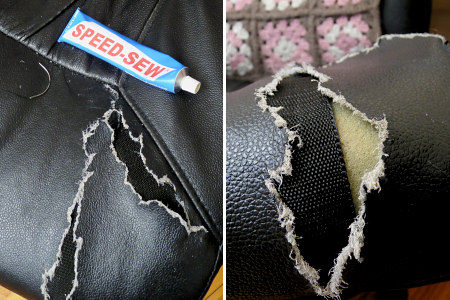
I cut some black webbing to fit inside the gaps, and then slowly glued a section of the seat cover to the webbing, and stitched the hole closed. The rip was so large that pulling the sides together was extremely difficult, especially as the seat fabric ripped if the stitches were too close to the ripped edge. I found that making large stitches through the fabric and into the webbing was the best bet – the stitches kept the fabric in place against the webbing while the glue dried, and added support for the glue.

It was a long, hard job – stitching through thick webbing with a thin curved upholstery needle is hard work, but a thicker needle would have damaged the pleather even more, so I persevered. And here’s the result:
No, it’s certainly not pretty, but it all holds together: my frankenstitches feel very stable with the glued webbing to back them up, and I think I’ve succeeded in saving the chair – the foam shouldn’t degrade any more now it’s safely hidden away. Now I just need to crochet a seat cover to hide the frankenstitches, and my chair will be as good as new 🙂
I’d ignored these problem for months, but having a book of mending techniques at my disposal makes me feel like I can tackle these things. Next I’m going to try fixing a too-loose zip that keeps falling down!
Peeves
- There’s a lot of information contained in the 200+ pages of this book, and some of the chapter headings are a bit broad and unclear (e.g. the Surface Fixes chapter includes fixes for snags and pulls, how to fix a patch pocket, 2 different project examples of adding new patch pockets, and instructions for re-pleating a skirt, while the Getting Fancy chapter includes lace, leather and stretch fabric repair). A one-sentence summary of each chapter on the Contents page would have been very helpful – I’d never have thought to look in ‘Getting Fancy’ to find the leather repair instructions! – so I definitely recommend consulting the index if you’re looking for something in particular.
- I have a very understated taste in clothing and I can’t imagine using any of the project ideas on my own clothes. They’d definitely be a fun way to extend the life of children’s clothing – which are much more likely to need mending anyway – or if you have a less conservative dress sense than me. Having said that, if I look at the projects as embellishment tutorials instead of mending tutorials, I could adapt them for decorating cushions, bags, etc, so they still have some value to me.
Final Thoughts
Mend It Better: Creative Patching, Darning, and Stitching has plenty of eye candy and project ideas for creative mending, upcycling and embellishing. For me, though, the real value of this book is in the well-explained techniques that will let you fix and mend common problems and make alterations to get more mileage out of your clothing (and also luggage and even upholstered furniture: although the book focuses on clothing, the techniques can obviously apply to any repairs of fabric, zips, buttons etc).
The techniques explained here are absolutely worth the purchase price, even if none of the projects appeal to you, so I recommend Mend It Better as a solid reference for a variety of sewing and mending techniques. I’ll be keeping my copy in my reference library, so I’ll have more confidence in attempting fixes and alterations for my clothes, and I’ll be well prepared next time I have a mending emergency!


maryethal said
why dont you just go buy a new chair instead of having something so shabby and nasty looking in your home ?
June said
For several reasons, maryethal:
Now I’ve completed the mend, my chair is no longer at all ‘shabby and nasty looking’, as you’ll see if you keep reading my blog!
Heidi said
Hi June,
Great job with the chair! I just saw that Craftleftovers.com is having a Make Do and Mend Contest. You should really enter your before and after pics of the chair!
www.craftleftovers.com/craft/make-do-and-mend-contest/
Heidi
June said
Thanks, Heidi! I had assumed the contest would be US only, but I see no country restrictions in the rules, so I think I will enter with 3 photos – before, after the above mend, and with the crocheted cover to hide the mend. It looks pretty good now – I’ll have to blog about that soon 😉
Silverlotus said
Great review, June. I recently read this book, also, and feel pretty much the same way. I think that a lot of the methods give you a result that is more something embellished, and repaired along the way, rather than a straight repair. None the less, I do feel like I learned some things from it.
Carmen said
I enjoyed to read your book review as well as the description of your reparation of the backpack and chair very much :).
It is fun that you are righting about it now, because I had bought myself the book about 1 month ago after having read one of your Twitter posts via your blog where mentioned that you were using this book for the reparation of something (I guess it was the chair back then 😉 ). This is how I got aware of this great book. So thank you also very much for having posted about this book on Twitter ;). I agree with you completely about the statements you made about the book.
Since then, I am looking forward to enlarge my library of mending, repair, and altering books (before, I had always done reparations intuitively). Do you have any other recommendation for a book of this kind? I found some interesting books on Amazon which were also dealing with this topic, even though they were not as positively rated by the readers as this one :).
Best regards and all the best on your upcoming stay in the UK!
June said
Thanks, Carmen! No, I don’t know of any other good mending or alteration books (although I’m not sure you’d really need another mending book in addition to this one, unless you want to delve deeply into a specific topic). If any other readers have any recommendations, please feel free to share them here.
camaharet said
Thanks for this review. This looks like a book I might pick up to learn some needle techniques. I have no idea how to mend!