Paper Weaving
This tutorial was originally published on my old papercraft site, Folding Trees.
Weaving doesn’t just have to be used to make fabric! Use strips cut from magazine pages to weave a colourful and original design. Once you’ve finished weaving, you can easily turn your work into a stylish card or bookmark, or even wall art.
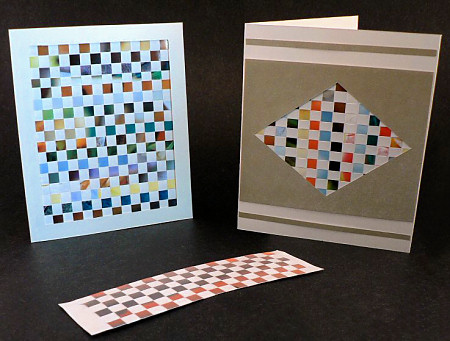
Woven paper can be used to decorate cards, bookmarks and much more.
This tutorial is Donationware – the instructions are available for free, but if you like it please consider sending me a donation to show your appreciation:
Send me a donation and receive the easy-to-print PDF version of the tutorial as a thank you!
Donations of any size are much appreciated. Just add the amount you wish to donate, and, once you have checked out and paid, your PDF will instantly be available to download from your PlanetJune account.
The complete instructions are available below, regardless of whether or not you choose to pay for them 🙂
This is a PlanetJune original tutorial. Please do not share or reproduce this tutorial; instead post a link to www.planetjune.com/paperweaving
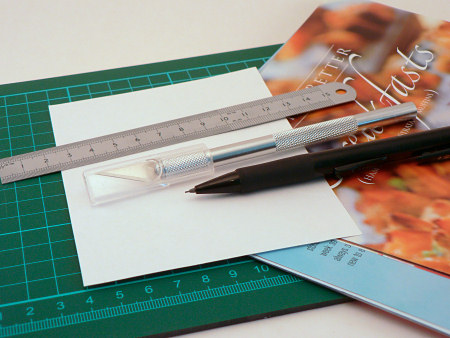
You will need:
- Strong glossy paper (e.g. magazine pages) for the strips
- Thinner paper (e.g. standard printer/copy paper) for the base
- Pencil
- Ruler
- Sharp craft knife or scalpel
- Cutting mat
Instructions
1. Cut your base sheet of paper (the white paper in my case) to the size you’d like to work with.
2. Decide on the size of your woven squares. Larger squares are easier to weave and work up a lot more quickly! I used 6mm (1/4″) squares; I recommend you use a larger square size (e.g. 1cm, 3/8″) for your first attempt.
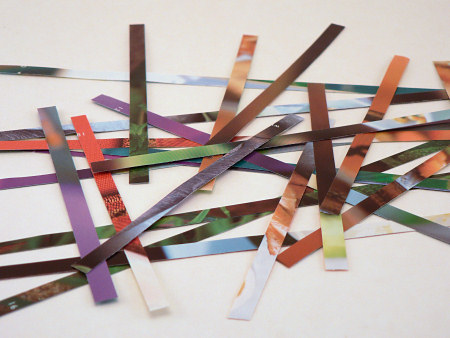
3. Cut strips from magazine pages with each strip as wide as your square size. It doesn’t matter if the pages have text – the small size of each square will render the text unreadable. You can choose a colour palette for your strips, or use random strips – anything will look good! The strips should be slightly longer than the width of your base sheet. You don’t need to cut them to length now – you can always trim them once they are woven.
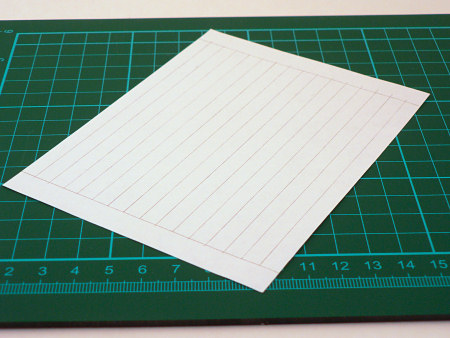
4. Use your pencil and ruler to mark up the back side of your base sheet. Mark two horizontal lines, one 1cm (3/8″) from the top and one 1cm (3/8″) from the bottom, then mark vertical lines between the two. The vertical lines should be the same distance apart as the width of your paper strips:
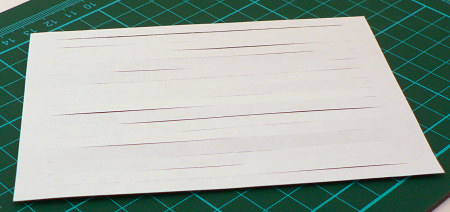
5. Use your craft knife and the ruler to cut along all the vertical lines. Take care to leave that 1cm (3/8″) border at the top and bottom intact (uncut). Below, you can just about see the slits I have cut:
6. Take your first strip of paper and get ready to weave…
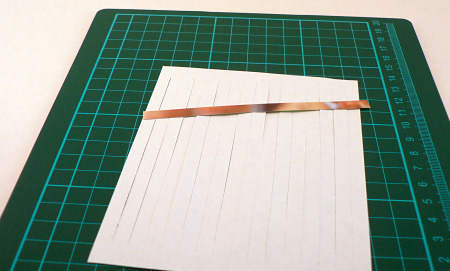
7. Place the strip over the first vertical bar, then slide it under the second bar. Continue to work across the base sheet in this way, weaving the strip alternately over and under each vertical bar.
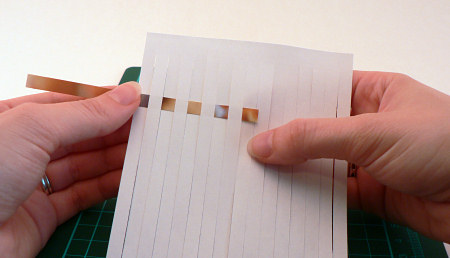
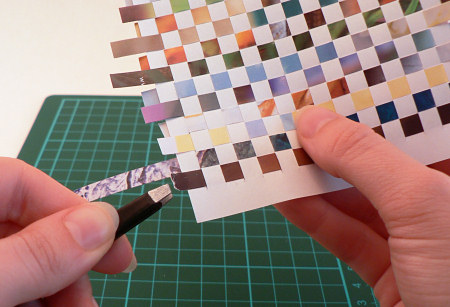
8. When it is woven all the way across the base sheet, gently ease the strip right up to the top of the vertical slits.
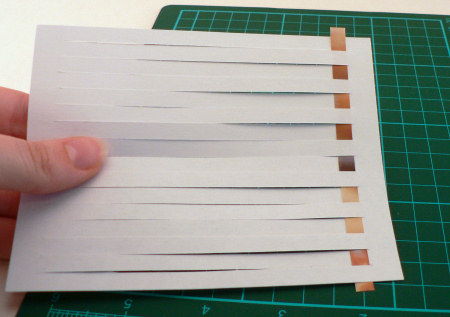
9. Now take your next strip, and begin to weave it across the base sheet. This time, start by weaving the strip under the first vertical bar and over the second bar (the opposite way to the first strip).
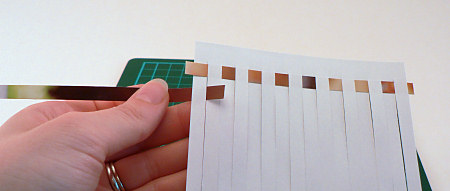
10. Snug the second strip up so it is as close to the first strip as possible. I find it is easiest to weave the next strip away from the previous strip, then wiggle it up to the previous strip once it is woven.
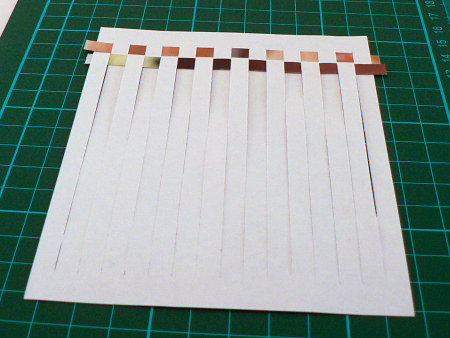
11. Continue to weave your strips, alternating between starting above and below the first vertical bar. Here’s how I ‘snug’ each strip closely up to the previous strip: I turn the work upside down, hold down the bottom of the base sheet securely with one hand, and use my fingertip (not a fingernail) to gently drag the paper strip towards me, starting at one edge and dragging each exposed area of the strip down into place. Be slow and delicate – you don’t want the paper to rip or crumple.
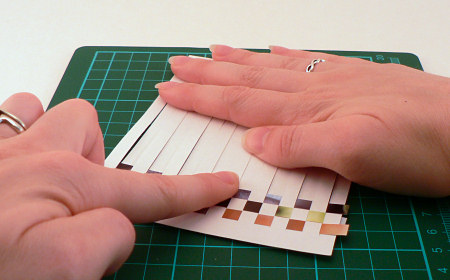
12. When you reach the last strip, it will be very difficult to weave. I find that tweezers help to grab the end of the strip and slide it through each gap, although it does make the end of the strip a bit ragged, so make sure you start with a strip that’s too long, to allow for cutting off the ragged end afterwards. Alternatively, skip this last strip if it’s too difficult to weave through.
Framing. To easily turn your work into a greeting card or wall art, make a paper or cardboard frame for it. This hides the edges and reduces the amount of finishing you need to do. To do this, cut a shape from the middle of a piece of card, and place it over the woven paper, so the weaving shows through the hole. The frame doesn’t have to be rectangular, and you can mount the woven piece at any angle – experiment to find an effect you like.
Unframed. If you don’t want to use a frame, you can use scissors to trim the edges of each strip flush with the backing paper, or leave them uneven for an arty effect. To keep it all together, glue each sticking-up end of each strip down to the backing paper, then flip over the work, and glue the rest of the strip ends to the backing paper. You can also cut away the top and bottom borders from the base sheet of paper and glue all the ends of the vertical strips to the top or bottom horizontal strip, or you can fold the top and bottom borders behind the work so they don’t show.

What can you make with your woven paper? Here are a few ideas, but I’m sure you can think of many more!
- Greeting Card. Glue your weaving (framed or unframed) to the front of a folded card.
- Pen pot. Wrap the woven paper around a can, jar, plastic cup, or something similar to make a decorative pen pot. Use double-sided tape to stick the ends to the can.
- Book cover. Make a woven cover for a handmade notebook or journal.
- Bookmark. To make a bookmark, once you have glued down all the strip ends (I used Mod Podge for this), seal both sides of the finished piece with a few coats of Mod Podge (or a similar paper sealant) to add strength and keep everything locked together. The nice thing about a woven bookmark is that both sides of the weaving will be on display. (Note: you could also make paper coasters in the same way.)
I hope you enjoyed this tutorial! Please leave me a comment if you did, and consider leaving me a donation. Thanks!
And I’d love to see a photo of your woven creations in the PlanetJune Tutorials flickr group 🙂


anton said
hi june, i think that all of your projects are really cool and i wondered if you i would be able to make one of these than use it in another project like the bookmark to make it look even cooler. 🙂