Tiny Bees crochet pattern
© June Gilbank 2026
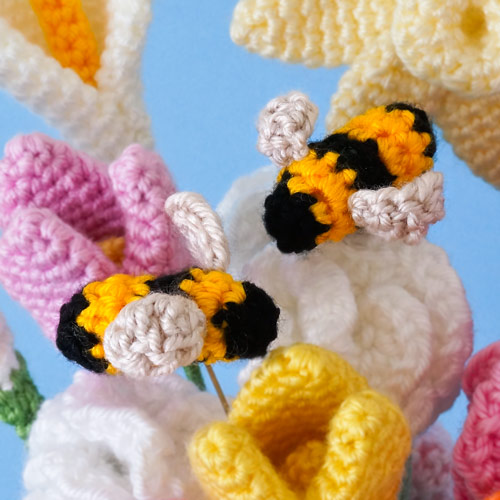
Full of colour and slightly larger than life-sized, Tiny Bees are the perfect addition to any crocheted flower arrangement. With just a few rounds of crochet, a couple of colour changes, and simple no-sew wings, your little bee friend will come together in no time at all.
This pattern is Donationware – the pattern is available for free, but if you like it please consider sending me a donation to show your appreciation:
Send me a donation and receive the easy-to-print PDF version of the pattern as a thank you!
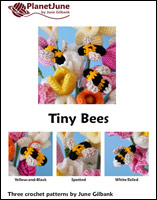
It also includes two bonus bee patterns that you’ll only find in the PDF version, so you can make all three common bumblebee styles.
Donations of any size are much appreciated. Just add the amount you wish to donate, and, once you have checked out and paid, your pattern will instantly be available to download from your PlanetJune account.
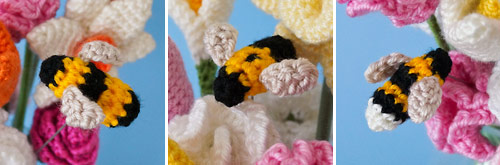 All three tiny bees – read more about them in my blog post!
The complete pattern and instructions for the basic (yellow-and-black) bumblebee are available below, regardless of whether or not you choose to pay for them 🙂 But please consider donating, so you’ll receive the spotted and white-tailed bumblebee patterns too!
This is a PlanetJune original crochet pattern. Feel free to use items made from this pattern however you wish, but I’d appreciate credit as the pattern designer. Please do not reproduce the pattern anywhere else; instead post a link to www.planetjune.com/tinybees
Not ready to make it yet? Add it to your Ravelry queue: 
Terminology
| ch | chain |
| dc | double crochet (treble crochet for UK/Aus) |
| hdc | half double crochet (half treble crochet for UK/Aus) |
| invdec | invisible decrease Note: If you prefer, you may use a standard sc2tog decrease in place of each invdec. |
| sc | single crochet (double crochet for UK/Aus) |
| st | stitch |
You will need…
- E US/3.5mm crochet hook
- Small quantity of worsted weight yarn in yellow, black, and off-white
- Polyester fibrefill stuffing
- Yarn needle to weave in ends
- Stitch marker
Size
Approx 1.75″ (4.5cm) long. (Your gauge and yarn choice will affect the finished size slightly.)
Gauge
Gauge is unimportant for this pattern, provided the pieces are crocheted sufficiently tightly that they will not gape visibly when stuffed. To test a swatch, crochet the first 3 rounds and then push a piece of fibrefill behind it:
- If the stitches stretch open too much and the fibrefill is clearly visible, reduce the hook size.
- If you cannot insert the hook into the previous stitches, reduce your tension (crochet more loosely) or increase the hook size.
Notes
- Do not join at the end of each round; rounds are worked in continuous spirals.
- Use a stitch marker to mark the beginning of each round. Move the marker up each time you start a new round.
- Always change colour in the last loop of the stitch before the colour change: www.planetjune.com/colour
Colour code
A: yellow yarn
B: black yarn
C: off-white (or any colour you prefer) for the wings
General Tips
Colour Changes
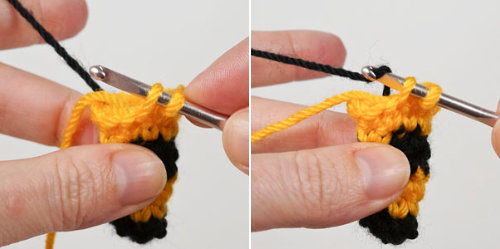
You can cut and tie the yarn ends at every colour change if you want, but it’s not really necessary for such a tiny piece! I suggest you keep things simple: just drop the unused colour to the inside (below, left), and pick it up again when you need to switch back to it (below, right).
Stuffing
There’s no need to stuff firmly with this tiny pattern. Cut any unused yarns, then push all the yarn ends into the body as stuffing. Add a small amount of stuffing as needed to fill out the rest of the body.
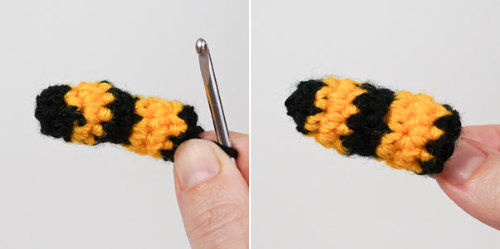
Don’t worry if the shaping of the body looks strangely shaped and skinny while you crochet (below, left) – once you add the stuffing, the thorax and abdomen will fill out just enough to create the realistic bee shape (below, right).
Finishing
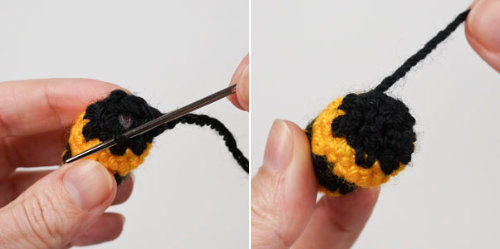
To finish your bee neatly, use the Ultimate Finish to close the body (below, left), passing the yarn through the body and pulling it tight (below, right) to give your bee its little rounded rear end!
Pass the yarn through the black stitches of the body a couple of times to secure it before you trim the remaining yarn.
Body
(worked from head back)
Note: Before you start to crochet, please read through all the instructions above for additional instructions and tips.
With B, make a magic ring, ch 1.
| Rnd 1: | B: 6 sc in magic ring. (6 st) |
| Rnd 2: | B: sc in next 5 st, A: sc in next st. (6 st) |
| Rnd 3: | A: sc in next 4 st, 2 sc in next 2 st. (8 st) |
| Rnd 4: | A: 2 sc in next 2 st, sc in next st, B: sc in next 5 st. (10 st) |
| Rnd 5: | B: sc in next 6 st, invdec twice. (8 st) |
| Rnd 6: | B: sc in next st, invdec twice, sc in next st, A: 2 sc in next 2 st. (8 st) |
| Rnd 7: | A: sc in next st, 2 sc in next 2 st, sc in next 5 st. (10 st) |
| Rnd 8: | A: sc in next 7 st, B: sc in next 3 st. (10 st) |
| Rnd 9: | B: (invdec, sc in next 3 st) twice. (8 st). Stuff body through hole. |
| Rnd 10: | B: invdec twice. (2 st, plus 4 unworked) |
Fasten off, stitch the remaining hole closed and weave in the end.
Wing (make 2)
Note: All stitches worked into chains should be worked into the back bumps of the chains.
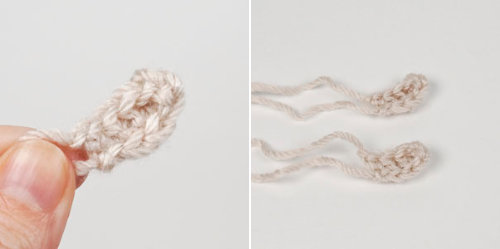
With C, leaving a 6″/15cm starting tail:
ch 5, hdc in second chain from hook, dc in next 2 chains, sc in last chain.
Fasten off, leaving a long end of yarn.
Positioning Wings
Position the wings two rounds back from the black head, with 4 stitches between them. You can judge the position of the wings by eye if you prefer, but I have an easy way for you to identify the perfect attachment point for each wing:
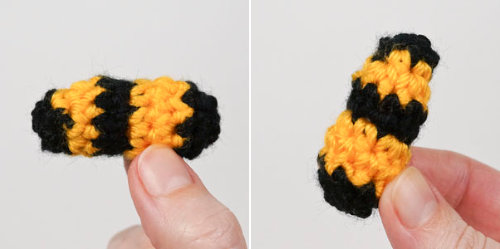
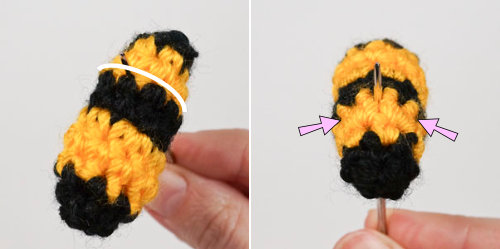
- The underside of the bee has all the jogs from the colour changes (white lines, below, left).
- To find the exact top of the bee, insert a yarn needle into the bee from the underside at the first colour jog. Looking at the bee from the front, pass the needle directly up through the bee so it emerges at the top (below, right).
- Now, with the needle tip in place at the top of the body, look at the front edge of the central black band on the body (white line, below, left).
- The attachment points for the wings are along this edge, two stitches to either side of your needle tip at the top of the body (arrows, below, right).

Attaching Wings
Here’s my method to attach the wings to the body neatly, without any stitching.
Note: This no-sew attachment method is essentially the same as for attaching the eyes in my Tiny Eyes tutorial – just with wings instead of eyes – so you can watch that video to see the process in action!
(You can jump straight to the chapter marker for attaching the eyes at 2:00 into the video – here are the direct links for right-handers and left-handers).
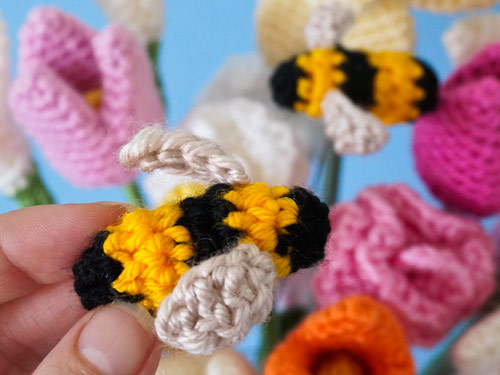
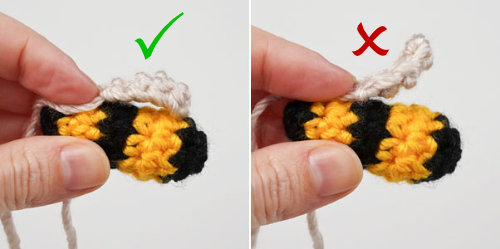
First, note that the wings have a natural curve. Your bee will look most realistic if you attach both wings with the curve pointing towards the body (below, left), but if you prefer the look of them curving away from the body (below, right), you can do that too – just make sure that you attach the wings so both curves match!
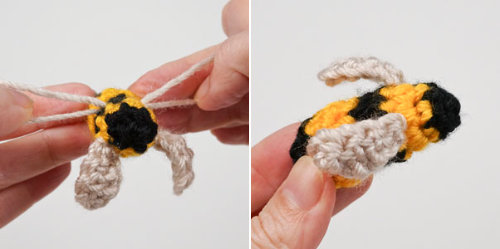
For the first wing, thread one yarn end at a time onto the yarn needle:
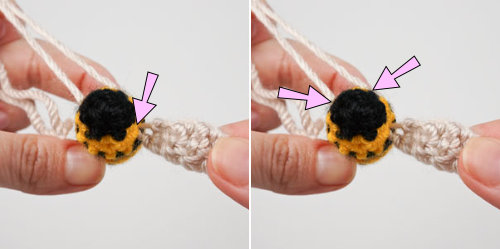
- For each yarn end, insert the needle at the same wing attachment point (arrow, below, left).
- For each yarn end, bring out the needle at a different gap between stitches on the underside of the body, so the yarn ends are separated (arrows, below, right).
- Don’t fasten off these ends yet!
Now repeat the process for the second wing at the other wing attachment point, but this time bring out one yarn end at each of the same gaps between stitches as you did for the first wing, so you end up with two pairs of yarn ends at the bottom of the body (below, left).
Smooth out the wings along the body, then gently tug each yarn end in turn to draw the bases of the wings to the body. When you’re happy with the wing positions, tie each pair of yarn ends together securely.
For each knotted pair, thread both ends onto the yarn needle and pass them through the body, pulling tightly to draw the knot through to the inside so it’s no longer visible, then snip off the remaining yarn ends (below, right) to complete your bee!
Creating a Flower and Bee Arrangement
To display your bees hovering over a vase of crocheted flowers, take a floral wire and cut it to length, so it’s slightly longer than the top of your flower. Poke one end of the wire up into your bee, then you can treat your bee-on-a-stick as you would a stemmed flower and arrange it in your vase.
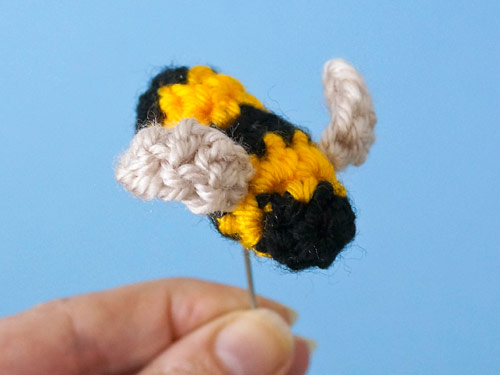
Note: Safety first! The bees could easily be pulled off their wires to reveal the sharp end, so please keep your flower-and-bee arrangement out of reach of curious young children and pets.
Place the wire into your arrangement after arranging your flowers in your vase, so the bee looks like it’s flying just above the flowers, or sitting on top of a flower.
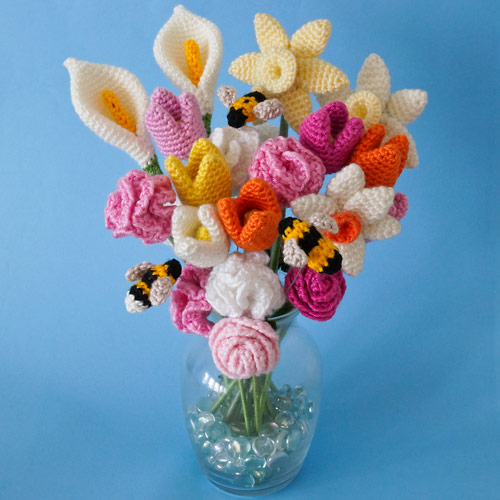 This arrangement includes crocheted Calla Lilies, Daffodils, Tulips, Carnations, and Basic Roses – find all these patterns here: PlanetJune crochet flower patterns 🙂
I think these tiny bees are the perfect finishing touch for any crocheted flower arrangement – don’t you agree?
I hope you enjoy this Tiny Bee pattern. Please leave me a comment below if you do, and consider leaving me a donation for the nicely formatted PDF version (don’t forget that the bonus spotted and white-tailed bumblebee patterns you see in the flower photo above are also included in the PDF).
Thank you so much for your support – it helps me to continue creating new designs like this!


Crochet Reader said
Love the Tiny Bees photos; these instructions are so clear!
Linda Barnard said
I made 12 little bees several years ago. I use them on wreaths, mainly. I have pinned them all over a shirt for Halloween, with a sign that reads ”Bee Yourself…I Bee’d Me.” They are a fun addition wherever you use them.
Merry c obrzut said
I want to say thank you for the little bee pattern. I love things that are realistic and add a special touch.
someday I hope you put your special lamb and goat pattern in the Gmail thing, I can’t do PDF it doesn’t work. I appreciate all your thoughtful patterns. much appreciated
yours Merry