Ultimate Finish for Amigurumi
The Ultimate Finish is the neatest way to fasten off and close the remaining hole when you’ve finished crocheting a piece of amigurumi.
Pair it with the invisible decrease for a smooth, gap-free base that looks almost as neat as the magic ring at the top!
I recommend you watch the video to see the Ultimate Finish method in action, but in case you prefer text or want something visual to refer to, I’ve also made a photo tutorial version for you.
Quick finder:
Ultimate Finish for Amigurumi (right-handed)
Click to watch this video on YouTube.
Ultimate Finish for Amigurumi (left-handed)
Click to watch this video on YouTube.
Note: The videos may look a little small embedded in the blog: if so, you can fullscreen them or click through to YouTube to watch them full-sized 🙂
Step-by-Step Instructions
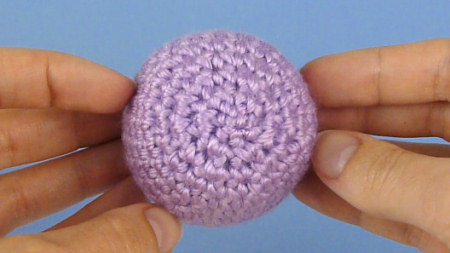
The almost-finished stuffed piece, with 6 sc remaining:
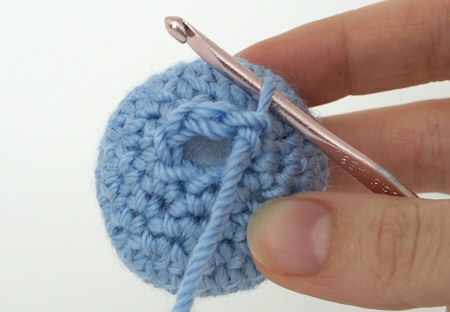
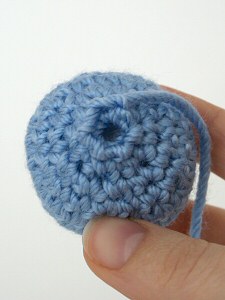
Cut the yarn, leaving a long yarn end. Draw the end through the final loop on the hook and thread it onto a yarn needle.
You’ll be using the front loops only for the next stage; those are the loops that are furthest from the hole:

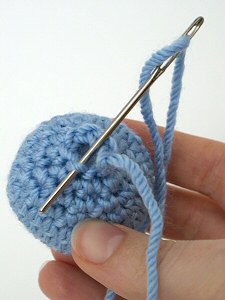
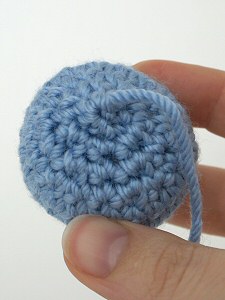
Working in the same direction as you crochet (clockwise for right-handers; anticlockwise for left-handers), insert your needle under the front loop of the next stitch, so the needle goes from the centre of the hole to the outside (below, left). Draw the yarn taut.
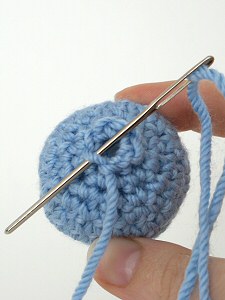
Move to the next stitch and repeat: insert the hook under the front loop of the stitch, again going from the middle of the hole to the outside (below, right). Draw the yarn taut, but don’t tighten it fully yet.
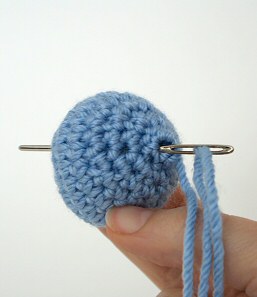
Repeat for the remaining stitches until you have woven the needle through all 6 stitches, going from the middle to the outside each time (below, left). Now pull the yarn tight (below, right). The hole will close up just like a magic ring! It does leave a small bump on the outside though…
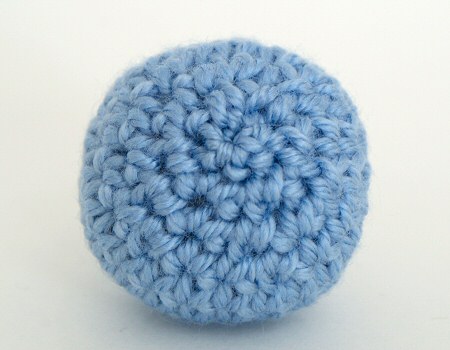
To get rid of the bump, insert the needle through the middle of the ring you’ve created, going into the piece, and bring it out an inch or two away. Pull the yarn tight and the bump at the closed end will disappear, leaving a nice smooth finish.

Finally, snip the end close to the surface, and the cut end will retract back inside the piece.
Give it a go and let me know what you think of my Ultimate Finish!

Loved this tutorial? I have so many more amigurumi tips and tricks to share with you!
Boost your amigurumi skills with my latest book, The Essential Guide to Amigurumi, your comprehensive guide to amigurumi techniques and tips.
Do you find my tutorials helpful? If so, please consider making a contribution towards my time so I can continue to create clear and concise tutorials for you:
Thank you so much for your support! Now click below for loads more crochet video and photo tutorials (and do let me know what else you’d like me to cover in future tutorials…)


Minette said
These are excellent tips. Thank you.
Ira Shah said
Your tips are practical and easy to follow. Thanks so much.
Ira
Luisa said
Nice and easy techniques
Michelle said
Is there any way to use this amazing technique and still leave a tail to attach the piece to another piece? Like finishing an arm that I will attach to a body. Thanks so much for sharing your expertise!!!
June said
Michelle, I’m not sure why you’d want to do this: a jointed arm would be more secure if you use a separate piece of yarn for the joint, and an unjointed arm would look neater if you don’t close the arm before you join it to the body (so you can get a smooth finish). You can see examples of both of these in my Aliens pattern – the green alien has smooth arm joins, and the blue alien has finished arms that are attached with thread joints later.
But, if you want to do it, you could leave an extra-long yarn tail and bring it back up to the starting point for attaching the arm to the body after completing the ultimate finish technique. There’s no right or wrong here – just experiment and see if you like the result!
Khara said
Thanks June!
Your videos are a true treasure trove! Keep up the great work! Cheers!
Dorothy Atkinson said
Great tip, I have been using the grafting method which is very nice but I can hardly wait to use this one.
Jessica said
Thank you so much for your tutorials! I’ve really been improving ever since I started watching them. This was especially helpful because after all the hard work you put into an amigurumi, if the hole won’t close, then it ruins the piece. Thanks!
Sheryl Watson said
I just followed your ultimate finish tutorial and my ‘finish at the top’ amigurumi looks amazingly neat! Thank you so much :o)
Yvonne said
This tutorial is just what I needed. Thank you again June! Now my pieces look so much better. I just keep learning more and more techniques thanks to you!
Merry Thornsburg said
Love this June…I’ve learned such great tips from you….THANKS A MILLION!
Merry ?
sandy turnage said
Thank you June for this tutorial! I’m new to crocheting and am doing a lot of amigurumi for my grandchildren – what a difference this technique will make. Love your blog!
Jessie said
I’ve been using a similar method for a while, but never worked out how to get rid of that annoying bump. Thanks, June!
Alycia said
great tutorial, as always 🙂 i have a very similar ring to your infinity ring!